
Creating collectibles that reward you with points when you collide with that collectible item is possible by searching for the class that you want to use on that item. However, chances are there will be more than one form of collectible for your player to choose from. This can be an issue since checking to determine if an item is available for pickup before attempting to utilize it might be difficult to handle.
So, how can you collect various sorts of objects with Unity? Using an Interface is one option. The Interface enables scripts to interact with one another based on the functionality they implement rather than what they are.
In this script, we will learn to collect different types of objects using Interface.
Interfaces in Unity
In Unity, an interface is a sort of script that specifies functionality. It is a set of functions that must be implemented by any class that implements the Interface.
When a class implements an interface, it must publicly contain all the functions using the same method names, arguments, and return types specified in the interface script. This creates a form of contract, a compatibility condition that the script must fulfil to successfully implement the Interface.
Simply said, an interface requires you to include particular functions in a script so that other scripts can use them.
Collectibles with Interface: A Step-by-Step Process
Step 1: Create the Interface
First of all, we are going to create an Interface named ICollectible.cs. In this interface script, we are going to create a method named Collect(). This function must be called when the object is to be collected by the player.
public interface ICollectible
    {
        public void Collect();
}ICollectible.csStep 2: Create Collector Script
Then, the next script Collector.cs is created and added on the player or any other character which you want to interact with. This method’s sole function is to detect whether the player collides with an object having Interface ICollectible.cs or not. If the object collides, then call the collect function inside the Interface.
public class Collector : MonoBehaviour
    {
        private void OnTriggerEnter2D(Collider2D col)
        {
            ICollectible collectible = col.GetComponent<ICollectible>();
            if (collectible != null)
            {
                collectible.Collect();
            }
        }
}Collector.csStep 3: Create a Script for Collecting Items
Next, a script Collectibles.cs is created and added to all the collectible items.
This code defines an enum called CollectibleType, which has two possible values: i.e., Coin and Gem (They may be different in your game). It also defines a class called Collectibles, which is a MonoBehaviour and implements the ICollectible interface.
The collectible class has three public variables:
IncrementValue, which is an integer initialized to 0,ItemType, which is aCollectibleType, andOnCollectiblesCollected, which is a static event that takes an integer and aCollectibleTypeas parameters.
Here, we have created this event to notify which collectible type collided with the player and how much value is to be increased or decreased.
If there are no values to be increased or decreased, then the default value will be 0.
public enum CollectibleType
    {
        Coin,
        Gem
    }

    public class Collectibles : MonoBehaviour, ICollectible
    {
        public int IncrementValue=0;
        public CollectibleType ItemType;
        public static event Action<int, CollectibleType> OnCollectiblesCollected;
        public void Collect()
        {
            Debug.Log($"Hi You Have Collected {ItemType}");
            OnCollectiblesCollected?.Invoke(IncrementValue,ItemType);
            Destroy(gameObject);
        }
}Collectibles.csStep 4: Create a UI Script to Display the Collected Items
Finally, the last script CollectiblesUI.cs is created and added to the GameObject. This script handles the display of collected coins and gems in the game. It uses two Text Objects – CoinText and GemText, to display the number of coins and gems, respectively.
The OnEnable() function subscribes to an event called OnCollectiblesCollected, which is triggered when the player collects a collectible item.
The CollectiblesCollected() function is called when the event is triggered, and it takes two arguments – the value of the collected item and the type of the item.
If the item is a coin, it sets the CoinText to display the new value of coins collected.
If the item is a gem, it sets the GemText to display the new value of gems collected.
Lastly, OnDisable() function unsubscribes an event called before, i.e.,OnCollectiblesCollected.
public class CollectibleUI : MonoBehaviour
{
[SerializeField] private Text CoinText;
[SerializeField] private Text GemText;
private void OnEnable()
{
Collectibles.OnCollectiblesCollected += CollectiblesCollected;
}
private void OnDisable()
{
Collectibles.OnCollectiblesCollected -= CollectiblesCollected;
}
private void CollectiblesCollected(int valueForIncrement, CollectibleType item)
{
Debug.Log($"Increasing amount {valueForIncrement} of {item}");
if (item == CollectibleType.Coin)
{
CoinText.text = "Coins: " + valueForIncrement;
}
if (item == CollectibleType.Gem)
{
GemText.text = "Gems: "+valueForIncrement;
}
}
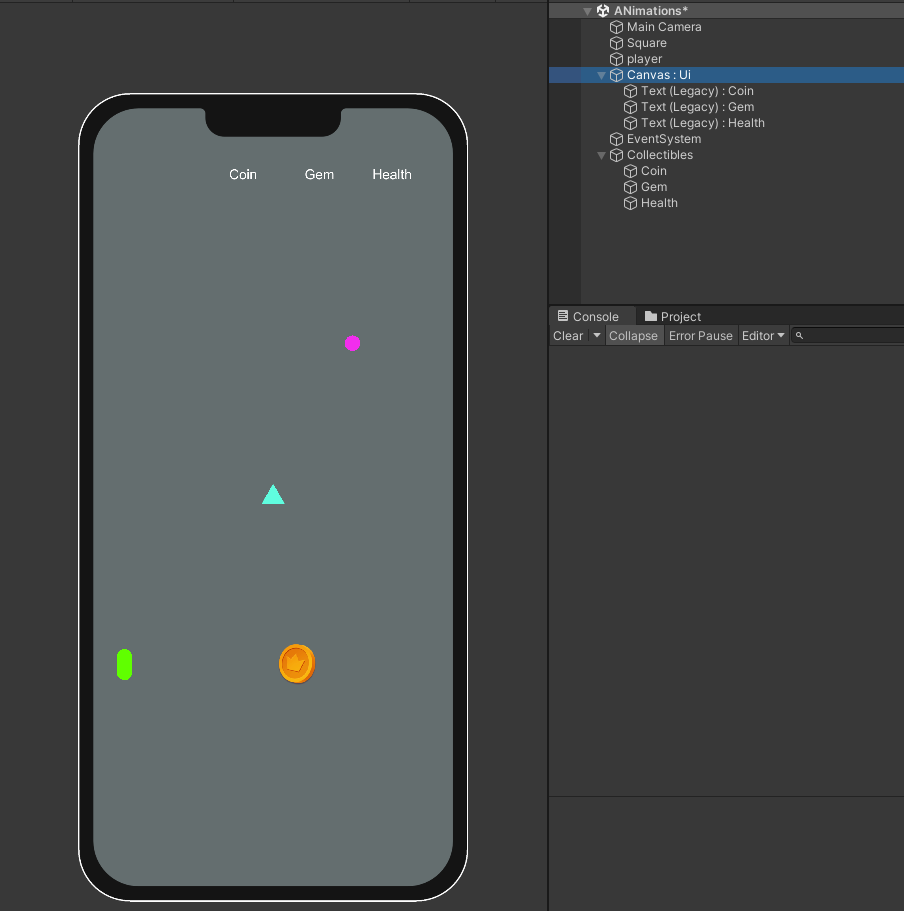
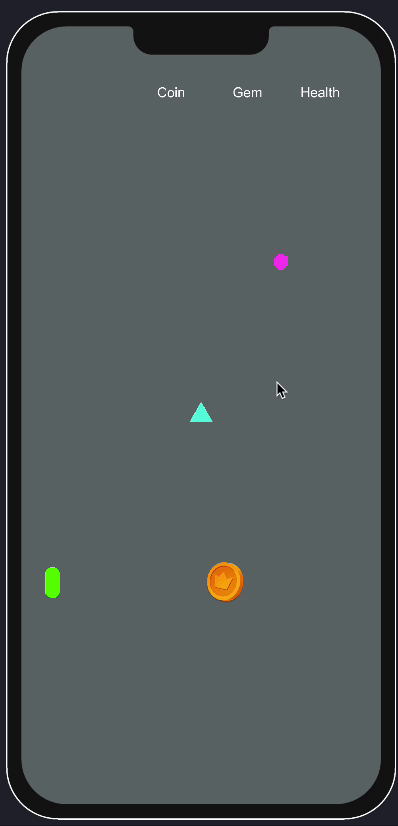
}I have set up a scene where the player is a triangle with its movement and collector scripts from above.
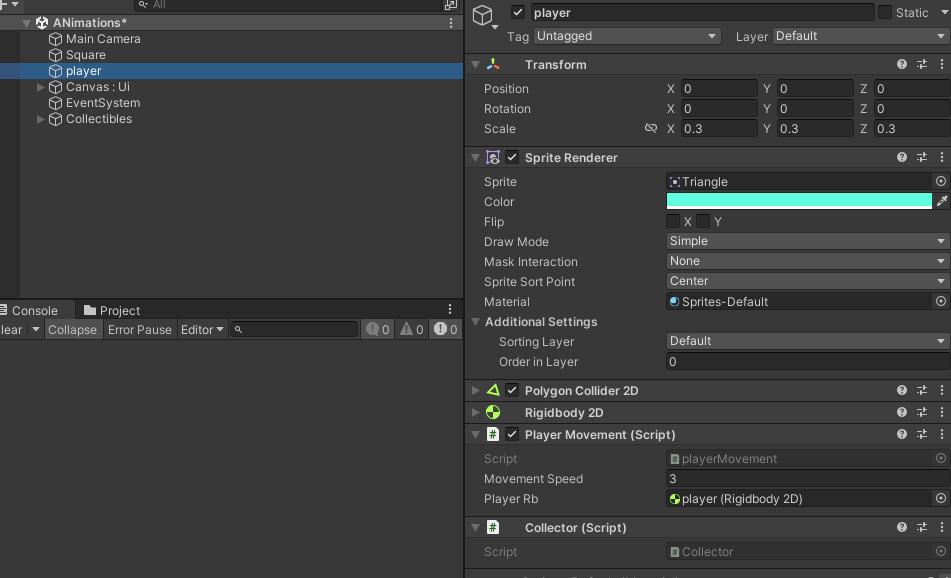
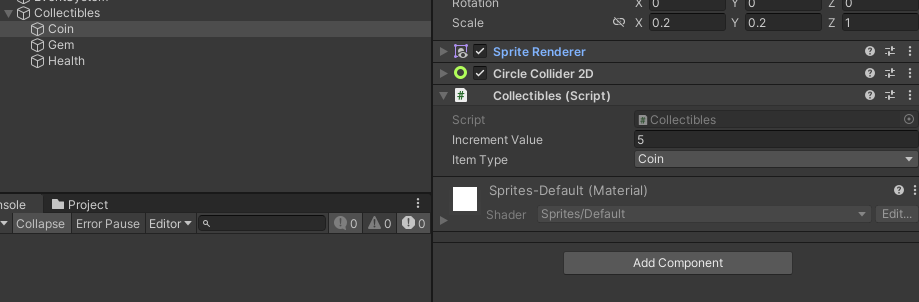
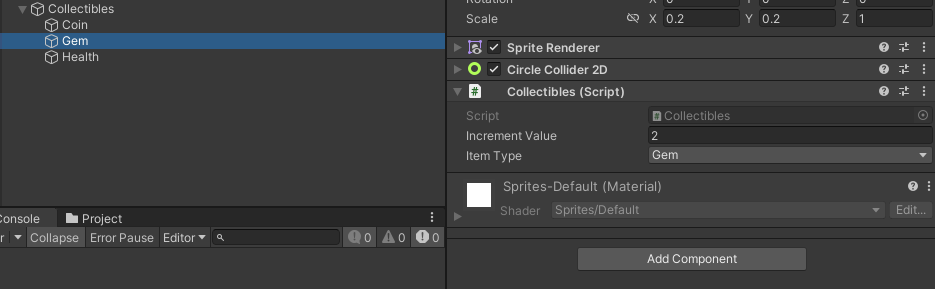
GameObjectThere are three types of collectors, i.e., Gem, Coin and Health. All the collectible has their own increment values with their type. Make sure that the circle collider is set to trigger.

The below texts show the updated collectible values.
The following video displays the working mechanism of the above code.
Thanks for reading! Don't forget to subscribe and leave a comment below.