
In Unity, there are multiple approaches to creating vehicle movements. While one simple method involves moving a vehicle object in 3D space and adding wheel rotation animations, this approach lacks realism as it ignores physics.
To accurately simulate vehicle movement, Unity provides a specialized component called WheelCollider. This collider is designed to mimic the behaviour of grounded vehicle wheels. The attached vehicle can be realistically moved by applying forces to the wheel colliders, similar to real-world vehicles.
The WheelCollider component offers various properties that can be adjusted, such as mass, radius, suspension settings, and friction settings, allowing users to fine-tune the physical properties and achieve the desired effect.
1. Getting Started
We will import a vehicle object (3D model of a vehicle) to make it more realistic and attractive from the Unity asset store. Don't worry; many free assets are available in the Unity asset store. This one is very small in size and free too.
However, if you prefer, you can also use your own 3D model of a vehicle or follow along using the basic primitive 3D objects provided by Unity (such as cubes and cylinders).
2. Starting the Project
- Open the Unity Hub and click on the
New Projectbutton to create a new project. - Select
3D corefrom the list of available templates, give the project a proper name and location. - You will have a sample scene created and opened for you with a
Main CameraandDirectional Lightin the scene. In your project view, you can find the scene insideAssets>Scenes>SampleScene. You can rename the scene if you want.
3. Importing the Assets
- Click on the
Add to My Assetsbutton on the Unity Assets store. You may need to sign in with your Unity account if you have not signed in already. - Accept the
ToSandEULAif prompted. This will add the asset to your account. - Then click on
Open in Unityand open the link. It will open thePackage Managerwith the option to download the asset into your project. Make sure thecarasset is selected, and click on theDownloadbutton. - Once the download completes, it will show a button to import the asset into the project. Click on the
Importbutton on thePackage Manager. You should see a new folder inside yourAssetsfolder containing the imported assets.
- If you want to use a
3D modelthat you already have on your device, you can simply drag and drop it into yourProject Window.
4. Setting Up the Scene
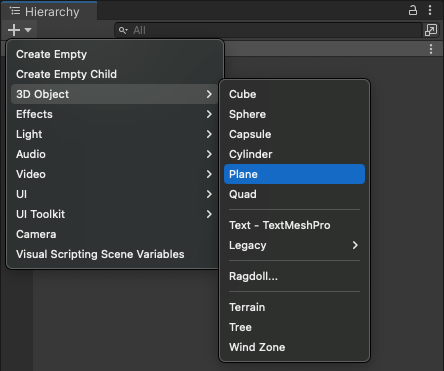
- Add a plane to the scene from the
+button in theHierarchywindow and give it a scale of100along thex-axisandz-axis, so that we have enough area to drive the car around.

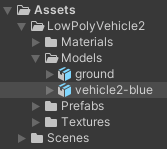
Hierarchy window- Find the
vehicle2-blueobject insideAssets>LowPolyVehicle2>Models. Drag and drop it into the hierarchy. You should see the car model in theScene Viewtoo.
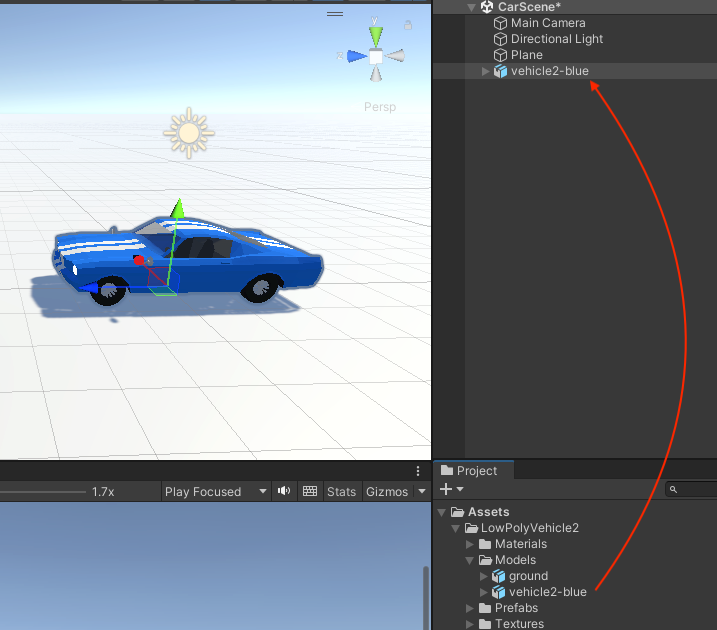
- Did you notice how the
vehicle2-blueobject is blue while the others are not? It is because it is set as aprefabobject. We will make changes within this object, so let's unpack it completely. - Right-click the object and select
Prefab>Unpack Completely. - Let's rename the object to 'Car'.
5. Setting Up the Vehicle Physics
We need to add the Colliders and Rigidbody components to our vehicle to use it as a physical object with physical properties. For that, follow the listed steps.
- Select the
Carobject and click theAdd Componentbutton on the inspector.
Click on theSearch boxand typeRigidbody. You will see two matching components,RigidbodyandRigidbody 2D.Rigidbodyis used for 3D objects, whileRigidbody 2Dis used for 2D objects. - Click on
Rigidbodyto add rigidbody components to the object,Car. - Within the
Rigidbodycomponent properties, update the mass of the car from1to1500(kg) and drag to0.01(optional). - Click on
Add Componentand typeBox Collider. - Select
Box Colliderfrom the filtered list to add a box collider component to the object,Car. - Within the
Box Collidercomponent, adjust theSizeandCenterof the collider to match the base of the car.
Mesh Collider or combine multiple colliders to match the shape of the vehicle. I will be using a single Box Collider for demo purposes.
6. Setting Up Vehicle Components
Let us take a look at the Car object. If we expand it, we can see the body, doors, windows, wheels, etc., as the Child Objects of the main Car object.
Let's group the wheels together.
- Right-click the
Carobject and click onCreate Empty. It will add an empty object inside theCarobject. (Make sure itsTransform Valuesare set toDefault, i.e.,0's for position and rotation and1's for scale). - Rename the newly created object as
Wheels. - Select all four wheel object
WheelBL,WheelBR,WheelFL,WheelFRwithin theCarobject and drag them intoWheels. This will make them child-objects ofWheels.
wheels components- Similarly, create another empty object inside
carand rename it asWheelColliders. Again, create an empty object insideWheelCollidersand rename it asWCFL.
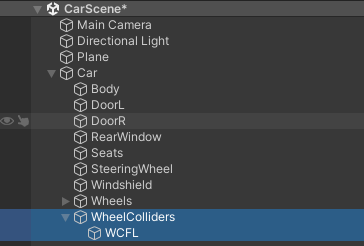
- Select the
WCFLobject and click onAdd Componentbutton in theInspectorview. TypeWheelColliderin the search box and select theWheelCollideroption from the filtered list. This action adds a wheel collider component. - You may need to select the
Carobject to see theWheelCollidercomponent on the scene view. Move theWCFLobject to align itsCenterwith one of the car wheels. Then adjust its radius in theInspectorview to match the size of the car wheel.
WheelCollider components- We need to move
WCFLtoWheelFLposition. Copy the transform values ofWheelFLontoWCFLand adjust theY-positionvalue manually.
WCFL values to WheelFL- Duplicate
WCFLthree times and rename them asWCFR,WCBLandWCBRrespectively. Copy the positions ofWheelFR,WheelBLandWheelBRontoWCFR,WCBLandWCBRrespectively.
WCFL
WCFR, WCBL and WCBR- Create an empty object within
Carand rename it toCenterOfMass. Then position it somewhereCenterat the base of the car body. This will be used to set the center of mass of the car. It is recommended to place it a little forward from the center (closer to the engine) because that is the center of mass in real cars.
7. Setting Up Input
Our vehicle is now set up and ready to move. We need to read the input from the user, which controls the vehicle movements.
- Create a C# script named
InputController.cs. - Add the following properties in the script to read input values from the user:
using UnityEngine;
public class InputController : MonoBehaviour
{
    public float Horizontal { get; private set; }
    public float Vertical { get; private set; }
    public float Brake { get; private set; }
}Here, each property uses a public get and a private set. This allows the values to be accessed from outside this script but modified/controlled within this script only.
- Now, let us read the input values and assign them to the properties declared above from the
Updatemethod.
using UnityEngine;
public class InputController : MonoBehaviour
{
    public float Horizontal { get; private set; }
    public float Vertical { get; private set; }
    public float Brake { get; private set; }

    void Update()
    {
        Horizontal = Input.GetAxis("Horizontal");
        Vertical = Input.GetAxis("Vertical");
        Brake = Input.GetAxis("Jump");
    }
}
Our script is ready to read input from the user. Now we need to attach it to a GameObject.
- Create an empty
GameObjectin the hierarchy and rename it asInputController. Then attach the script we just wrote to theGameObject.
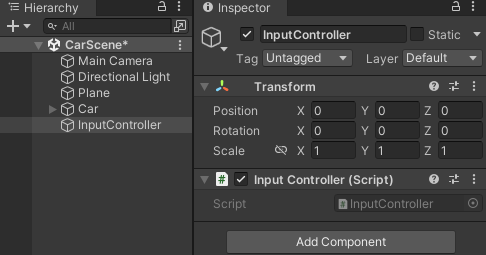
InputController GameObject8. Controlling the Vehicle with Input
Now, we will use the input values to control the vehicle movements.
- Create a C# script named
VehicleController.cs. - Declare some variables that are used to control the vehicle movements:
-Forcewill be used to drive the vehicles usingWheelColliders.
- Positive value and negative value of force will move the vehicle forward and in reverse, respectively.
-Anglewill be used to steer the vehicle left or right.
-BrakeForcewill be used to apply brakes.
using UnityEngine;
public class VehicleController : MonoBehaviour
{
    public InputController InputCtrl;
    [Tooltip("Set ref in order of FL, FR, RL, RR")]
    public WheelCollider[] WheelColliders;

    [Tooltip("Set ref of wheel meshes in order of  FL, FR, RL, RR")]
    public Transform[] Wheels;

    public Transform CenterOfMass;

    public int Force;
    public int Angle;
    public int BrakeForce;
}
VehicleController.csLet's create methods to use these values in action.
Here, we assume the vehicle is a front-wheel drive, and we use indices 0 and 1 to reference front WheelColliders. We use motorTorque to apply rotating force on the front WheelColliders , which results in the vehicle's movement. Similarly, steerAngle and brakeTorque are used to apply steering and braking force, respectively.
using UnityEngine;
public class VehicleController : MonoBehaviour
{
    ...
    public int BrakeForce;

    private void Drive()
    {
        WheelColliders[0].motorTorque = WheelColliders[1].motorTorque = InputCtrl.Vertical * Force;
    }

    private void Steer()
    {
        WheelColliders[0].steerAngle = WheelColliders[1].steerAngle = InputCtrl.Horizontal * Angle;
    }

    private void Brake()
    {
        WheelColliders[0].brakeTorque = WheelColliders[1].brakeTorque = InputCtrl.Brake * BrakeForce;
    }
}
VehicleController.cs- The above code updates the
WheelCollidersand results into vehicle movements, but the wheels (tyres) of the vehicles are not updated. Note that theWheelCollidersare not visible in the gameplay. - Moving a vehicle without moving the visible wheels would be unrealistic. So, the next step is to move the wheels to match the vehicle's movement. To achieve this, we will copy the
WheelCollidermovements (positions, rotations) onto thewheel-transforms.
using UnityEngine;
public class VehicleController : MonoBehaviour
{
    ...
    private void Brake()
    {
        ...
    }

    private void UpdateWheelMovements()
    {
        for (var i = 0; i < Wheels.Length; i++)
        {
            Vector3 pos;
            Quaternion rot;
            WheelColliders[i].GetWorldPose(out pos, out rot);
            Wheels[i].transform.position = pos;
            Wheels[i].transform.rotation = rot;
        }
    }
}
We have the methods to move the vehicle. Let's call them inside FixedUpdate function.
using UnityEngine;
public class VehicleController : MonoBehaviour
{
    ...
    private void UpdateWheelMovements()
    {
       ...
    }
    private void FixedUpdate()
    {
        Steer();
        Drive();
        Brake();
        UpdateWheelMovements();
    }
}
- This should be enough to make the vehicle move, turn, etc. Let's make it more stable so it won't trip over while steering. We will use
centerOfMassposition for this purpose. The lower the center of mass, the more stable the vehicle.Rigidbodyof the vehicle is used to set thecenterOfMassposition. We will set that in theStartmethod. We can access theRigidbodycomponent usingGetComponent<Rigidbody>().
using UnityEngine;
public class VehicleController : MonoBehaviour
{
    ...
    private void FixedUpdate()
    {
        ...
    }
    private void Start()
    {
        GetComponent<Rigidbody>().centerOfMass = CenterOfMass.localPosition;
    }
}
That's it. Our VehicleController script is ready. Let's move some methods up/down and see the final script.
using UnityEngine;
public class VehicleController : MonoBehaviour
{
    public InputController InputCtrl;
    [Tooltip("Set ref in order of FL, FR, RL, RR")]
    public WheelCollider[] WheelColliders;

    [Tooltip("Set ref of wheel meshes in order of  FL, FR, RL, RR")]
    public Transform[] Wheels;

    public Transform CenterOfMass;

    public int Force;
    public int Angle;
    public int BrakeForce;

    private void Start()
    {
        GetComponent<Rigidbody>().centerOfMass = CenterOfMass.localPosition;
    }

    private void FixedUpdate()
    {
        Steer();
        Drive();
        Brake();
        UpdateWheelMovements();
    }

	//Drive forward/backward
    private void Drive()
    {
        WheelColliders[0].motorTorque = WheelColliders[1].motorTorque = InputCtrl.Vertical * Force;
    }

	//Steer left/right
    private void Steer()
    {
        WheelColliders[0].steerAngle = WheelColliders[1].steerAngle = InputCtrl.Horizontal * Angle;
    }

	//Apply brakes
    private void Brake()
    {
        WheelColliders[0].brakeTorque = WheelColliders[1].brakeTorque = InputCtrl.Brake * BrakeForce;
    }

	//imitate the wheelcollider movements onto the wheel-meshes
    private void UpdateWheelMovements()
    {
        for (var i = 0; i < Wheels.Length; i++)
        {
            Vector3 pos;
            Quaternion rot;
            WheelColliders[i].GetWorldPose(out pos, out rot);
            Wheels[i].transform.position = pos;
            Wheels[i].transform.rotation = rot;
        }
    }
}- It is time to attach this script to a
GameObjectand provide the necessary references. - Let's create an empty
GameObjectinside the vehicle to mark theCenterOfMassposition.
CenterOfMass- Attach
VehicleController.csscript onto theCarobject and provide references.
Car objectNow, your vehicle is ready to be controlled using arrows or WSAD keys and Spacebar. You can experiment by tweaking the values until you find the movements of your liking. Congratulations on making your first vehicle simulation using wheel colliders in Unity.
Thank you for reading. I hope it was helpful and easy to follow. More on vehicle controller coming soon.