
Hello devs, I will show you how to read touch input in a fixed area today. This touch input reader will detect UI blockage in the touch area in Unity. This method will provide an alternative to the popular Touch class method commonly used by mobile apps to draw and control input methods.
In this tutorial, we will be building a simple touch input reader that uses a joystick to move the camera.
Making the Touch Input Reader
Step 1: Understanding How it Works
We will read the position of the first touch point on the screen. After that, we will calculate the position difference between the first touch point and the new touch points. This is the main formula to calculate input direction. However, it will not work as expected without additional improvising.
Now our next step will be to keep a reference of PointerEventData on OnPointerDown() . In the Update() method, we will check whether the pointer is moving or not. If the pointer is moving, we will set the isMoving boolean variable to true.
When this pointer is not moving, we will reset the first touch point to zero value. Then our TouchInputReader script is ready to implement.
This process can be broken down into two steps.
Step 2: Scripting
Create a C# script and name it as TouchInputReader. In the script, we will add the interfaces IDragHandler, IPointerDownHandler and IPointerUpHandler.
You will now see an error. Click on the error area and press the Alt + Enter key. We will see the options to import libraries. Hit Enter and paste in the code below.
using System.Collections;
using System.Collections.Generic;
using UnityEngine;

using UnityEngine.EventSystems;

public class TouchInputReader: MonoBehaviour, IDragHandler, IPointerDownHandler, IPointerUpHandler {

  public float touhSensitivity;
  public GameObject player;

  [SerializeField] Vector2 initialTouchPoint = Vector2.zero, pointPosition;
  [SerializeField] bool isMoving;
  PointerEventData ped;
  /// <summary>
  /// updated pointer position during drag.
  /// </summary>
  Vector2 newTouchPoint = Vector2.zero;

  void Update() {
    if (ped == null)
      return;
    isMoving = ped.IsPointerMoving();

    initialTouchPoint = ped.position;
  }
  public void OnDrag(PointerEventData eventData) {
    ped = eventData;
    newTouchPoint = eventData.position;
    if (!isMoving)
      return;
    pointPosition = newTouchPoint - initialTouchPoint;

    RotateCamera();
  }

  public void OnPointerDown(PointerEventData eventData) {
    initialTouchPoint = eventData.position;

  }

  public void OnPointerUp(PointerEventData eventData) {

    initialTouchPoint = Vector2.zero;
    ped = null;
  }
  void RotateCamera() {
    Debug.Log(pointPosition);
    player.transform.Rotate(transform.up, pointPosition.x * touhSensitivity);
  }

}GameObject called player in the script. This is because we are going to check the TouchInputReader on a camera. The camera will act as the player object, as you will see later Now, In the Unity Editor, create any 3D GameObject. Then, set our camera as a child of this cube. Once we set our camera's appropriate position and rotation, we will get this script to work.
In the InputReader image, attach this script and assign the cube as player in the script. Modify the touchSensitivity value to change the camera rotation speed.
Step 3: Using the Scripts
Once the scripts are all set up, we can move on to applying them in the UI.
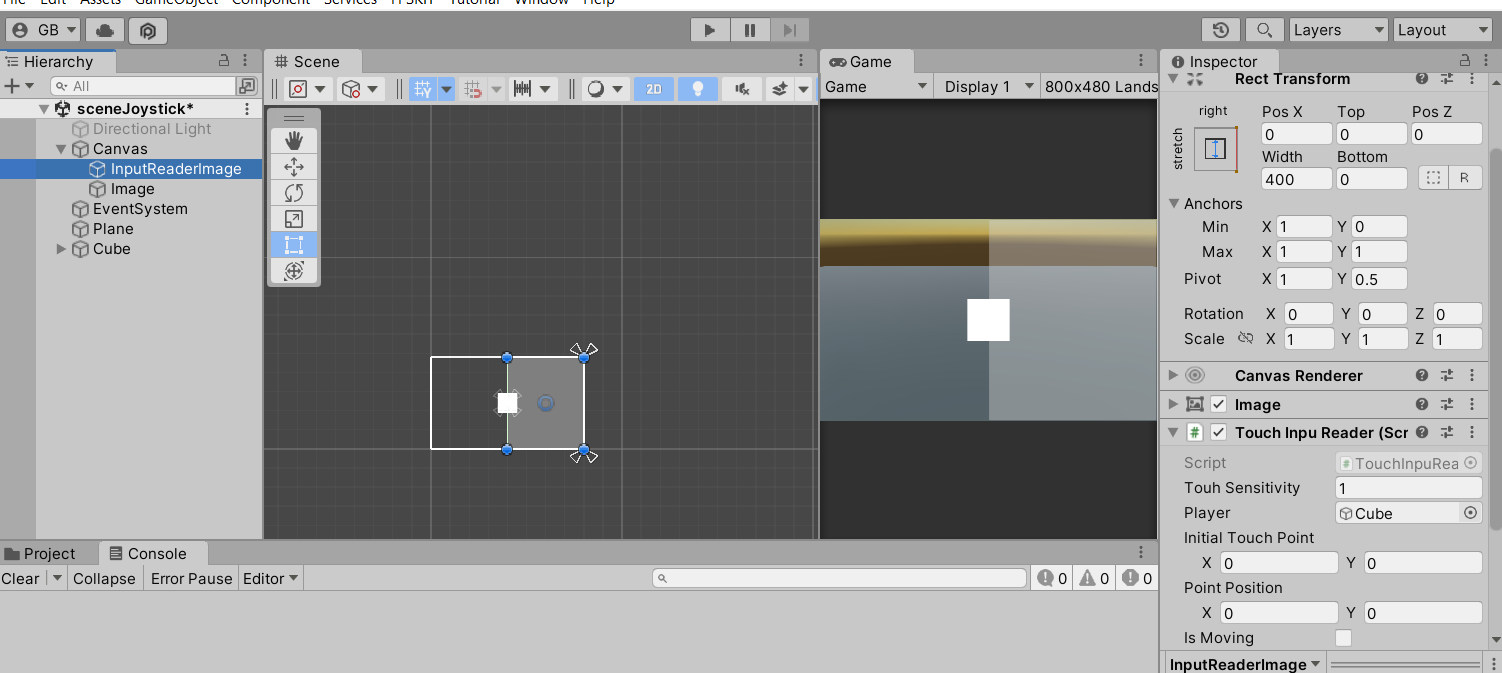
In the Unity Editor, add a Canvas and create an image GameObject inside it. Name it InputReaderImage. We then change its RectTransform value to stretch the image vertically on the right side and set its width to 400.
Now, attach the TouchInputReader.cs script to the image. Change the size of InputReaderImage to 500*500. This UI element will now serve as our joystick.
Step 4: Testing
Everything is all set up now. We can now test the input reader. We will also test our input reader by applying it to the camera to rotate it horizontally.
Create a 3D plane gameObject and a cube. We will use this cube as our player. Place the cube anywhere on the plane and make the camera a child of the cube. Change the position and rotation of the camera to match the view.
Assign the cube as a player to the TouchInputReader component of the InputReader image and give touchSensitivity a value of 1.
Finally, it's time to see the result. Play the game and try to swipe on the InputReaderImage, and you will see your camera view rotating!
This should work on both PC and mobile devices. Isn't that sweet?
Notable Features
Flexibility in the Touch Area
With this method, you can easily change the touch area to any shape by replacing the sprite in the image component. For example, if you change the touch reader's image with a star sprite, our touch area will be the visible part of the star.
Touch Area Response to Other UI
This method also allows better interaction between several touchable UI elements. If we don't want to read touch input when we touch over other UI elements like images or buttons, then we just need to place those UI elements a step below the input reader image in the hierarchy in the editor.
Simpler Calculation
If we were to use Unity's Touch class to read touch input, then we would have to perform calculations in the Update() method, which is called in every frame. In those calculations, we would read touch state, position, and a lot more data we don't want to bog down our code.
Instead, we are going to use OnDrag(), OnPointerUp() and OnPointerDown() method, which is less demanding on the renderer.
Short Code
Our code will be very short because we don't have to check if any UI element is on the way in the touch input reader area. We also don't have to check the isPointerTouching and isPointerMoving methods, which saves us a lot of time.
That's all for now, I'll see you in the next blog!