
Have you ever thought about how you write? The collection of steps you take from the beginning of a piece of work until the final version of the work is produced is your Writing Process. Knowing what steps you need to take to write effectively will drastically improve the quality of anything you write, personally or otherwise.
The Writing Process
Commonly, the writing process consists of five steps. Let's look at them in the context of writing a fictional article called Advanced Modelling in Blender.
- Prewriting. The first step to writing is thinking about what you want to write and deciding how you want to approach it. For example, for our fictional article Advanced Modelling in Blender, we would decide what tools we want to talk about and what we want to say about each of them. The document you produce during this stage is called a prewrite.
- Researching: The second step is to research and find all the data you need to fill in the gaps in your prewrite. In this case, we would open Blender, start collecting all the relevant screenshots and note down the details we want to put in my article.
- Drafting: The third step is to produce a rough draft that combines your prewrite from the first step and your research data from the second step to create an alpha version of your final article. This step is also when you would start a draft in the DevBlog.
- Revising: The fourth step is to revise everything you have written to see if it requires any fundamental changes you cannot make later on. You should finalize the contents of your article at this point.
- Editing and Proofreading: The final step is to edit and proofread the article so you can catch any grammatical or editorial errors you made while writing.
Your article should be ready for publishing by the end of this process.
A Writer's Responsibility
You might think to yourself, why do I need to know all these details? Isn't this why we have editors?
The answer is simple. Notice that editing is the last part of the writing process. This means that your editor can only help you during the final writing stage – the first four stages are your sole responsibility. An editor has one step to worry about; you have four. So, understanding each stage is important for a writer, even more than an editor.
But fear not, the purpose of this article is to help you get through these difficult four steps as efficiently as possible.
The Process in Action
The first thing to do is to find a topic you want to write about. Then, start following the writing process.
Step 1: Prewriting - Creating a Skeleton
While there are many ways to prepare a prewrite, I recommend starting with a "skeleton" of your article to add structure to your thoughts.
For example, the skeleton for our fictional Advanced Modelling in Blender article might look something like this.
Introduction (Advanced Modeling description, list of basic tools covered, list of prior knowledge required)
Core:
Tool #1 - Tool Name/How to Use/Screenshots
Tool #2 - Tool Name/How to Use/Screenshots
Tool #3 - Tool Name/How to Use/Screenshots
Conclusion (Tips and tricks, advantages)
Your skeleton can be shorter or longer than my example depending on what you're writing, but make sure it's not too short that it confuses you when researching.
Remember, no matter what the contents of an article are, all articles need an Introduction, a Core, and a Conclusion. The Introduction will introduce your idea and explain the purpose of your article, the Core will support the claims made by the introduction, and the Conclusion will show the final result of your article or provide useful insight.
These parts do not need to be labelled as such; for example, not every first paragraph needs to be called an Introduction, nor every concluding paragraph a Conclusion. But, all articles need a story that introduces something at the start, continues it in the middle, and ends with a fitting finale and wrap up.
Step 2: Researching - Finding the Flesh
Next, you need to plan what you want to say during each article section. This is when you need to take screenshots, make notes, write code snippets etc. Devote an appropriate amount of time to every part of your skeleton and jot down all the relevant info you find during research.
For our fictional Advanced Modelling in Blender article, I would come up with research that looks like this for one of my three tools.
Screenshots to use:
I would then repeat this process for all individual sections of my skeleton (Intro, Tool 2, Tool 3, Conclusion). Some sections might require text, images, code snippets, etc., so make sure you get as much information about everything as you possibly can.
Now, once you have research material you are happy with, you should move on to the next step.
Step 3: Drafting - Assembly
Once you know what you want to say and how to say it, the next step is to begin a draft.
A draft is a working version of an article. Drafts are where an article starts resembling its final form. This is the step where you would open up your online text editor for the blog and start typing things up.
I will list key steps you should follow when drafting to make the drafting process easier.
- Start with the skeleton. Remember the skeleton you made in Step 1? Now is the time to use it. Simply copy and paste your skeleton into your word processor to have a good idea of what the draft will look like. These are the bones of your article.
- Link your research. Now, get all your research data together and put them in the appropriate locations on the skeleton. Don't worry about grammar or formatting; just get everything down to see the bigger picture. This is the meat of your article.
- Fill in the blanks. With a skeleton down and the meat in position, all that's left is to fit these two together. Write out your intro and connecting sentences and add paragraphs or numbered points if necessary. Get all the text down in an organized manner.
For our fictional Advanced Modelling in Blender article, let's look at how I format my research from Step 2 as a draft.
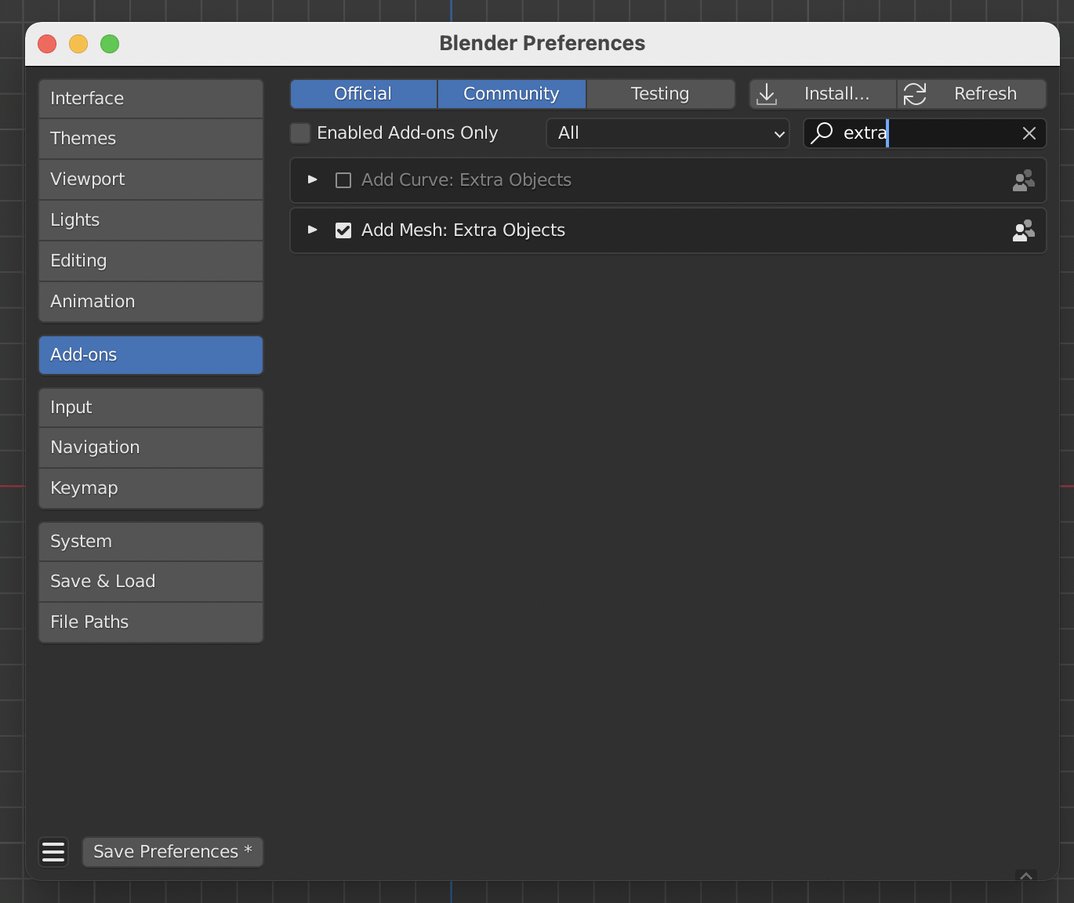
Step 1. On the Add-on section, search for extra objects and enable Add Mesh: Extra Objects. The extra objects include a Round Cube, Single Vert, and Torus Objects. (First Image)
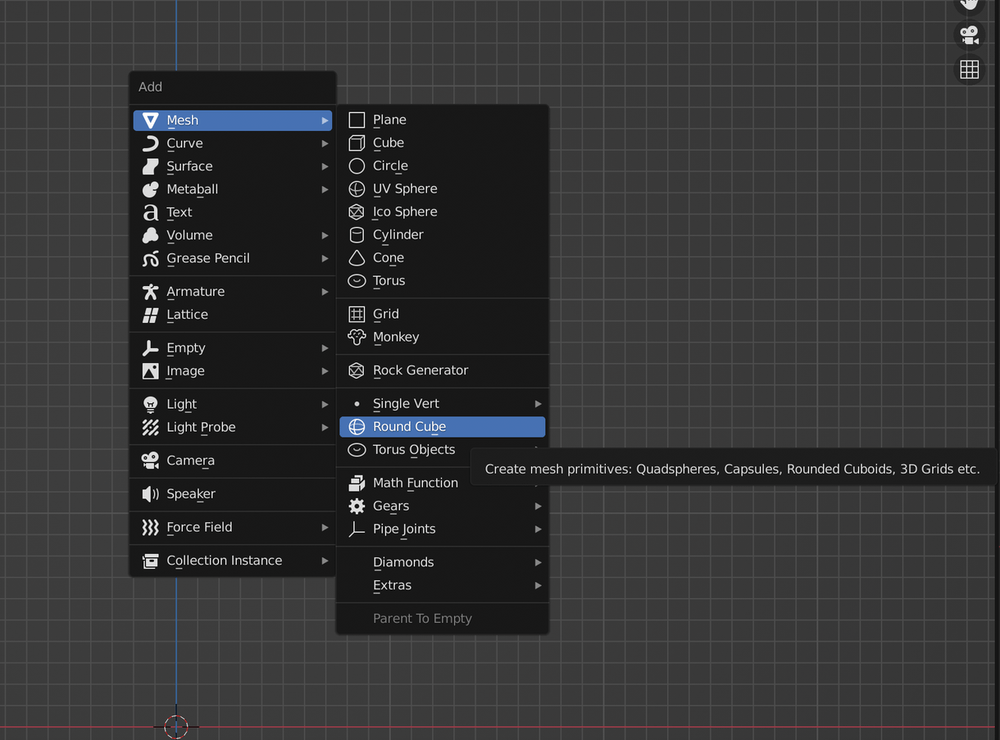
Step 2. Now, you can add a Round Cube to your scene with the shortcut Shift +A.
Step 3. It will bring up a menu with all the objects you can add to a scene. Select the round cube from the available mesh options. (Second Image)
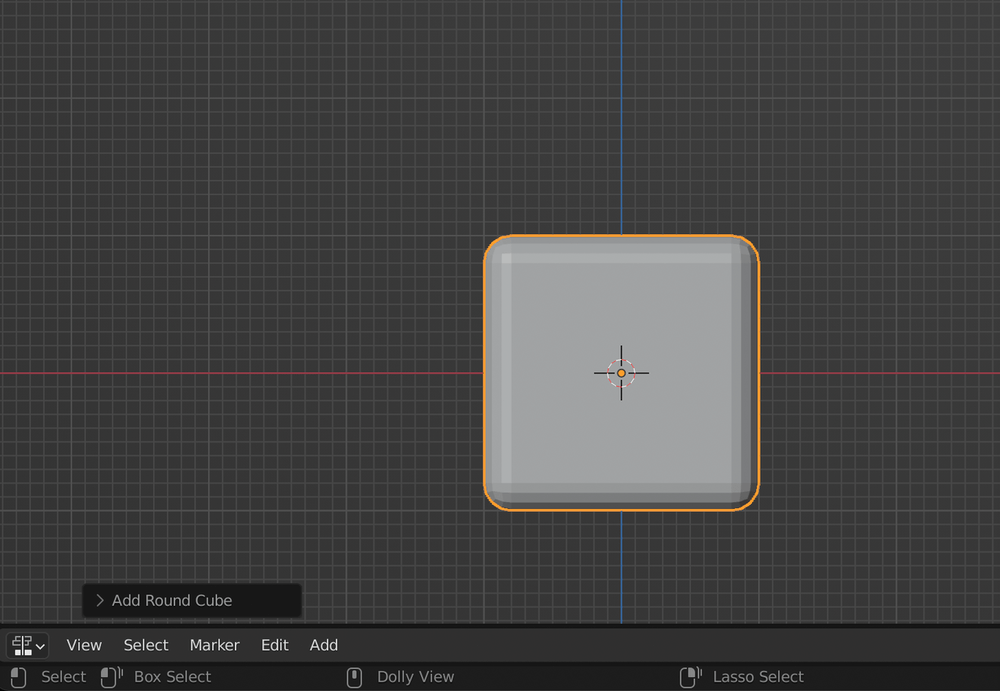
Step 4. As soon as the round cube is added to the scene, you will see a down-down menu pop up at the bottom left corner with the title Add Round Cube. (Third Image)
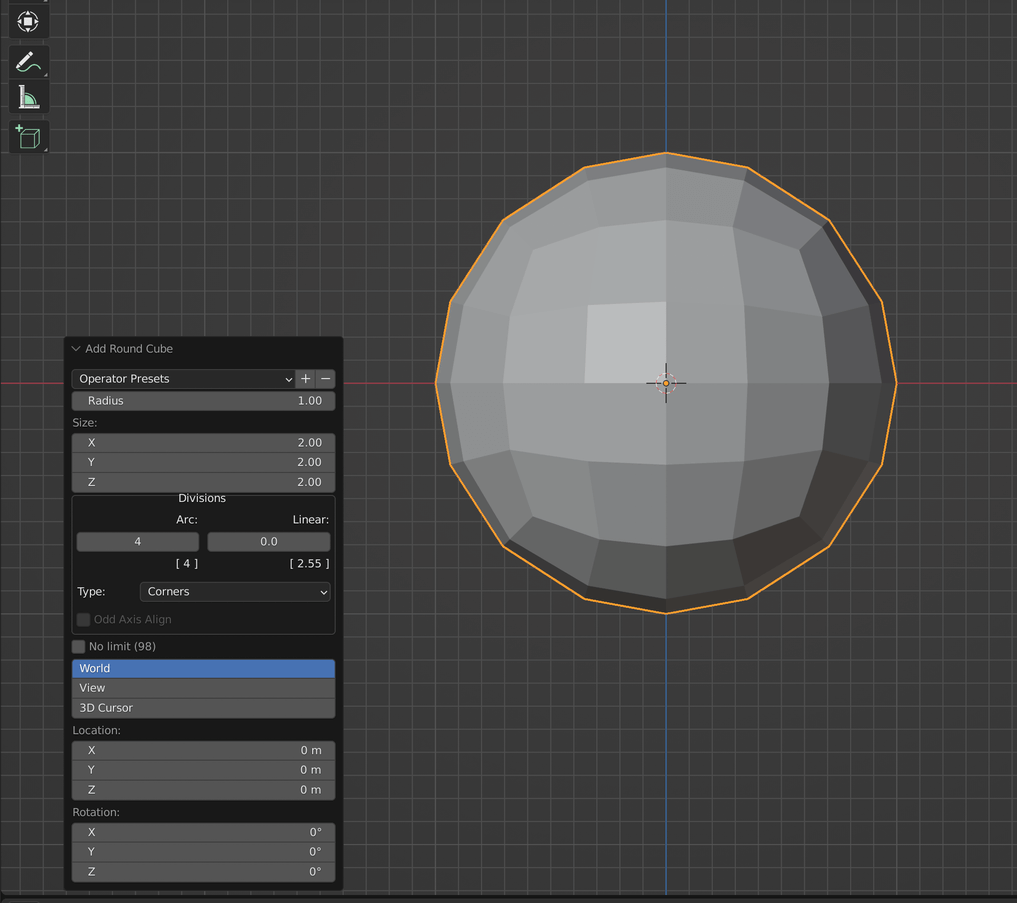
Step 5. You can click to open the drop-down menu and change the cube's properties. This is a quick way to change the size or the vertex count early on. You can easily change the cube into a sphere by modifying the radius of the cube to 1.
Round cubes are a faster and better way to create a sphere than adding sub-divisions on the default cube, resulting in a slightly wonky-looking sphere.
Don't worry about grammar or proper editing for your first draft. However, at this point in time, you should have the clearest vision of what the article wants to say.
It should look like a perfect article, if only from a distance.
Step 4: Revising - Performing Surgery
Once a draft is done, it's time to start revising your material and adding or removing anything that detracts from your article's point. Here are a few questions to ask and answer while you are revising.
- Is it formatted properly, and is there enough space between paragraphs? Are my headers properly set?
- Are all my code snippets and images labelled properly?
- Do I repeat a point or sentence in the article more than once? If so, can I delete one of them?
- Do my paragraphs flow from one to the other logically? Are there connecting statements between the major sections of my article?
- If I find a sentence or paragraph too long, how can I make it easier to read?
- Can I follow this tutorial myself? Does this article about a piece of software inform me enough about how it works? Does it fulfil its purpose?
- Does the article say what it is trying to say? Does it make sense when reading from start to finish?
Don't be afraid to make big changes to your draft at this stage either. Sometimes we might realize we have missed something that should have been addressed in the research phase. For example, for our article about Advanced Modeling in Blender, I seem to have missed a few key things when writing the section of my draft about the Round Cube tool.
- I have too many steps. Steps 2 and 3 can be combined into one step.
- I don't have an image to show what happens in the last step.
- My images don't have captions.
So, I can go back and combine Steps 2 and 3, take a screenshot to be shown after the last step, and provide captions for all of my images.
During this phase, you should read your article multiple times, take a step back and read it after a break, or do whatever you want until you feel like you cannot change anything about the contents of your article any further.
Your article should need no major changes at the end of the revising phase. Now, any other issues with the article should be about the editing or grammar – not the content. Make sure you hold it up to a proper standard.
Conclusion - A Healthy Patient
Of course, you don't need to follow all of these steps beat by beat. The writing process helps keep your writing on track and less messy, which is good for everyone who reads it.
Hopefully, now you know enough about the writing process to use it when writing your own articles for the DevBlog. You'll be surprised by how well you can write when this process becomes natural to you.
Stay tuned for next time when we will discuss how to format your blog properly for readability!