
Introduction
Application deployment in Kubernetes is a bit complex. Many YAML files are required to deploy different resources inside the cluster for a single application.
Helm is here to solve those issues and make the deployment of an application as simple as possible.
What is Helm?
Helm is a Package Manager for Kubernetes that makes it easy to configure and deploy applications into Kubernetes clusters. Helm is similar to package managers like apt, pip, yum, etc.
Helm is capable of:
- Installing and Upgrading Applications
- Fetch Application Packages from Repositories
- Configure Application Deployments
Understanding a Helm Chart Package
A Helm Package is also known as a chart. It consists of YAML Configuration files and templates that are rendered into a Kubernetes Manifest File. This is the basic directory structure of a Helm chart.
helm-chart/
  Chart.yaml
  templates/
  Values.yaml
Here,
Chart.yaml = It's a YAML file with metadata about the chart like chart name, version, maintainer, description, etc.
Values.yaml = It consists of configuration values for the chart, which are modifiable.
templates/ = This directory has files that are used to define Kubernetes resources. These files are used in conjunction with the values.yaml file.
Installing Helm
Helm can be installed via package managers as well as binary releases. Installation commands for different systems are given below:
Brew (Linux/macOS) = brew install helm
apt (Debian) = apt install helm
yum (CentOS/Fedora/RedHat) = yum install helm
Chocolatey (Windows) = choco install kubernetes-helm
Scoop (Windows) = scoop install helm
A Bash Script is also provided by Helm to make installation easier:
curl -fsSL -o get_helm.sh https://raw.githubusercontent.com/helm/helm/main/scripts/get-helm-3

chmod 700 get_helm.sh

./get_helm.sh
Alternatively,
curl https://raw.githubusercontent.com/helm/helm/main/scripts/get-helm-3Creating a Helm Chart
Now that we've installed Helm let's learn the basics by creating a custom Helm Chart for Nginx WebServer.
We'll go through different steps, after which you'll be comfortable enough to start creating your own custom Helm Charts.
Happy Helming!
Step 1: Creating a Namespace
Let's create a namespace called helm-demo in our cluster.
kubectl create ns helm-demoSwitch to the newly created helm-demo namespace.
kubectl config set-context --current --namespace=helm-demoNow we'll create a directory to store our helm chart.
mkdir -p helm-chart-demo/charts/nginx-helm-demo && cd helm-chart-demo/charts/nginx-helm-demoStep 2: Creating Helm Definition files
Create a Chart.yaml file.
vim Chart.yamlChart.yaml FileAdd the following lines to the file.
apiVersion: v2
name: nginx-helm-demo
version: 0.1
appVersion: 1
type: application
description: "Helm Nginx Demo"Chart.yaml FileHere:
apiVersion = API that Helm will use to communicate with Kubernetes before helm 3 v1 is used.
name = name of the helm chart.
version = Helm Chart Version.
appVersion = Application deployment version.
type = Chart Type.
description = Chart Description (will be visible during helm searches).
Step 3: Creating the Kubernetes Deployment Files
Create a directory called templates, where we will store the definition files.
mkdir templates && cd templatesLet's create a deployment file for Nginx.
We can use the fry run argument in kubectl to easily generate a template for our deployment and service files.
kubectl create deployment nginx-helm-demo --image nginx --replicas 1 --dry-run=client -o yaml >> nginx-deployment.yamlThat will create a basic configuration for the deployment.
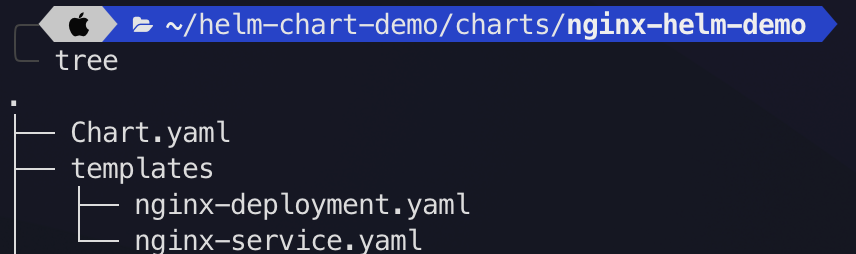
Now let's create a service file for Nginx.
kubectl expose deployment nginx --port 80 --dry-run=client -o yaml > nginx-service.yamlThe directory structure should look something like this now!
Step 4: Installing the Helm Chart
Now let's install the chart in the Kubernetes Cluster.
helm install nginx-helm-demo $HOME/helm-chart-demo/charts/nginx-helm-demoHere,
nginx-helm-demo = Name of the Chart to be Deployed
$HOME/helm-chart-demo/charts/nginx-helm-demo = Path to Chart
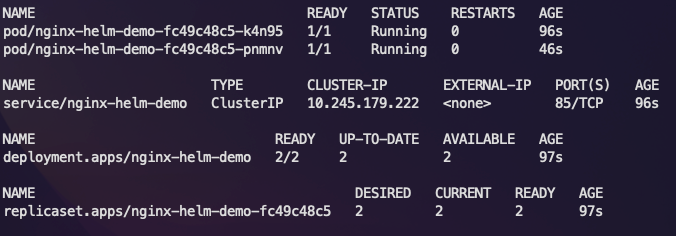
Run the following command to get the status of objects in our cluster
watch -x kubectl get all -n helm-demo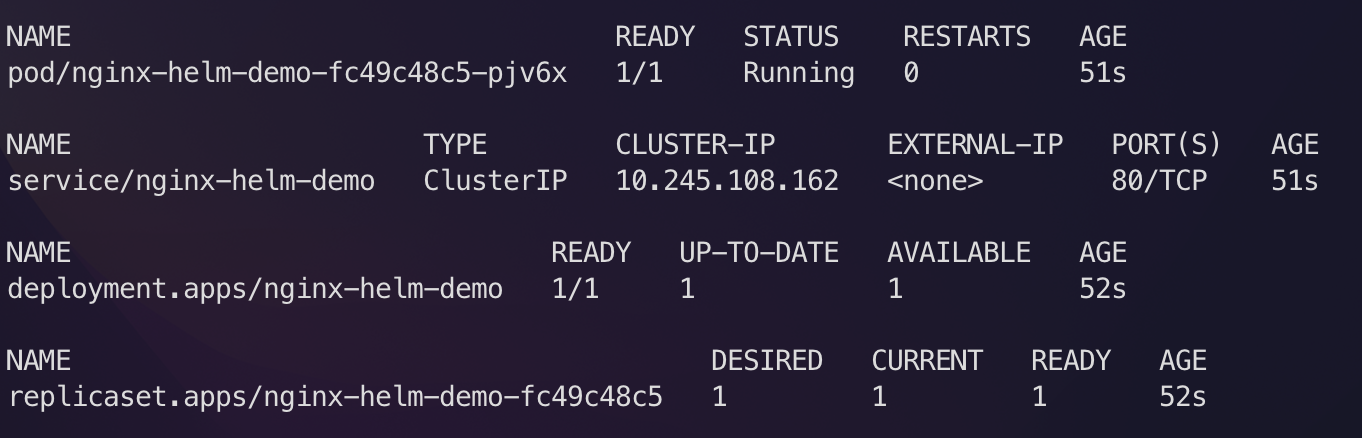
But this is not all. The reason we use Helm is because of the extensibility it provides in customizing the values of our deployments
Customizing the Helm Deployment
Let's create a values.yaml file in the nginx-helm-demo directory
vim values.yamlvalues.yaml FileWe'll try to customize the value of the replica set and service port.
Add the following to the values file.
replicaCount: 2
service:
port: 85values.yaml FileNow we'll customize the deployment files with reference to these values so that the helm controller knows where customization is required.
In the Nginx deployment file, customize the spec for replicas as follows.
replicas: {{ .Values.replicaCount }}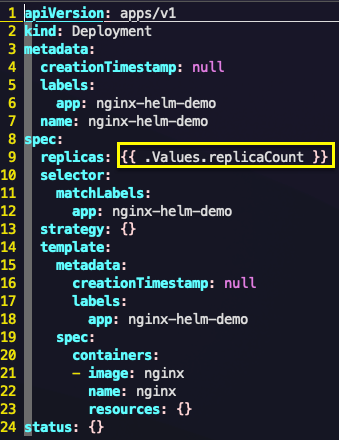
And in the Nginx service file, customize the spec for the port as follows:
ports:
  - port: {{ .Values.service.port }}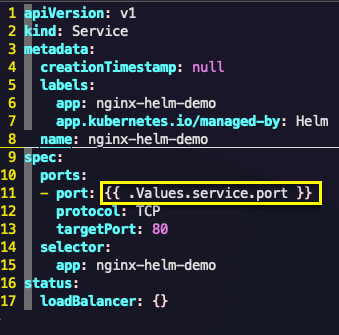
Upgrading the Helm Chart
The changes that we made to the configuration can be deployed easily using the helm upgrade command. As we've already installed the helm chart before this command will update the configuration of the existing chart.
helm upgrade nginx-helm-demo $HOME/helm-chart-demo/charts/nginx-helm-demo
If you've left the terminal for watch open, you should see that a new pod has been deployed, and the service port has been changed to 85.
Let's change the value back to 80 again!
replicaCount: 2
service:
port: 80Let's again upgrade the helm chart.
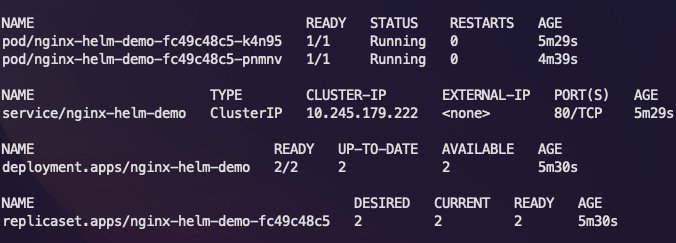
helm upgrade nginx-helm-demo $HOME/helm-chart-demo/charts/nginx-helm-demo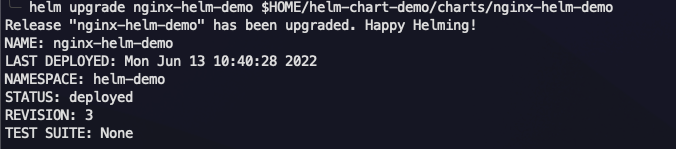
The Service Port has now been changed to 80 with the latest upgrade!
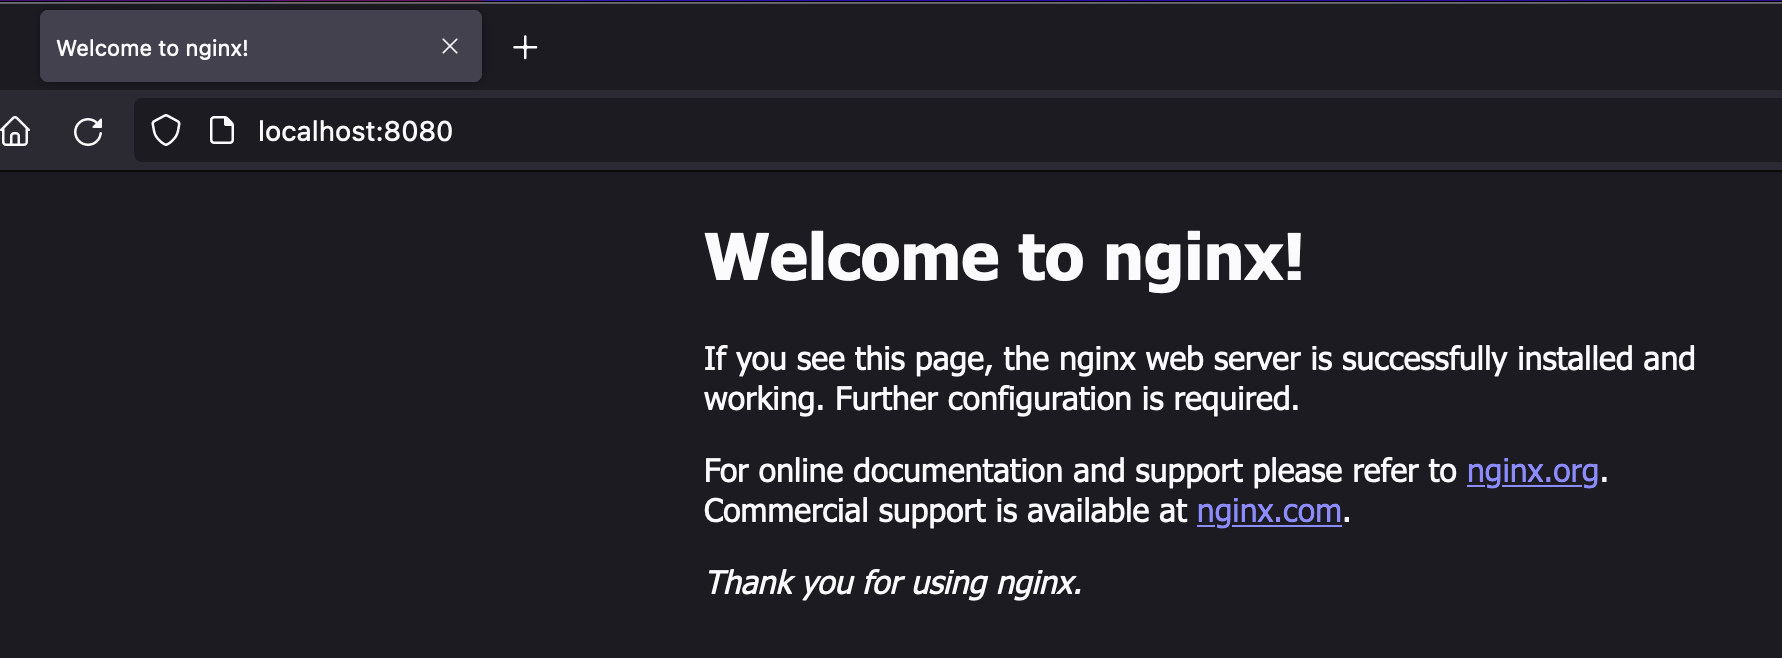
Let's port-forward and check if the deployment and service are working as intended!
kubectl port-forward service/nginx-helm-demo 8080:80 -n helm-demo
Helm Rollback
Our Helm Chart has deployed the required resources we wanted, but what if an unintended change was performed? Can it be reverted?
Yes! Helm allows us to switch between different versions of a chart as required.
For this example, let's deploy back to version 1, where only one pod was present.
helm rollback nginx-helm-demo 1Here,
1 = The version to revert to (It can be any version that you've already deployed before)

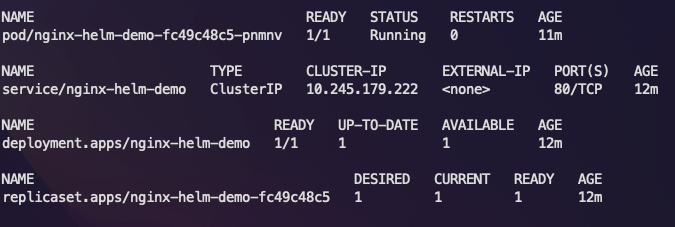
The helm rollback was a success, and we only have one pod running in our cluster!
To display installed charts, we can run the following command:
helm list
Uninstalling the Helm Chart
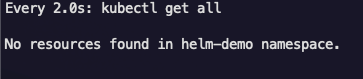
To Uninstall the Chart, we simply run.
helm uninstall nginx-helm-demoThe resources deployed into the cluster will now be deleted!
In this blog, we reviewed Helm, a package manager for Kubernetes. We learned about the fundamental components that make up a Helm Chart. We also learned to create helm charts, perform upgrades, roll back to a different version and uninstalled the created chart!
So this is it for the blog on Helm basics, I'll be back with more Helm content later on! Until then Happy Helming!