
We are all familiar with button click animations. When combined with a satisfying click sound, they form a nice button clicking experience. Here are a few examples of such animations commonly used by our Dev team.
- Scale-up/down clicks, where a button grows or compresses in size when it is pressed
- Colour tint on button click, where the colour of the button changes as it is pressed
To add to this list, I have recently revised and researched a new type of button press animation. It uses buttons that have two faces – the shadow face and the top face – to better visually simulate the action of being pressed.
The Button
First, you will need an image of the button you want to animate. This is the one I am using.
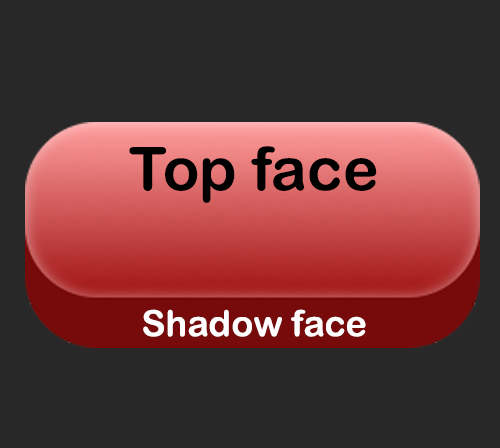
This animation is very simple. When the button is pressed, the top face of the button will gradually cover the shadow face, creating an illusion of 3D movement. For this, we need to differentiate the single button image shown above into two separate parts, viz. the Top face and the Shadow face.
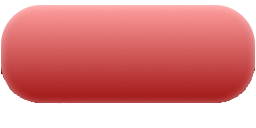

These are the images we get after separating the button image using an image editor. Now, let's dive into Unity and arrange things.
Programming the Button
Step 1: Button Creation
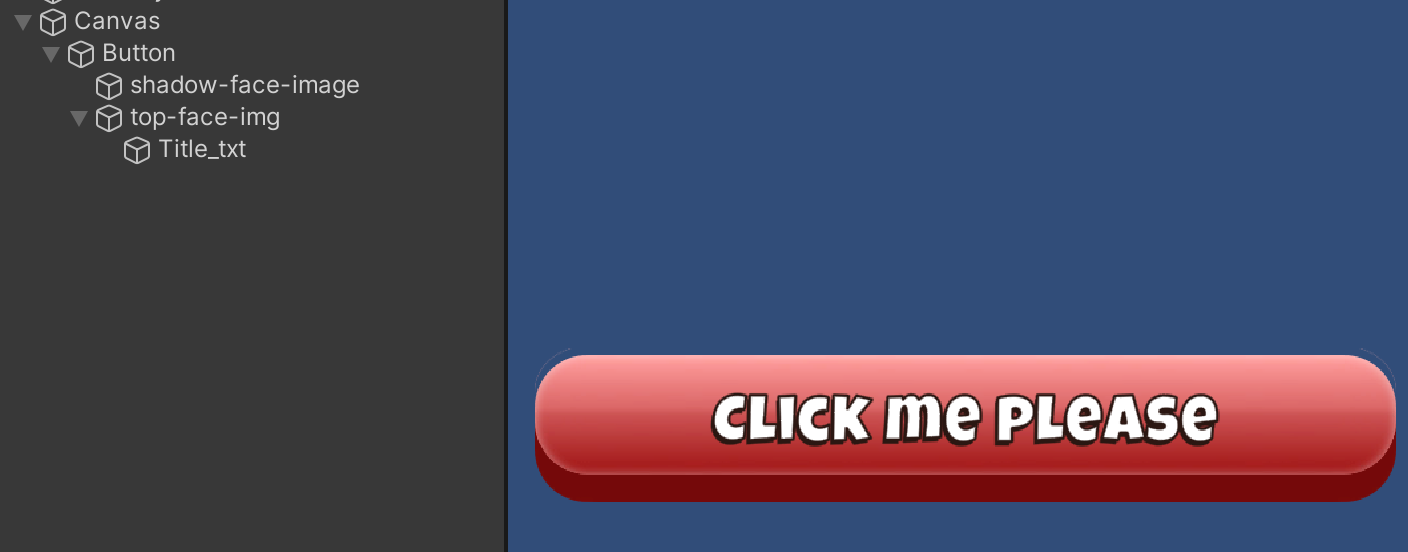
Open Unity and create a new button. After making a button, create two children image objects inside it and name them top-face-img and shadow-face-img respectively. Then, assign the appropriate face images to the children objects you just created. Remember to remove the default image on the button parent. You can also add text to the button, as I did below. To add text, you can right-click on the top-face-img and select UI >>Text.
Step 2: Animation Generation
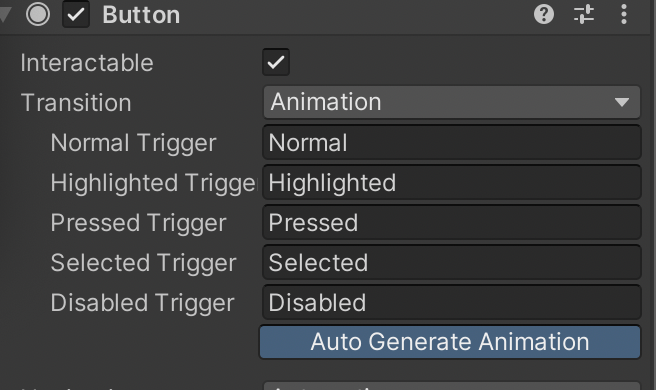
On the parent button, look at the inspector's Button component. Initially, the Transition is set to be Color Tint. We need to change it into Animation.
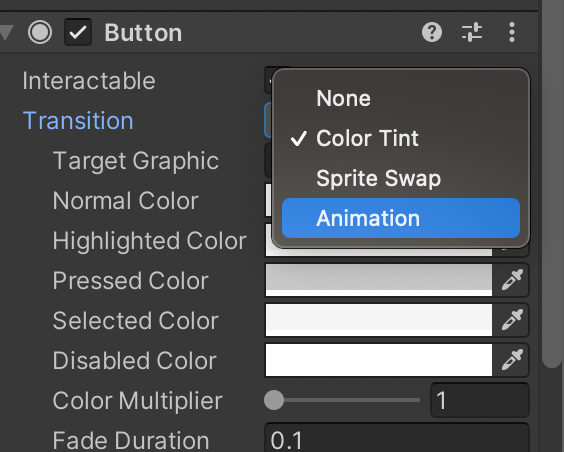
After changing to animation, click on the Auto Generate Animation button below.
Now, you can create and attach a default animator for the button. The animation of the Pressed state needs to be changed so that it moves the button's top-face-img down – or negative on the Y-axis.
Step 3: Final Animation

The gif above shows what the final button press animation should look like.
Conclusion
I have listed a few things you need to keep in mind while using this approach.
- If you want to make the button look fancier, make sure to put all the extra content inside the
top-face-imgobject. - If you need any other animations for the button, do not put it on the parent button. Put it on the child
top-face-imgor any other child oftop-face-img. - Always follow the naming system and hierarchies of the button. For example, here we have
button>>[top-face-img&shadow-face-img]. Consistent hierarchies allow you to reuse buttons easily and help the animator pick the right files as they are required.
Follow these simple and easy steps to make your game buttons feel more realistic. See you in the next blog!