
Unity engine recently introduced a new input system in version 2021.1, replacing the old one. The new input system in Unity is a powerful tool that can assist game developers in creating more understandable and responsive input schemes for their games.
Features of the New Input System
The new input system provides several key improvements and features for handling user input, including:
Platform Independence
The new input system provides a more platform-independent method of handling multiple user inputs. This makes creating cross-platform games that work seamlessly across different devices and areas easier.
Multi-Touch Support
The new input system improves support for multi-touch input, supporting up to 64 touch points. It also assists developers in creating games that can handle complex touch interactions.
Controller Support
The new input system provides improved support for gamepads and other controllers. Developers are now provided with smooth support for different types of controllers and have greater control over how buttons and axes are assigned to in-game actions.
Setting up the New Input System
To get started with New Input System, stick with the following steps.
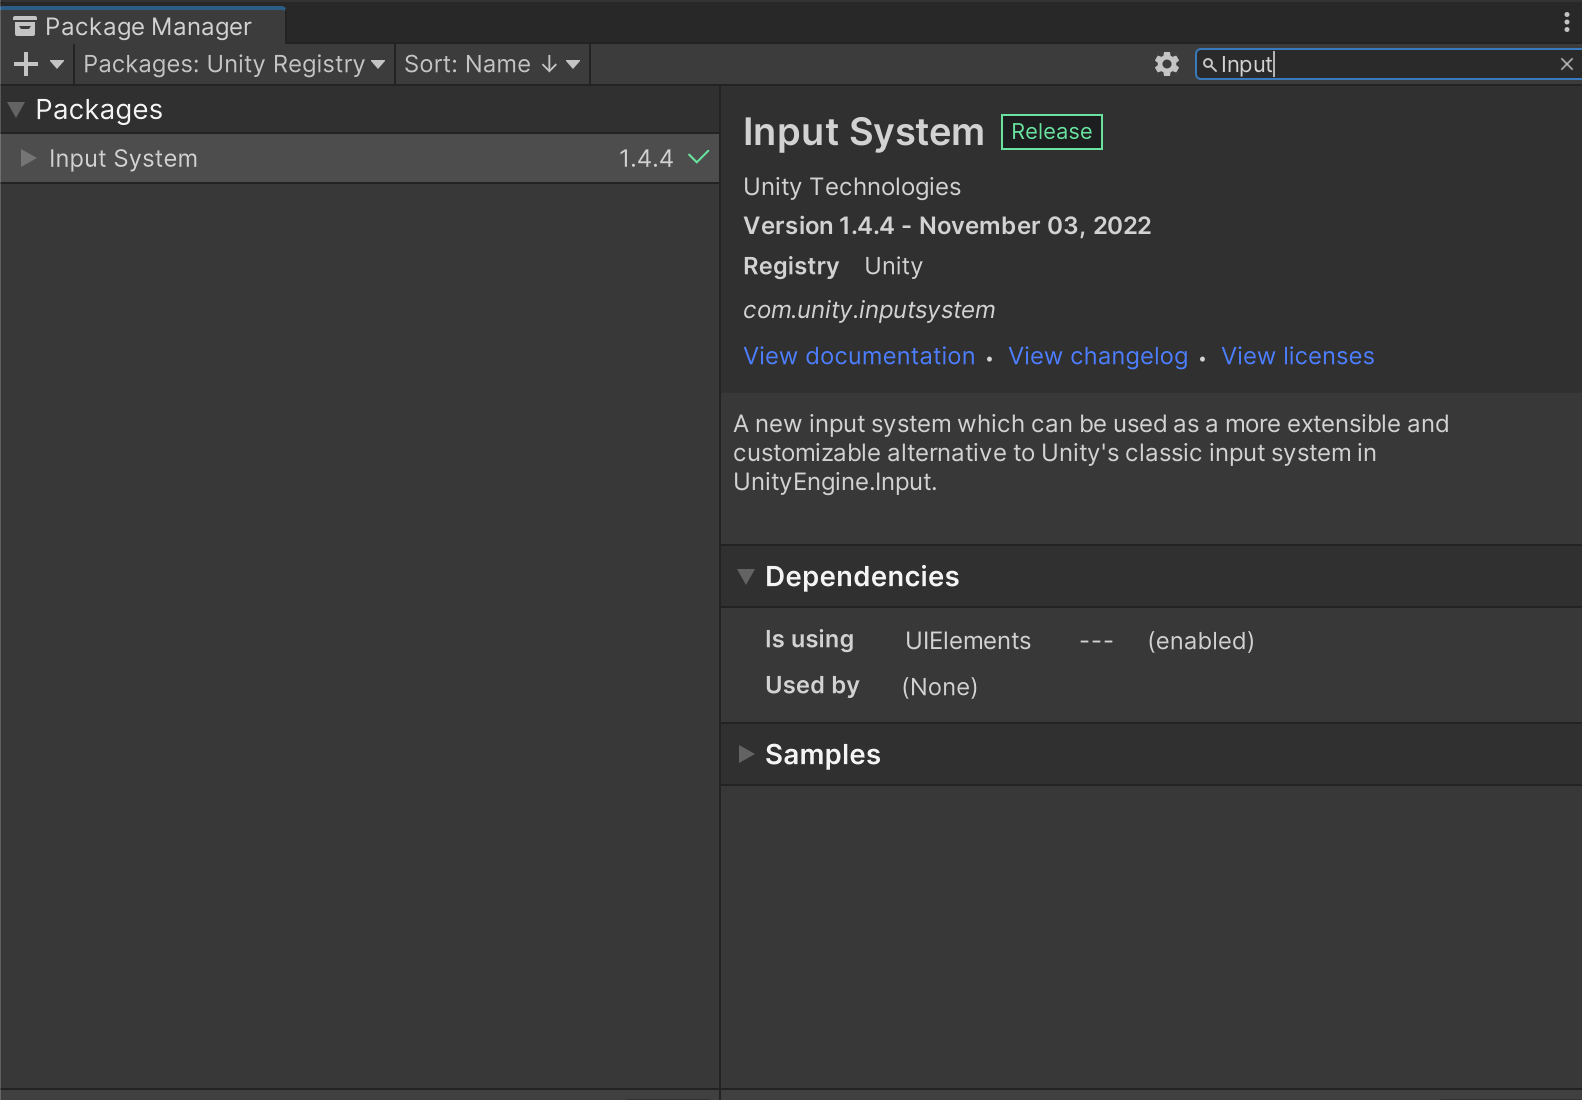
Step 1: Installing the package
Install the Input System package in the Unity Package Manager by going to Window > Package Manager >Unity Registry> Input System > Install.
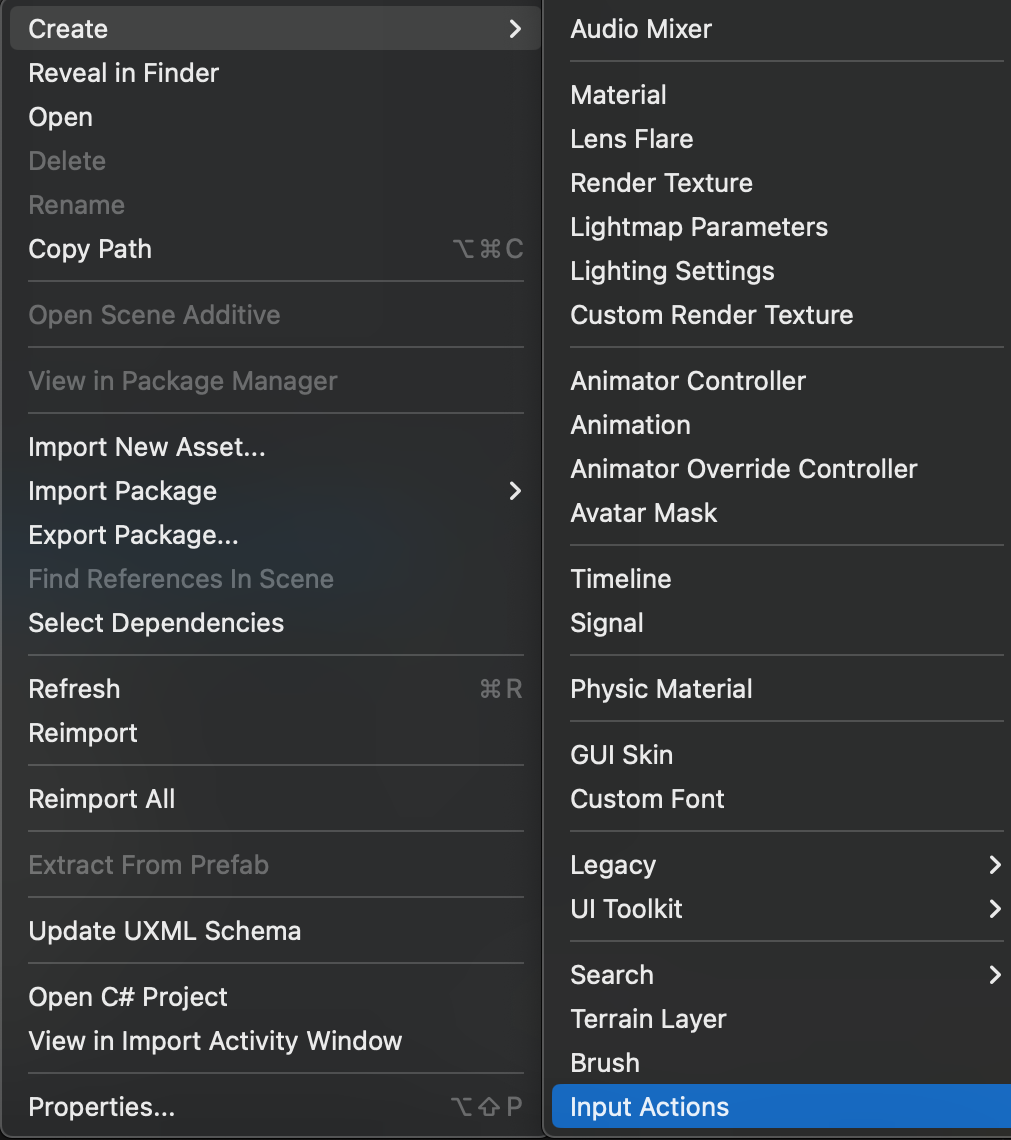
Step 2: Creating assets
Create a new Input Action asset by going to Assets > Create > Input System > Input Actions. This will create an asset you can use to define your input actions.
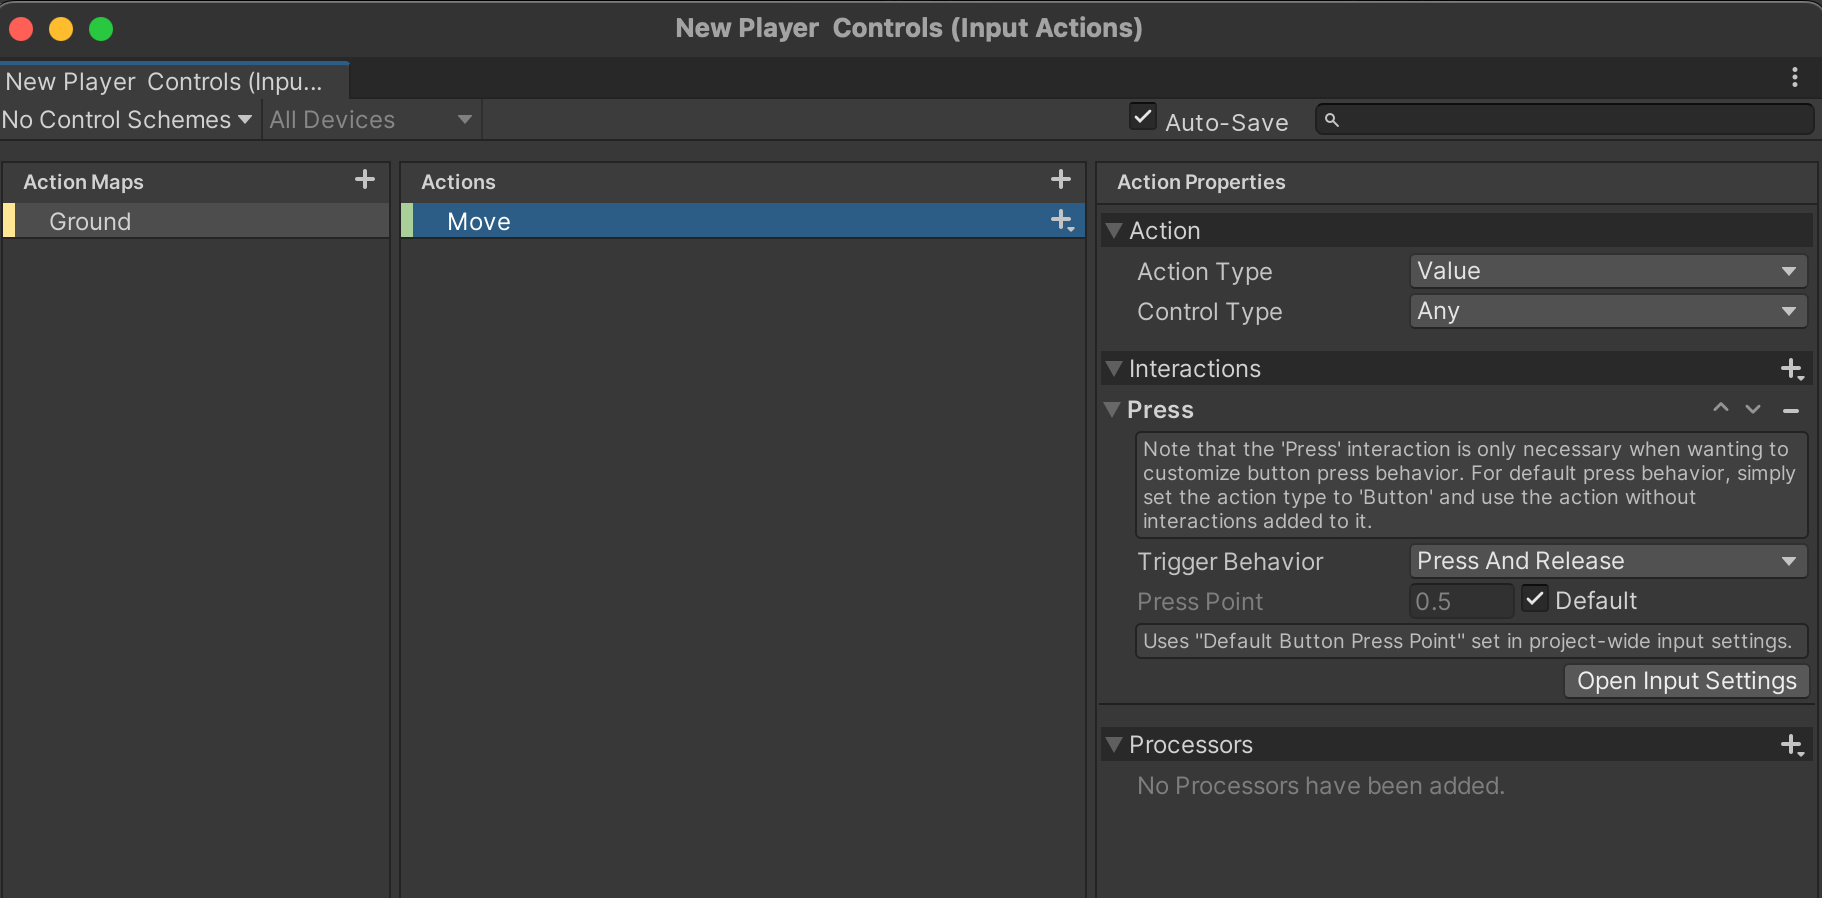
Input ActionsStep 3: Creating an action map
Create an InputActionMap asset by going to Assets > Create > Input System > Input Action Map. This asset is used to map actions to specific devices or platforms. You can also separate the action according to land, air or water. I am going to add the Ground Action Map.
Step 4: Creating actions
Define your input actions by adding actions to the Input Actions asset. For example, you might create actions for jumping, shooting, or moving on air, ground and water. Let's start with the players' movement. Add the player's movement action and follow the properties as well.
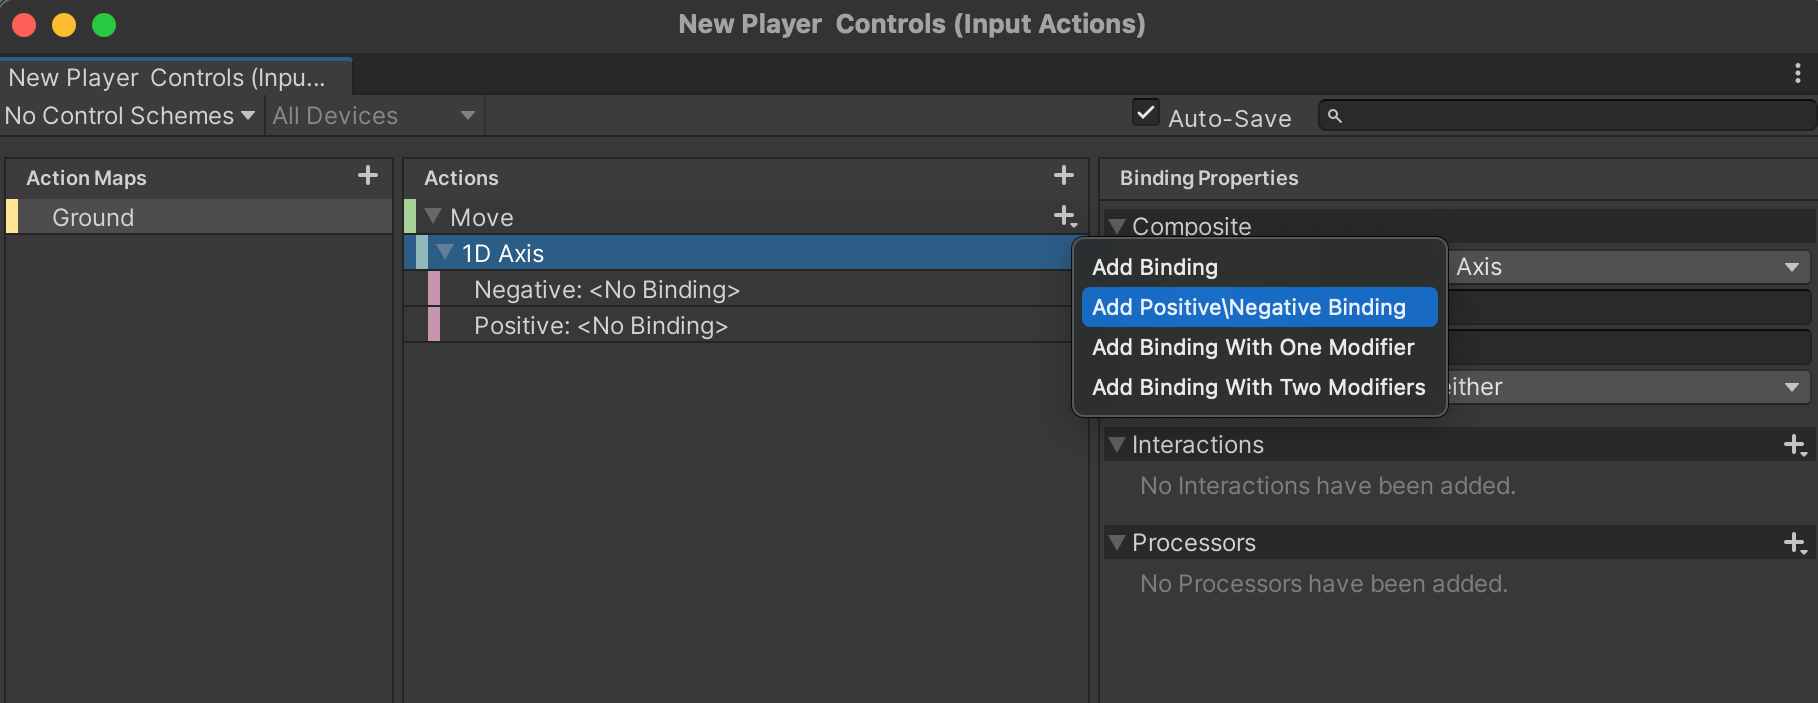
Step 5: Adding key bindings
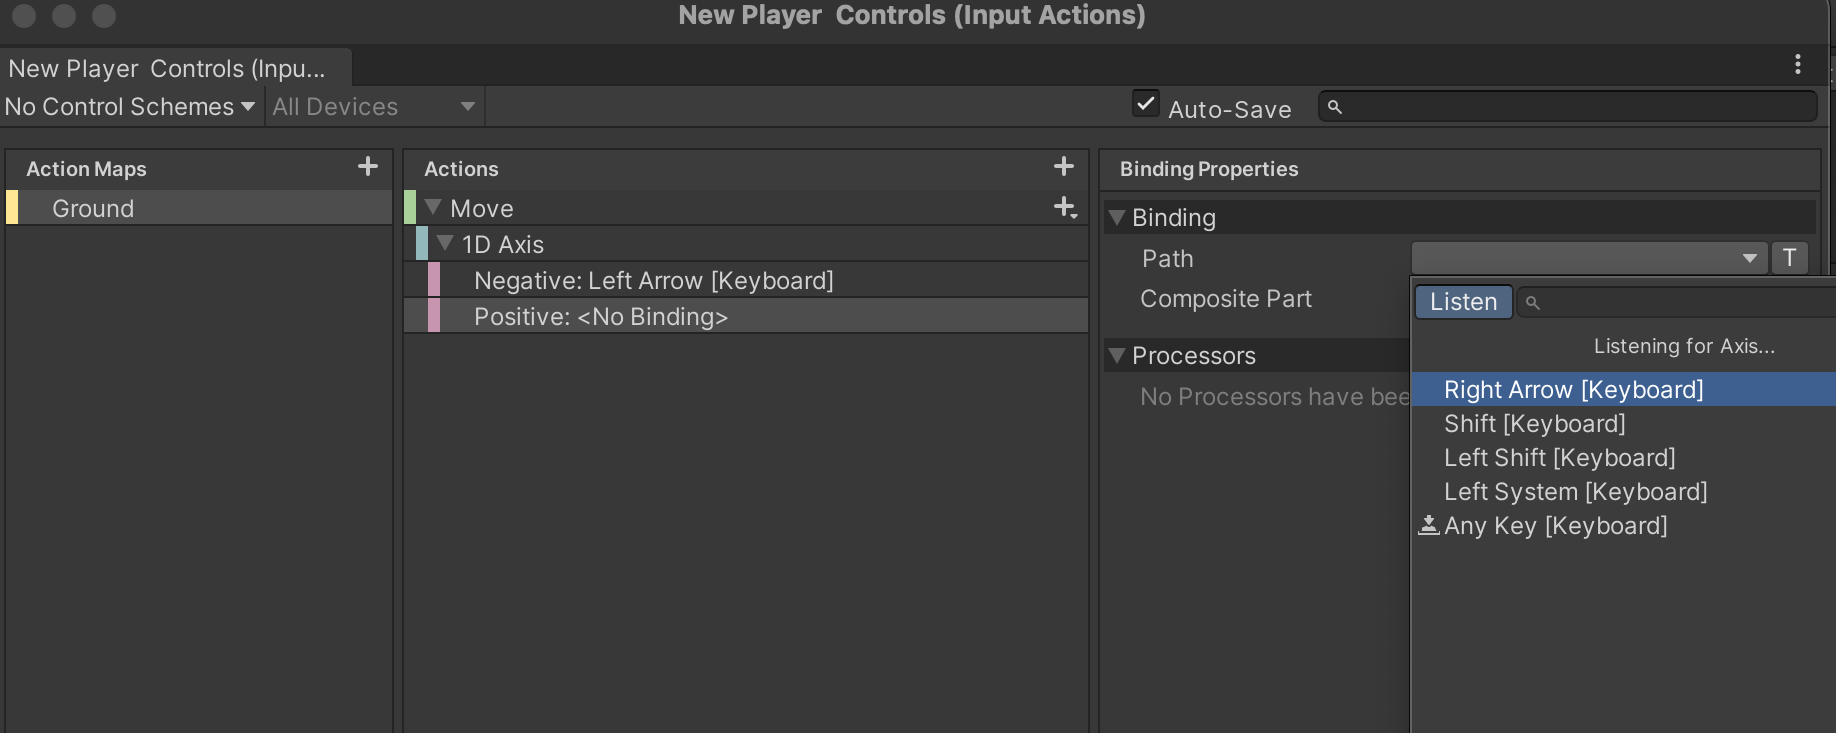
Now, let's add the binding of the Move action. To do this, click on the plus icon near the Move action. Then, click on the Add Positive/Negative binding values since we will move the player only left and right.
Step 6: Mapping input actions
Let's map our input actions according to the controls we want to use. Here, I will assign the left and right arrows from the keyboard for negative and positive values, respectively.
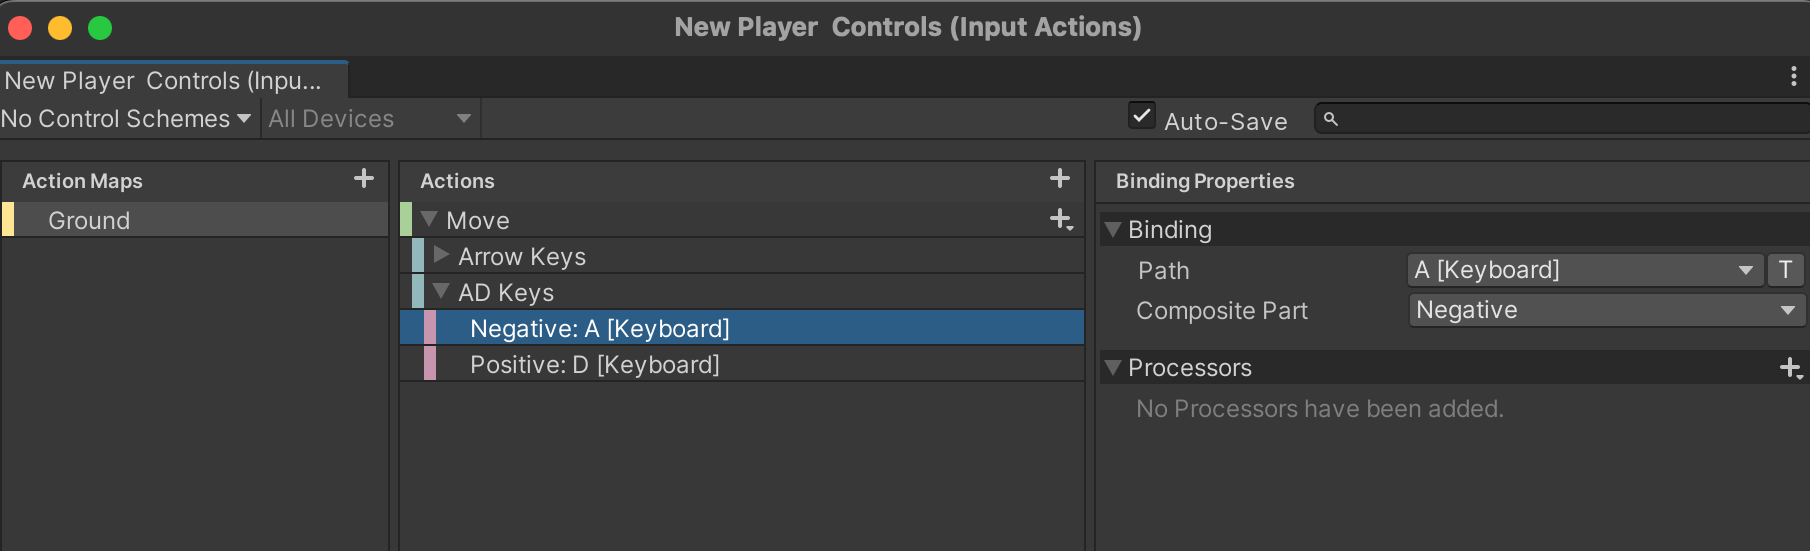
Step 7: Adding new bindings
Similarly, add the new bindings for the A and D keys on the keyboard.
Generating Script from Input Action Asset
Even though your player's movement action is completed, there are different methods to implement these actions for a player's movement. So, let's start generating its C# script. For this, click on Input Action > New Player Controls > Generate C# Class > Apply.
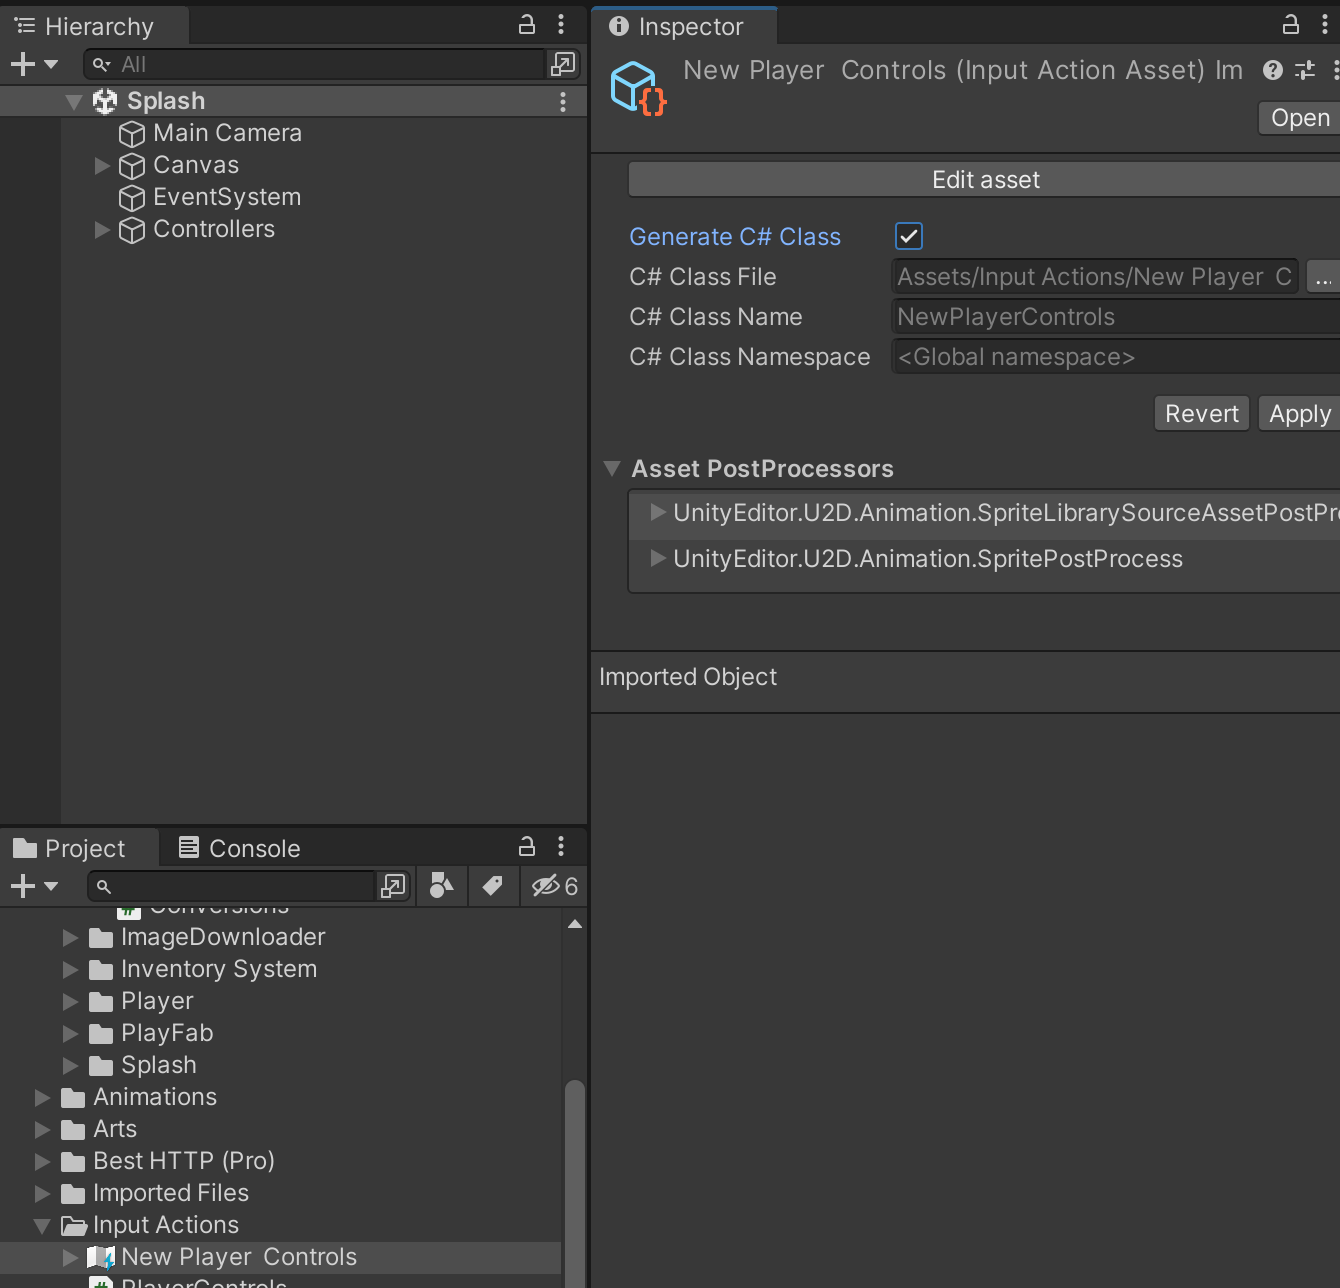
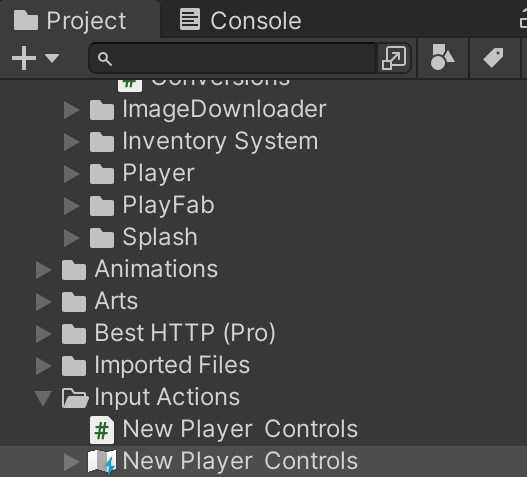
Inside your assets folder, you can find that the new c# script is generated under the same name as the input action.
Also Read: A Step-by-Step Approach to Crafting Reusable UI in Unity
Creating a script to move the player
Let's dive into the player's movement script.
//variables
public float PlayersMovementSPeed; //this is players movement speed.
    private float _playersMovementDirection = 0; //this will give the direction of the players movement.
    private NewPlayerControl _inputActionReference; // reference of the generated c# script form the input action
    private Rigidbody2D _playersRigidBody; //reference of the players rigid body.


    private void Start()
    {
        //Getting the reference of the players rigid body.
        _playersRigidBody ??= GetComponent<Rigidbody2D>();

        _inputActionReference = new NewPlayerControl();
        //enabling the Input actions
        _inputActionReference.Enable();
        //reading the values of the player movement direction for the players movement.
        _inputActionReference.Ground.Move.performed += moving =>
        {
            _playersMovementDirection = moving.ReadValue<float>();
        };
    }


    private void FixedUpdate()
    {
        //Moving player using player rigid body.
        _playersRigidBody.velocity =
            new Vector2(_playersMovementDirection * PlayersMovementSPeed, _playersRigidBody.velocity.y);
    }
PlayersMovement.cs
In the above script, PlayerMovementSpeed refers to the speed of the player moving, _playerMovementDirection refers to the direction of the player's movement, _inputActionRefernce refers the newly generated C# script from the input actions & _playersRigidBody refers to the player's rigid body property.
_playerMovementDirection, the positive value means that the player is moving towards the right, and the negative value means the player is moving towards the left.First of all, in Start() we are going to assign the _playersRigidBody variable. Then, create a new object of the _inputActionReference. Before reading the values from the input action, we are required to enable it.
Then, in FixedUpdate(), we are moving the player using the player's rigid body property.
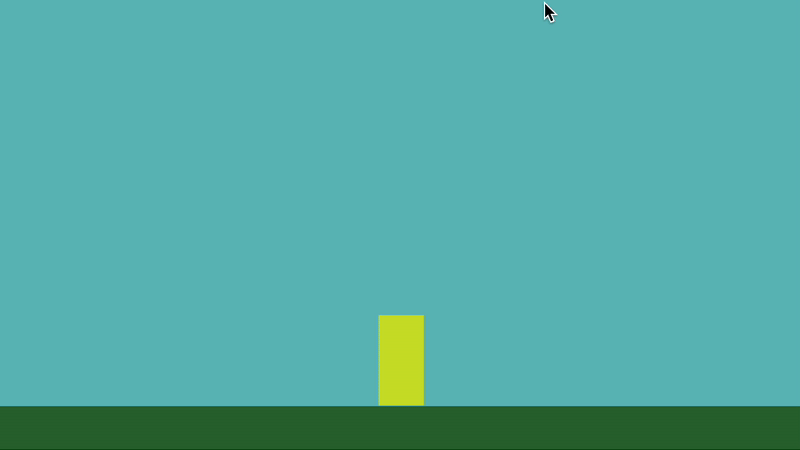
After that, add the PlayersMovement() script to the player in the game & assign the player moving speed from the editor. Run the game and check the result by clicking the A and D keys on the keyboard.
Adding a new jump action
Repeating the same process, add the jump feature to the player. Add the new action from input actions.
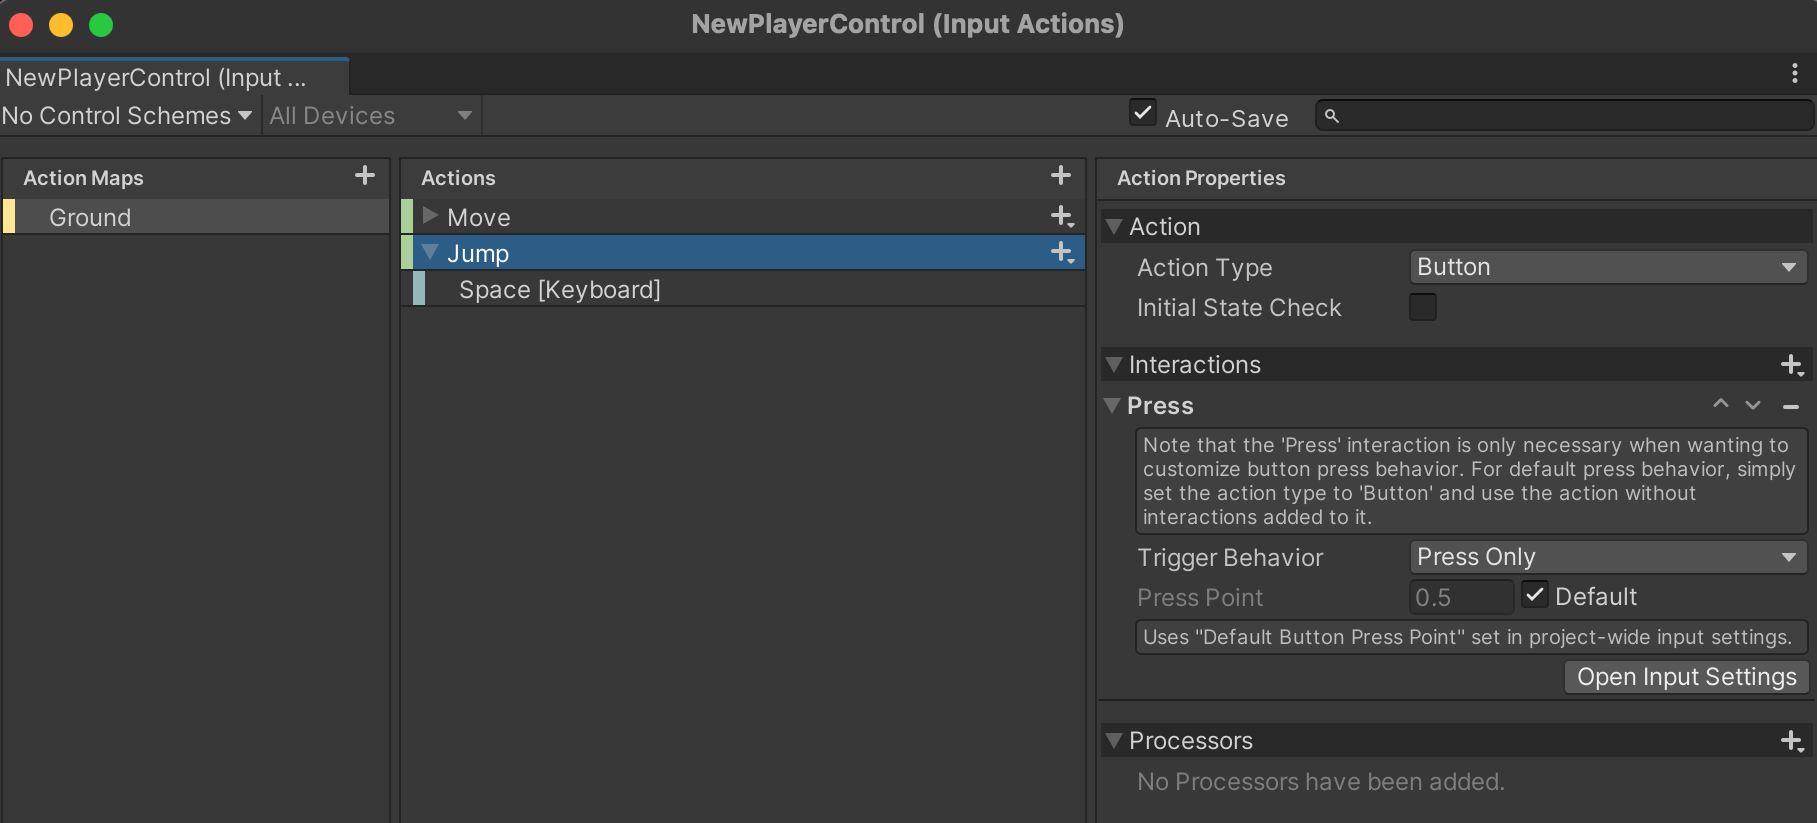
After adding the jump action, the final script becomes:
using System;
using System.Collections;
using System.Collections.Generic;
using Unity.VisualScripting.ReorderableList;
using UnityEngine;
using UnityEngine.Serialization;

public class PlayersMovement : MonoBehaviour
{
    public float PlayersMovementSPeed; //this is players movement speed.
    public float PlayerJumpingForce; //this is players jumping force.
    private float _playersMovementDirection = 0; //this will give the direction of the players movement.
    private NewPlayerControl _inputActionReference; // reference of the generated c# script form the input action
    private Rigidbody2D _playersRigidBody; //reference of the players rigid body.


    private void Start()
    {
        //Getting the reference of the players rigid body.
        _playersRigidBody ??= GetComponent<Rigidbody2D>();

        _inputActionReference = new NewPlayerControl();
        //enabling the Input actions
        _inputActionReference.Enable();
        //reading the values of the player movement direction for the players movement.
        _inputActionReference.Ground.Move.performed += moving =>
        {
            _playersMovementDirection = moving.ReadValue<float>();
        };

        //Jumping the player
        _inputActionReference.Ground.Jump.performed += jumping => { JumpThePlayer();};
    }


    private void FixedUpdate()
    {
        //Moving player using player rigid body.
        _playersRigidBody.velocity =
            new Vector2(_playersMovementDirection * PlayersMovementSPeed, _playersRigidBody.velocity.y);
    }


    private void JumpThePlayer()
    {
        //Moving player using player rigid body.
        _playersRigidBody.velocity = Vector2.up * PlayerJumpingForce;
    }
}
Final PlayerMovement.cs script after adding the jump action
You will find a similar result if you follow the listed steps.
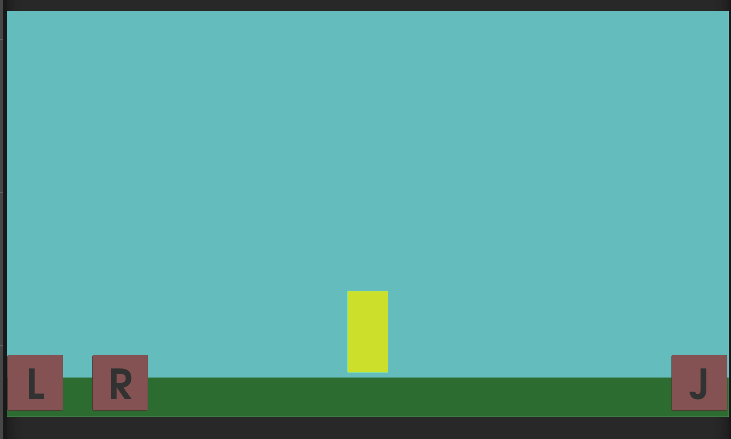
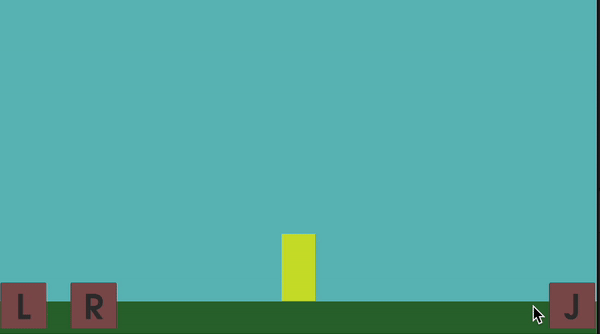
For Mobile Controls
Step 1: Adding buttons
The above actions are only applicable as keyboard controls (PC games). Now, for the mobile game, add all the buttons from the canvas you will use to control the player.
Also Read: Unity Addressable for Assets Management
Step 2: Adding a script to the buttons
For each Player Control Buttons, add On-Screen Button.cs from the Buttons > Inspector > Add Component > On-Screen Buttons. After adding, bind the same keys for the proper actions that you have used in keyboard controls.
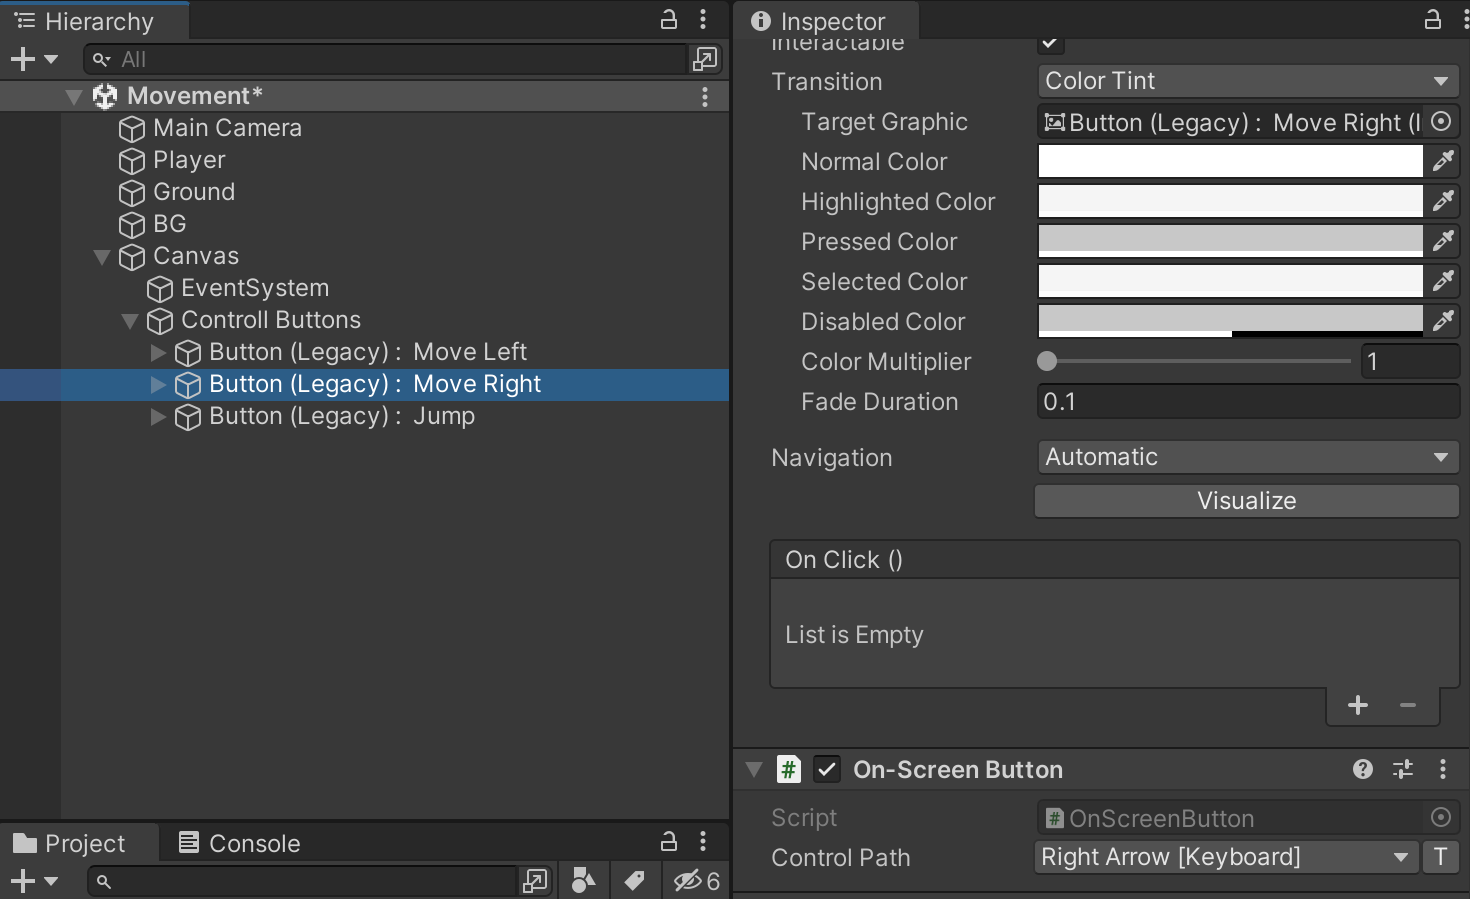
Buttons.cs for player movement control buttonsFinally, view the result using an android mobile.
Conclusion
Unity's new input system is a very flexible, efficient, and platform-independent approach to managing user input. Whether you're designing a game for mobile, desktop, or virtual reality, the new input system gives a robust toolset for generating rich and compelling user experiences.
Thank you for reading this article. Hope you found it helpful. Subscribe for more.