
Unity released a new input system quite a while ago, but many developers still don't know about it. Most of us use the old input system because of its simple learning curve, which even a beginner can easily understand.
Why Switch?
The old input system has its benefits; however, the new input system is on a whole new level. We can do very complex input handling easily using the new input system.
It also provides lots of really cool features like easily swapping input schemes based on in-game conditions or changing how input is handled on different devices. Button remapping is another feature that can be easily achieved using this system.
There is no reason not to switch. The new system is simply better.
So, let's see how we can set up and use the new input system in our Unity project.
Setup
First, we need to select Input System Package (New) from the Active Input Handling menu, found at Edit > Project Settings > Players > Other Settings > Active Input Handling.
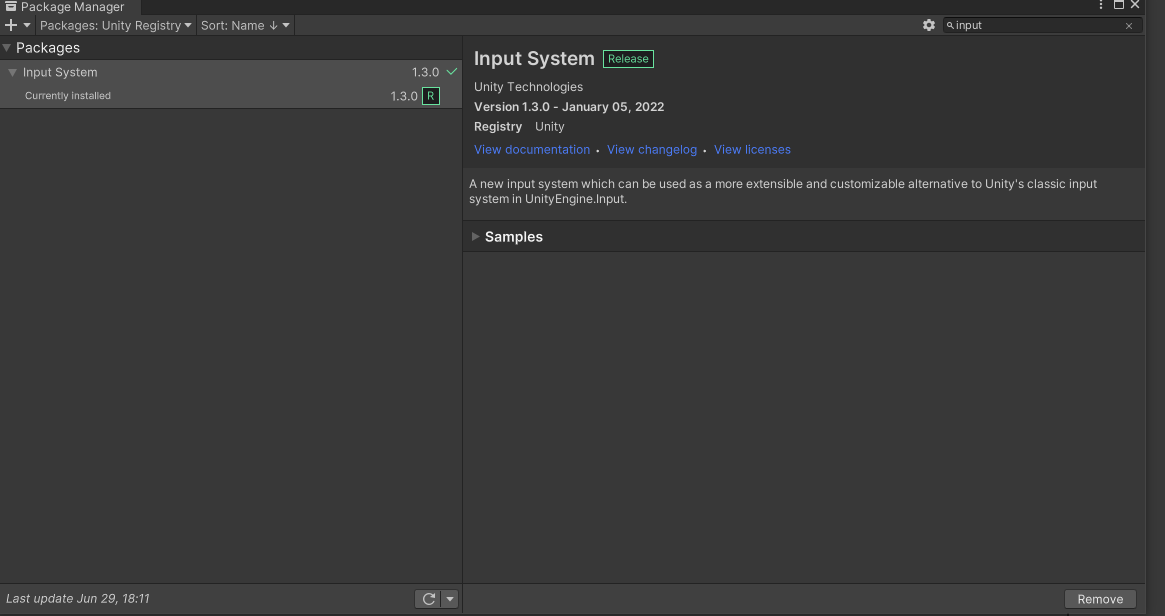
Then, we need to install the Input System package from the package manager.
Create a new Input action by using Create > Input Actions in Project Explorer.
Finally, rename and open the asset just created.
Input Actions
Once the input action is created and opened, we can see its three categories: Action Maps, Actions, and Action Properties.
- Action Maps is used to define different input schemes for different conditions. Sometimes, you may need to change inputs based on whether the player is walking, in combat, or for UI navigation when the game is paused. For example, pressing WSAD keys in GTA games will perform different actions based on where the player is. The movement key will move the character if he is on the street, whereas, on a boat or vehicle, it moves the vehicle instead of the character.
- Actions are used to trigger events based on the key binding we provide. We can make multiple actions with multiple binding here.
- Action Properties define the type of actions they are. There are 3 Action Properties: Value, Button, and Pass-through. Value provides continuous input through the currently active control device. Pass through is the same as value, but it can accept input from multiple devices. Button provides input like a regular button which is triggered when pressed or unpressed.
Input Binding
Now let's go through the process of setting input actions.
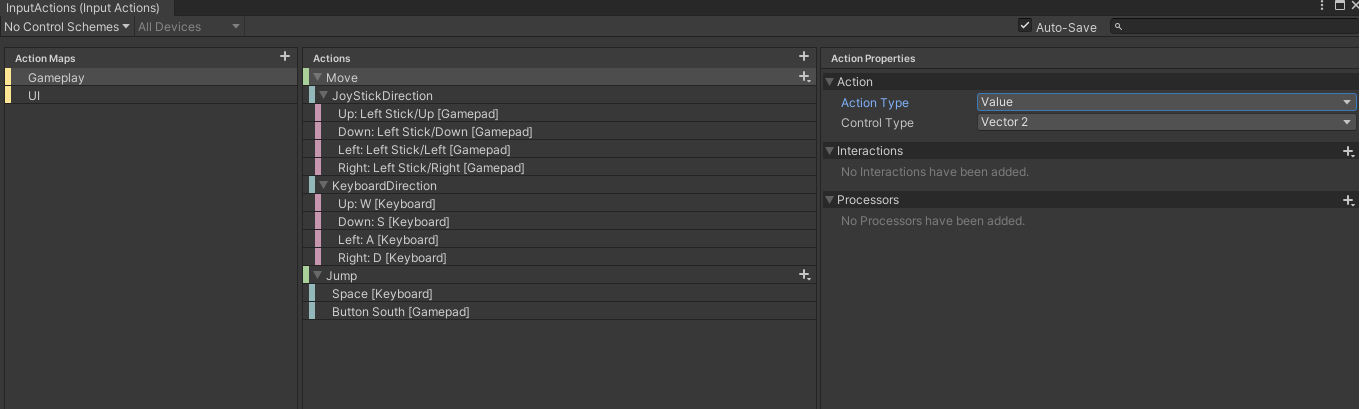
We can start by creating 2 action maps, Gameplay and UI. We will learn to use these action maps to perform different actions using the same input key later.
Create an action for the Gameplay action map. In my example, I have created 2 actions, Move and Jump. Now we need to add keybindings to these actions.
For the Move action, I use vector2 as a value with 4 key bindings, Up, Down, Left, and Right, for the keyboard and generic gamepad.
For the Jump action, I have used space as a key binding for the keyboard and Button South for the gamepad (same as A in the Xbox controller and X in the PlayStation controller).
Here is the view of my setup so far.
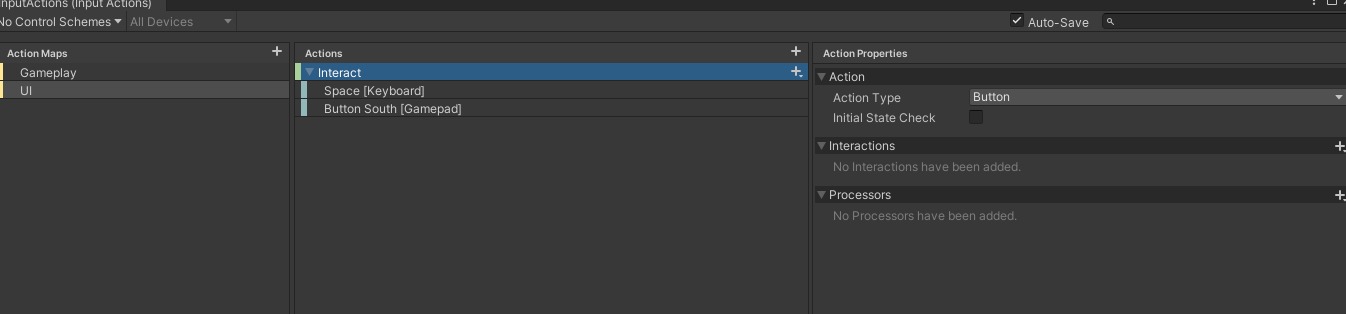
Hand here is the binding for UI action Map.
Now let's see how we can use all these key bindings.
There are different ways of using these actions, Generating a C# Class from input action or using Unity's built-in component Player Input. I will be showing a later one.
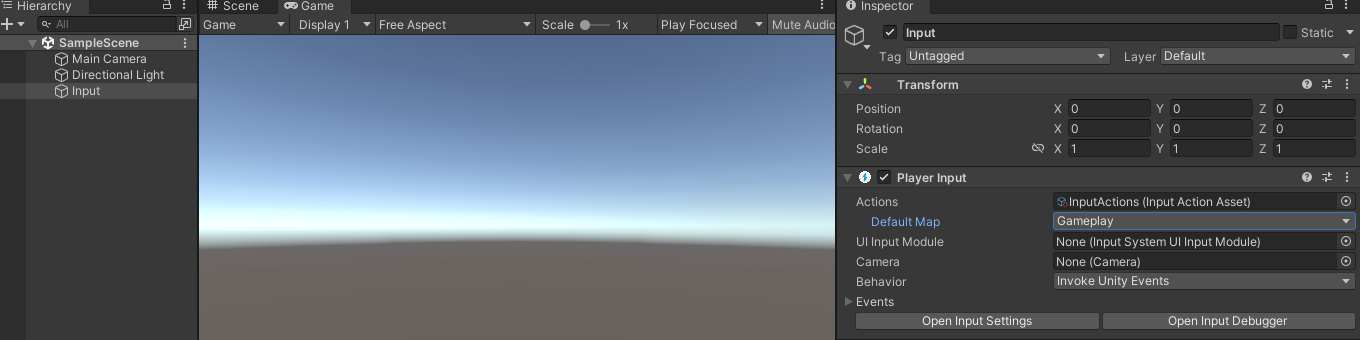
First of all, we need to create an empty game object and add the Player Input component to it. We then assign our input action to the Action field. Let's select the default map to Gameplay for now. Here is my example
Now let's create a C# class that implements all these action events. I have created a test script that handles various inputs. The main concept of this system is to listen to the event fired by the Input action and perform a task based on it. By using the PlayerInput component, we can access the value of the action by registering the event or directly reading the value from the input action.
Here is the code I am using.
using UnityEngine;
using UnityEngine.InputSystem;

public class InputTest : MonoBehaviour
{
  private PlayerInput _playerInput;

  //   ----------  creating reference of input actions for easier use --------
  private InputAction _jumpAction; // stores jump action
  private InputAction _moveAction; // stores move action


  private void Start()
  {
    _playerInput = GetComponent<PlayerInput>();

    _jumpAction = _playerInput.actions["Jump"];
    _moveAction = _playerInput.actions["Move"];

    // register to _jumpAction performed event
    _jumpAction.performed += HandleJumpPressed;
  }

  private void OnDestroy()
  {
    // unregister from _jumpAction performed event
    _jumpAction.performed -= HandleJumpPressed;
  }

  // Method called when Jump action in fired
  private void HandleJumpPressed(InputAction.CallbackContext context)
  {
    Debug.Log("jump pressed");
  }

  private void Update()
  {
    // read value for move action instead of awaiting in performed event because this way we can get action value every frame instead on performed event
    Vector2 val = _moveAction.ReadValue<Vector2>();
    Debug.Log($"current move val is : {val}");
  }
}
Mouse.current.leftButton.wasPressedThisFrame method replaces the old method of getting the mouse button using Input.GetMouseButtonDown(0) .Swapping Action Maps
Now let's look at how we can easily swap action maps and make the same input do completely different things.
We just need to use the player input object to call SwitchCurrentActionMap("UI") to switch from the current action map to the UI action map. Let's make a little change to our code so that we can swap the action map using the left and right mouse buttons. Here is the complete code.
using UnityEngine;
using UnityEngine.InputSystem;

public class InputTest : MonoBehaviour
{
  private PlayerInput _playerInput;

  //   ----------  creating reference of input actions for easier use --------
  private InputAction _jumpAction; // stores jump action
  private InputAction _moveAction; // stores move action
  private InputAction _uiInteractAction; // stores UI interact action

  private InputActionMap _uiActionMap, _gameplayActionMap;

  private void Start()
  {
    _playerInput = GetComponent<PlayerInput>();

	// finds UI action map
    _uiActionMap = _playerInput.actions.FindActionMap("UI");
    // finds gameplay action map
    _gameplayActionMap = _playerInput.actions.FindActionMap("Gameplay");

    _jumpAction = _gameplayActionMap.FindAction("Jump");
    _moveAction = _gameplayActionMap.FindAction("Move");
    _uiInteractAction = _uiActionMap.FindAction("Interact");

    // register to _jumpAction performed event
    _jumpAction.performed += HandleJumpPressed;
    _uiInteractAction.performed += InteractWithUI;

    _playerInput.SwitchCurrentActionMap("Gameplay");

  }

  private void OnDestroy()
  {
    // unregister from _jumpAction performed event
    _jumpAction.performed -= HandleJumpPressed;
    _uiInteractAction.performed -= InteractWithUI;

  }

  // Method called when Jump action in fired
  private void HandleJumpPressed(InputAction.CallbackContext context)
  {
    Debug.Log("jump pressed");
  }

  private void InteractWithUI(InputAction.CallbackContext context)
  {
    Debug.Log("interacted with UI");
  }

  private void Update()
  {
    // read value for move action instead of awaiting in performed event because this way we can get action value every frame instead on performed event
    Vector2 val = _moveAction.ReadValue<Vector2>();
    Debug.Log($"current move val is : {val}");

    if (Mouse.current.leftButton.wasPressedThisFrame)
    {
      Debug.Log("left mouse button pressed  !!");
      _playerInput.SwitchCurrentActionMap("Gameplay");
    }

    if (Mouse.current.rightButton.wasPressedThisFrame)
    {
      Debug.Log("right mouse button pressed  !!");
      _playerInput.SwitchCurrentActionMap("UI");
    }
  }
}
There you have it. You can see how easily you can swap between different action maps. This is the basics of how the new input system works. I hope you learned something new.
See you soon in the next article!