
In this article, we will learn how to create and mix a hologram effect with the default material using a shader. Then, we will learn how to generate the hologram effect at specific parts of the model (wherever we click our mouse on in our case) as well.
Requirements
- You need to have URP (Universal Render Pipeline) or HDRP (High Definition Render Pipeline) as your render pipeline. You can download URP or HDRP from the package manager if you don't have already.
- You need to have a shader graph installed. We will be writing shader on shader graph rather than on text editor. You should also be acquainted with how to create nodes in the graph.
- Familiarity with Unity is also required.
Setting up the Hologram Materials
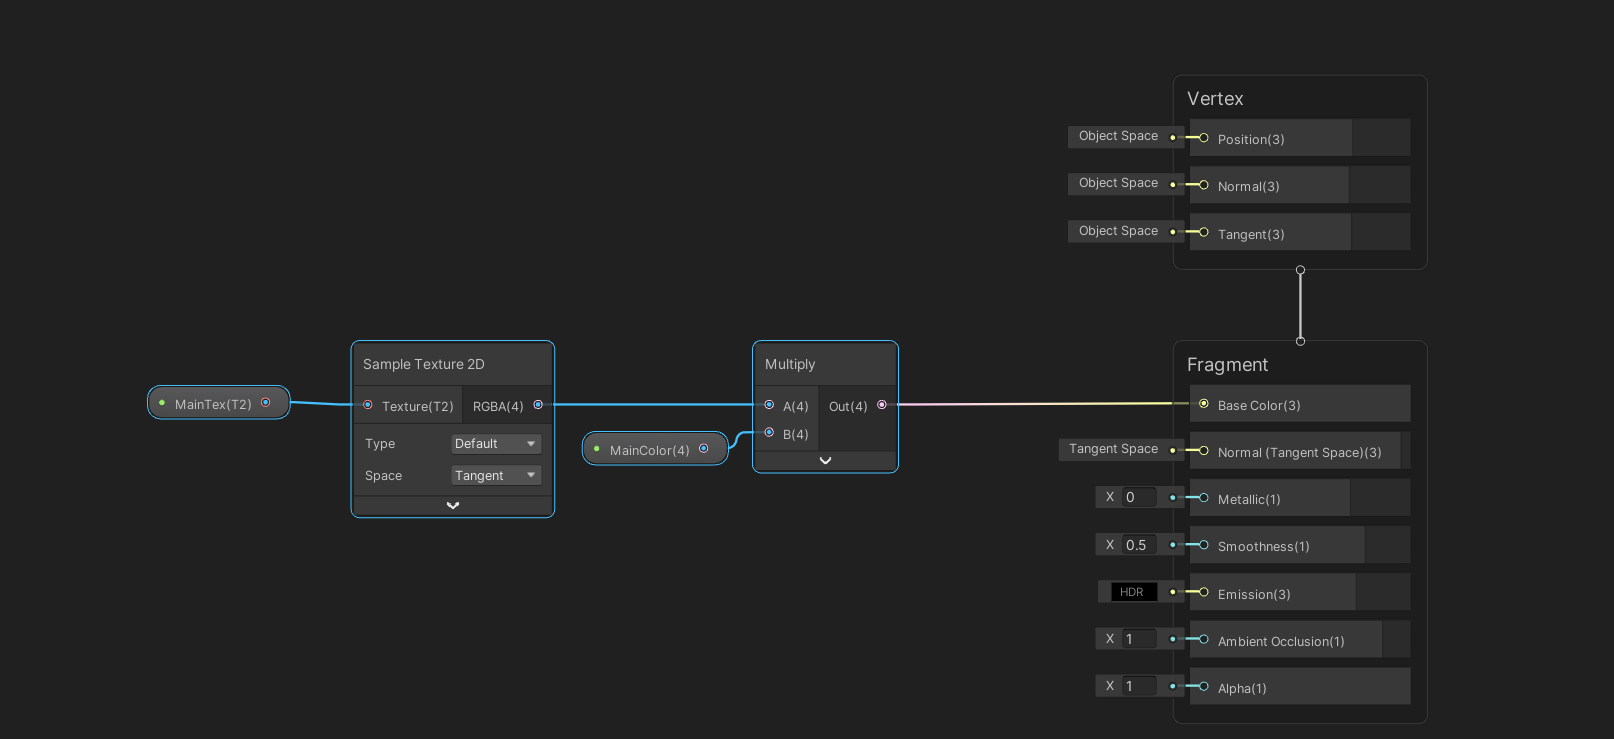
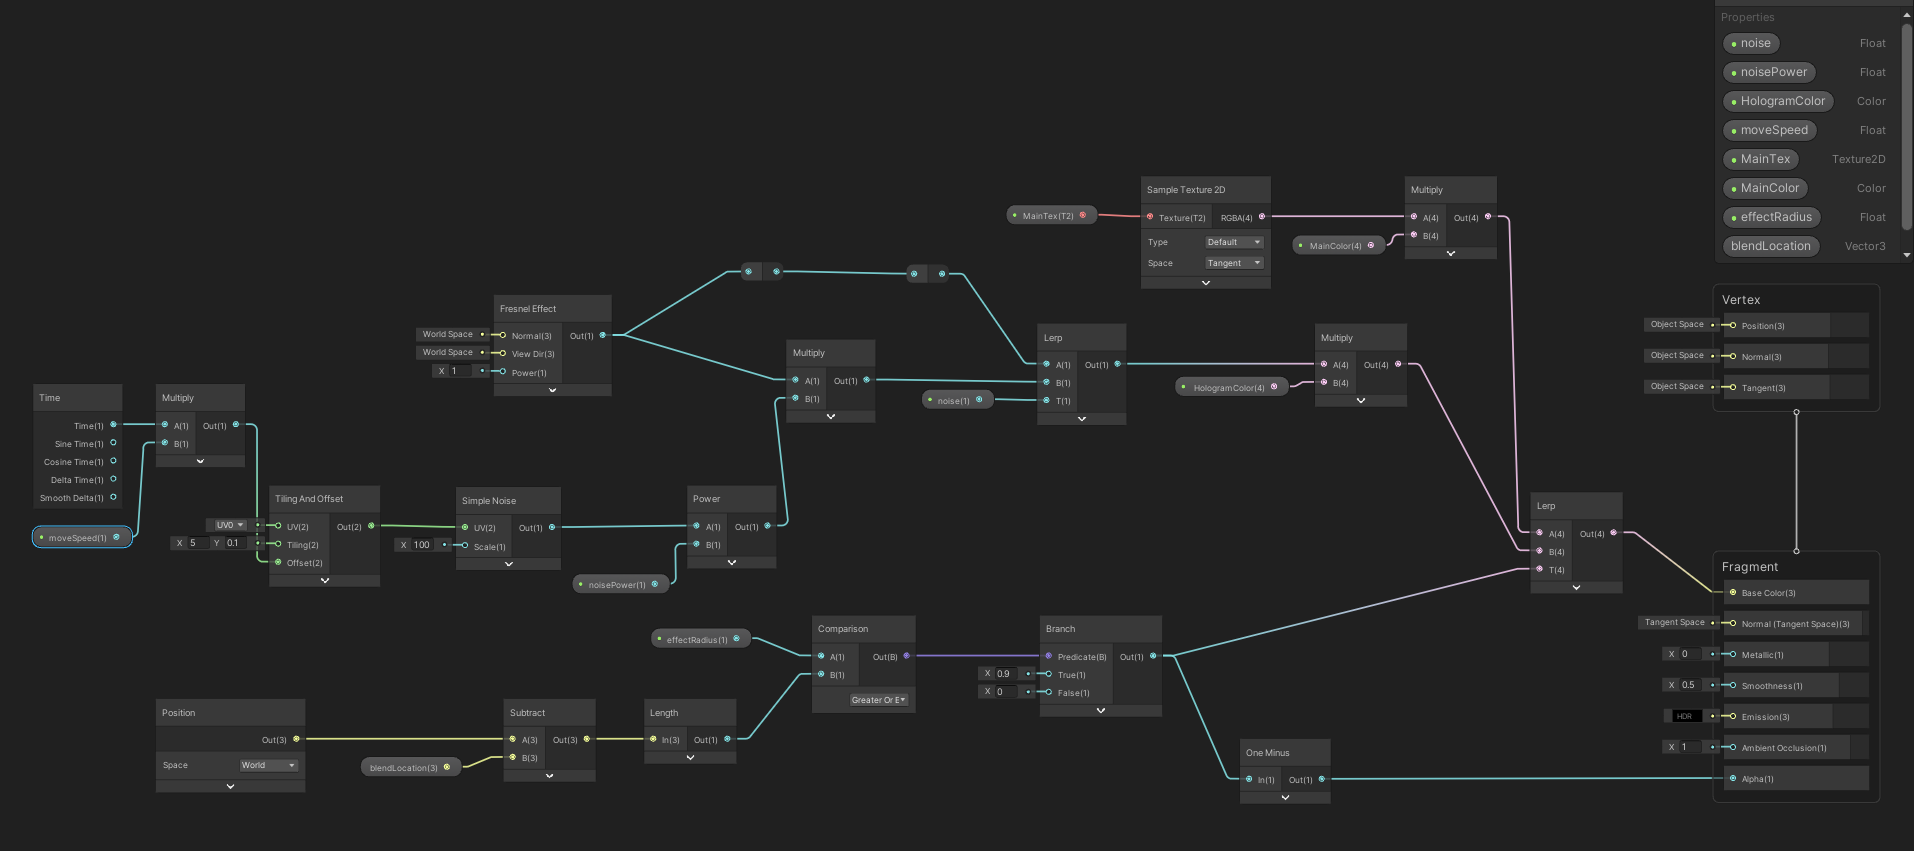
Initially, we need to make a simple PBR (Physically Based Rendering) graph and create a standard material using simple texture and colour. The implementation of the materials in the graph is as shown below.
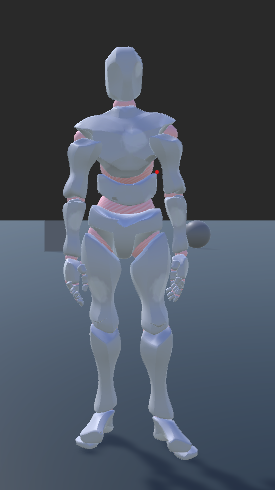
Our model will look like this with the standard material setup:
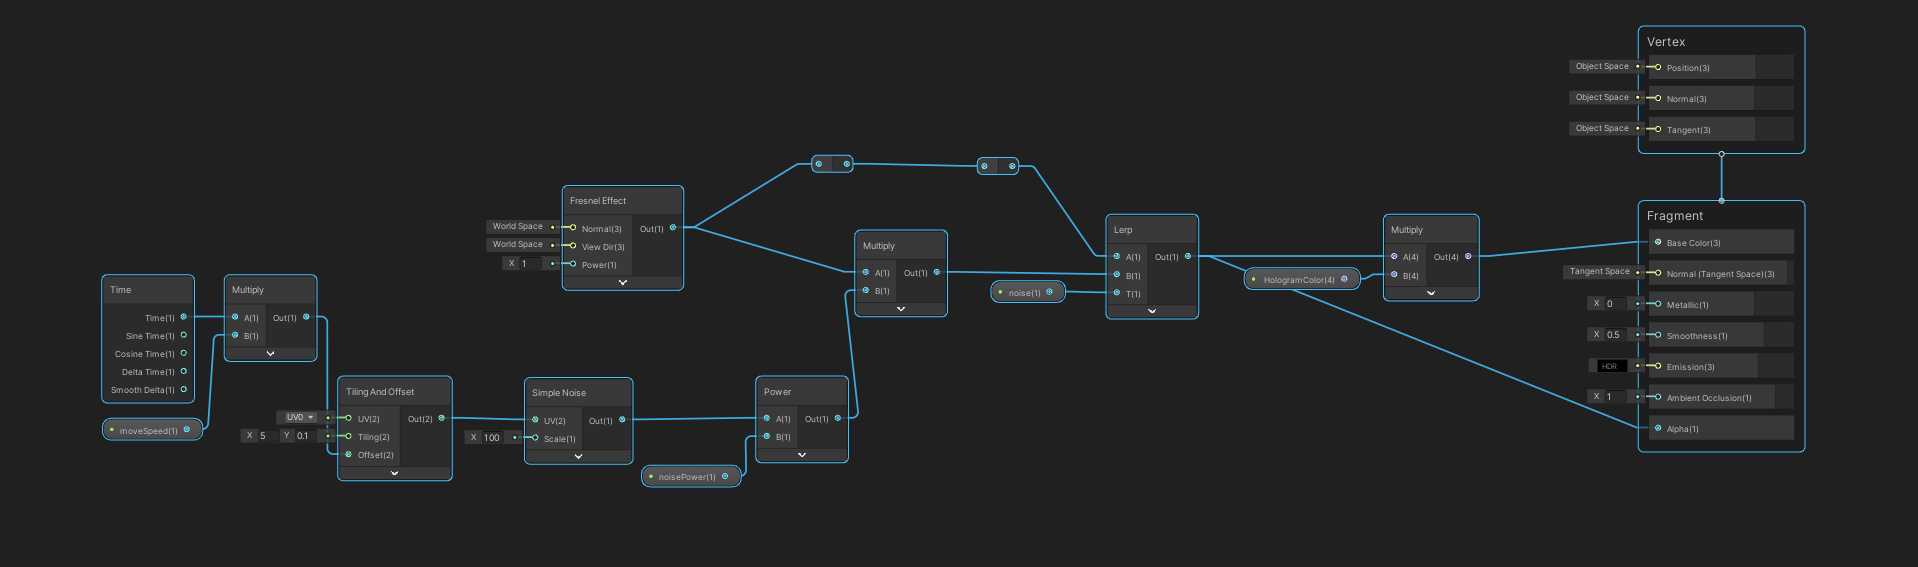
Now we need to make a simple noise and then modify it with the Tiling and Offset nodes. Changing the tiling offset and scale of the noise will produce a different result. You can experiment with these values and use whatever feels right to you.
We can also change the offset of noise using the Time node. This will create an illusion of moving particles. You can add a multiply the node to control the speed of the Tiling offset.
Finally, we should multiply the current output node with the Fresnel effect. The multiplied output is then "lerped" (linearly interpolated) with the base fresnel effect, and then multiplied with colour to get the hologram effect.
Notes
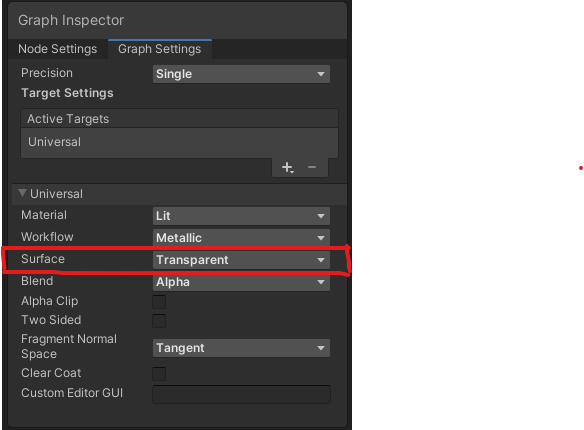
If you want your hologram to be see-through, you need to change the surface to transparent from opaque in the shader graph as shown here:
The image below shows the shader graph implementation for hologram:
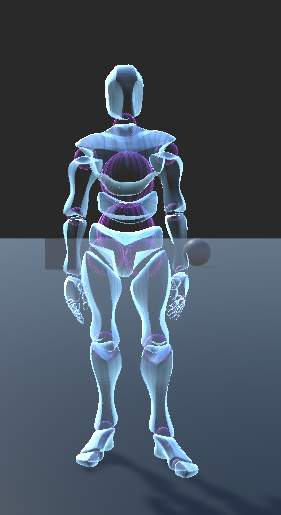
This will be our final result:
Blending
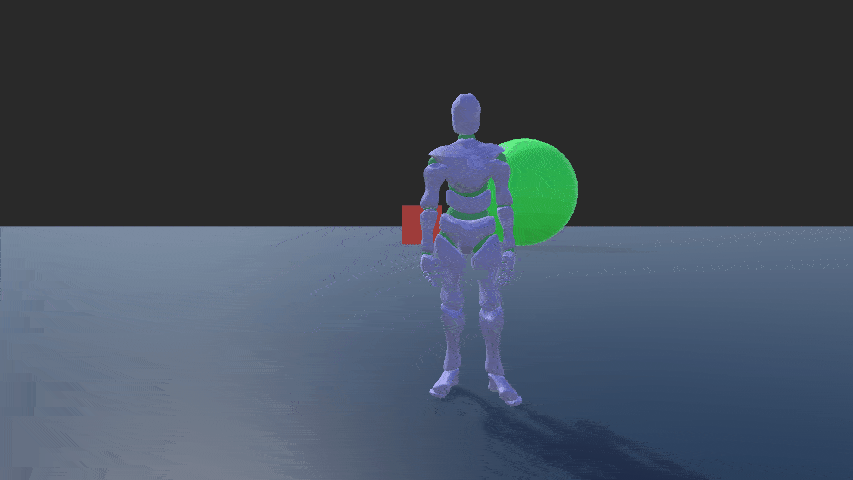
Now that the hologram effect and standard setup are done, we need a way to blend them. Blending is easy – we can simply lerp the standard setup with a hologram effect. The real challenge lies when we want our effect to be visible in only the parts we click. Let's see how we can show the hologram effect only on certain body parts while the rest of the model uses a standard material setup.
Initially we need to create a script called EffectShower and attach it on our model of choice. This script will communicate with our shader and change various properties of shader.
Then, we need to find a point in the model where we want our material to change. So, we cast a ray from the camera (Raycast) using the mouse position to detect the world position. World position is then passed to all the materials attached to the current model using the SetVector function, which will change the shader property _blendLocation. After that, we generate a random radius and pass it using the SetFloat function to change the _effectRadius property. The generated radius is used for blending the standard material with the hologram effect. Here is the C# code for the above implementation.
using UnityEngine;

public class EffectShower : MonoBehaviour
{
   [SerializeField] private float blendResetSpeed;
   [SerializeField] private float minSize=1f, maxSize=3f;
   private Renderer[] _renderer;
   private Camera _camera;

   private float blendRadius;
   private void Awake()
   {
      _renderer = GetComponentsInChildren<Renderer>();
      _camera = Camera.main;
   }

   private void Update()
   {
      TakeInput();
      if (blendRadius>0)
      {
         blendRadius = Mathf.MoveTowards(blendRadius, 0, blendResetSpeed * Time.deltaTime);
         foreach (var rd in _renderer)
         {
            foreach (var mat in  rd.materials)
            {
               mat.SetFloat("_effectRadius",blendRadius);
            }
         }
      }
   }

   void TakeInput()
   {
      if (Input.GetMouseButtonDown(0))
      {
         Ray ray = _camera.ScreenPointToRay(Input.mousePosition);
         bool success =Physics.Raycast(ray, out RaycastHit hitInfo, 100);
         if (success)
         {
            foreach (var rd in _renderer)
            {
               foreach (var mat in  rd.materials)
               {
                  mat.SetVector("_blendLocation",hitInfo.point);
                  blendRadius = Random.Range(minSize, maxSize);
               }
            }
         }
      }
   }
}In our example, the hologram effect will appear in a radius around the clicked point. You should also modify your final shader graph to look something like this:
And here is the final result after blending the material.
You can now manipulate materials at specific points in Unity. This tutorial was for the hologram effect, but it can also be used for other effects like wireframes or color overlays. I will be back with more articles related to shaders later on.
That's it, I hope you learned something new! Stay tuned for more tutorials.