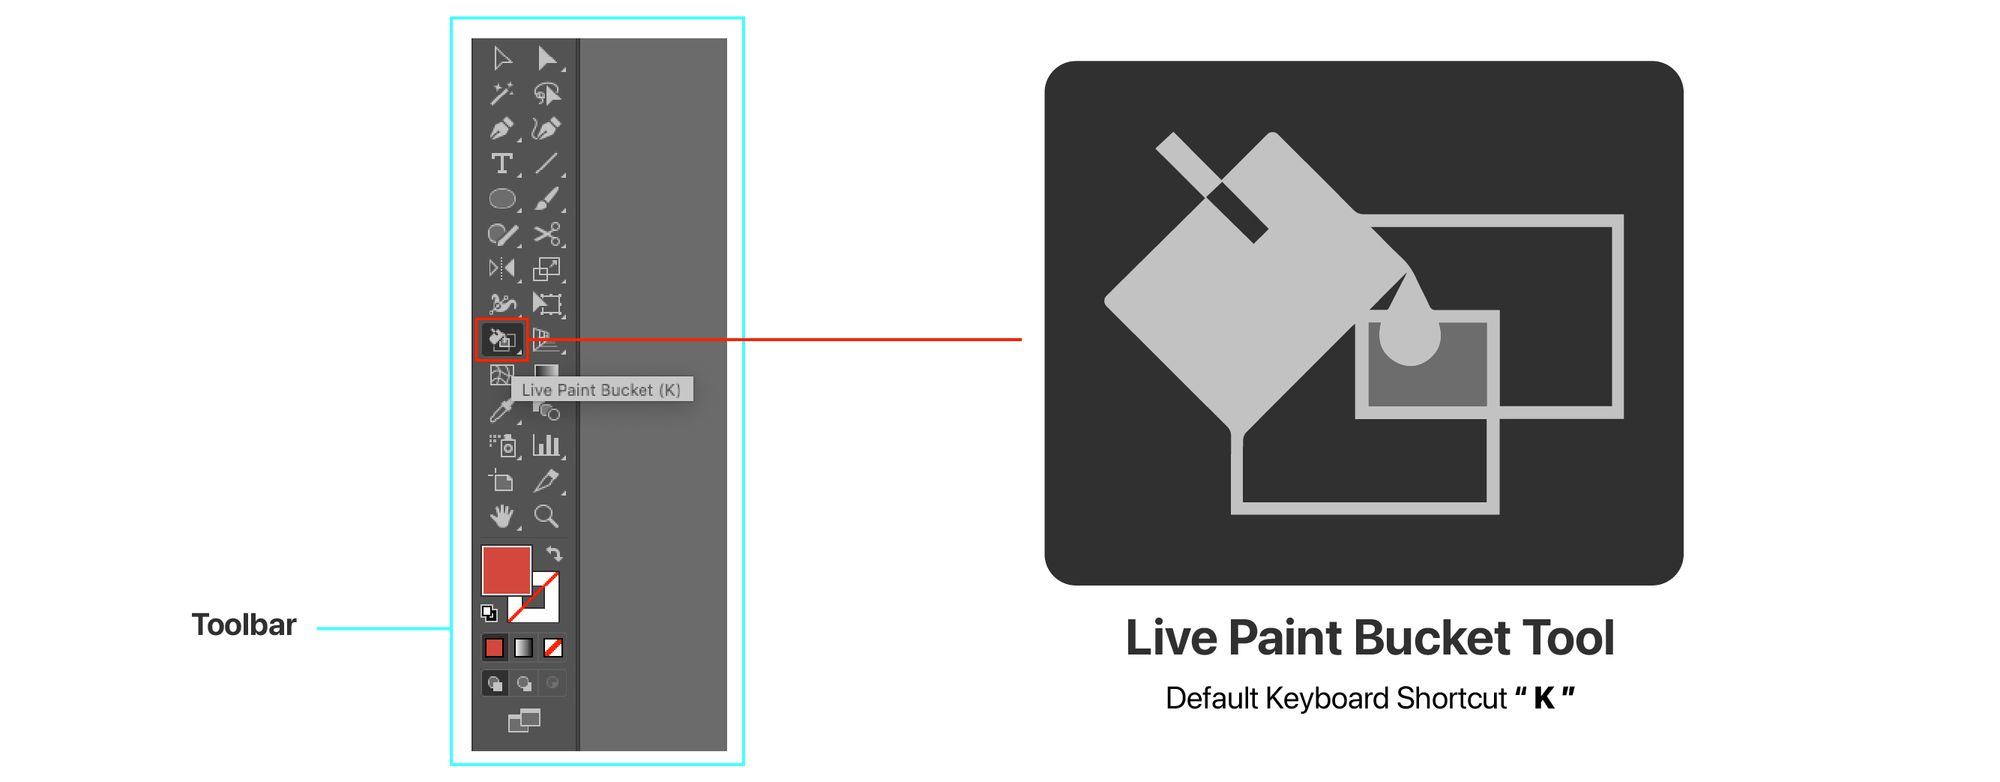
Adobe illustrator is one of the finest software to create vector illustrations and artworks in the market today. In illustrator, we have lots of tools and presets to create and apply color to the objects. In simpler words, there are numerous ways to fill colour to your object in illustrator. Coloring in illustrator can be very tricky. If it's a basic shape or object, you simply add the fill and stroke and voila it's done. But it can be very frustrating managing the strokes, grouping the shapes, trimming and organizing objects to fill complex objects or object with multiple layers or paths. This is where the live painting tool comes in handy to save your time and frustrations. The live painting tool can be found in the toolbar panel in illustrator. Its mostly used when you desire flat multi-layered illustrations under one group of objects. The live-painting tool can be found in the advanced toolbar section of the illustrator, grouped with the Shape Builder Tool and Live Paint Selection Tool. This is what the Live-Painting icon looks like:
Let me walk you through how to achieve these snakes using the Live Painting tool.
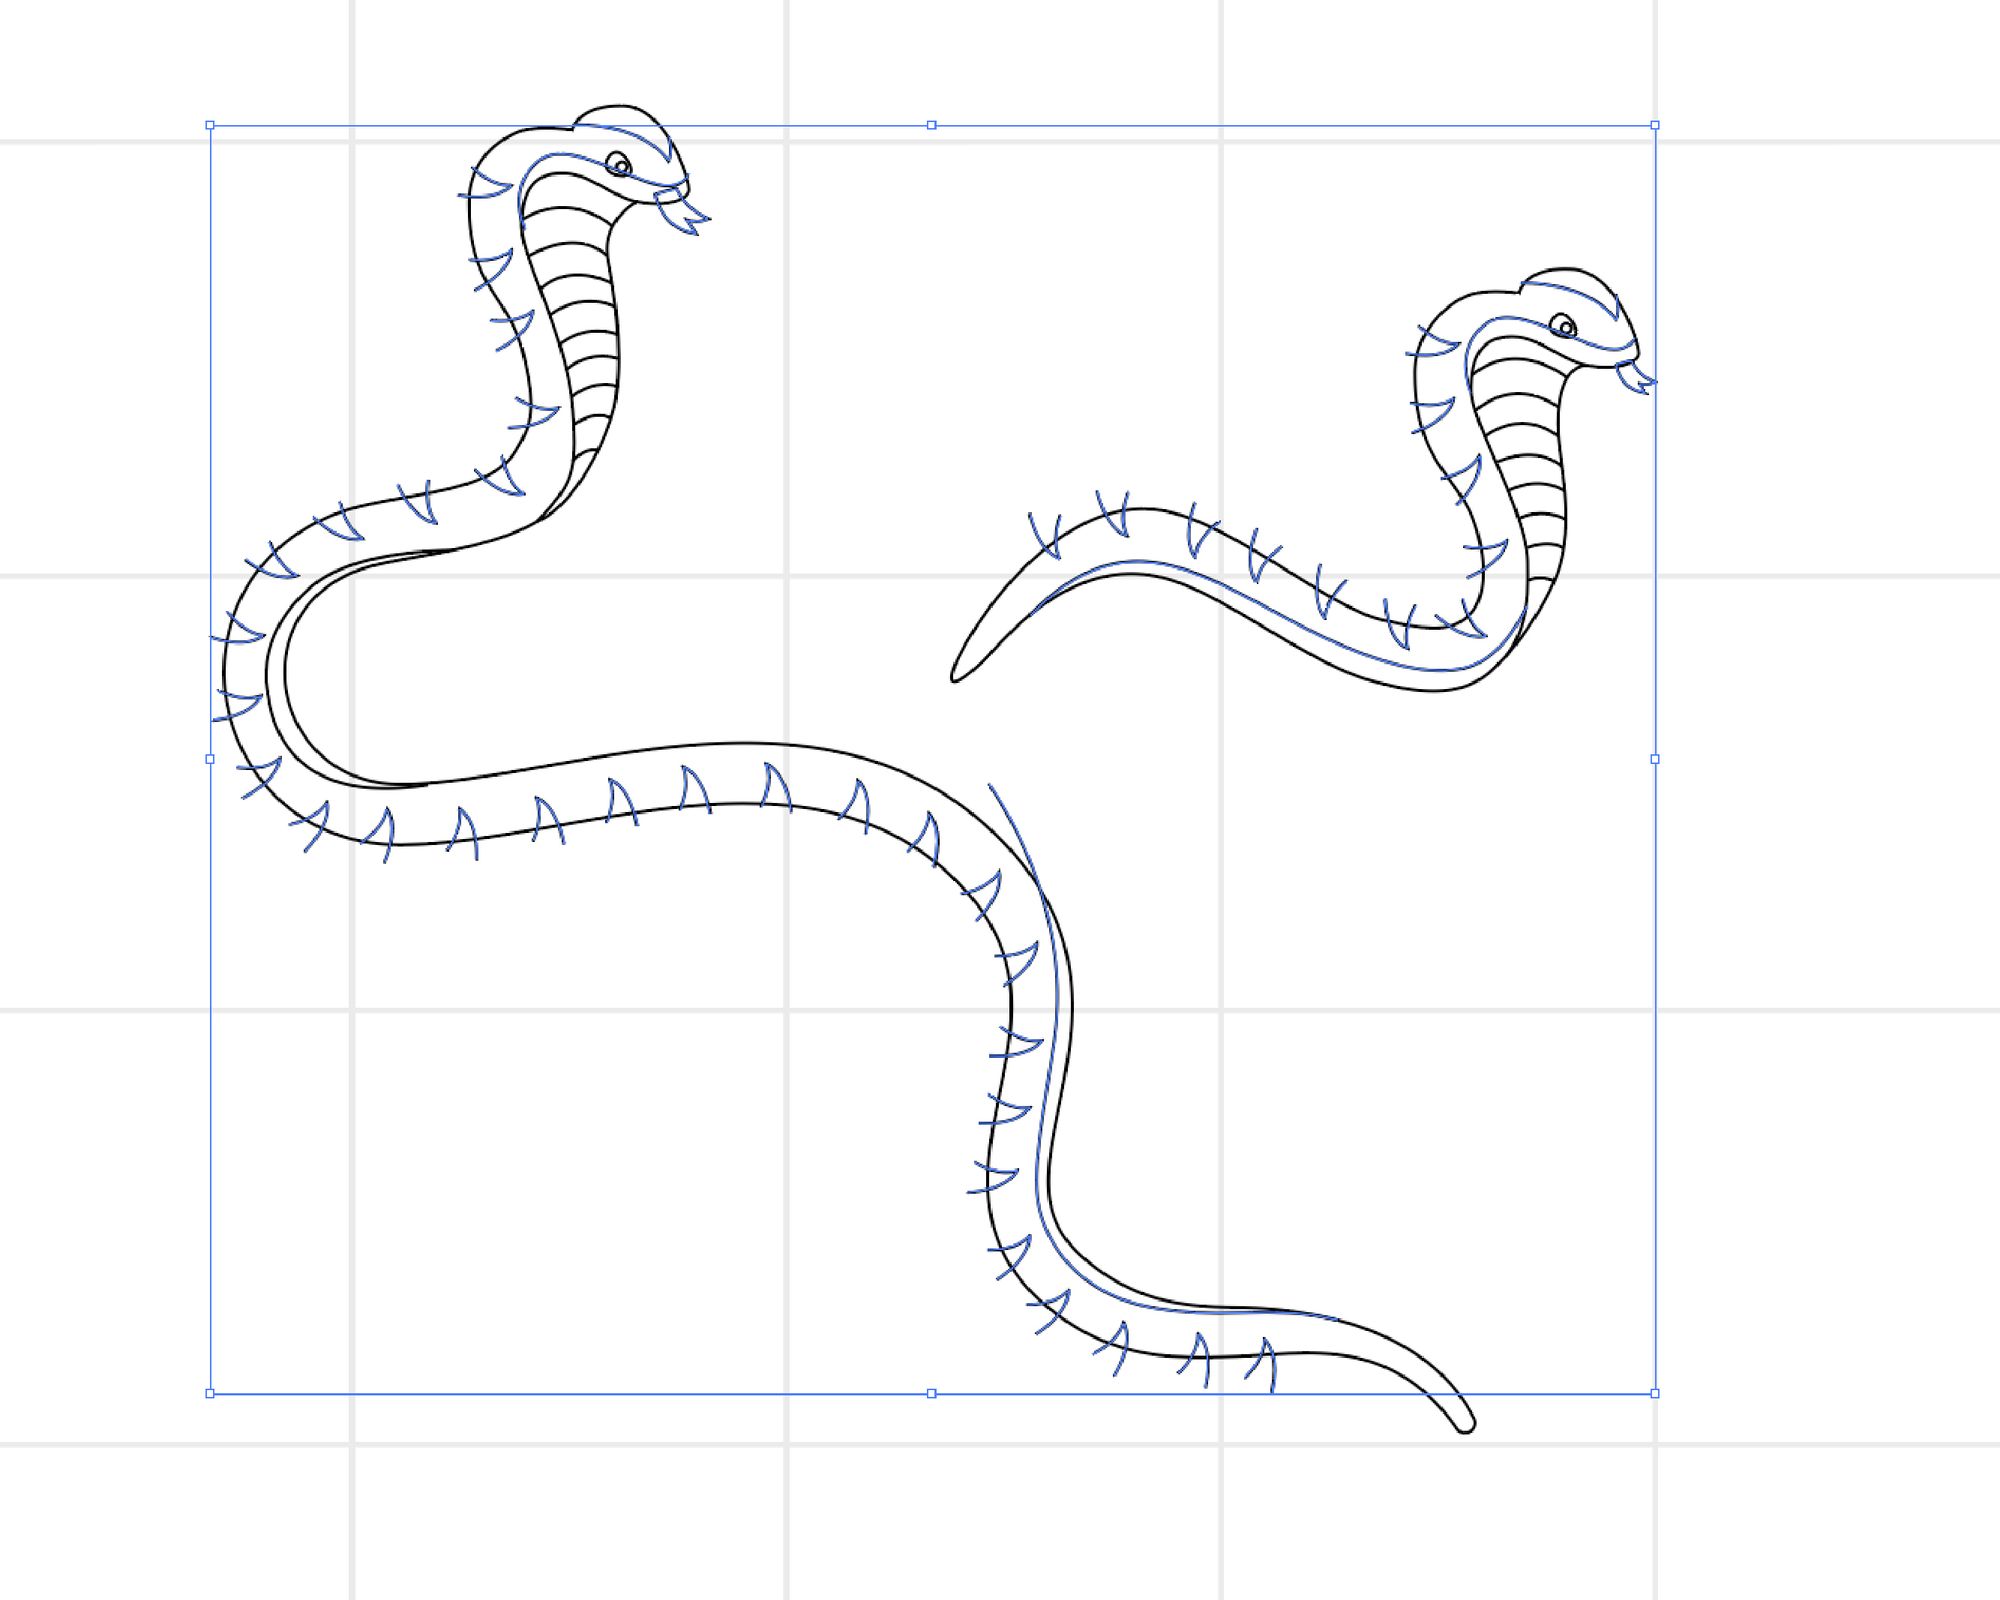
- Sketched out the snakes on my iPad and exported the image file. Sketching before digitizing the illustration/artwork is very important either use the iPad, drawing tabs or sketch on a piece of paper, all mediums are equally effective. It serves as a guideline and creates less distraction. By less distraction I mean, if you try to directly create the artwork in illustrator using the pen tool or other shape build tool, you are overwhelmed by the tools and you start duplicating and editing multiple artworks with no proper objective. In simpler words, you get lost iterating shapes and objects. This results in wasted time and effort for the project. So always sketch and plan before doing them directly in the software (any design software).
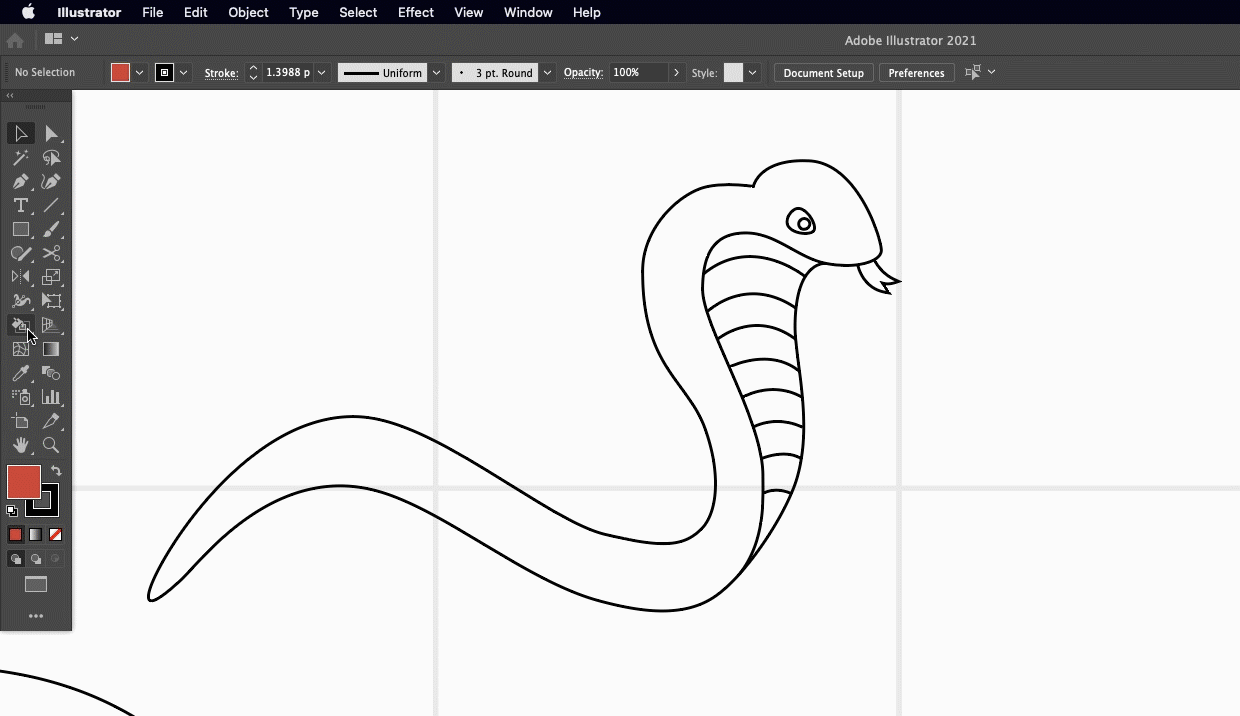
- All the sketched items now should be imported to the illustrator. You can take a picture or scan it directly. The scanned picture needs to be imported into illustrator and placed in the lower layer and dimmed to 50% (or as per your need). Now in the new layer, you start tracing out the sketch creating enclosed paths using the pen tool. The enclosed path is very essential for live painting because it avoids flooding the group of colors to the unwanted area of the object.
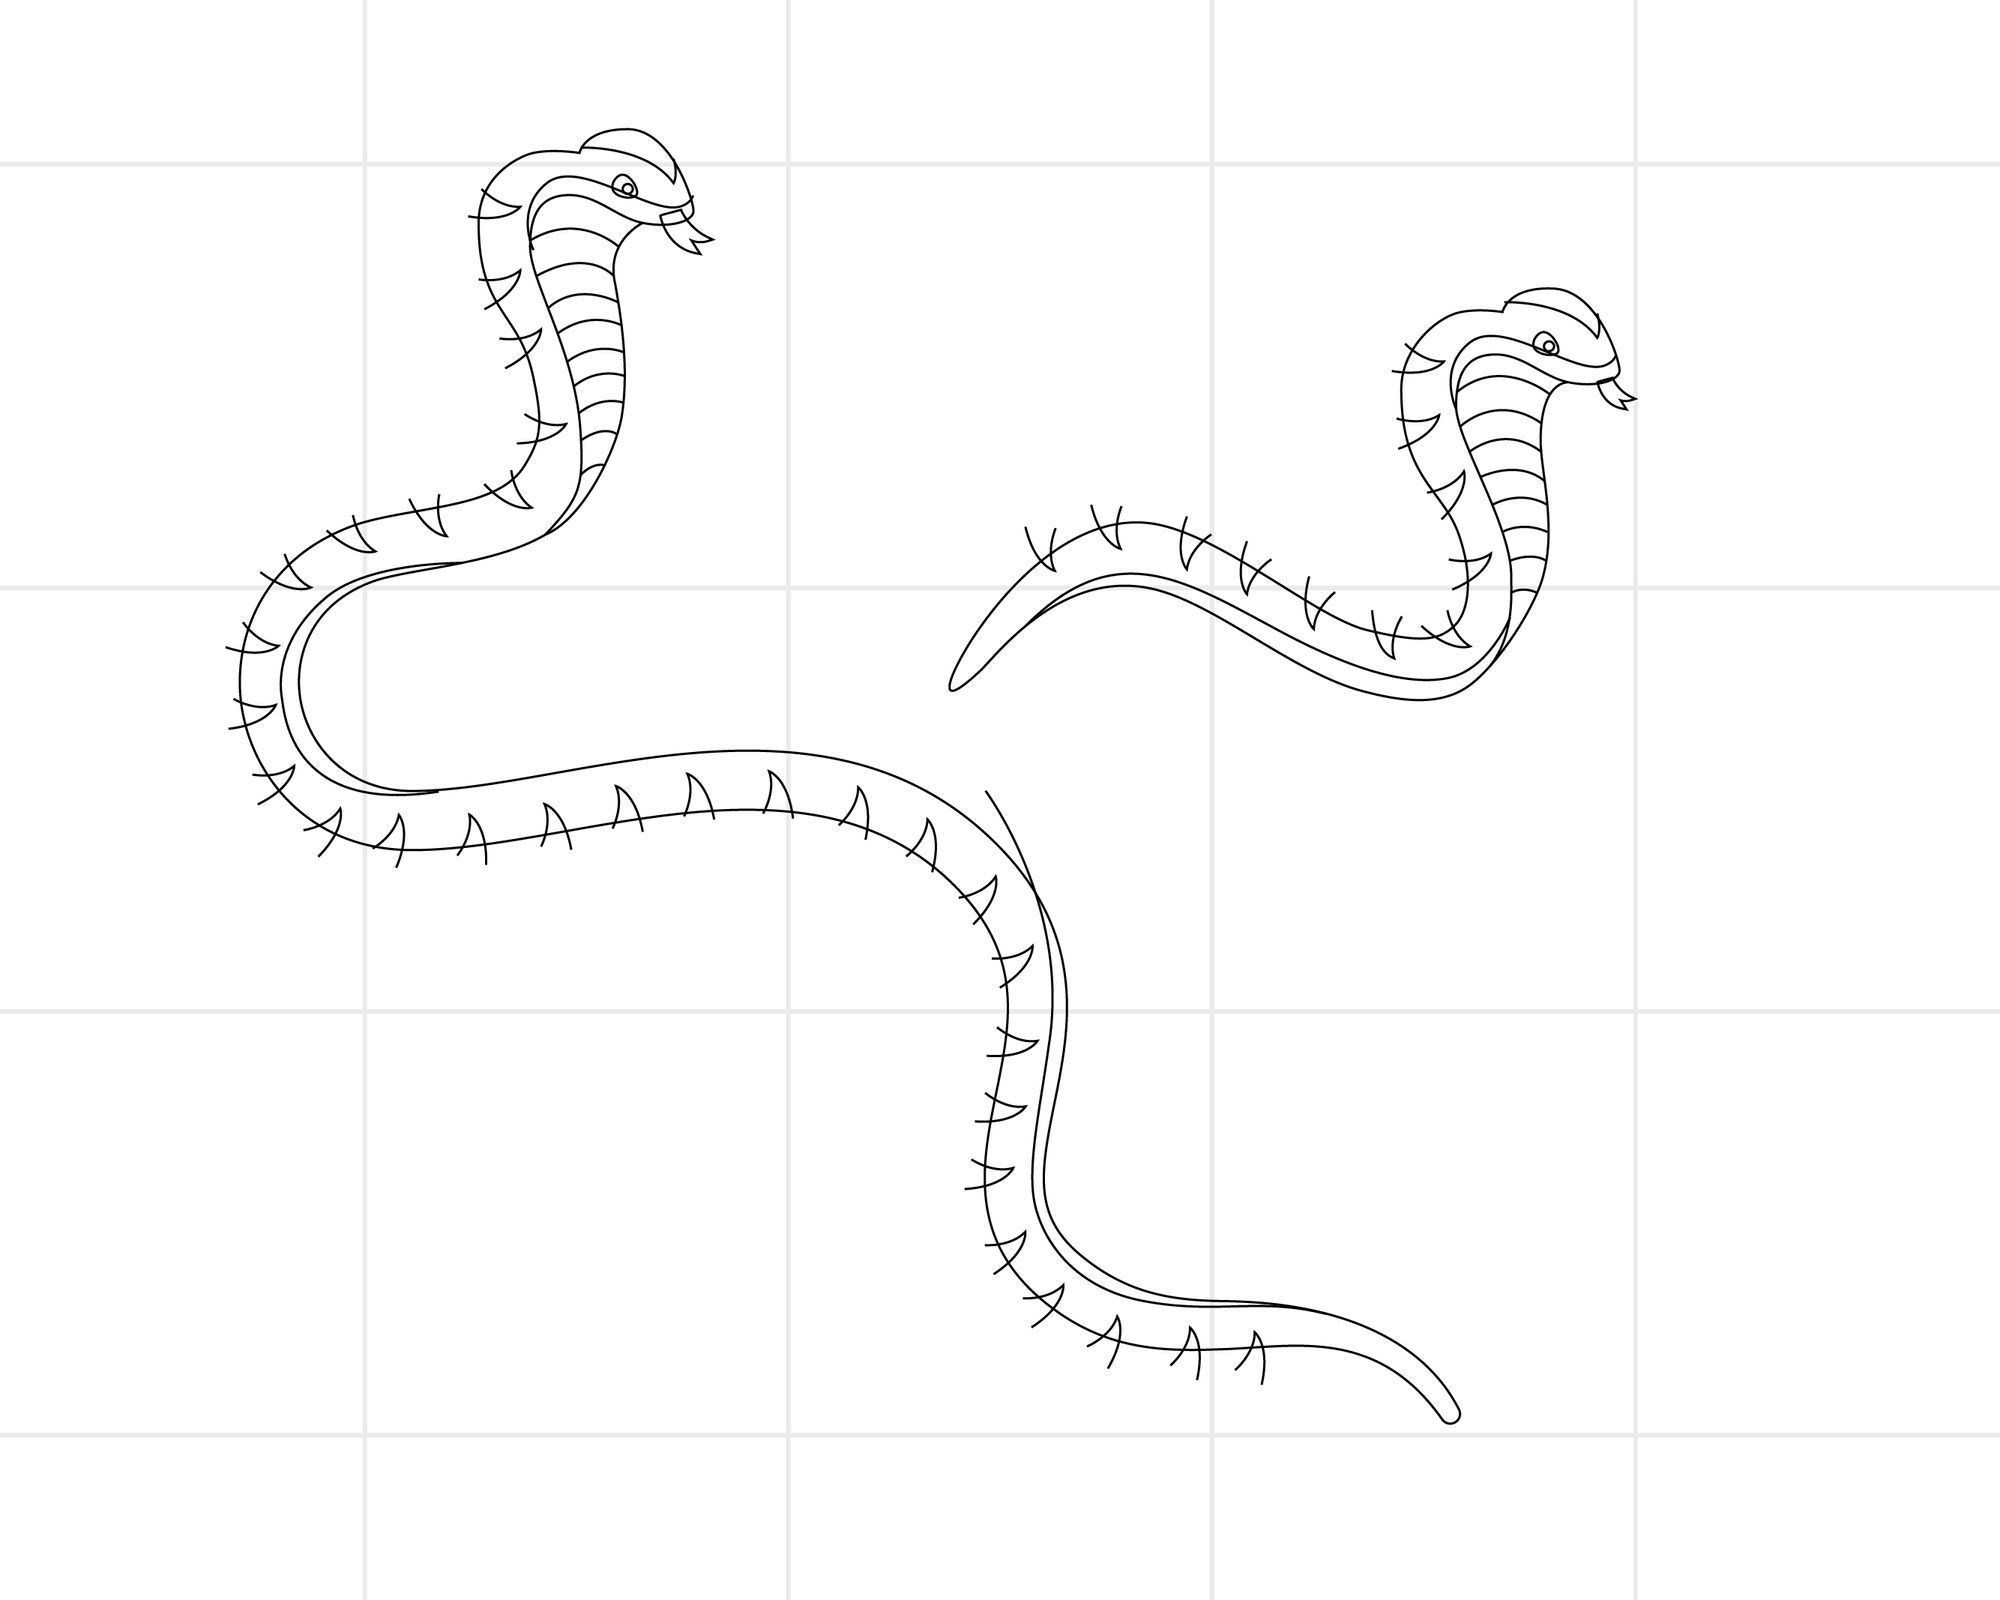
3. Next up I removed the unwanted strokes from the illustration, leaving just the path. You can do that by selecting the shapes which require no strokes and applying zero strokes to them. You can refer to the sketch to check this. This means that the part which does not require stroke but fills only should be selected and strokes should be removed to achieve the desired illustration.
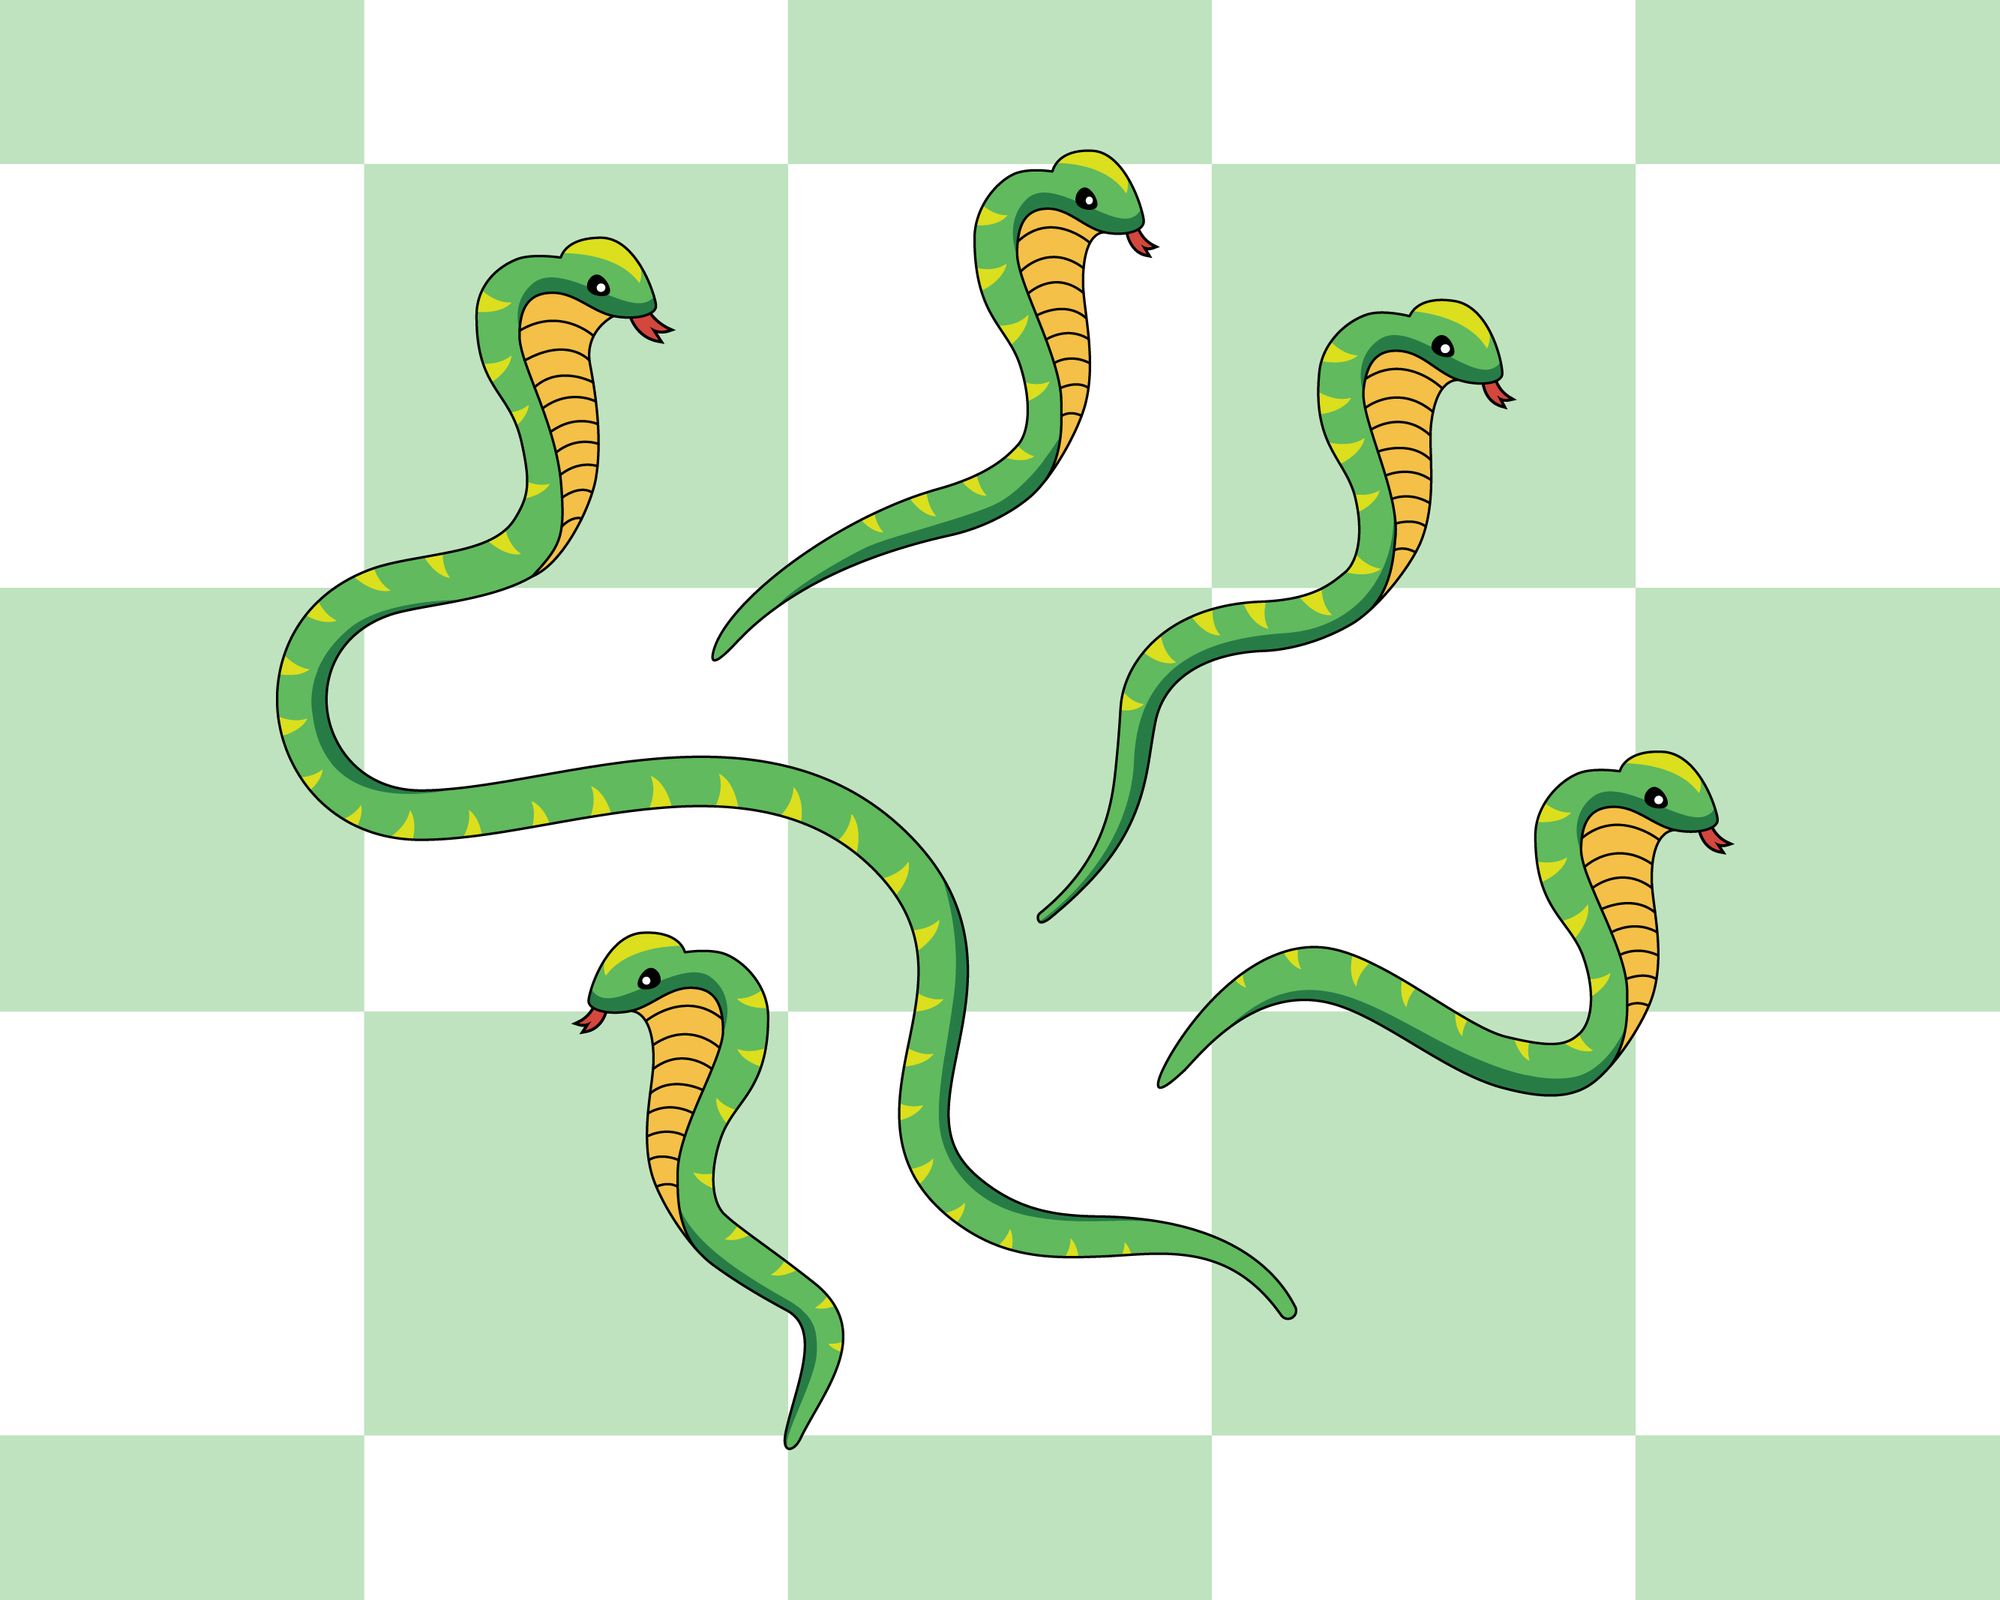
4) Next step is creating the color palette. Always make sure the color complement each other and harmonize with other palettes as well. There are multiple sites that offer preset palettes and custom palettes for your project, like coolors.co or color.adobe.com for generating palettes. You may also refer to other moodboards to pick colors sometimes or create your own if you have good knowledge about color theory and color wheels. I created the following color palette for the default snake in the project.

5) After you are ready with the color palettes, it's time to use the Live Painting Tool. Hit "K" or select the live paint tool for the toolbar panel and click the grouped object to deploy live painting over that object. I started by selecting the group and left-clicking it and applying color from the palette to the snake using the Live paint tool. It works just like a shape builder tool, where instead of merging objects you fill the colors progressively in the enclosed path area. The palette that you have selected or created now comes in handy during this process of live painting. It saves time and effort by creating the color guidelines and not wanting to test multiple colors in the object.
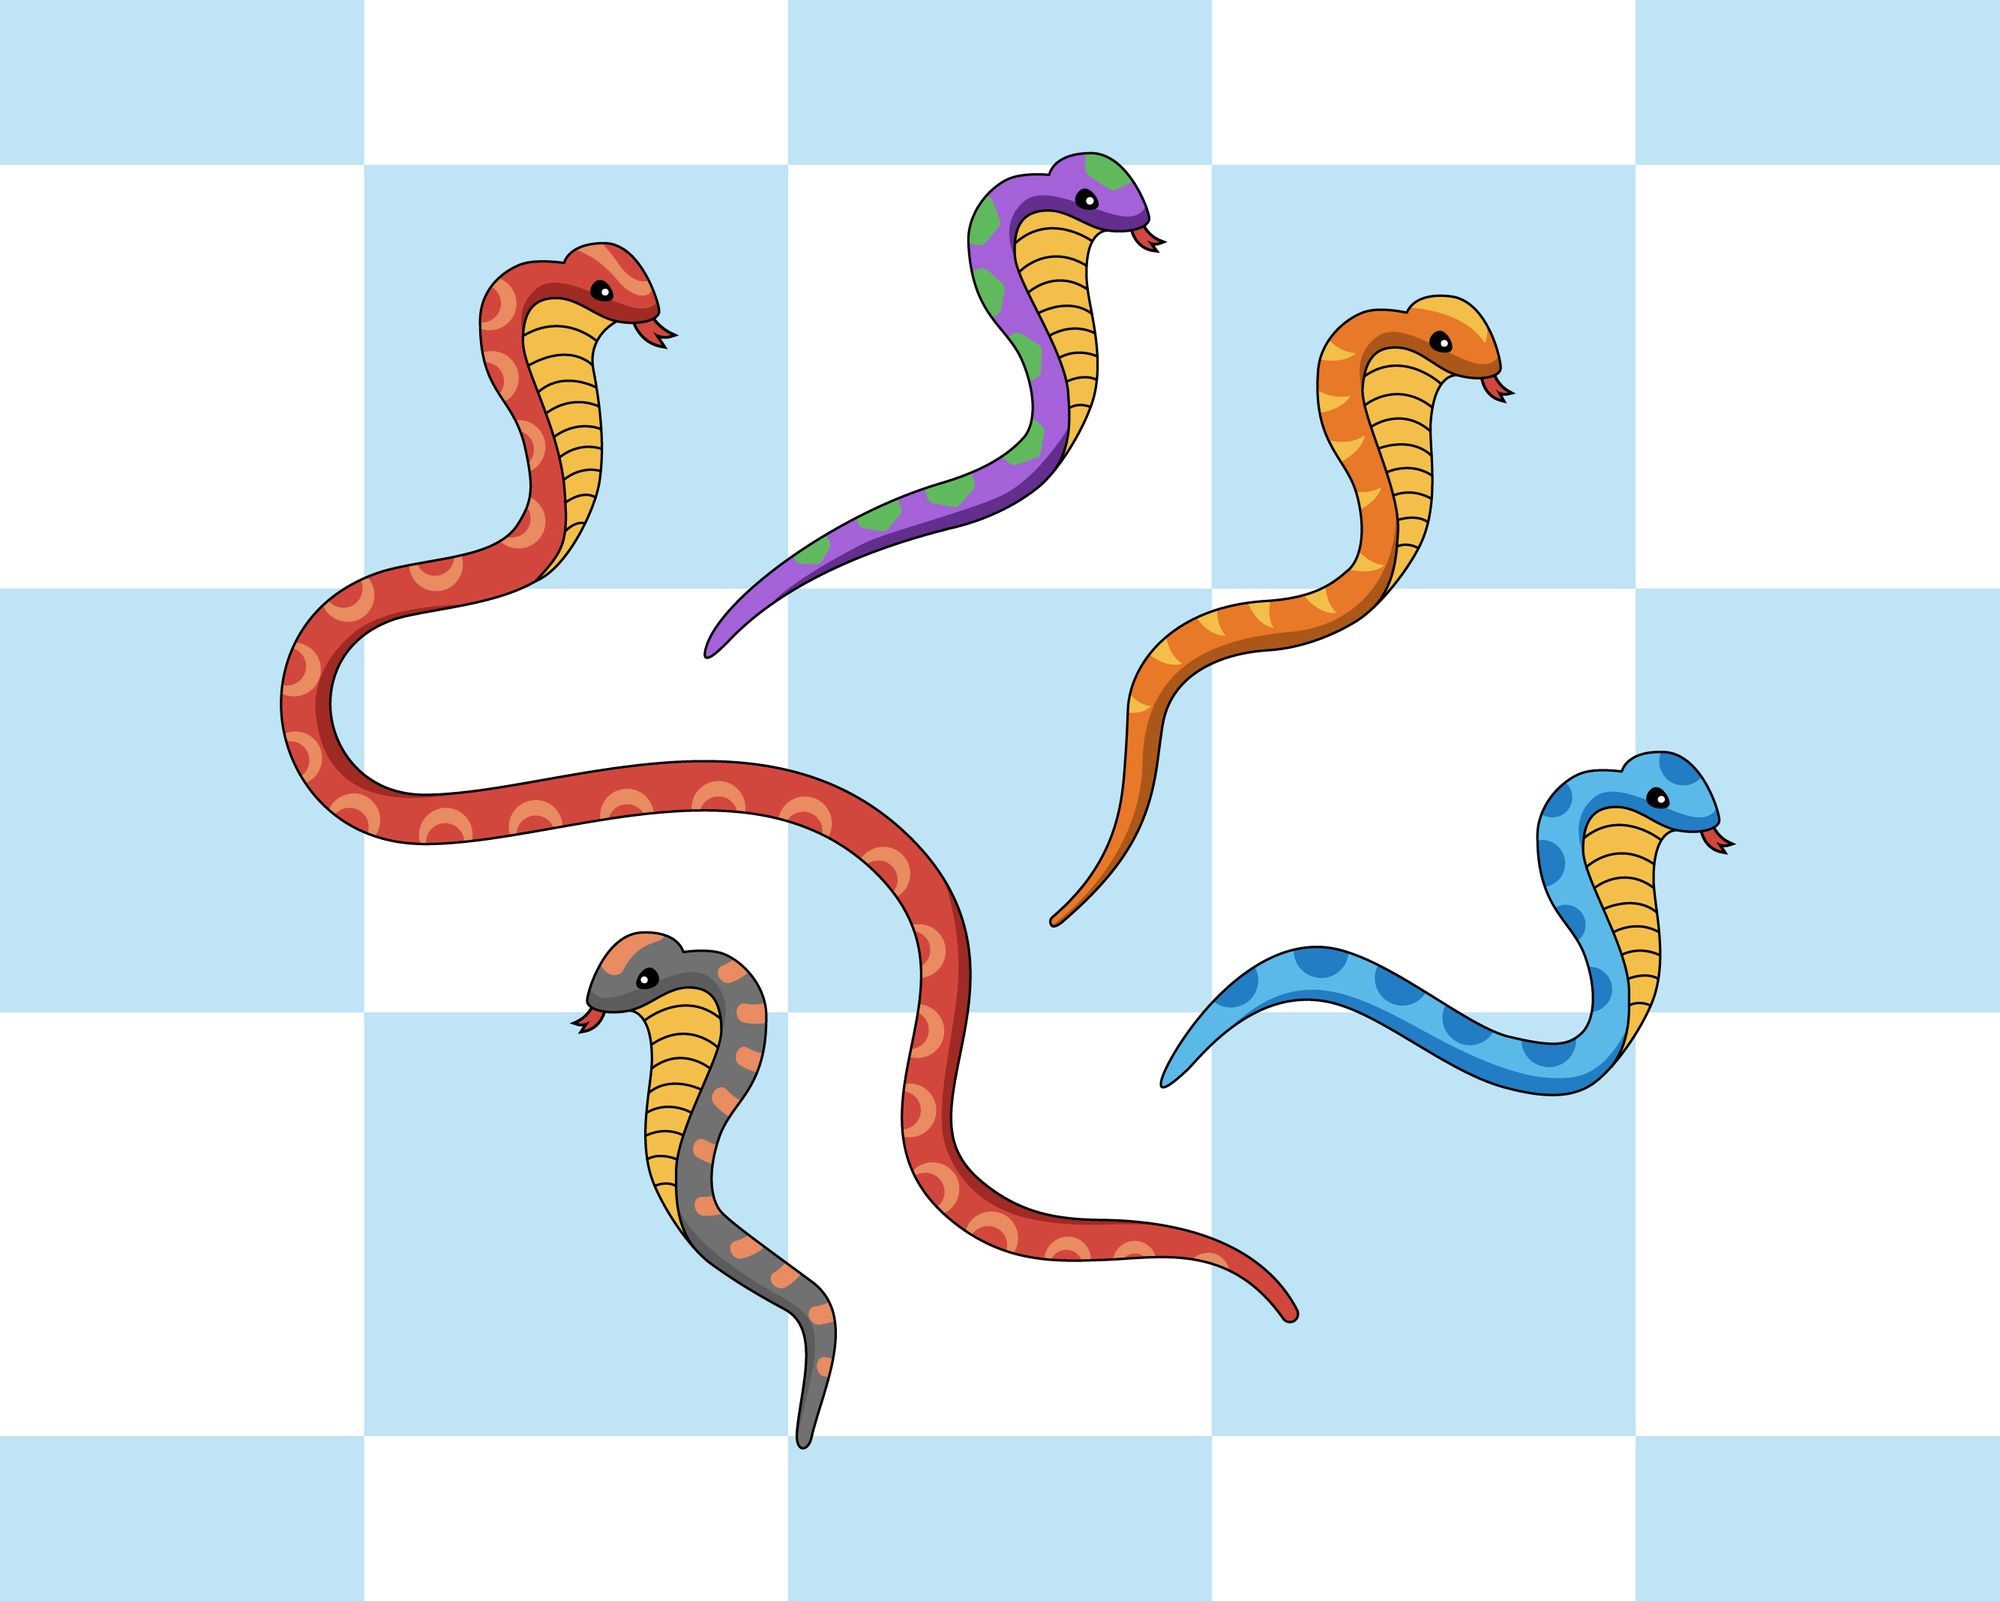
Similarly, I created multiple snakes using the above steps and with this technique of live-painting, I was able to apply and edit the colour to multiple objects with ease. To re-edit it I just had to add/edit the color palette and replace it by re-applying it over the illustrations. You can directly select the fill area and multiple areas you want to edit using the Live-Pain Selection tool which can be found in the same tool group in the toolbar panel.