
RabbitMQ is an open-source message broker. It is lightweight and easy to deploy on-premises and in the cloud. It runs on many operating systems and cloud environments and provides a wide range of developer tools for the most popular languages.
Work Queues
Let's talk a bit about work queues. Generally, when you code on a local machine, it does the task for you. But what if the task could be granularized and distributed across machines?
Let's talk about an example of a website that does the image/video manipulation and exports the output. It will require quite a bit of resource. One machine is overloaded with multiple tasks for handling multiple jobs, leading to greater resource consumption and high task completion time due to resource blocking or other failures.
In such a scenario, RabbitMQ comes to the rescue. It allows us to create multiple servers and reroute the task to them.
Work Queues with RabbitMQ
Let's install the library packages with npm
npm i amqplib express typescript
npm i --save-dev @types/amqplib @types/express @types/nodeWe can now create index.ts, consumer.ts, producer.ts and constants.ts files in an src directory according to this article's project configuration. You can proceed anyways.
Let's write up our constants.ts file with the constants we will use through this project. It will contain a port for express where our project will run, a rabbit host and a queue name.
export const express_port: number = 3000;
export const rabbit_host: string = "amqp://localhost";
export const rabbit_queue_name: string = "my_queue";Now let's write up our producer.ts file that utilizes the amqplib package to connect and create a channel. It will also have a process to send the data to the queue.
import amqp, { Channel, Connection } from "amqplib/callback_api";
import { rabbit_host, rabbit_queue_name } from "./constants";

export function RabbitProducer() {
	console.log("producer rabbitMQ : connecting");
	let theChannel: Channel;
	amqp.connect(rabbit_host, async (err: any, connection: Connection) => {
		if (err) {
			throw err
		}

		connection.createChannel((err: any, channel: Channel) => {
			if (err) {
				throw err
			}
			theChannel = channel;
			console.log("producer rabbitMQ : connected");
		});
	});
	return (data: any) => {
		const msg = JSON.stringify(data)
		theChannel.sendToQueue(rabbit_queue_name, Buffer.from(msg));
	};
}Now let's write up our consumer.ts file that utilizes the amqplib package to connect and listen to the channel. It will just print the message received for now.
import amqp, { Message } from "amqplib/callback_api";
import { rabbit_host, rabbit_queue_name } from "./constants";

amqp.connect(rabbit_host, (err: any, conn) => {
	if (err) {
		throw err; // error connecting
	}

	conn.createChannel((err, channel) => {
		if (err) {
			throw err; // error creating channel
		}

		console.log("consumer rabbitMQ : connected");
		channel.assertQueue(rabbit_queue_name, { durable: false });
		channel.consume(
			rabbit_queue_name,
			async (data: Message | null) => {
				if (data) {
					const msg = JSON.parse(data.content.toString());
					console.log(msg); // do your thing with the message
				}
			},
			{ noAck: true }
		);
	});
});
Finally, our index.ts file has dummy data to send, an express server with a route that will call up the producer function to relay that data to the consumers.
import express from "express";
import { express_port } from "./constants";
import { RabbitProducer } from "./producer";

const app = express();

let index = 0;
const dummy = {
	name: "rabbit",
	food: "carrot",
	index: index,
};
const pro = RabbitProducer();

function createDummyData(): any {
	index++;
	dummy.index = index;
	return dummy;
}

app.get("/", (req, res) => {
	const data = createDummyData();
	pro(data);
	res.send("welcome to rabbit");
});

app.listen(express_port, () => {
	console.log(`Express with Typescript! http://localhost:${express_port}`);
});Let's compile the typescript tsc -p tsconfig.json from the project's directory. According to the config from my earlier blog, it will create a dist directory. Now we proceed to run our main file with node dist/index.js. And run our consumer code in another two terminals, each with node dist/consumer.js.
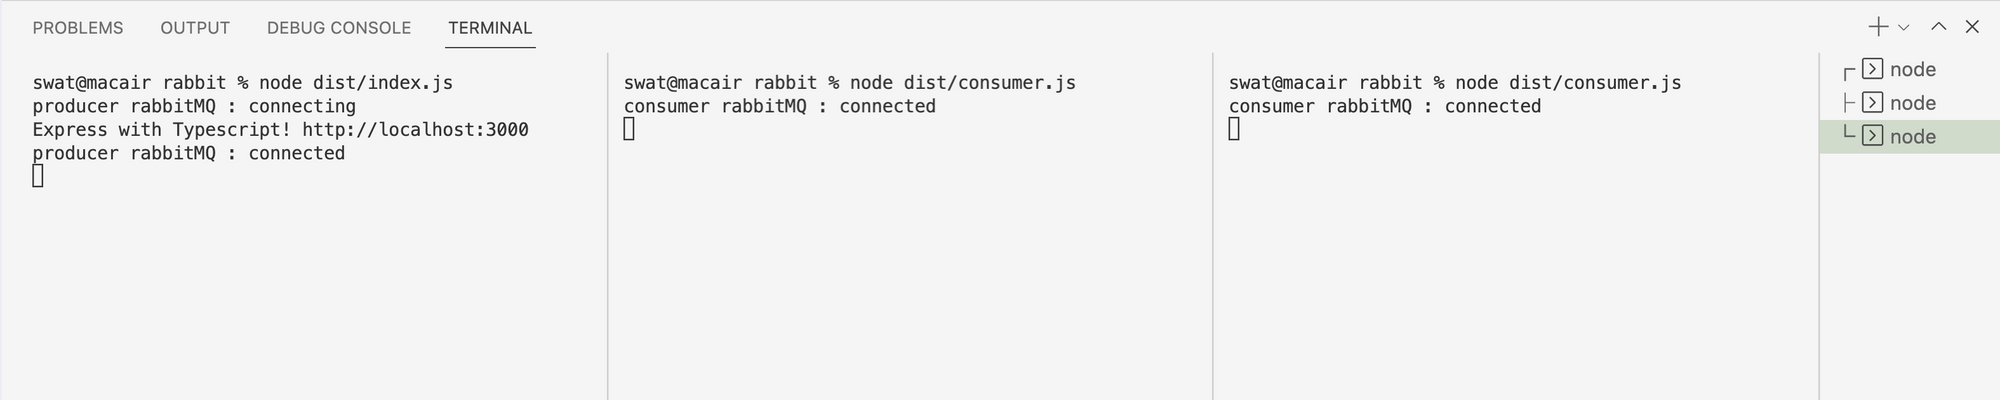
The default index route of our express server calls up our producer's function to send a message to the queue. Which in turn distributes that task/message to the available workers.
We have an incremental index value in our dummy data from index.ts that allows us to track the number and distribution of tasks. Let's call up our index route http://localhost:3000 in the browser five times and see the results.

We can see that the task was evenly distributed among the workers in a round-robin fashion. You can carry out the test with more or fewer consumers and observer the task distribution.
Conclusion
Hold on! This is not the only thing RabbitMQ does. It allows us to further ease the queuing process by providing us with delivery acknowledgement, delivery acknowledgement timeout, dispatching techniques, message durability, fair dispatch, etc., for queues.
You can find more details about all of these processes on their site. Furthermore, they support publishing/subscribing, routing, topics, RPC, etc. You can get started on those from their getting-started page.
Hope you learned something. Subscribe for the upcoming dose of tech blogs. Happy coding!