
Adobe Illustrator has many excellent features that make working with typography easy and fun. It is, without any doubt, my favourite tool for designing at the moment. Even though I use it almost daily, I had never explored any 3D effects on Illustrator. I recently started researching what the 3D effects Illustrator can achieve and was pleasantly surprised.
In this article, we will create a fake 3D isometric text effect that uses a little bit of the 3D magic from Illustrator and a few gradient tricks to achieve a fake 3D effect.
We are starting with a 1920x1080 px artboard with the default colour mode (RGB). So, let's get started!
Making an Isometric Grid
First things first, we are going to need an isometric grid setup. There are a few different ways to get an isometric grid. Here's one I prefer the most because it results in a highly customizable grid:
Step 1: Select the Rectangular Grid Tool from the toolbar, and left-click anywhere on your artboard to get the Rectangular Grid Tool Options prompt.
Step 2: Make the grid 1000 by 1000 px square, and add 100 horizontal and vertical dividers on the Rectangular Grid Tool prompt. You will get a 1000 x 1000 px square grid.
Step 3: To turn the square into an isometric grid, change the height of the grid to 86.602%. Simply type 86.602% on the height value of the grid. Make sure the Constrain Width and Height Proportions button is turned off.
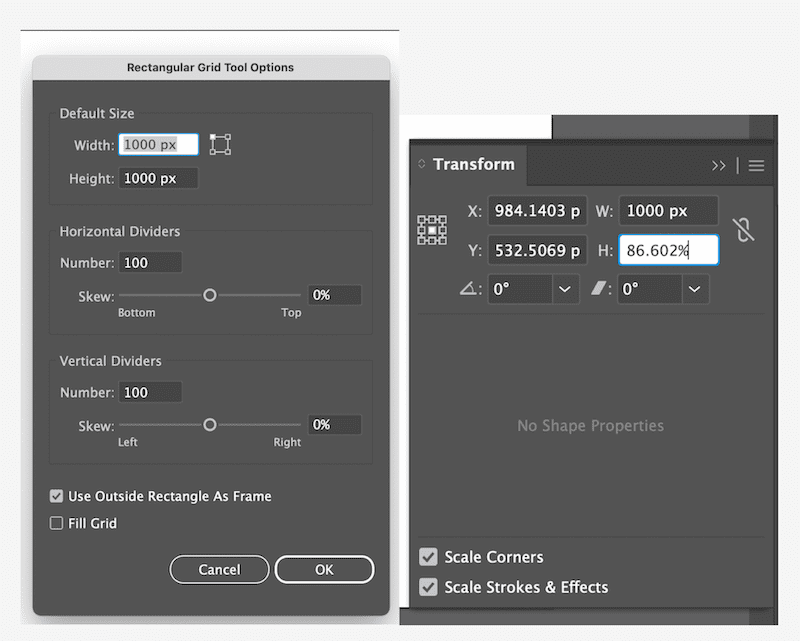
Step 4: Then change the Shear value to -30 and Rotation value to 30 on the Transform panel. Now, we have an isometric grid!
Transform panel, it can be found under Window >Transform.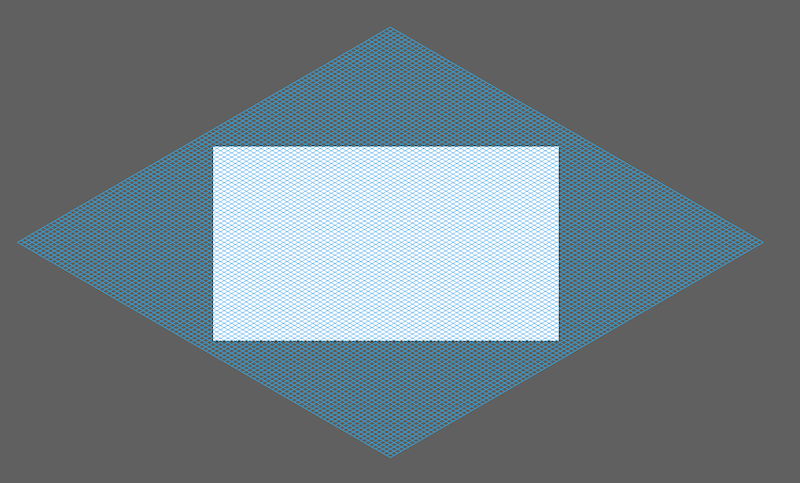
This grid is highly customizable since you can increase the grid over the artboard and change the stroke colour, width, and opacity.
Throughout the rest of the process, you can use this grid to ensure the texts are aligned with the grid, creating an isometric effect. I have the grid with 15% opacity and locked for the rest of the process.
Adding the Isometric Text
Step 1: We will use a Google font – Anton, at regular weight for the text. Once you are satisfied with the text, you can expand the text with Object > Expand.
Step 2: To turn it isometric, follow the same steps for the grid. Change the height to 86.602% and add in -30 shear and 30 rotation.
Adding the Layers and Colors
We can add more layers to the text to create a stack. We are creating a stack of the stack, get it?...
For layers
To create a stack, we will use the classic 3D method in Illustrator, which will give us a vector shape instead of turning the text shape raster. Select the text and go to Effects > 3D and Materials > 3D(Classic) > Extrude and Bevel(Classic)
Step 1: On the Extrude and Bevel Options(Classic) prompt, set all the rotations to zero to see what effect you add.
Step 2: Change the extrude depth to 150 pts.
Step 3: Then slowly change the rotation around X-axis value to add a layer below the text.
Step 4: Select No Shading from the shading options on the Surface dropdown menu, and press Enter.
Appearance tab.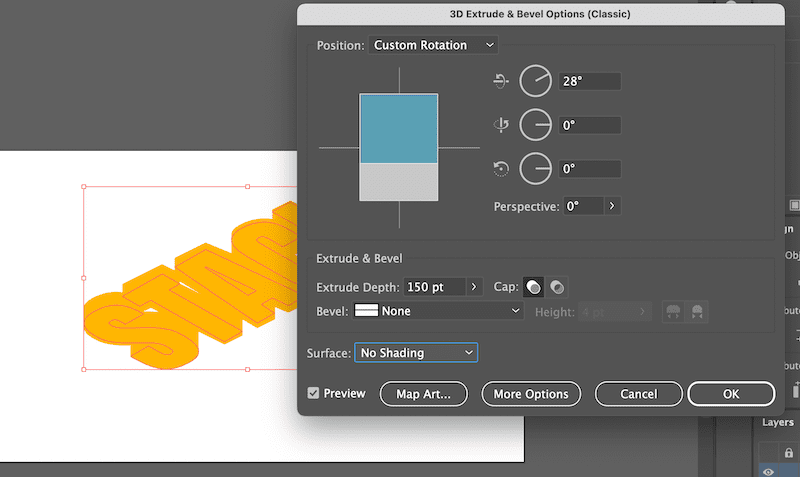
For colours
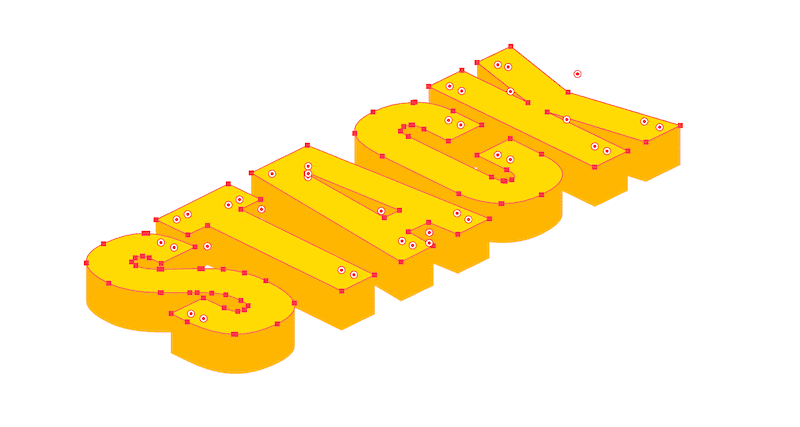
We can now move on to playing with colours. Expand the 3D shape and ungroup with Command + Shift + G. You must ungroup it several times to separate all the shapes.
Step 1: Select the original word, group them, and give them a different colour.
Step 2: Hide the top layer with the shortcut Command + 3 to select the remaining shapes. Select them all and group them. Then combine the shapes with the Pathfinder's Unite option and give it a different colour.
We can un-hide our top layer with the shortcut Command + Alt + 3.
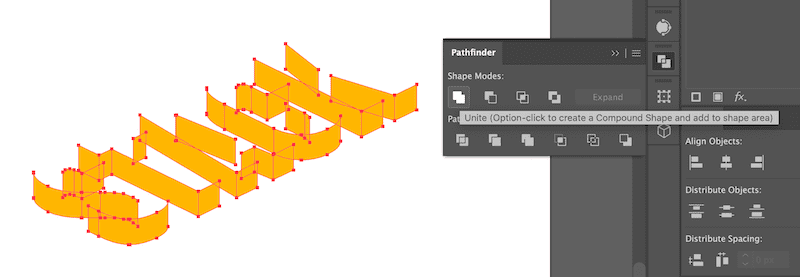
Step 3: To add more layers, we can select the bottom layer and copy and paste it to the back with the shortcut, Command + C and Command + B. Push the third layer down and change the colour to a darker value. Repeat this step three more times, or more if you want, and get the stacked text effect.
Adding Shadows and Highlight
We can add shadows and highlights with gradients to give the text a more 3D effect.
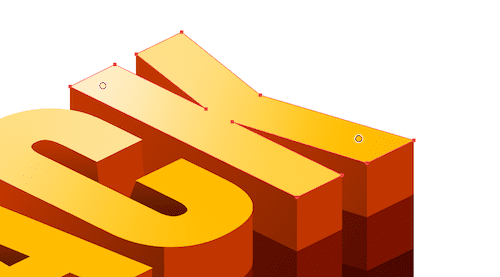
For shadows
Step 1: Trace out the shapes where shadows are needed.
Step 2: Add a black and white linear gradient to the shape.
Step 3: Change the layer mode of the shape to multiply and lower the opacity.
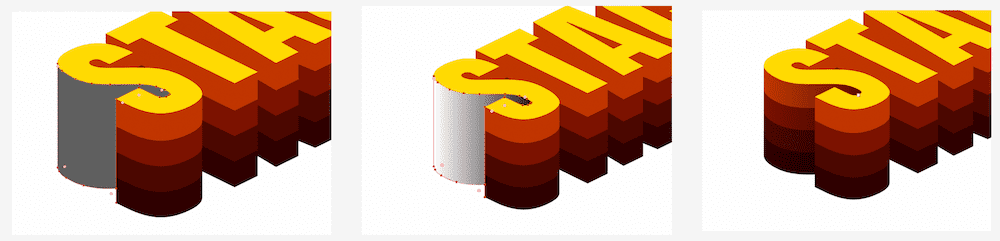
For highlights
Step 1: Make a copy of the top layer, and paste it into the same place with Command + C and Command + F.
Step 2: Un-group the shapes and add a free-form gradient with two points. The bottom one will be the same as the top layer, and the top one will be a much lighter colour, almost white.
Step 3: Drop the layer opacity to around 80%, and copy the same steps for the rest of the letters.
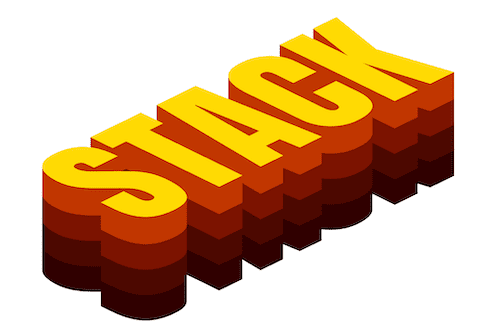
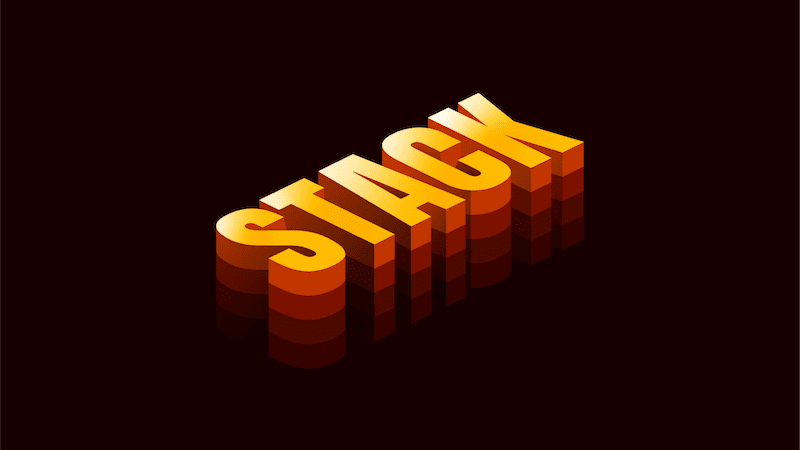
End Result
After adding the highlights and shadows, the result looks like this:
Hope you learned a few new tricks for working with Adobe Illustrator!
Happy learning, and see you at the next one! Subscribe and leave a comment if you have any questions.