
Introduction
Everyone has experienced the need to write integration tests for an application they're working on, which leads to the database becoming clogged with tons of data generated by the test script(s). Even after cleanup, there may still be instances in which our data during development testing interferes with the test resulting in it becoming nondeterministic (we do not want that).
One approach for separating the test environment from the development environment is by using a separate database instance dedicated to testing. However, if there are other services involved, such as caching, message broker, and search engine services, running multiple instances for testing purposes can waste valuable system resources. This becomes even more challenging when working with multiple applications, requiring additional services and implementing in-memory solutions. Overhead and the need for testing these implementations can further complicate the process.
What is Testcontainers?
Testcontainers is a tool built to run services in lightweight docker containers for your tests. In addition to isolating the test environment, it also adds an extra benefit of simulating the test environment as close as possible to that of the production environment. There's also less overhead of writing mocks for the services. Now let us dive into how to use Testcontainers in your Node.js project. We will use Node, NestJs, Jest, Prisma, Postgresql and Testcontainers.
Configuring the Environment
Let us set up a demo to-do application; we will write some tests. Let's run the following commands to install the necessary stuff.
pnpm i -g @nestjs/cli

nest new todo-app && cs todo-app

pnpm i -D prisma @testcontainers/posgresql

pnpm prisma init

nest g service prisma --no-spec --flat

nest g mo todo && nest g s todoSetting up Database
Now, let us define our database schema in prisma/schema.prisma. Just add the following content to the file.
model Todo {
  id String @id @default(uuid()) @db.Uuid

  title String
  done  Boolean @default(false)

  createdAt DateTime @default(now()) @db.Timestamp(6)
  updatedAt DateTime @updatedAt @db.Timestamp(6)
}Let us set up our Postgres database now. I will be using docker for this. Create a new file in the project root and name it docker-compose.yml. Then copy the following content.
version: '3.9'

services:
  todo-db:
    image: "postgres:15"
    env_file:
      - .env
    ports:
      - "${POSTGRES_PORT}:5432"
    volumes:
      - db_data:/var/lib/postgresql/data

volumes:
db_data:Now open the .env file and update its content as the following.
POSTGRES_USER=postgres
POSTGRES_PASSWORD=postgres
POSTGRES_HOST=localhost
POSTGRES_PORT=5432
POSTGRES_DB=todo_db

DATABASE_URL="postgresql://${POSTGRES_USER}:${POSTGRES_PASSWORD}@${POSTGRES_HOST}:${POSTGRES_PORT}/${POSTGRES_DB}?schema=public"Run docker compose up -d and your database should be up and running.
To sync the database with our schema, run the command :pnpm prisma migrate dev and name the migration whatever you'd like when prompted.
Now, let's configure our database service. Open the src/prisma.service.ts file and update the source as following:
import { Injectable, OnModuleInit } from '@nestjs/common';
import { PrismaClient } from '@prisma/client';

@Injectable()
export class PrismaService extends PrismaClient implements OnModuleInit {
  async onModuleInit() {
    await this.$connect();
  }
}
Writing Service
Now let us write a simple CRUD service for the to-do app we are going to build. Update the src/todo/todo.module.ts and add PrismaService to the list of providers array. Then open the src/todo/todo.service.ts file and update it as follows:
import { Injectable } from '@nestjs/common';
import { PrismaService } from '../prisma.service';

@Injectable()
export class TodoService {
  constructor(private readonly prisma: PrismaService) {}

  async create(data: any) {
    return await this.prisma.todo.create({ data });
  }

  async findAll() {
    return await this.prisma.todo.findMany();
  }

  async findOne(id: string) {
    return await this.prisma.todo.findUnique({ where: { id } });
  }

  async update(id: string, data: any) {
    return await this.prisma.todo.update({ where: { id }, data });
  }

  async remove(id: string) {
    return await this.prisma.todo.delete({ where: { id } });
  }
}
Writing Helper Functions
Now let us write some helper functions to set up testcontainers. Create a new file utils/test.utils.ts and populate the content as follows:
import { exec } from 'child_process';
import { promisify } from 'util';
import { PostgreSqlContainer } from '@testcontainers/postgresql';

import { PrismaService } from '../prisma.service';

const execAsync = promisify(exec);

async function setupTestContainer() {
  const container = await new PostgreSqlContainer().start();

  const connectionConfig = {
    host: container.getHost(),
    port: container.getMappedPort(5432),
    database: container.getDatabase(),
    user: container.getUsername(),
    password: container.getPassword(),
  };

  return connectionConfig;
}

export async function setupPrismaService() {
  const connectionConfig = await setupTestContainer();
  const databaseUrl = `postgresql://${connectionConfig.user}:${connectionConfig.password}@${connectionConfig.host}:${connectionConfig.port}/${connectionConfig.database}`;

  const result = await execAsync(
    `DATABASE_URL=${databaseUrl} npx prisma migrate deploy --preview-feature`,
  );

  const prisma = new PrismaService({
    datasources: {
      db: {
        url: databaseUrl,
      },
    },
  });

  return prisma;
}
The above functions will create a database container and create a Prisma service that connects to the container during the test. It will also apply migrations to the testcontainer database.
Now coming back to todo.service.spec.ts we will be overriding the Prisma service with our own Prisma service that connects to the test container. Override the beforeAll function with the following piece of code.
  beforeAll(async () => {
    const module: TestingModule = await Test.createTestingModule({
      providers: [TodoService, PrismaService],
    })
      .overrideProvider(PrismaService)
      .useValue(await setupPrismaService())
      .compile();

    service = module.get<TodoService>(TodoService);
  });
beforeAll function for todo.service.spec.tsWhat the above piece of code does is override the PrismaService with the PrismaService instance generated by setupPrismaService which is connected to the database in the test container.
Writing Actual Tests
Writing tests are straightforward. As stated earlier, there won't be much mocking involved. Let's write a simple test to insert a to-do entity in the database.
  it('should create a todo', async () => {
    const todo = {
      title: 'Test',
    };

    const result = await service.create(todo);

    expect(result).toBeDefined();
    expect(result.id).toBeDefined();
    expect(result.title).toBe(todo.title);
    expect(result.done).toBe(false);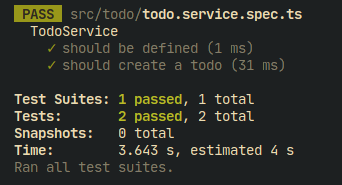
});Now run the test with the command pnpm test and we should see that the test passes.
Now let's write a few more tests for the remaining CRUD operations
it('should find all todos', async () => {
    const result = await service.findAll();

    expect(result).toBeDefined();
    expect(result.length).toBe(1);
  });

  it('should find a todo by id', async () => {
    const todo = await service.create({
      title: 'Test2',
    });

    const result = await service.findOne(todo.id);

    expect(result).toBeDefined();
    expect(result.id).toBe(todo.id);
  });

  it('should update a todo', async () => {
    const todo = await service.create({
      title: 'Test3',
    });

    const updatedValue = {
      title: 'Test4',
    };

    const result = await service.update(todo.id, updatedValue);

    expect(result).toBeDefined();
    expect(result.id).toBe(todo.id);
    expect(result.title).toBe(updatedValue.title);
  });

  it('should delete a todo', async () => {
    const todo = await service.create({
      title: 'Test5',
    });

    const result = await service.remove(todo.id);

    expect(result).toBeDefined();
    expect(result.id).toBe(todo.id);

    const found = await service.findOne(todo.id);
    expect(found).toBeNull();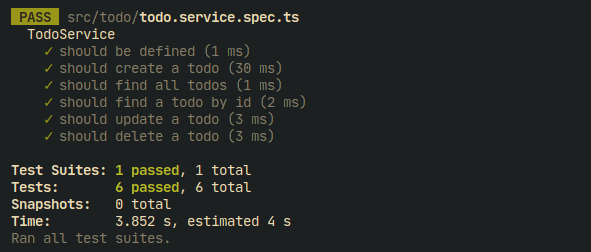
});Upon running the command pnpm test we should find the following result.
By doing all this, we have completely isolated the dev database environment and test database environment. Testcontainers provides containers for 50+ common services such as Redis, Elasticsearch, KeyCloak, MinIO, Nginx, and many more.
Conclusion
In this blog, we learned how to isolate the development environment and testing environment with the help of a tool called Testcontainers. This brings many benefits to the table, such as
- Tests are more deterministic.
- Tests can be run on an environment that closely replicates production.
- Less overhead writing mocks or in-memory implementations of external services.
- Don't have to worry about test data cleanup since the tests are run in temporary environments.
Thank you for reading this article. Please consider subscribing or leaving a comment if you loved it.