Image scaling refers to the resizing of a digital image. A new image with a higher or lower number of pixels must be generated when scaling a raster graphics image. In the case of decreasing the pixel number (scaling down), this usually results in a visible quality loss.
In this blog, we will go through the 3 most used algorithms or image scaling processes available in most image editing apps or software.
Nearest Neighbour Image Resizing
The Nearest Neighbour image scaling technique uses Euclidean distance for computing the closest distance of a pixel. It preserves details by duplicating the original pixel value, which results in jagged edges in the re-scaled image.

This image resizing technique is useful for illustrations or images containing edges that are not anti-aliased. It preserves hard edges and produces a smaller file. For example, pixel artists would prefer this method while resizing their artwork since the algorithm avoids blurring the edges of the images.

Back in the early-to-mid '90s, the nearest neighbour technique was used everywhere because GPUs weren't available to help with image scaling, and CPUs could not afford to waste cycles on interpolation math for every single screen pixel. Nearest Neighbor produces fewer artefacts and is faster to calculate.
Early 3D home consoles, like PlayStation 1, also did the same. Highly stylized games such as Minecraft, where blocky textures stay blocky however close you zoom, use this image scaling process.
Pros
- Fast and resource-light
- Smaller image size
- Good for scaling pixel art
Cons
- Doesn't work well with photographs or detailed rasters
- Low quality upscaling and downscaling
Bilinear Interpolation
The Bilinear Interpolation resizing process fills the additional pixels when scaling an image by taking the average between 4 (2x2) of the original pixel values. The blurry and softened edges become more noticeable upon scaling up due to the intermediate pixel values.
This is useful when editing raster images to preserve the realistic treatment of colour and light but don't care that much about the details lost through the average values of original pixels.
Although this is desirable for continuous-tone images like photographs and paintings, this algorithm reduces contrast (sharp edges) in a way that may be undesirable for line art.

Bilinear sampling/scaling is used for almost everything in modern real-time 3D graphics and games. This is thanks to dedicated hardware parts in GPUs found in most computers today, making them resource-friendly and very efficient to use.
Pros
- Works well with photographs and detailed raster images (to a certain extent)
- Comparatively resource-light
- Smoothed contours
- Retains natural lighting
Cons
- The image does not retain sharpness (softened edges)
- Distorts the shape of the image
- Not suitable for line work
Bicubic Interpolation
Bicubic Interpolation is the most advanced image scaling algorithm available in most industry-standard image editing apps or software. Scaling images is usually smoother using this method. It is very resource-heavy in terms of calculation but produces a more precise method based on examining the values of surrounding pixels.
In contrast to bilinear interpolation, which only takes 4 pixels (2×2) into account, bicubic interpolation considers 16 pixels (4×4). As a result, images resampled are smoother and have fewer interpolation artefacts.
Bicubic produces smoother tonal gradations than Nearest Neighbor or Bilinear and is recommended for scaling up images for large prints or displays.

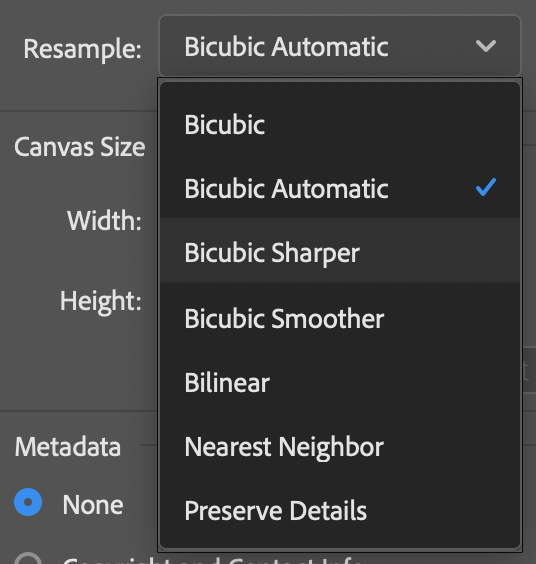
Bicubic interpolation processes in software like Adobe Photoshop have several additional modes for different finishings.

Pros
- More correct value overall
- The contours are smoother compared to Bilinear
- Retains more lighting details
Cons
- Doesn't work well with line art
- Heavy computation required
That's all, I hope you learned something new about image resizing today! Catch you in the next one.
