
I recently stumbled across a really cute and funky pattern on Pinterest, and it inspired me to create my own pattern swatch in Illustrator. After combing through a few decent tutorials, I realized how easy it was to create my own patterns! I will be breaking down the steps to draw custom patterns in Illustrator with an easy-to-follow tutorial post below!

Adobe Illustrator comes with a large set of preset patterns. You could probably make a lot of awesome things with the options there. However, it will be even easier if you know enough about editing these patterns. Illustrator is even great for creating your own patterns if you want to go the extra step!
First things first, you need to decide on a theme for the pattern. You can jump right into Adobe Illustrator and start making illustrations for the pattern.
You can make a pattern out of any illustration you want.
Creating the Pattern
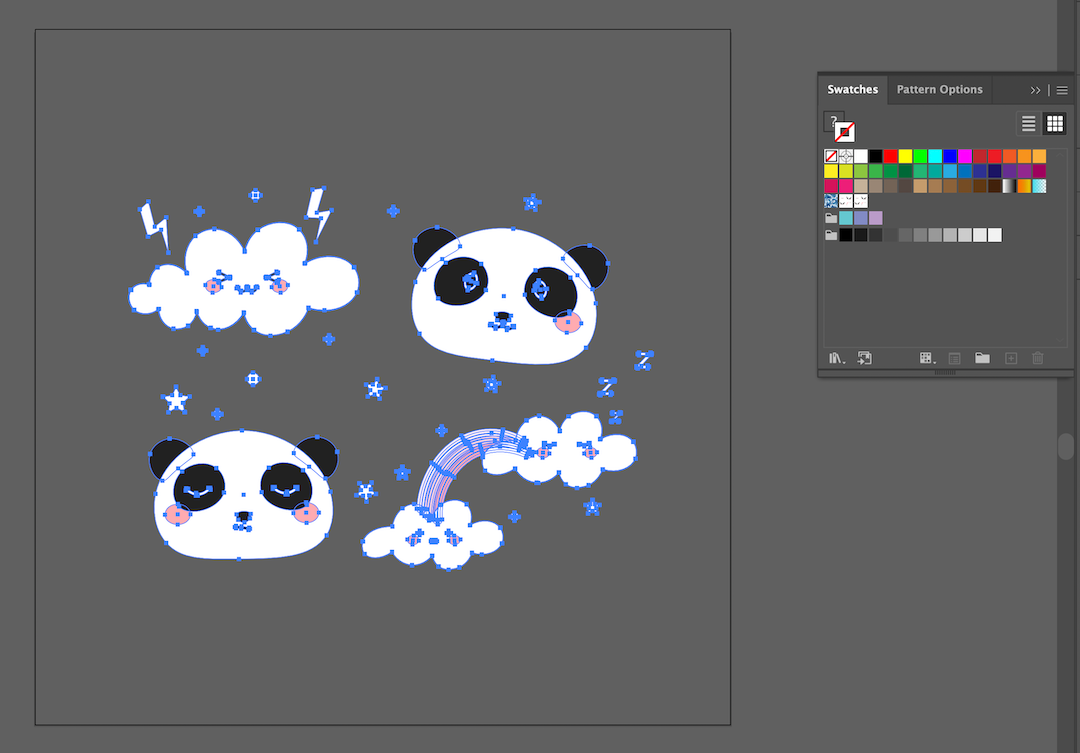
You can work with any illustration or shape that you want. I created a simple illustration of a Panda and some clouds.

Create a square with the shape tool using M (holding shift to make a square).
Then, arrange the illustrations on the square. You can rotate different elements and place them on the square. The square is going to the sample space for the pattern.
Select all the elements without the background square and group them with Ctrl + G. The square is just for guidance which will not be included in the pattern, or you can choose to have the background fill for the pattern as well!

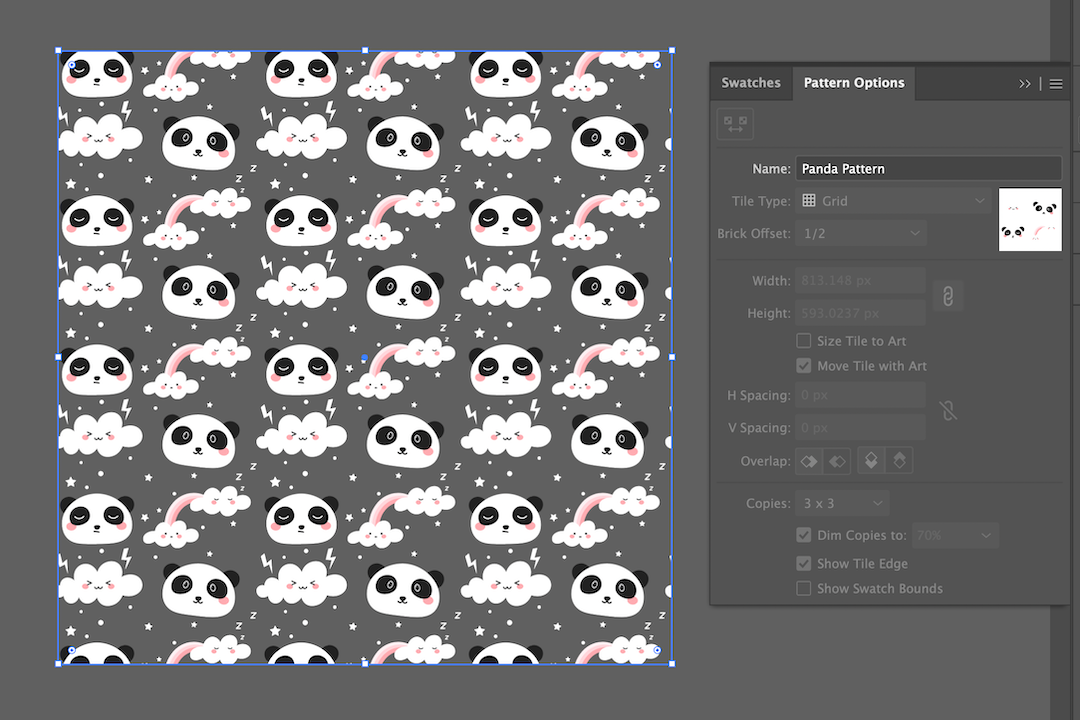
Go to the swatch window, and drag the grouped illustrations into the swatches panel.
Window > Swatches to get the panel.Your pattern is already ready to be used! You can now use the pattern as a fill or stroke on any shape or text on Illustrator.
Further Editing your Pattern
Why stop here? There are still a few more steps you can take to further customize your pattern!
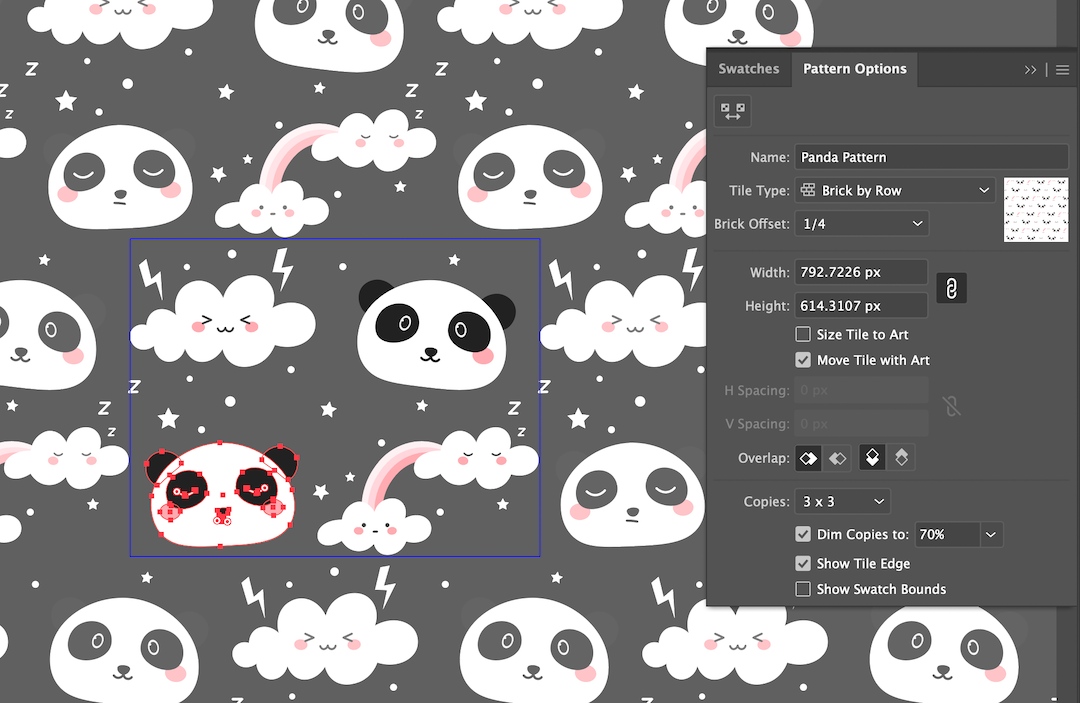
Open up the Pattern Options panel for that. You can get the panel from Window > Pattern Options
As you can see, the input fields in the Panel Options are greyed out by default. You can only edit the pattern from the swatches. For that, open up your swatches panel.
1. Double click on the pattern you created on the swatches panel.
It should automatically open up your Pattern Options panel, and all the input fields should be editable.
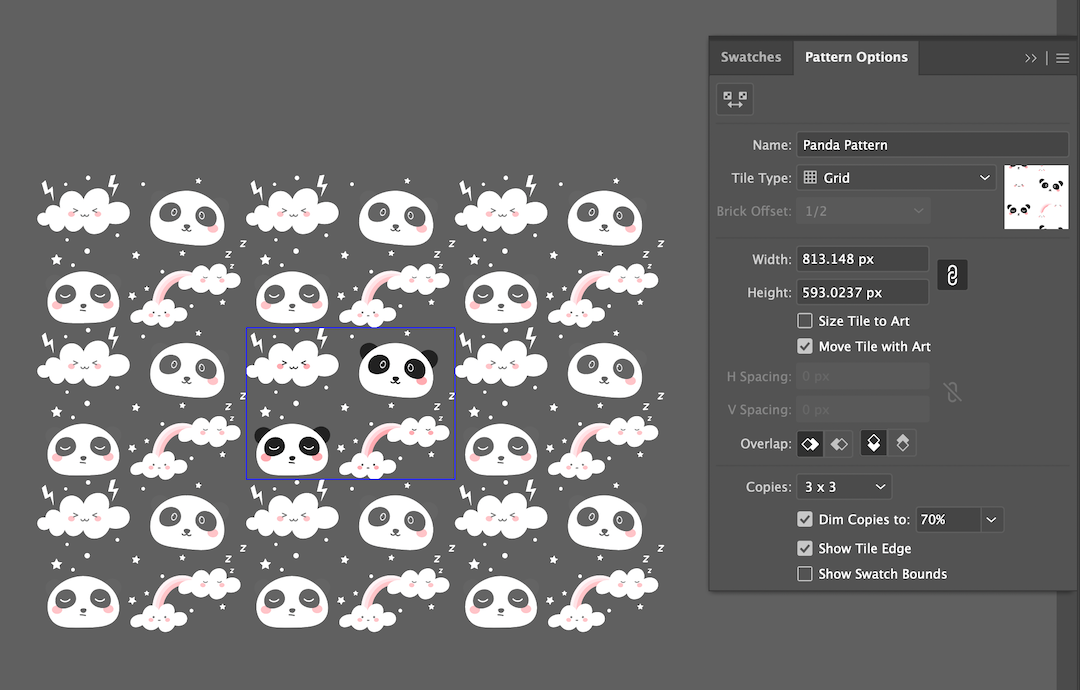
2. You can edit the spacing between the pattern square with the Pattern Tile tool
3. You can also change the overall arrangement with the Tile Type options available. I went with Brick Offset 1/4.
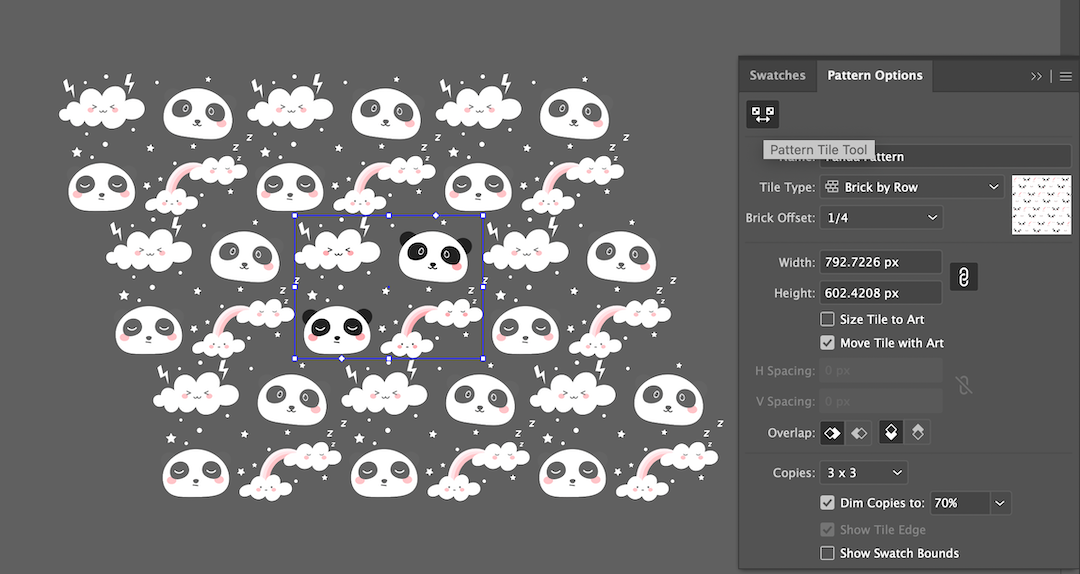
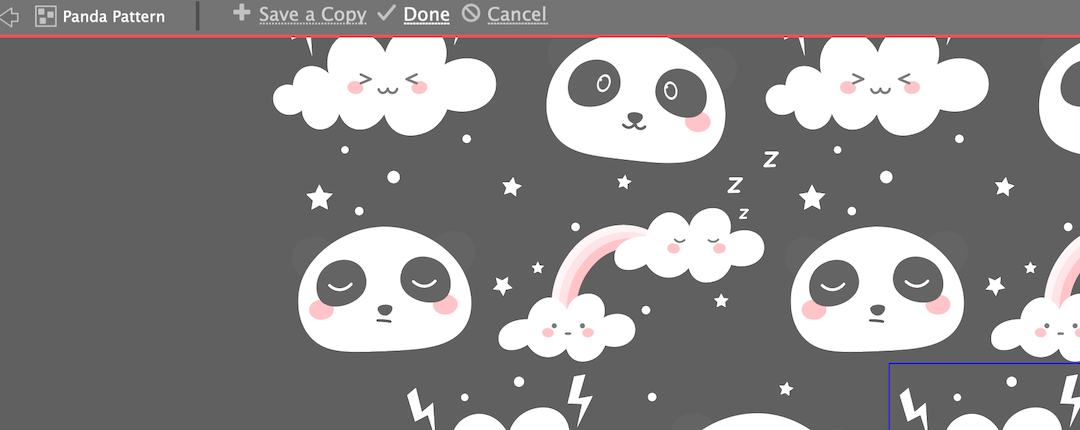
4. If you want to change the illustration itself, you need to turn the Pattern Tile tool off and double-click on the elements to edit them, like in Isolation mode.
After you're done making changes, press Done on the top left side.
There you have it! Your own illustrations turned into a pattern. Patterns have many fun uses in Illustrator, so go out there and make some of your own!

Thanks for reading. Catch you at the next one!