Seeing your designs on a mockup is quite an exciting feeling. Even better if you can physically hold a product that you have been designing! But not every project that you work on will lead to a physical build, so a mockup is the next best thing.
Mockup Types
Designers have some flexibility in choosing how they want to create a mockup.
PSD Mockup Templates
PSD Mockup Templates are editable Photoshop files with a sample object with space for a custom design. A good mockup generally has a decently organized layer hierarchy and smart objects that allow us to replace the dummy text/image with our own designs.
Some mockups even have a 'how to use' file packaged along with them. All thanks to generous and skilled designers who create these mockups and share them with everyone!

Online Mockup Generator
There are some mockup generator websites that will simply require you to upload your design to a website, and you can view your designs on a wide variety of products. You can then download the images to see a render of the mockup.
These websites are not always the best option as they are more likely to have some kind of restriction on their usage, like only allowing image downloads with watermarks. They also lack the many tools and features that Photoshop provides.
That's why this article will only focus on using PSD Mockup Templates.
Where to Get Mockups?
Luckily for us, there are many awesome free resources to get mockups. I personally use Freepik and MockupTree. Besides these two sites, a quick google search should help you get access to a lot of decent free stuff.
My favourite site for mockups is mockuptree.com. They have a great collection of mockups for a wide variety of products.
If the free stuff does not look like what you envision your product to be, then you can find more exclusive mockups on different websites like Creative Market, Envato, and premium stuff on FreePik.
Choosing the Right Mockup
Finding the best mockup for your design is all about trial and error. The searching process might be long and arduous, but trust me – a good mockup will really make your design shine.
After you browse and browse and browse... and browse some more, you will finally select and download a couple of mockups that catch your eye. Now all you have to do is put your design on the mockups.
Placing and Editing Your Design
If you are planning to have your design printed in any form, then you probably already have a pre-defined size that you are working with. For the mockups, however, the sizes are most likely going to be different. For that, you can quickly check what size is needed for the mockup.
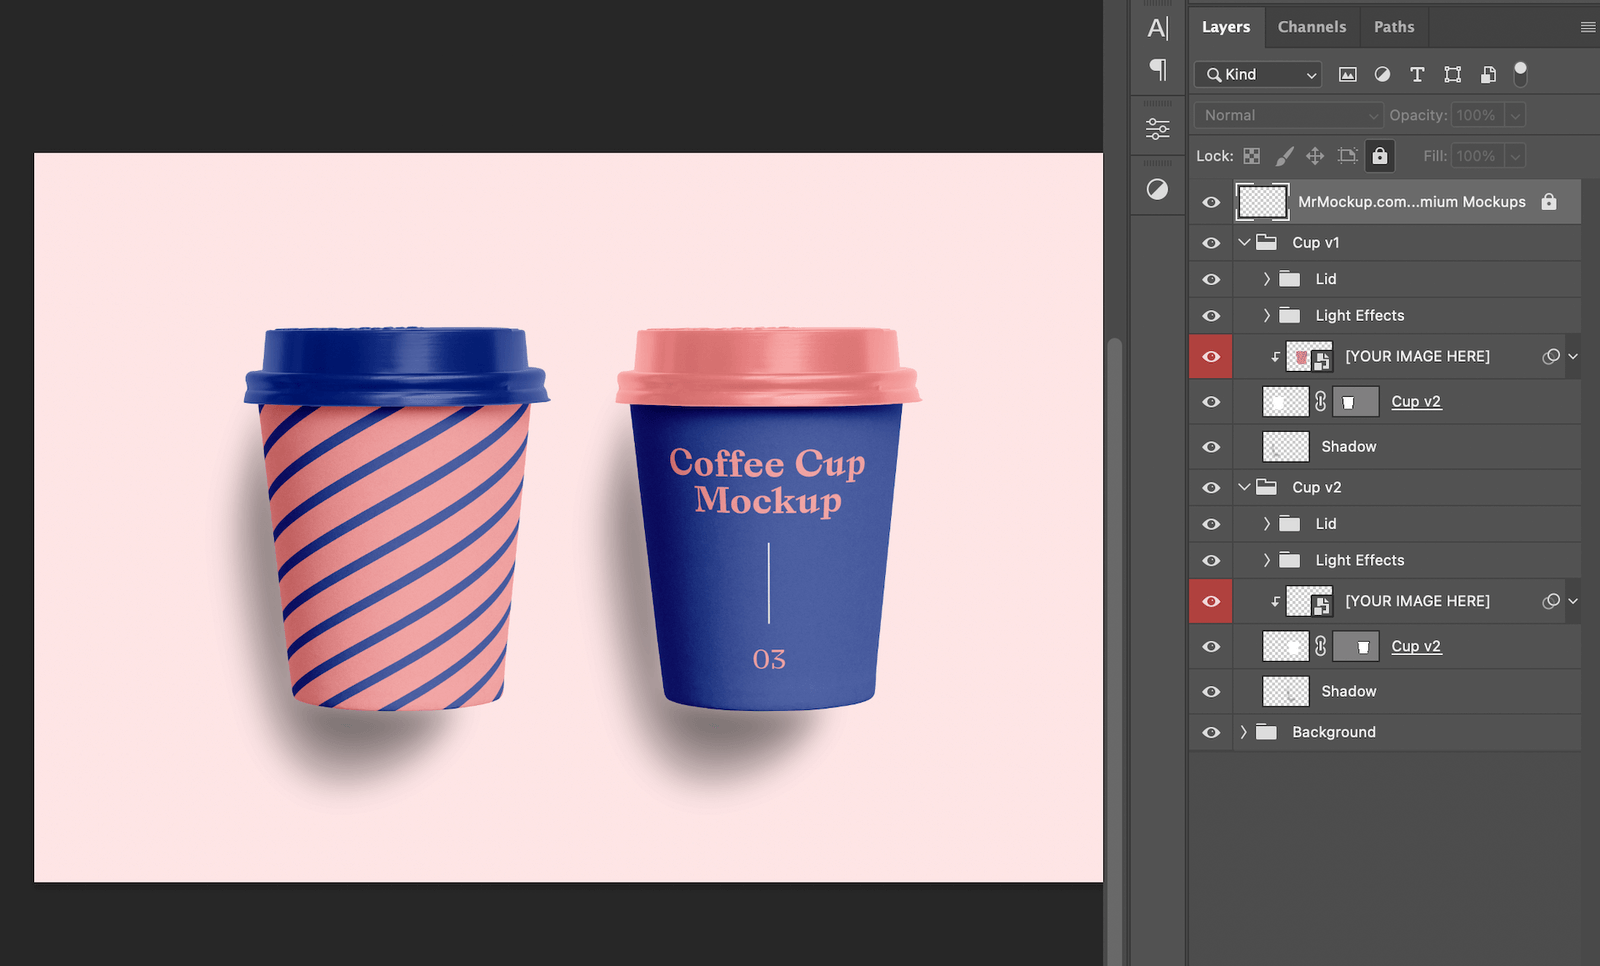
In the layers panel, you can identify the layer that will have the design as it usually has some identifying text such as "Edit Here" or "Your Design Here". It is also usually a smart object, and once you double click on that layer, a new photoshop window will pop up.

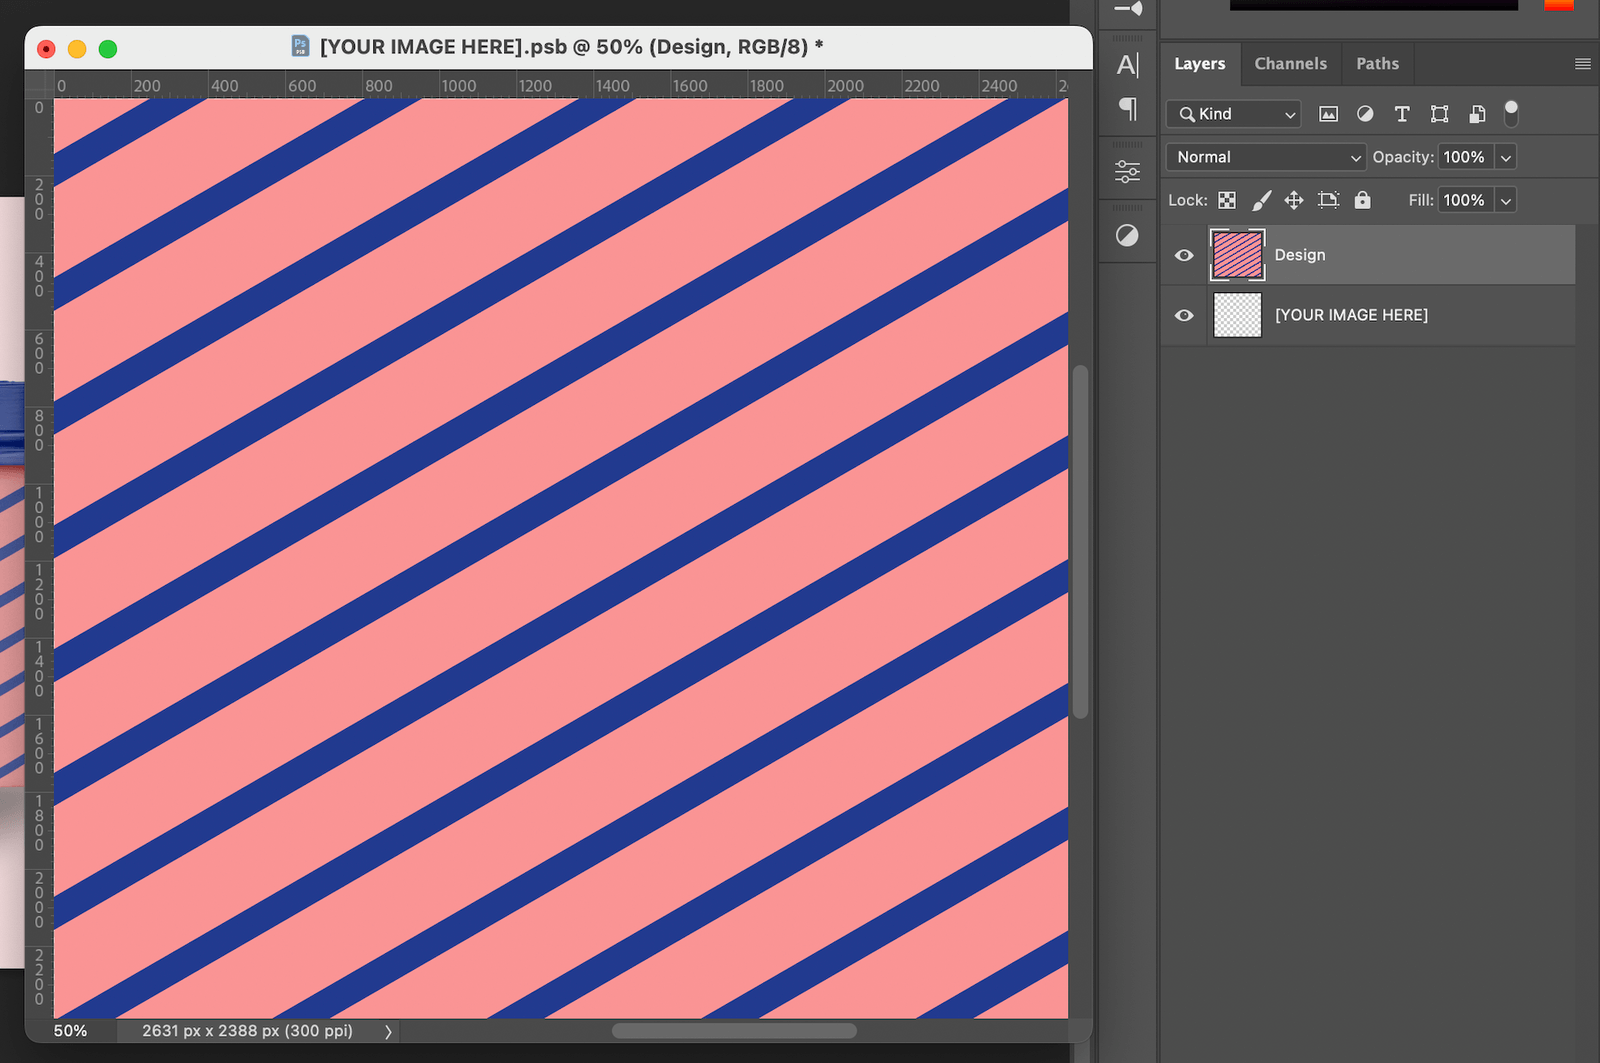
For instance, in the mockup above, if you double click on the layer titled "[YOUR IMAGE HERE]", you will get a new Photoshop window with the design layers.
This is where your design will go. Make a new layer and add your design there. You can add .pngs or any other image format Photoshop accepts.
If you are working with Adobe Photoshop or Adobe Illustrator, you can simply copy and paste your designs into a new layer on this window.
Workspace for Mockup Editing
You can now arrange the open windows to make your workflow easier.
I prefer having two windows open so that I can make edits to the design and see how it looks on the mockup at the same without having to switch tabs.
Got to Window > Arrange > 2-up-Vertical.

Now you can edit the design and see the changes right after you save the design and not have to constantly switch between the tabs.

And there you have it. Your design on a mockup! There are tons of mockup resources available on the internet, and I hope this article gave you a clear idea of how you can use them.
Thanks for reading and happy designing!
