
Introduction
Static Content
Static content refers to digital material that remains consistent for all users, regardless of their geographic location or the time they access it. This type of content is characterized by its unchanging nature, displaying identical information to every visitor without adapting to individual circumstances or environmental factors.
A key attribute of static content is its stability across various viewing contexts. Unlike dynamic content, which may adjust based on user preferences, time zones, or other variables, static content maintains a uniform presentation.
An illustrative example of static content is the website https://example.com. This site serves as a standard reference point, providing the same information to all visitors, irrespective of when or where they access it from.
Web Server for Static Content
So, to get static content accessible from the public web we'll need a web server or it can also be made accessible from S3 Object Storage Platforms like AWS S3, DigitalOcean Spaces, Google Cloud Object storage, etc. If you already have a server with Public IPV4/6 address then it's better to setup your own Web Server and host it.
Normally webservers like nginx, httpd, caddy, etc come bundled with certain features that are not required when serving static content. They come ready with all features neccessary to setup a stable production site but because we only need the features that allows us to host static content their resource footprint can be reduced extensively. For example:
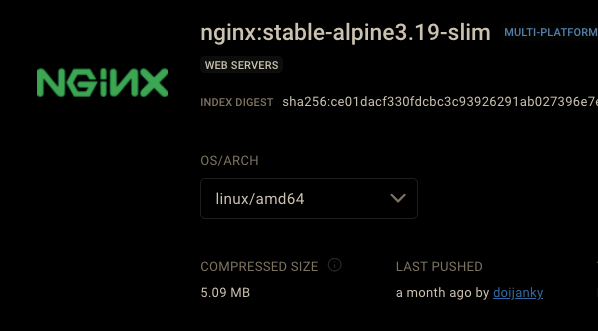
Although 5 MB seems low we can reduce the size further down by creating a Web Server image from scratch with only the necessary features for serving static content. With this we can save a lot on image pull/push bandwidth as well as the storage space for said docker images. The little gains that the low image size provides will add up to a lot in the long run.
Now let's get started building it.
Pre-Requisites
- A machine capable of building docker images
- Docker Daemon
Building it
To do this, let's understand the process we'll go through first. Here's an image showing the basic constituents of our final container image.
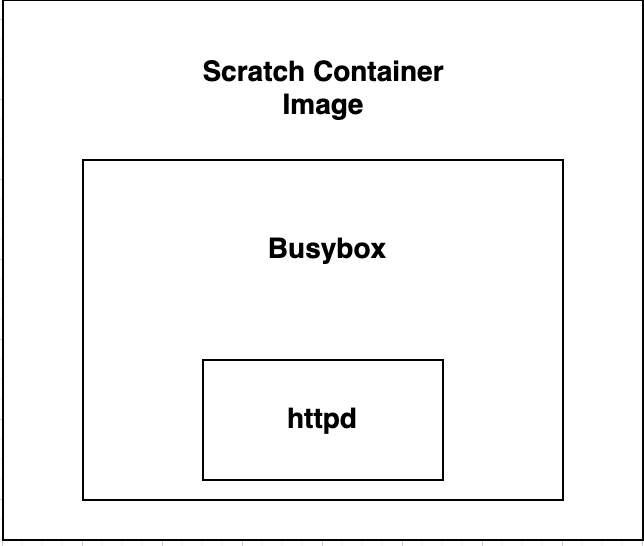
The major component of our image will be the scratch image which is a vaccum image that we can use as our base image. Busybox is very essential to our build here because it houses some of the commonly used unix tools and fortunately includes httpd as well. So we'll simply enable httpd and required features in busybox and use the compiled binary as our webserver.
Our final build will consist of the binary as well as an example static file which will be displayed upon visiting the Web Server's address.
Configuring Busybox
First configure busybox, follow the steps below.
git clone git://busybox.net/busybox.git
cd busybox/touch .config
make allnoconfigA config file will now be generated, looks something like this.
#
# Automatically generated make config: don't edit
# Busybox version: 1.37.0.git
# Fri Jul 19 08:08:33 2024
#
# Networking Utilities
#
# CONFIG_FEATURE_IPV6 is not set
CONFIG_HTTPD=y
CONFIG_FEATURE_HTTPD_PORT_DEFAULT=80
# CONFIG_FEATURE_HTTPD_RANGES is not set
# CONFIG_FEATURE_HTTPD_SETUID is not set
CONFIG_FEATURE_HTTPD_BASIC_AUTH=y
# CONFIG_FEATURE_HTTPD_AUTH_MD5 is not set
# CONFIG_FEATURE_HTTPD_CGI is not set
# CONFIG_FEATURE_HTTPD_CONFIG_WITH_SCRIPT_INTERPR is not set
# CONFIG_FEATURE_HTTPD_SET_REMOTE_PORT_TO_ENV is not set
# CONFIG_FEATURE_HTTPD_ENCODE_URL_STR is not set
CONFIG_FEATURE_HTTPD_ERROR_PAGES=y
CONFIG_FEATURE_HTTPD_PROXY=y
CONFIG_FEATURE_HTTPD_GZIP=y
CONFIG_FEATURE_HTTPD_ETAG=y
CONFIG_FEATURE_HTTPD_LAST_MODIFIED=y
CONFIG_FEATURE_HTTPD_DATE=y
CONFIG_FEATURE_HTTPD_ACL_IP=y
...
Busybox Makefile config, with only some httpd features enabled
This file is around 1200 lines long and adding it all here would be redundant, so I have only kept the parts important to us in this article.
Now, let's compile the binary,
make && make installmake -j && make install -jThis binary will be placed by default at _install/bin/busybox
Now test it by running the command below,
cd _install/bin && ./busybox httpd -p 8980Oneliner to test the compiled busybox binary
Check if the server is actually running by checking if the ports in use with the netstat -tulnp command. If you run the busybox command again you will be greeted with a bind address already in use error.
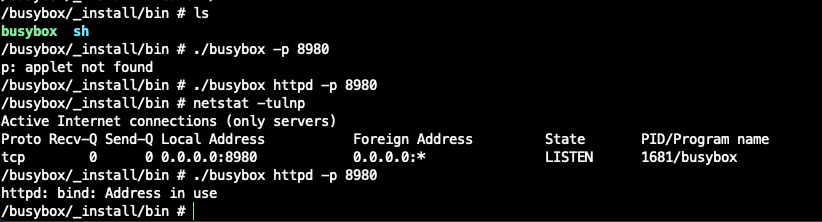
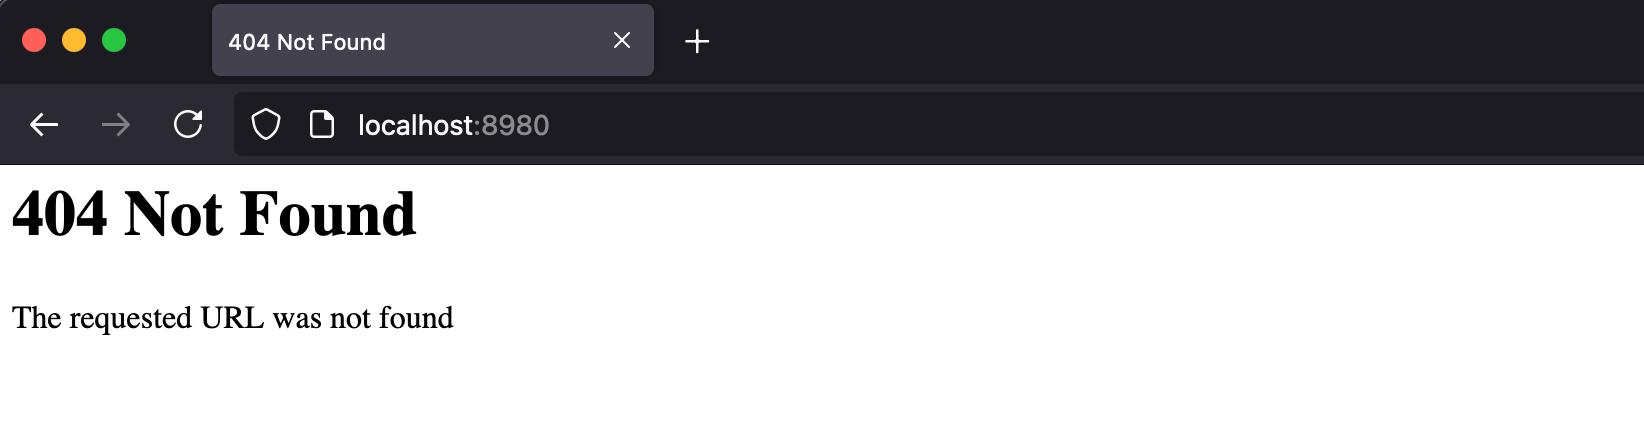
If you try to access the Web Server at http://localhost:8980 a 404 page will be displayed.
Creating the Docker Image
Now, let's create a Dockerfile using the the steps we used above. We'll also require a httpd.conf file, create an empty file in the directory.
touch httpd.confhttpd.conf file the container image will exit silently without during runtime without any errors or warning.FROM alpine:3.20.2 AS base
RUN apk add --no-cache gcc musl-dev perl git linux-headers make
FROM base AS build
RUN git clone https://github.com/mirror/busybox.git
WORKDIR /busybox
COPY busybox-httpd-config .config
RUN make -j && make -j install && adduser -D static
FROM scratch AS final
WORKDIR /home/static
COPY --from=build /busybox/_install/bin/busybox /busybox
COPY --from=build /etc/passwd /etc/passwd
COPY httpd.conf /httpd.conf
CMD ["/busybox", "httpd", "-p", "80", "-v", "-f", "httpd.conf"]
EXPOSE 80
USER staticDockerfile for building static content server
Finally, build the static content server with the command below,
docker build -t static-image-server:v1 ./ -f DockerfileThe final image size has come around to 199 KB.

Also Read: Build your own Nginx Web Server
Serving Static Content
Now, to serve our static content we'll use this Docker image as our base image and copy our static files inside the container. After that we're good to go.
For this test create a example index.html file.
<!DOCTYPE html>
<html lang="en">
<head>
<meta charset="UTF-8">
<meta name="viewport" content="width=device-width, initial-scale=1.0">
<title>Site</title>
</head>
<body>
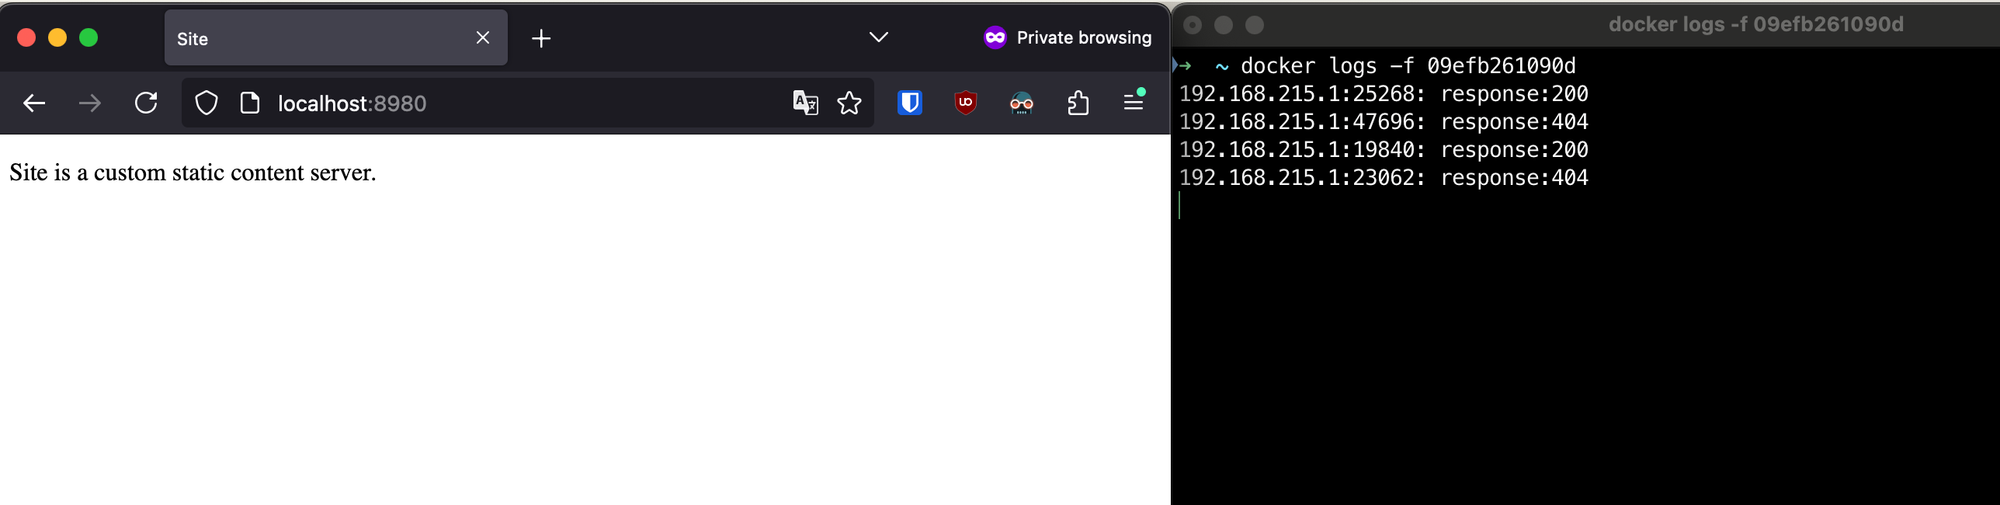
<p>Site is a custom static content server.</p>
</body>
</html>Contents of an example file (index.html)
FROM static-image-server:v1
COPY index.html /home/static/index.html
Dockerfile for hosting static content
Now, let's build it using the command,
docker build -t static-host:v1 ./ -f DockerfileBuilding the container image with the index.html file
Now, we run it using the following command,
docker run --rm -p 8980:80 static-image-server:v1 Running the container
Once the container is started, it should be accessible at http://localhost:8980 . One thing to note is that this container cannot be killed with the CTRL+C TERM signal, as it does not handle the signal properly. You'll have to manually stop it using either docker stop container_id or if you want it gone instantly, use docker kill container_id .
Conclusion
In this article we've learned about static content, where it can be hosted, and how we can build our own content server with a very small storage footprint. It will definitely help conserve container registry traffic bandwidth in the long run.
Thank you for reading.