
A Pen Tool is a basic and simple tool which allows you to draw points and connect them with a line or a curve. It only requires clicking and dragging the mouse. It can be used for various design tasks like making selections and creating custom complex shapes.
The Pen Tool creates vector paths instead of rasterized pixels. This makes it easier to edit the designs made with this tool. It helps to create designs with shapes, select and cut out parts of an image and combine different images. This tool is also available in other graphic designing software. Adobe Illustrator also has Pen Tool, which works similarly. Once you know how to use this tool, you will be able to use any variation of this tool in other software.
Pen Tool and its Uses
Before learning about the tool, let me explain the things it is used to create.
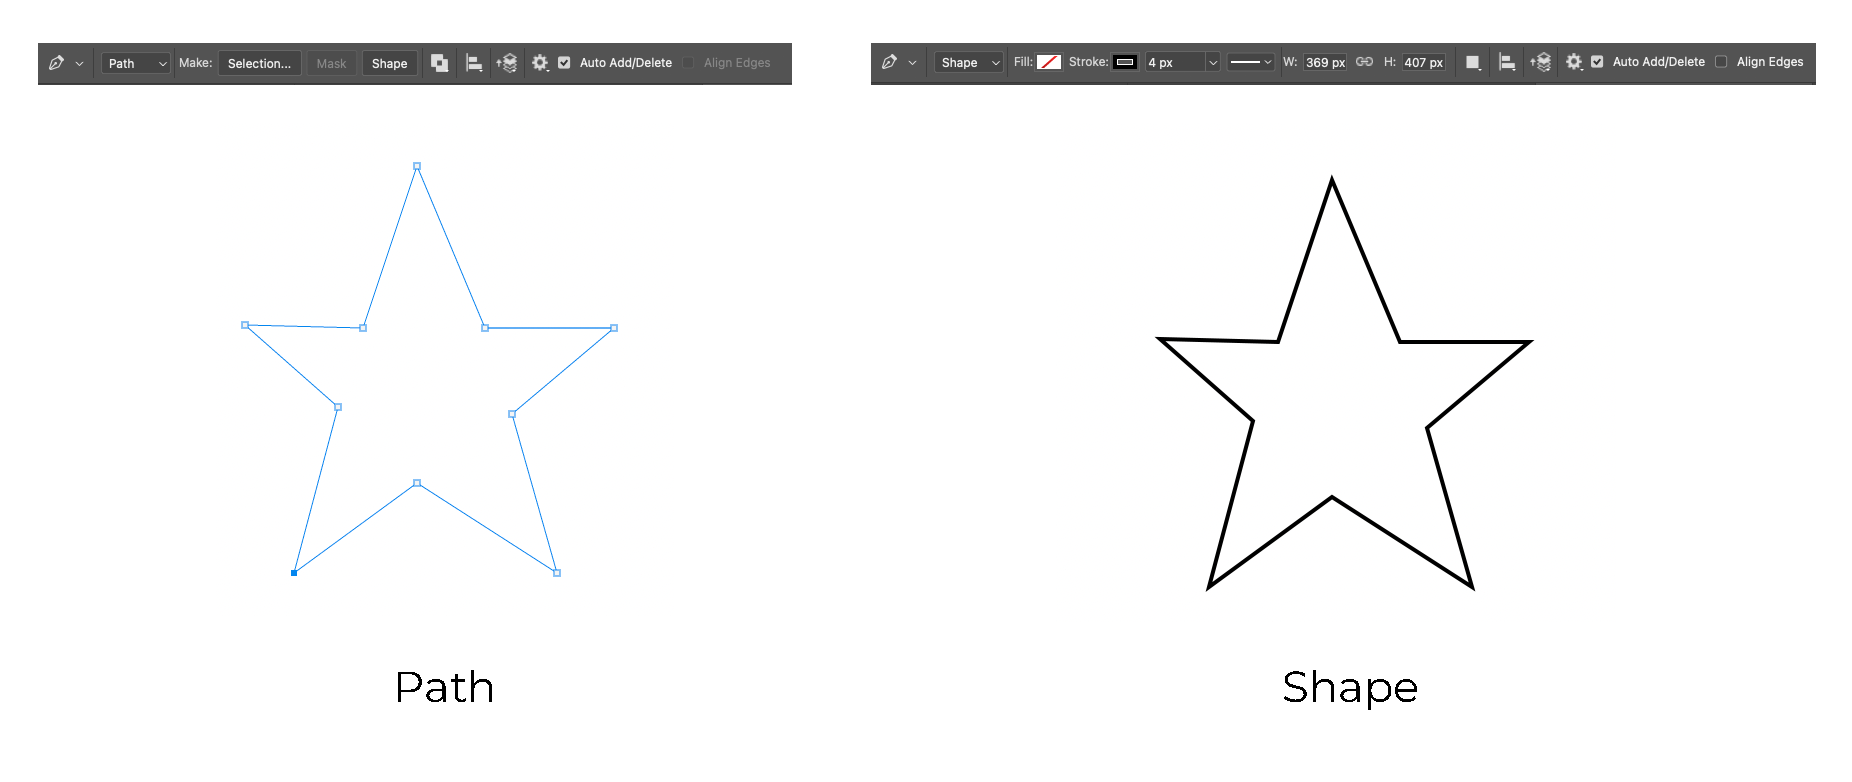
- Paths: They are editable vector lines without thickness. You can do many things with it, like convert it into selection, shapes and masks. You can also change its colour and stroke thickness. Unless it is converted into something else, paths will not be visible when exporting or printing your document.
- Shapes: These are vector objects that will retain their quality even if resized multiple times. Unlike raster objects made with the Brush Tool or the Pencil Tool, the edges of this object will always remain sharp when it is transformed. You can always change its fill layer, stroke colour and thickness. You can also move, add or remove its points or corners to change its shape.
Tool Location and its Types
The Pen Tool is located in the lower part of the toolbar. It has an icon of a fountain pen. Right-clicking on it will reveal three different types of pen tools and three tools to modify the points made by the pen tools.
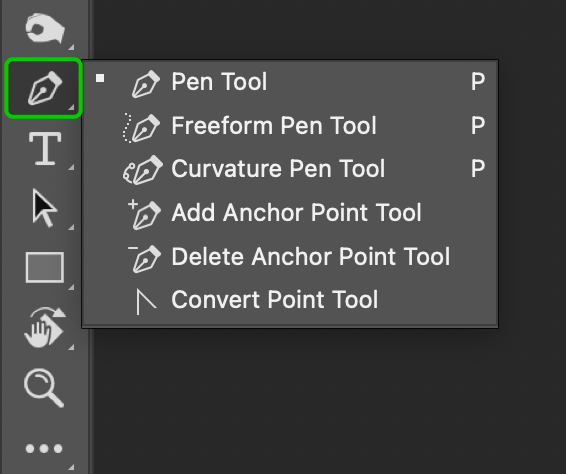
- Pen Tool: This is the standard pen tool similar to the tool in Adobe Illustrator. Paths, selections and shapes are created by clicking and connecting the points.
- Freeform Pen Tool: You can freely draw with this tool to create paths. Clicking the Magnetic option on its options bar will make it into the Magnetic Pen Tool. While holding and dragging the mouse button over an image, it automatically detects the differences in the colour pixels and allows one to trace it with a path.
- Curvature Pen Tool: This tool works the same way as the Pen Tool, but while connecting the points, it creates curves instead of straight lines. This tool can be used for making circles or shapes with round corners.
- Add Anchor Point Tool: It is used to add new points to the existing path. Once you have created a path with the pen tools, simply click on the part of the path where you want to add a point.
- Delete Anchor Point Tool: It will remove the points from a completed path. Click on the points with this tool to delete that point.
- Convert Point Tool: After creating a path with the pen tools, using this tool on a curved corner will convert that corner into a sharp corner and vice versa.
Using the Pen Tool

The above image shows the basic use of the Pen Tool. Select the Pen Tool and click on point A first and then on point B. This will create a straight path. While clicking on point B, hold the left-click mouse button and drag it down to create a curve.
Pen Tool in Complex Selection
We will use the Pen Tool to create a complex selection.
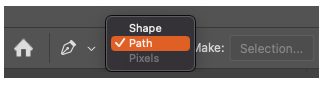
Step 1: First, click on the standard Pen Tool or press P.
Step 2: Select Path from the drop-down menu in the Options bar.
Step 3: Choose a place on the image to begin the path and click on it with the Pen Tool. This will create the starting point of the path.
Step 4: Keep clicking more points along the part of the image you want to select. Do not create many points close together. Keep the points to a minimum distance for efficiency. It will also be easier to edit in the future. Place the points at the start and end of the curves/angles or straight lines.
In the below image, I clicked the anchor points with the Pen Tool from A to B.
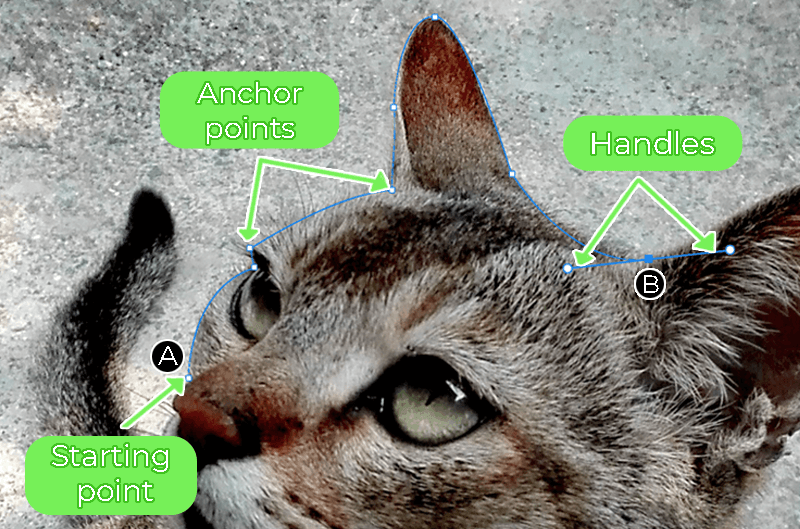
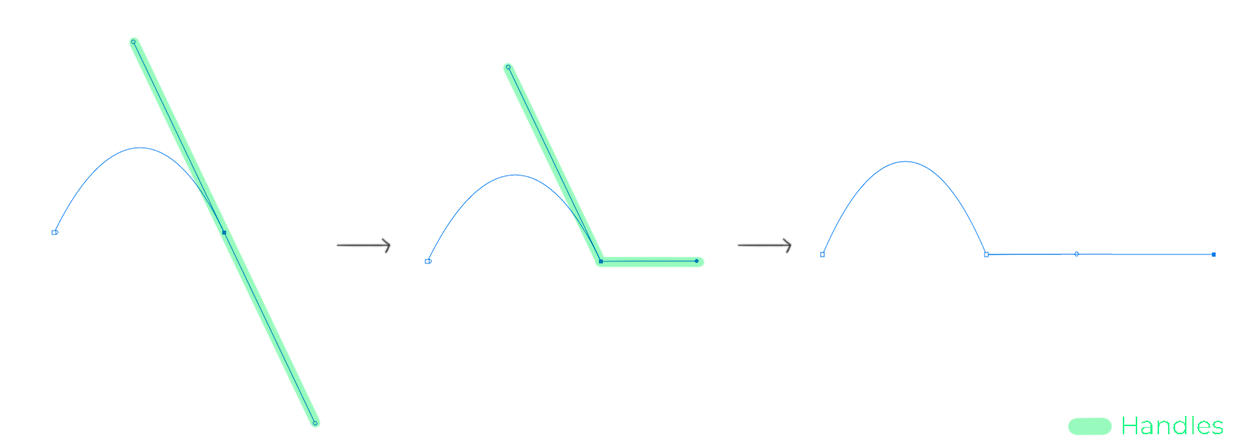
Step 5: Click and drag to create a curve. You will see two extra lines appear called handles. Let go of the mouse button to stop controlling the handles. If you rotate the handle, the angle of the curve will be changed. Dragging the handle to make it longer or shorter will change the intensity at which the angle of the curves is made.
Step 6: Hold Command (Mac) or Ctrl (Windows) and click on the existing points to edit its handle. This helps to change and move the existing curve.
Step 7: Hold Option (Mac) or Alt (Windows) to move the handle and left-click on the second part of the handle to remove it. Without two handles, the line will have a straight sharp edge. A straight angle in the handle makes a smooth curved line. If the handle is broken, it will create a sharp edge. The handle closer to the existing line controls that line, whereas the other part of the handle influences the upcoming curve.
Step 8: Reach the starting point to complete the path.
Step 9: Click on the Paths window. This window will show the completed path.
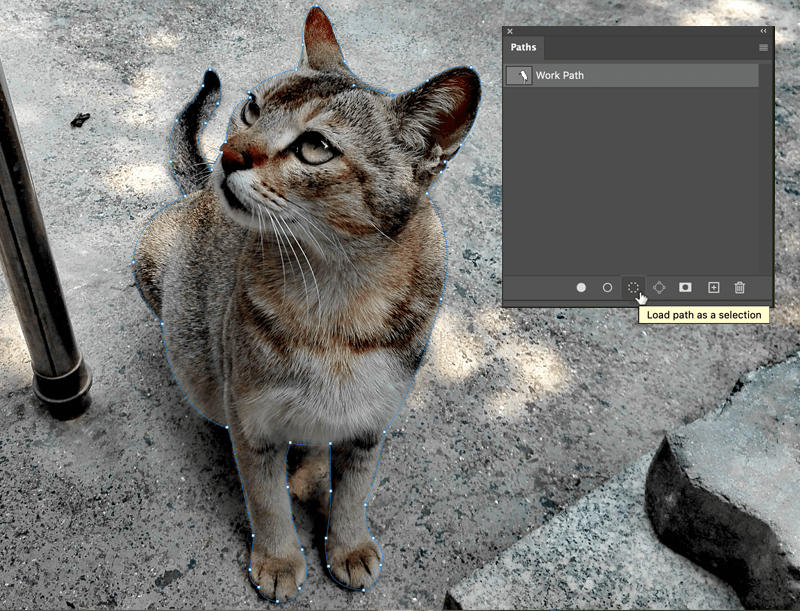
Step 10: Click on Load path as a selection (the dotted circle icon) at the bottom of the window to convert the path into a selection. You can right-click on the path and select Make Selection. You can also click on Selection from the Options menu bar at the top.
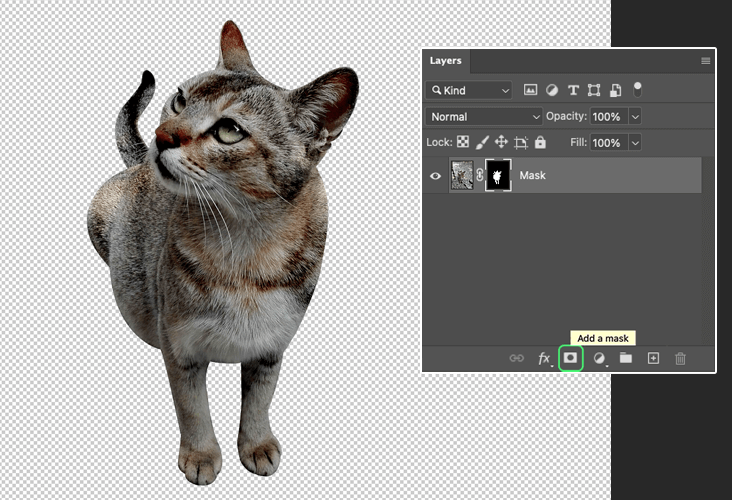
Step 11: Go back to the Layers window and click Add a mask button to create a mask from the selection.
The Pen Tool can help create amazing shapes and paths and easily create complex selections, but it might take practice to master and become proficient in it. You can easily edit the paths and shapes made with the pen tools.
Thank you so much for reading this article. Hope you found this guide to be helpful.