
I finished developing my Flutter app and wanted to test it on iOS. Using a Mac laptop, I installed everything. However, when I ran the command 'Flutter build iOS', I received this error when launching lib/main.dart in debug mode on my iPhone 14 Pro Max.

I added the pod GoogleMLKit/FaceDetection to my project's pod file in the iOS folder. However, they required a higher deployment target for iOS deployment, resulting in the above error message.
Before I added the GoogleMLkit plugin from the pub.dev to use it on human face detection, my application performed well on Android and iOS devices. Google's ML Kit Face Detection is a package that can find faces in an image, identify important facial characteristics and get the outlines of found faces.
The Problem
This is a CocoaPods error in Flutter in Android Studio on M1 Mac. I needed help resolving this error, so I attempted to read the error message multiple times. I tried other methods from various online resources. But, in the end, I solved those issues by merging many solutions I found on Stack Overflow and other resources.
The Solution
Step 1: Adding Platform iOS
Before installing CocoaPods and pod, I added platform iOS on my project Podfile inside the runner of iOS folder as:

Step 2: Installing Gem Cocoapods
I installed the Gem CocoaPods on the project by this command on the android studio terminal:
gem install cocoapods
If you have already installed Gem CocoaPods, deintegrate by using the given command.
gem install cocoapods-deintegrate
Step 3: De-integrate Pod
Run the following command if you de-integrated CocoaPods.
pod deintegrate
Step 4: Installing Pod
Now, install the pod from the iOS folder in the following steps.
Step 4.1
Go through the command line or GUI to open the terminal inside the iOS folder.

Step 4.2
Right-click on the iOS folder.
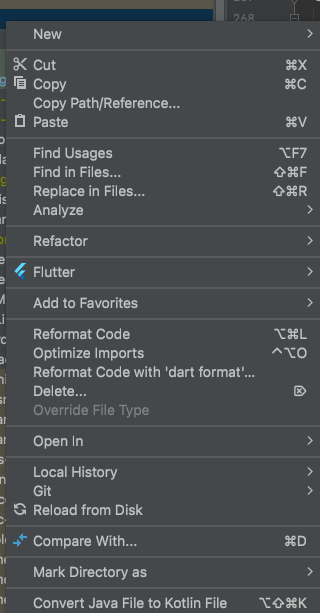
Step 4.3
After finding this screen, click Open in > Terminal.

Step 4.4
Now, you are inside the iOS folder on the terminal. Check and install the pod using the following command:
pod installI got a warning message on the terminal after installing the pod because I customized the configuration on the pod file before this process.

Why Do CocoaPods Complain?
If you add a custom build configuration to your existing project, CocoaPods will complain about it. As I already had a pod configuration, this happened to me. This made it possible to choose the appropriate configuration files for the base configuration.
We know that CocoaPods creates xcconfig files under the iOS folder directory. We must ensure that adding those files to our project in X-code is under the pod's directory.
Pods/Target Support Files/<build_target>
Naming pattern as Pods-<build_target>.
<build_config>.xcconfig.
you are also able to find xcconfig file from double tap of shift.How to Find the Info File on X-code?
After you've added those files, open your project in X-code from the IDE (Android studio) file. Go to the Info tab, and expand your custom configuration. Choose the correct xcconfig file for each target in your custom configuration.

This message is located inside your info.plist file or podfile (in the right corner). You can go through this Open iOS module in X-code, and then you are in.
Changing iOS Deployment Target Version
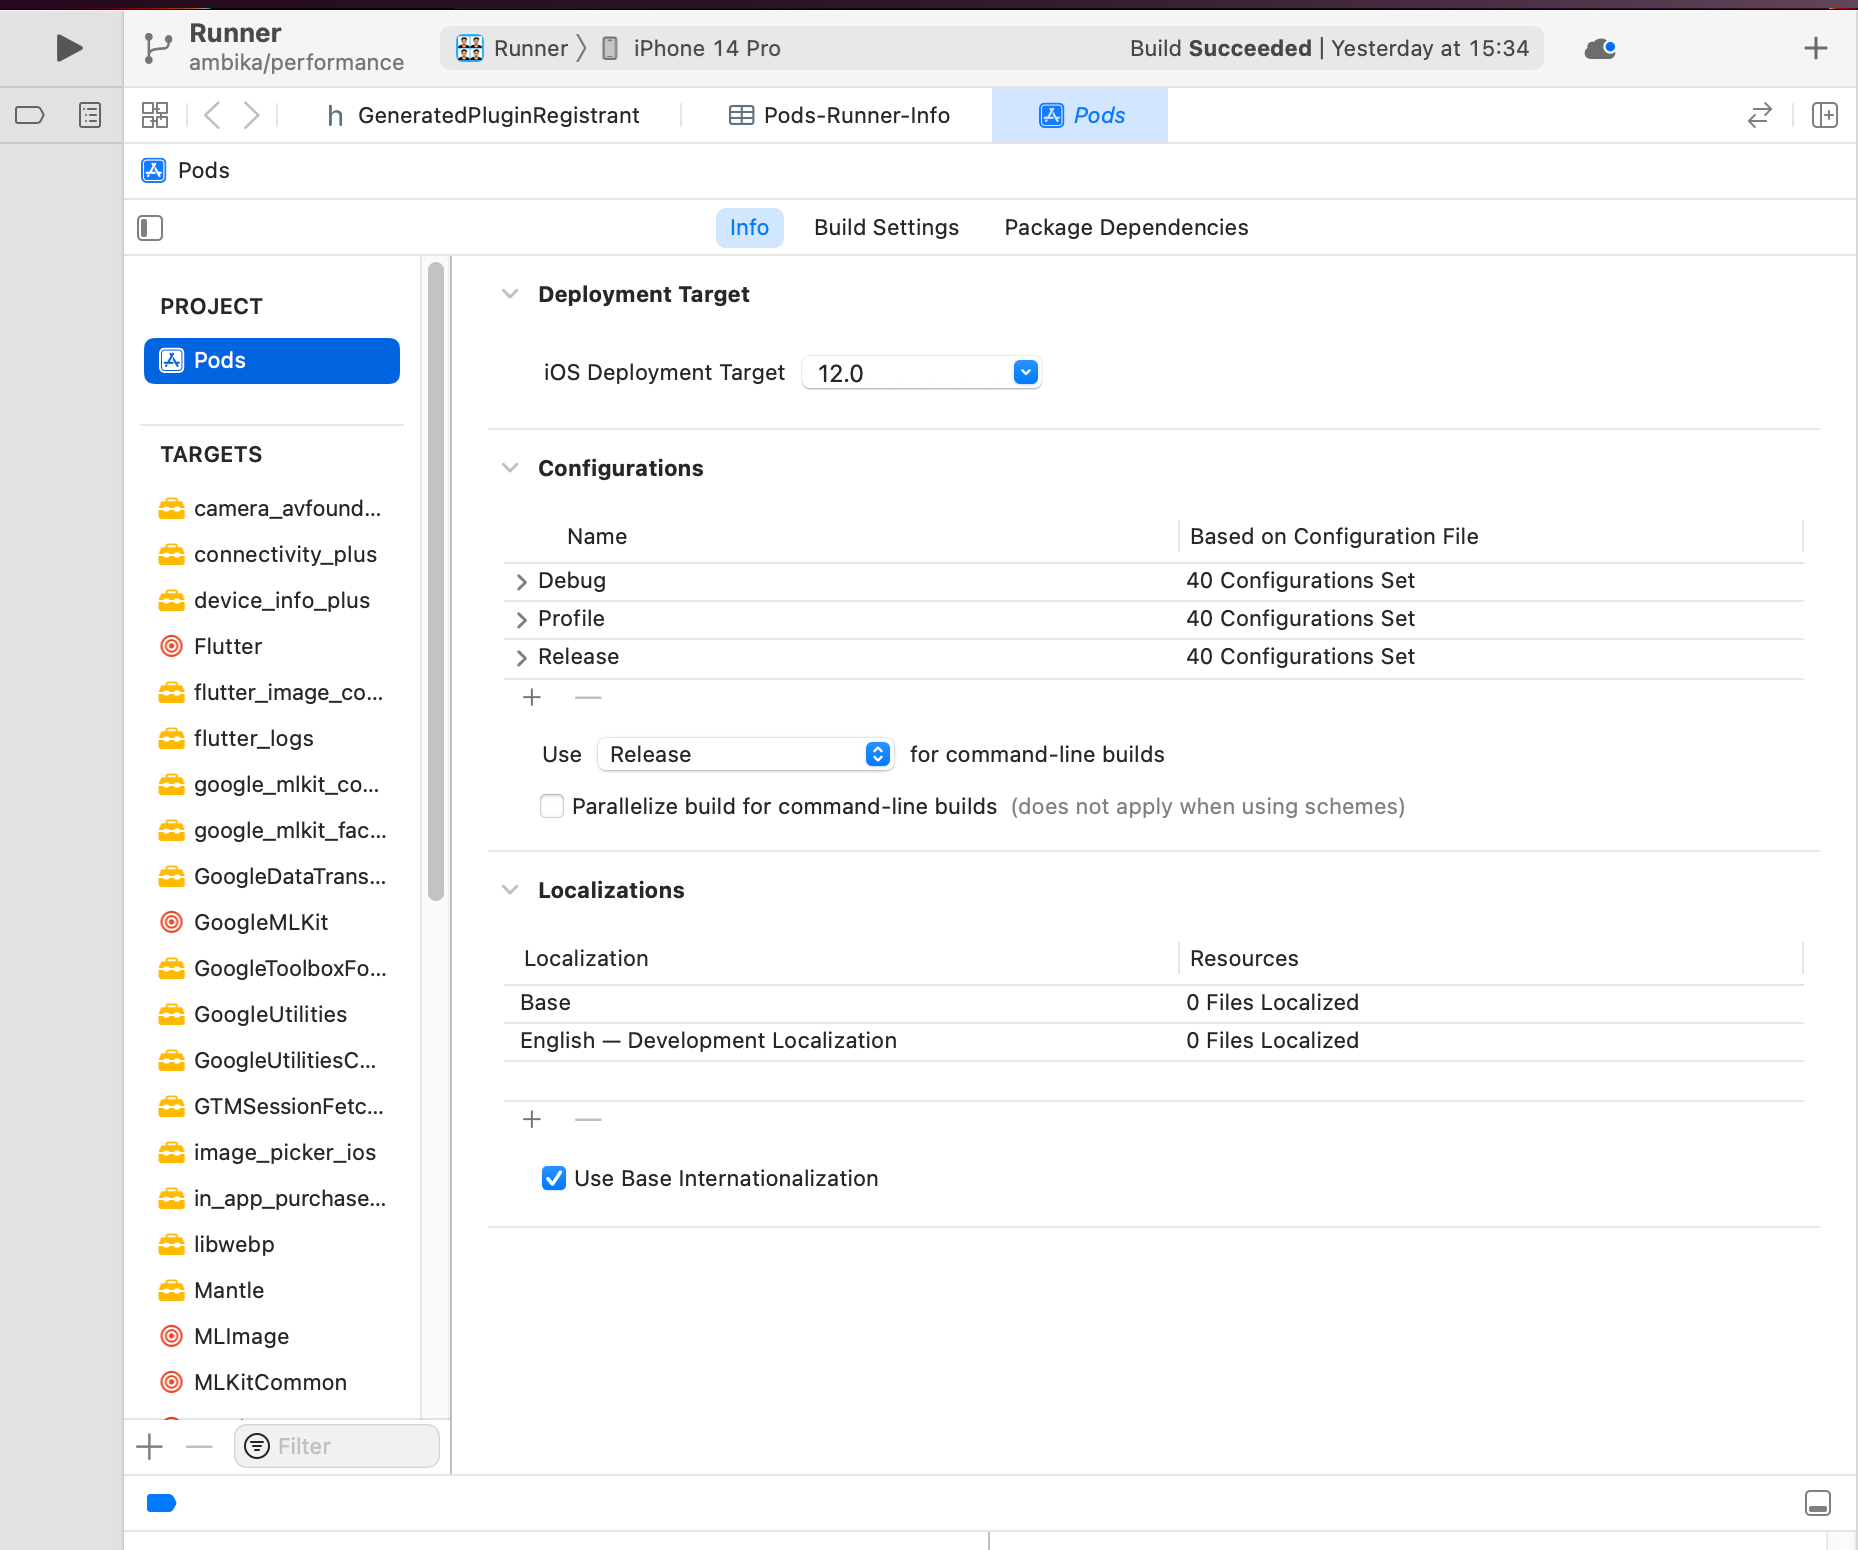
After you find this screen, change your iOS Deployment Target version and the dependence shown in the terminal message, which is required for your project. Check the project status as well.
If any iOS Deployment Targets are missing or remaining, click the run button (▶ button) from the top left corner of the X-code screen for confirmation. If it shows an error and needs changes, follow a similar way again by applying changes and finishing it. After resolving all the above-mentioned processes, try running the project on the simulator and testing the status.
Our Podfile GoogleMLKit/facedectection also includes a lot of other things. Like permissions required in the project, target configuration, and Flutter root-related generated X-code build setting path.
Additional Solution
If necessary, remove Podfile.lock from the project before running the app as X-code generates the podfile.
If you still can't find a proper solution to your problem, you can explore the steps and handle it your way.
Before you begin, download and install X-code on your Macbook. Select simulator devices, and verify that the device is visible in Android Studio and Vs-code.
FirebaseMLVision and GoogleMLKit
For instance, FirebaseMLVision contains the functions of Flutter iOS podfile setup, and Flutter installs all iOS pods, none of which are declared in this podfile. Since the historical FirebaseML did feature Flutter, which we no longer support, certain Flutter-related stages may pull in the FirebaseMLVision.
You shouldn't combine the legacy FirebaseML Flutter with the new GoogleMLKit. There are so many different ways to solve these issues. You can try various ways and read other resources too.
Lastly...
I hope you can solve any related issues with the help of this article. Even if it seems difficult, try combining different solutions and forming different strategies, as that's how I found a solution myself. Rely on different sources and do your own additional research if needed.
If you have any problems or queries, feel free to comment below. Subscribe for more!