
Adobe Photoshop has a wide range of photo editing and drawing features. But it is also capable of animation. Many tools are specifically made for animating, like Toon Boom, Adobe Animate and Adobe After Effects, which are better and specifically made for animations and videos. But if you are already used to working in Photoshop, you do not need to get that software to start with simple animations. Animating a simple ball bounce in Photoshop is a great way to start and explore the basics of animation. This will help you to understand the steps and tools.
Setting up the project
Creating a file is simple in Photoshop. Setting up the Photoshop file at the start will be helpful in the long run. If you make the animation in a small file and need to change the dimensions, the quality will be decreased significantly.
- First, go to File > New. A New Document panel will pop up.
- Select the Film & Video tab at the top of the panel.
- For this tutorial, pick HDTV 1080p. This document will have 1920x1080 px dimensions and 72 ppi.
- Click Create to get started.

Working with the Timeline panel
The Timeline is one of the most important tools for animation. This panel might not be active when you open Photoshop. You can make it appear by clicking Window on the menu bar and selecting Timeline. After that, click on Create Frame Animation in the Timeline panel.

Before starting, make sure some basic settings are adjusted. Click on the three-lined menu panel and select Set Timeline Frame Rate. I will be setting this to 24 frames per second for this animation. From the same menu, click on Panel Options and select Frame Number. Frame numbers will be easier to plan in animation.
Creating the Ball
Using the shape tools, draw a perfect circle on the canvas to represent the ball. You can hold the Shift key while dragging to maintain the aspect ratio and create a perfect circle. Customize the size and colour of the ball to your liking using the fill option in the menu bar.
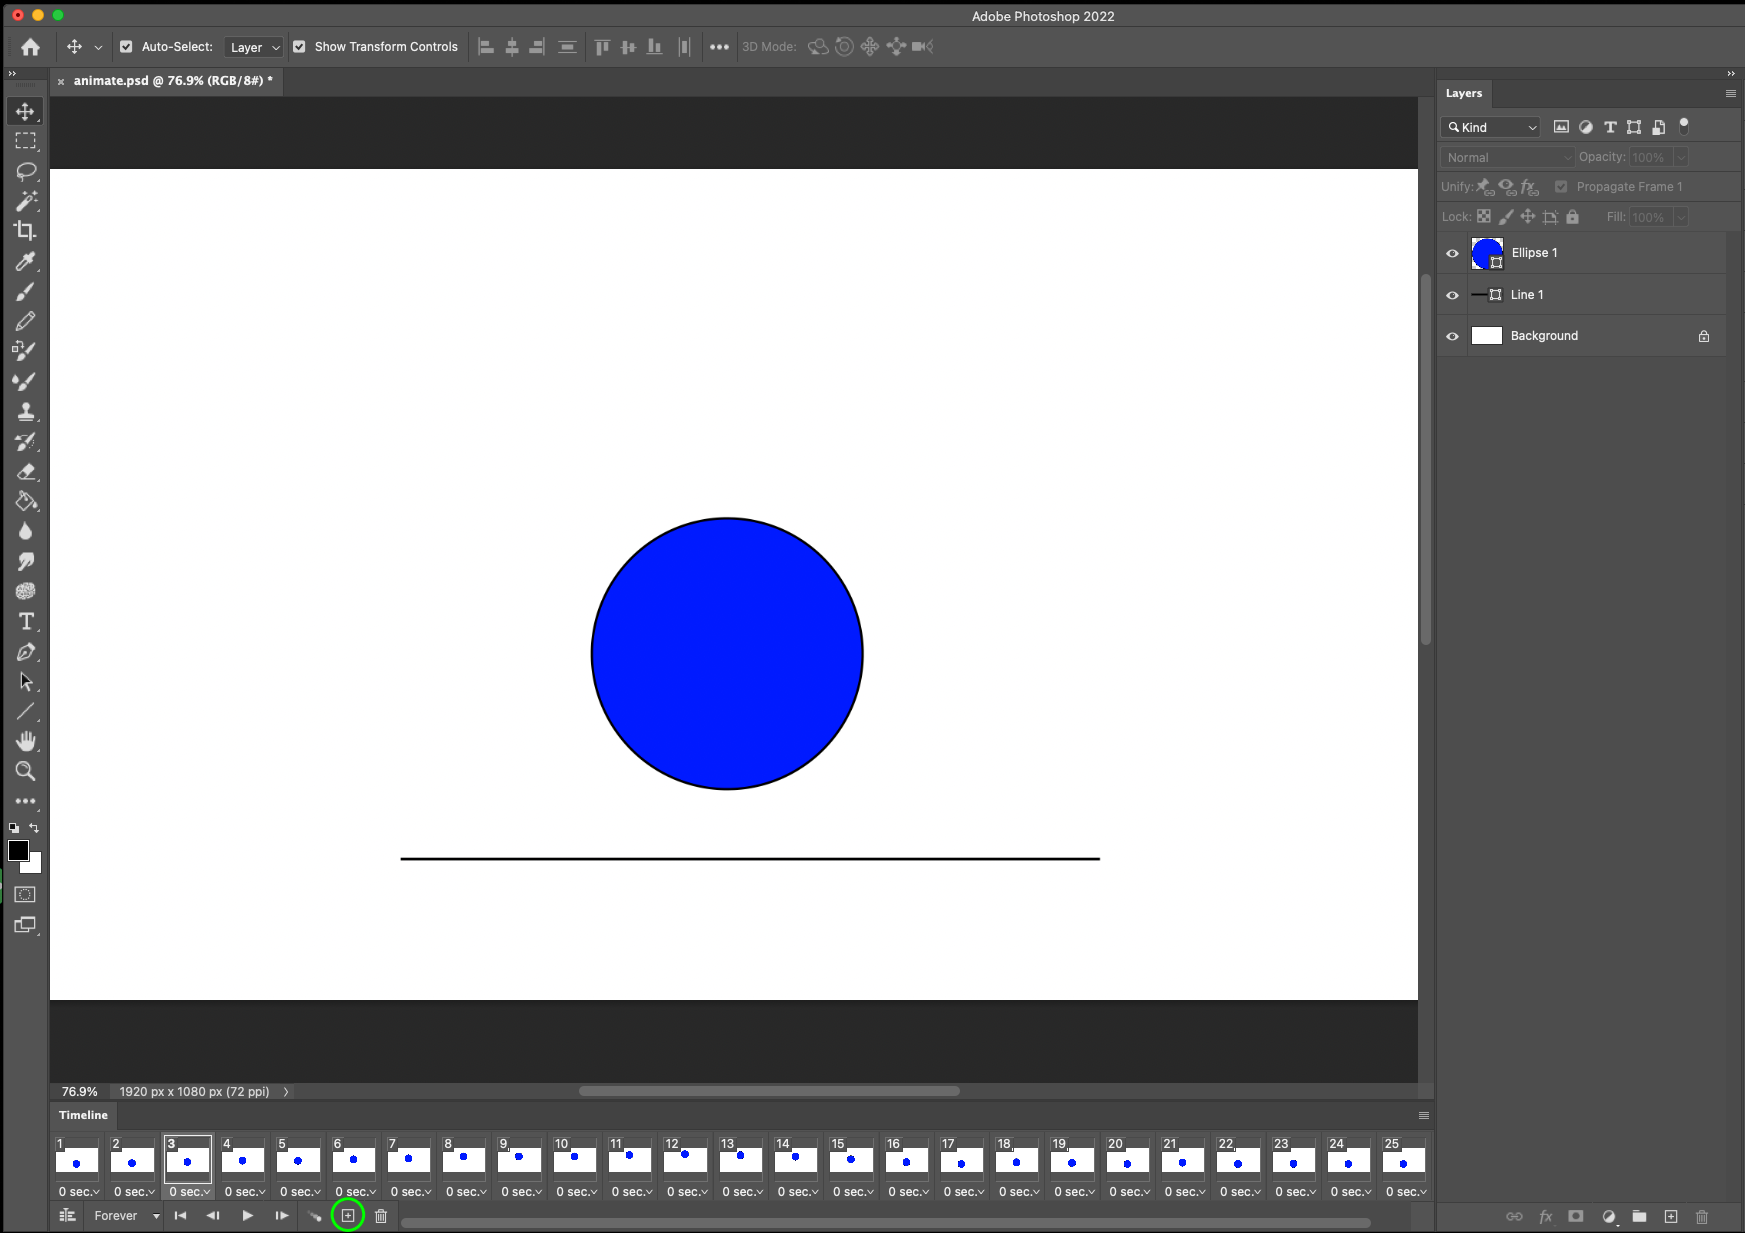
Select the first frame and click on Duplicates in the selected frame. In the second frame of the Timeline, select the ball layer and move it vertically up to simulate the ball's bounce. You can use the Move Tool (V) or arrow keys to achieve the desired position. Ensure the ball is positioned slightly above ground level and in a different position than the last frame. Repeat this process until you have enough frames to complete the animation. The more frames you add, the smoother the ball's bounce will appear.
To give the animation a more natural bounce effect, we can also modify the timing and ease of the frames. Select "0 sec" for the frame duration. Then, increase the duration slightly according to your animation needs.
Once you have set up the animation, click the Play button in the timeline panel to preview your ball bounce animation. If adjustments are needed, return to the Timeline, fine-tune the frame duration and editions, or add more frames as necessary.
Export the animation
After you have completed the animation, you can export it by clicking File in the navigation bar. Select Export and then Render Video to open the Window. You can choose your desired name and destination. This will export your animation in mp4 video format.
You can export this animation as a Graphics Interface Format (GIF). This compressed image file format consists of a series of images played sequentially, creating an illusion of movement. Select Export and then Save for Web (Legacy) to do this. This will open a new window. Pick GIF and click on the Save button.
You can create captivating motion with your designs using the timeline and frame animation tools. Experiment with different properties such as timing, ease, and positioning to achieve desired effects. As you become more comfortable with Photoshop's animation capabilities, you can apply these techniques to more complex animations and excitingly bring your designs to life. This is my way of animating short and simple animations in Photoshop. If you are working with long and complex animations, I recommend Adobe After Effects, Animate and Toon Boom.
Thank you for reading this article. Please consider subscribing if you liked the article.