
Trim paths in After Effects is one of the most interesting ways to animate a vector line or path. It has wide use over lines, geometric shapes, offset animation etc., including Alpha Matte in further steps.
Trim paths helps us create an illusion of animation of objects without actually animating the object. For a more detailed reference, this blog will guide you through the process of creating a ribbon in Adobe Illustrator and creating an illusion of animation of the ribbon.
So, let's dive in!
Create Ribbon in Illustrator
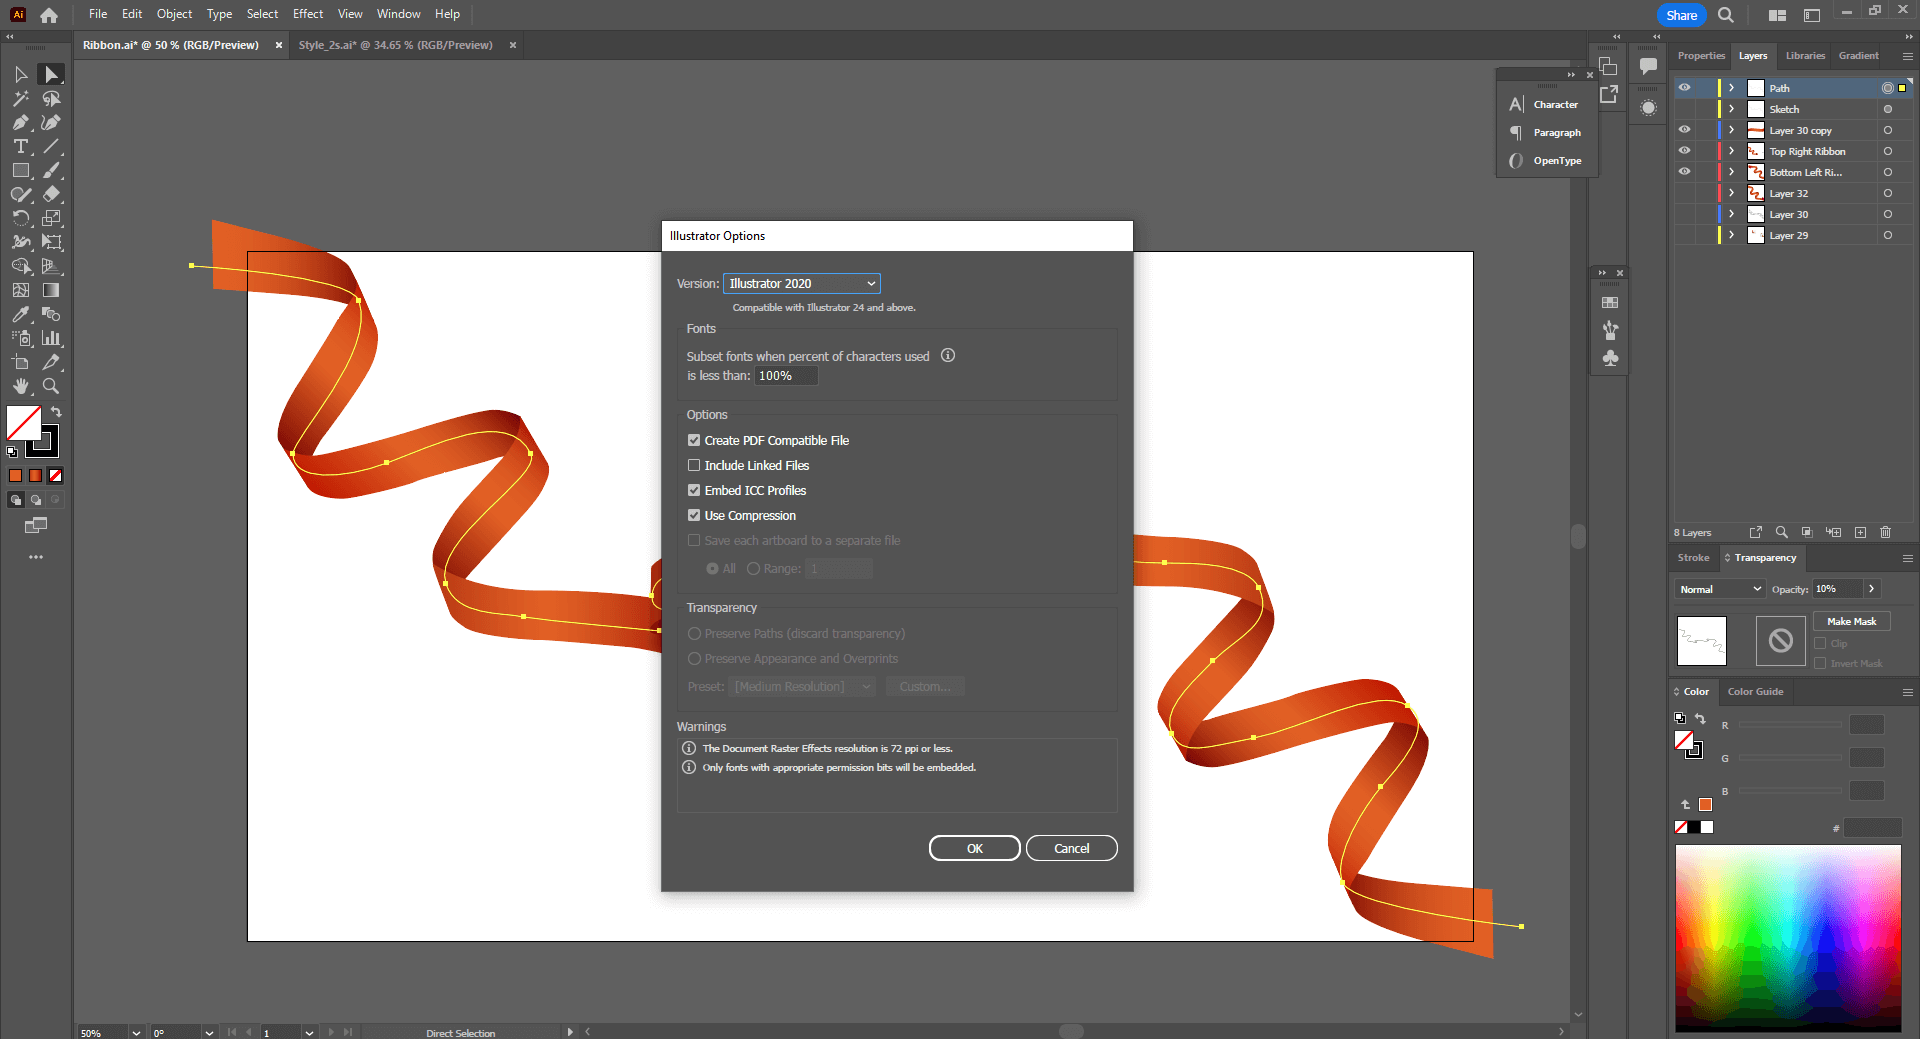
The most important step of this animation process is creating a perfect ribbon for illusion. Visualize the path of the ribbon and draft the path using the pen tool. We can take the references of ribbon from multiple images on the internet.

After the path has been drafted, complete the ribbon with gradients. We must mind the edges as they make the ribbon more distinctive and realistic. If you want to go with a flat style, putting less effort into the shadows might do the trick. Finalize the ribbon in AI format for further use in After Effects.


While saving the ribbon, save the previously drafted path, too, as it is the base path of the animation process ahead (along with all the ribbon layers necessary or appearing on the screen). However, we can also create ribbons directly on After Effects if that is your preferred way of illustrating or creating stuff.

Layer Setup in After Effects
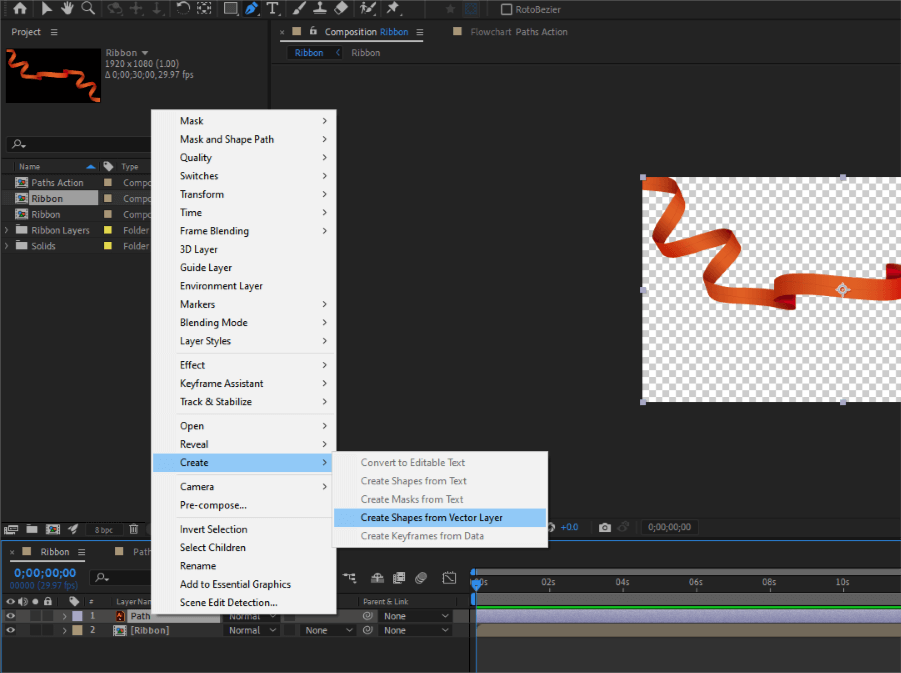
Import the ribbon file as a composition in After Effects to list out the layers and directly animate the individual layers. We can pre-compose the detail of the ribbon part to a single layer to make life easier during animation. To pre-compose, Select Layers > Pre-compose.

The path layer needs to be converted to a shape layer for the trim paths feature, which is found inside the shape attribute. To convert the AI file to a shape layer, right-click on Layer > Create > Create Shapes from Vector Layer.
Animate the Path in After Effects
Every stroke has its own path; thus, we can use these paths to draw out and animate according to our usage. For instance, we created our ribbon in Illustrator, starting from the top left of the artboard to the bottom right, along with the twist and turns in the middle way to give a feel of ribbon. Now, we can draw strokes using the path from anywhere within the path or top-left to bottom-right and vice versa.
The path layer, converted to the shape layer's stroke, can be used to animate the path. We can find the Trim Paths features as Shape Layer > Add > Trim Paths, or upon selecting the shape layer, we can see Add on the top toolbar palette.
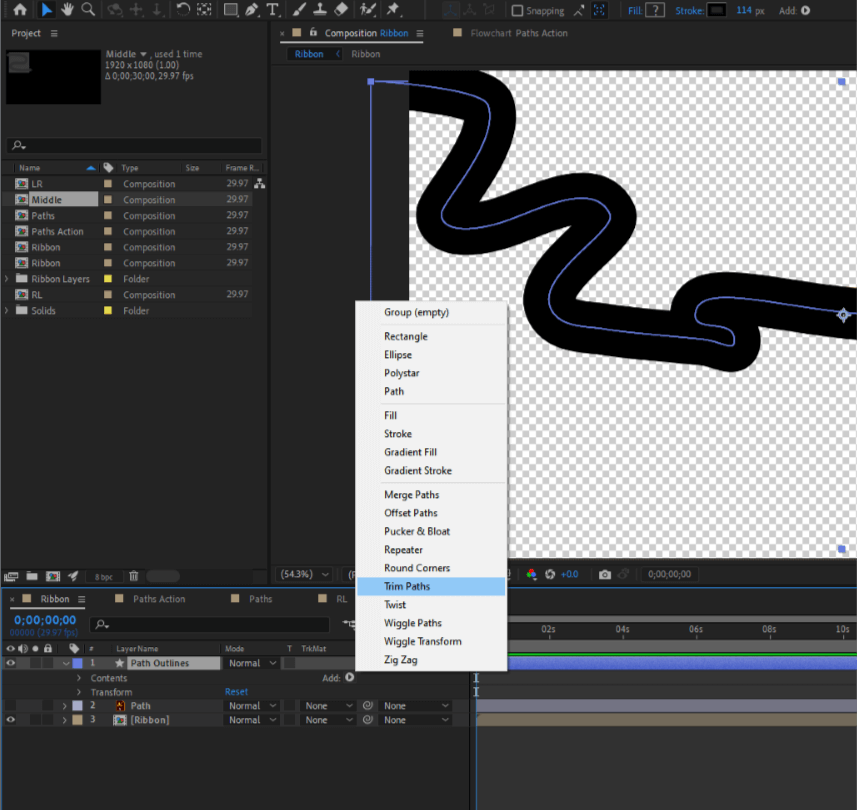
The Trim Paths feature offers us a start and end position for the path animation offset option for sliding the start point of the line to draw strokes from any position within the path. For now, we leave it to default, i.e., left to right. The steps then are as follows:
Step 1: Firstly, we set the start and end keyframe values to 0. Note that the end option keyframe should start after a while to give an illusion of movement to the ribbon.
Step 2: After two seconds, or your preferred duration, we add another keyframe to end the drawing animation. Here, we set the start and end keyframe values to 100 with the end keyframe placed after some time frame than the start keyframe.

Step 3: Select the keyframe and Easy Ease them for smooth animation. We can do it by selecting keyframes or pressing F9 or Right Click > Keyframe Assistance > Easy Ease.


Track Matte with Paths in After Effects
Next, we will use Alpha Matte for the masking purpose of the path with ribbon. Masking an object or layer with a pen tool might not always be the right option, especially when you want to mask the intersecting layers or vice versa. For this to happen, follow the listed steps.
Step 1: First, ensure the main layer, which acts as the masking layer, is on top of the content to be masked.

Path Outlines above Ribbon LayerStep 2: Select the Track Matte option to Alpha Matte on the layer to be masked. You can do it by clicking on the Track Matte dropdown > Alpha Matte “above_layer”.

Step 3: If the track matte column isn't visible, press on Toggle Switches/Modes at the bottom.

Now we can adjust the ribbon animation as we like, i.e., slow start, pause in the middle, and fast exit by playing with the keyframes as much as we want. Also, flow animation and gaussian blur effects can be added to the path layer for smooth edges of the ribbon to avoid rigid intersections.
Final Result
This is how the final fake ribbon animation video will look like:
Thanks for reading! Leave a comment and subscribe using either of the buttons below.