
Dynamic image carousels are an excellent way to add visual appeal and interactivity to your videos and presentations. One exciting project you can undertake in After Effects is creating a dynamic image carousel.
With Adobe After Effects, you can create stunning and customizable image carousels that showcase your photos or graphics in a captivating manner. Also, this tutorial will include tips to make some parts of the functionality more dynamic. I will walk you through the steps to create a dynamic image carousel, complete with adjustable settings for timing gaps.
Follow these steps to start creating your dynamic image carousel in After Effects.
Step 1: Setting up the Image Slider
Right-click in the Timeline panel and select New > Adjustment Layer. This layer will serve as the control panel for your carousel.
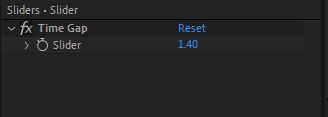
Open the Effects & Presets panel and search for Slider Control. Apply it to the adjustment layer. You can rename the slider as Time Gap.
Adjust the slider value as required for the time gap. We can increase using the slider or double-click on the slider value to edit it.
Step 2: Creating Image Holder Shapes
Now, let's create the shapes that will hold your images and arrange them according to the height gap set by the slider control.
Right-click in the Timeline panel and choose New > Shape Layer. This layer will act as the container for your images.
Using the shape-drawing tools (for example, Rectangle or Ellipse tool), draw several shapes or just Ctrl + D for duplicating shapes.
Each shape will represent the areas where your images will be displayed.
Step 3: Precomposing for Masking
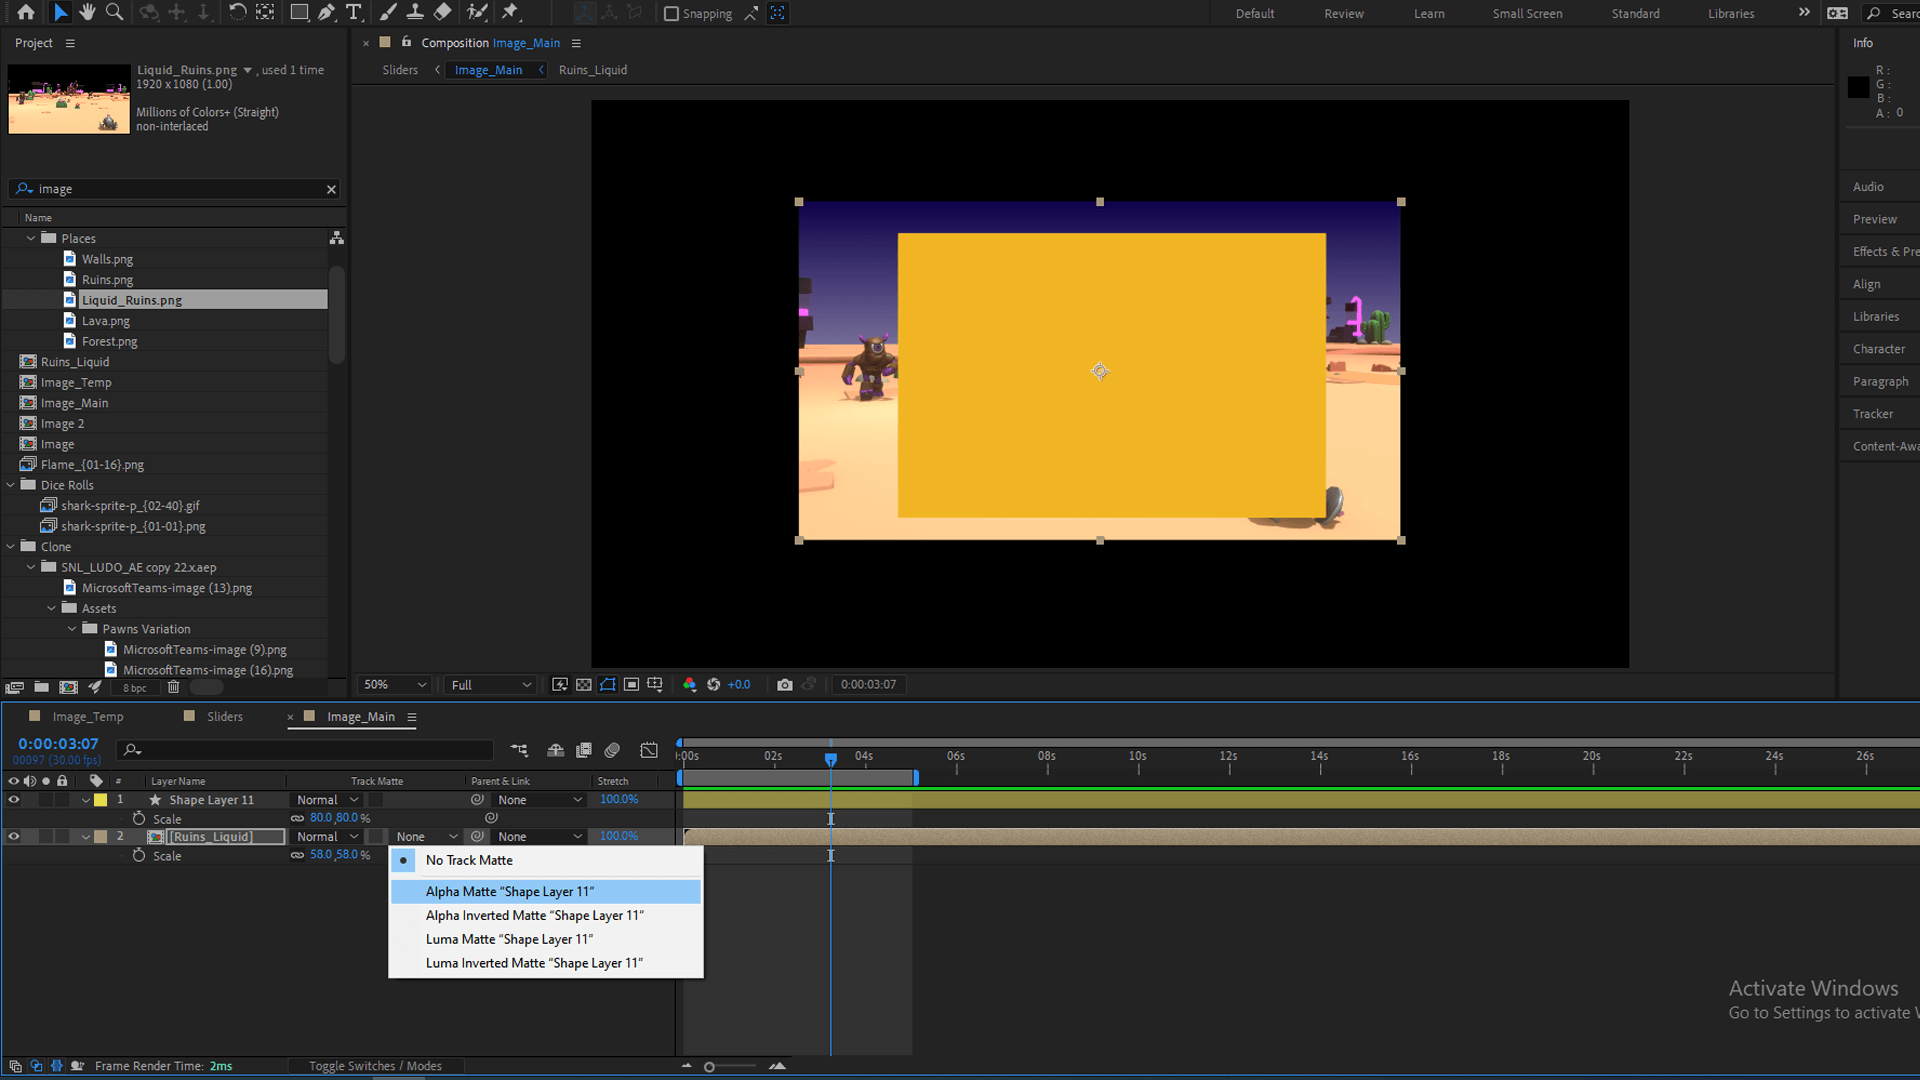
To create a masking effect for your images, precompose the shape layers individually.
In the Timeline panel, select the shape layers you've created one at a time.
Right-click on the selected layer and choose Precompose. This action will create a new composition containing only the shape layers.
Add the image you want to mask and work out inside the precomposition.
Place the image layer below the shape layer and mask it as Alpha Matte. This will mask the image as the shape above it. This process is done to avoid any keyframes issues on the position of shapes as of the main composition.
Step 4: Adding Keyframes for Animation
With the structure in place, it's time to animate your dynamic image carousel.
We will add a keyframe to only one precomp layer; others will follow these keyframes after a certain time frame.
We will perform the animation on the scale and position property of the precomp layer at the top of layers or for the precomp layer to appear first.
The animation will imitate a carousel, i.e. slides from the right, stops in the middle and scales big, slides to the left and scales down.
We'll add keyframes to animate the shapes horizontally across the composition, creating the sliding effect.
Ensure you adjust the timing of your keyframes to match the desired speed and direction of the carousel.
Step 5: Using valueAtTime for Timing Control
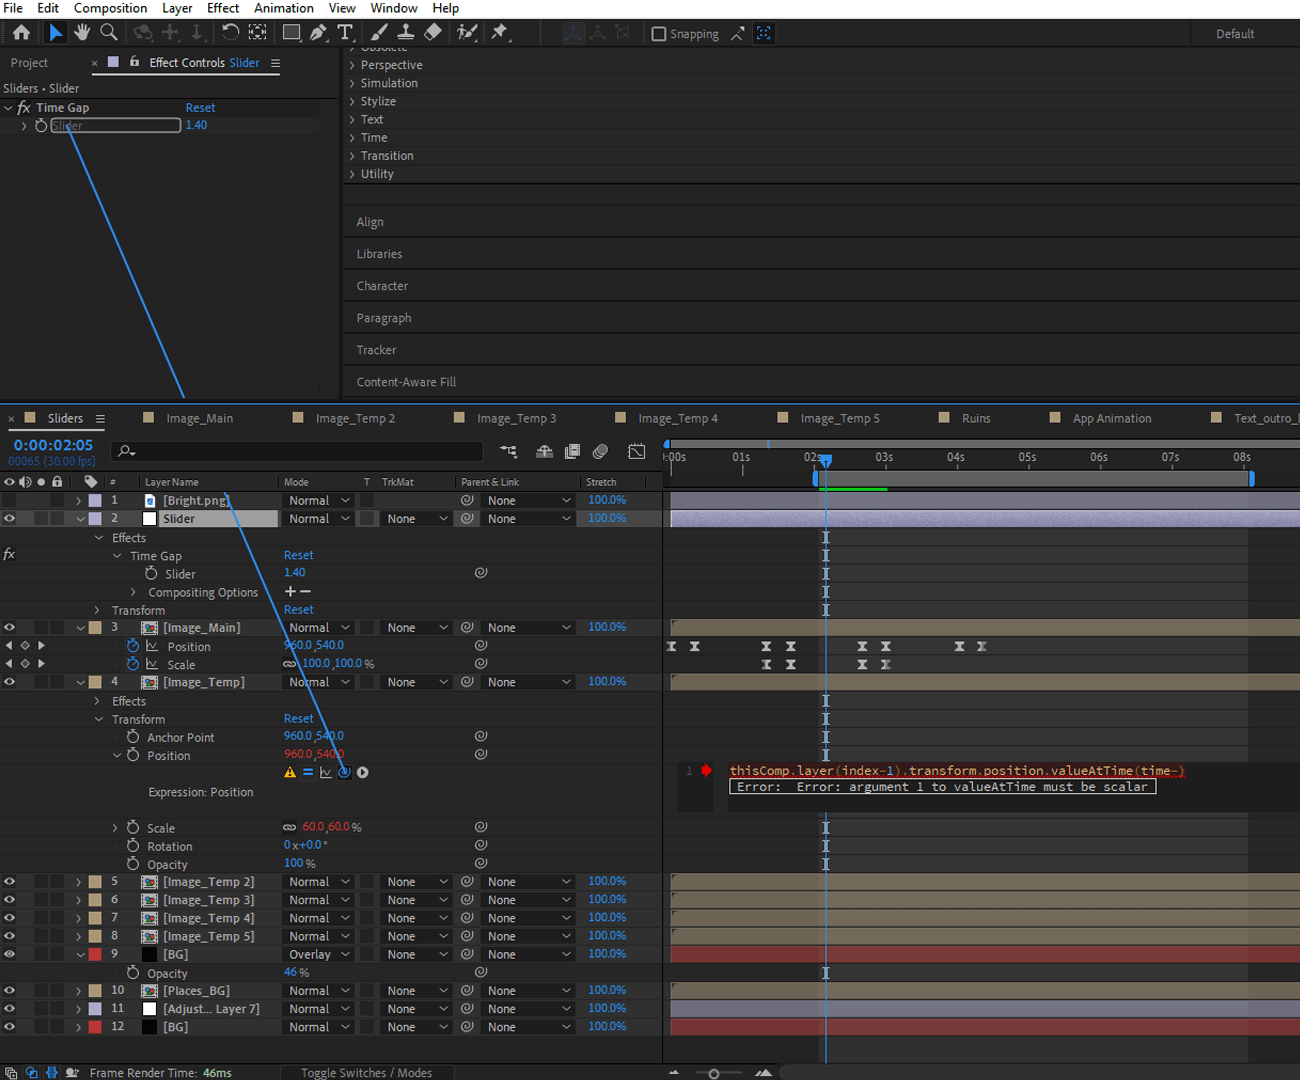
For precise timing control over multiple layers, you can use the valueAtTime expression on each precomp layer.
On position and scale properties of all the precomp layers except the layer which has the keyframe, we will add expressions to make the animation dynamic, i.e. controllable from sliders and only one layer.
Press Alt and Click on Position Stopwatch. This opens the Expressions editor.
Write an expression like this to control the timing of the position of each shape layer:
thisComp.layer(index-1).transform.position.valueAtTime(time-thisComp.layer("Slider").effect("Time Gap")("Slider"))This expression calculates the position of each shape layer based on the current time and the index of the layer, taking into account the time gap specified by the Time Gap slider control.
In this expression, we replace the layer reference, i.e.,
thisComp.layer("Layer_name") with index - 1, signifying the layer directly above it. This substitution means the layer with the keyframes will influence the one below it.
If the layer below happens to be a precomp and possesses an expression on its position property, it will seamlessly synchronize with the motion of the layer above. This effectively grants us centralized control over all layers through the keyframes and timing values alone. This streamlined approach significantly reduces the time and effort required for intricate animation coordination.
Next, press Alt and click on Scale Stopwatch. Similar to the position's expression, the scale property will also be linked with the precomp layer, consisting of the keyframes above this layer.
Write an expression like the following to control the timing of the scale of each shape layer:
thisComp.layer(index-1).transform.scale.valueAtTime(time-thisComp.layer("Slider").effect("Time Gap")("Slider"))Repeat this process for each shape layer in your carousel to ensure they move at the desired intervals.
Step 6 (Optional): Beautify with Background
To enhance the background of your video using After Effects, you can apply gradients, patterns, and creative elements, adding bursts of colours and visual interest. Consider delicately blending gradients to evoke specific moods, layering in subtle patterns and textures for depth, and selectively blurring areas for focus.
Customized frames can envelop your content in a unique aesthetic, and creative elements like overlays and animated transitions can punctuate your video's key moments.
The key is maintaining consistency in your visual style while experimenting with various effects to make your video background visually captivating and appealing.
Image Sliders
By following these steps, you can create a dynamic image carousel in Adobe After Effects that is visually engaging and highly customizable.
You have the flexibility to adjust height gaps, timing, and more, making it a versatile tool for various video and animation projects.
Experiment with different shapes, transitions, and effects to craft the perfect carousel for your needs. Happy creating!
If you found this blogtorial helpful, let us know by leaving a comment below. Subscribe for more design tutorials like this!