
Motion designing in After Effects offers a rich array of powerful tools and effects, such as controllers, some of which play a game-changing role in flexible and dynamic layer controls. These controllers offer a wide range of control over a layer's properties, from changing the value of the layer's properties to even switching over multiple layers or compositions. One such controller appears to be the Dropdown Menu.
Introduction to Dropdown Menu Control
A dropdown menu in After Effects is a controller for selecting a parameter or value from a list of multiple values. It can take various forms, including expression controllers, effect controls, layer controls, and custom dropdowns. These controllers provide a convenient way to organize and access values or parameters within your compositions or layers, making managing complex animations and effects easier.
This is probably one of the most used features in the world. While its application might differ in the building process from different platforms, its application remains the same in all fields. For instance, a website may use a dropdown menu to navigate its menu bar. While this is a basic use case scenario, its usage can also be customised according to the necessary project requirements and dynamism with advanced expressions.
Steps to use Dropdown Menu Control:
We will start by creating a dropdown menu to switch over multiple characters using expression controls. Follow the steps below:
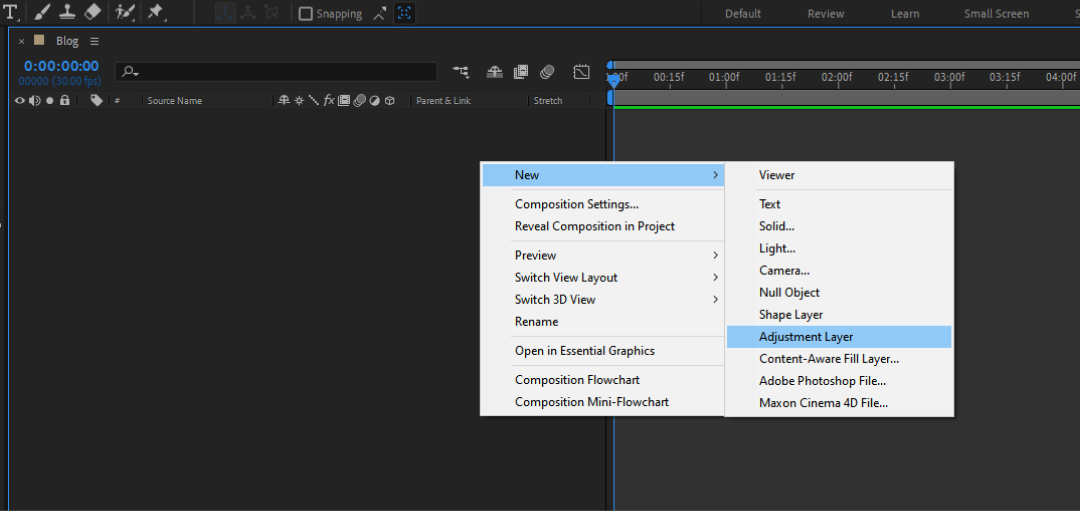
Firstly, create an adjustment layer to hold the controller and its operations. Right-click on the control panel and select "adjustment layer."
You can bring your preferred compositions and layers for the switch control process. Content placements or design compositions can be made for a better appearance.
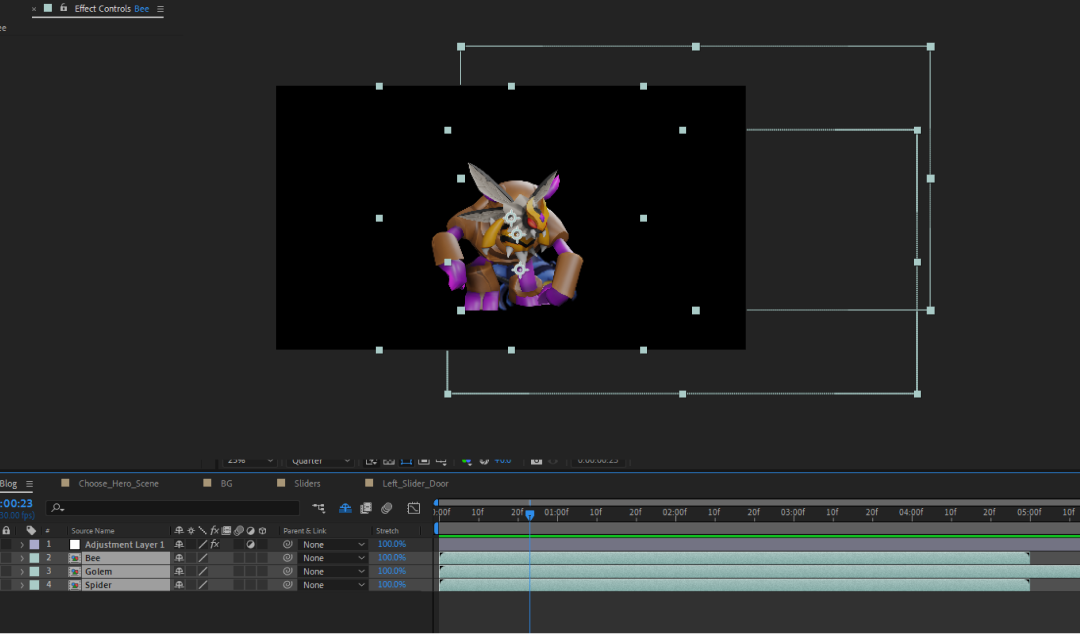
You can also add text layers and fill them dynamically with dropdown contents or values.
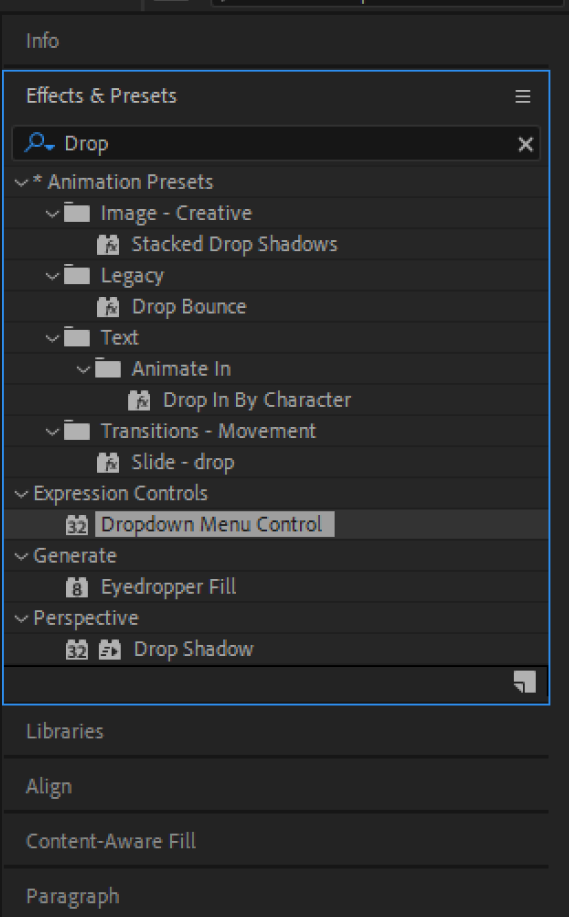
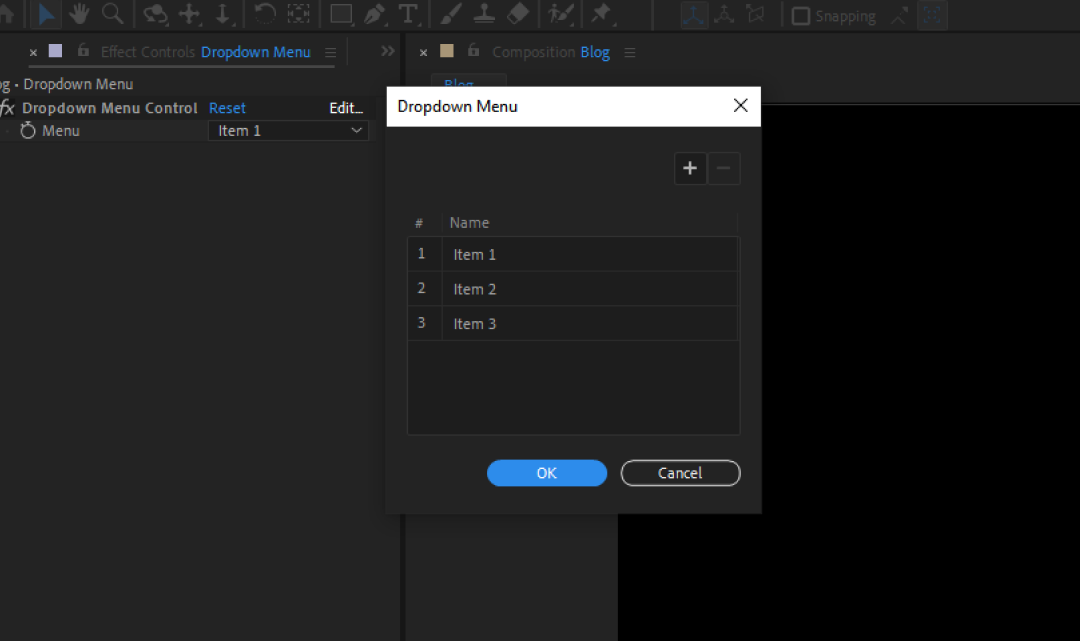
Then Go to the "Effects & Presets" panel and search for the "Dropdown Menu Control" effect and apply it to the adjustment layer. You can also use it over any other desired layer.
By default, the Dropdown Menu Control will have values such as Item 1, Item 2, Item 3, etc. The values can be added or removed with the "+" or "-" buttons, respectively. However, the controller limits the minimum number of items to 3, so you can't have options less than that.
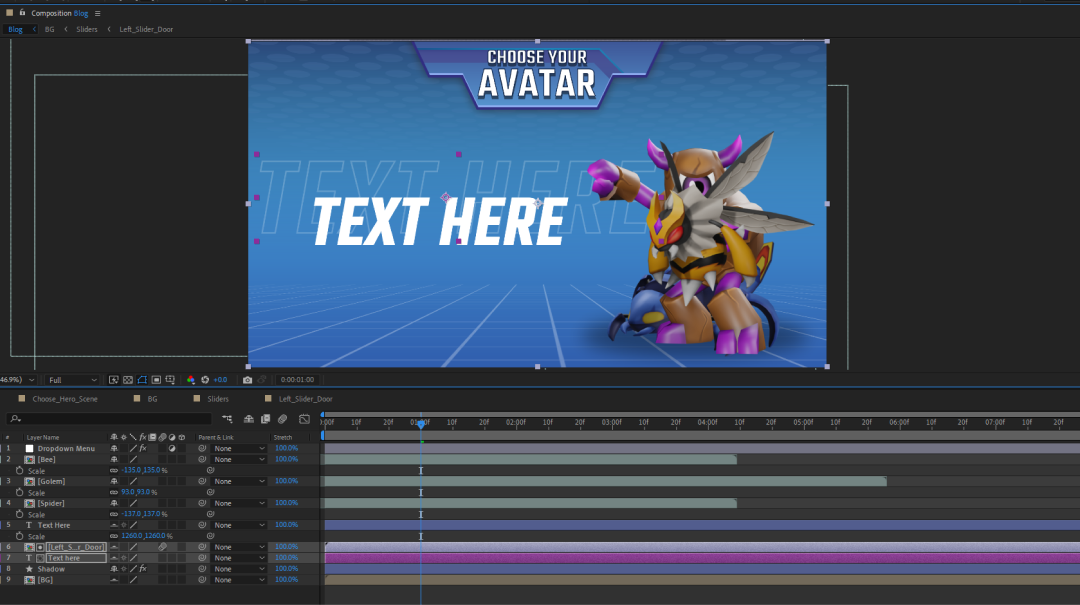
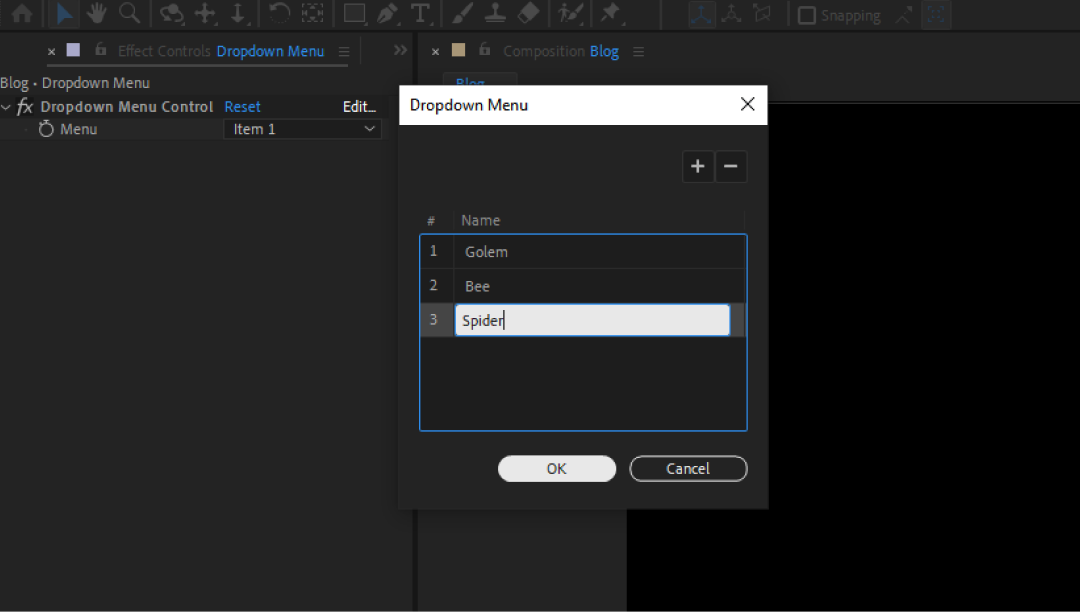
You can edit the item names by navigating to Edit>Click on the items, which will change the value names. In our case, the options are based on the avatar names.
After changing names, we link the layers according to the Dropdown avatar name. You can use the following expression to link the OOpacity of the avatars to the menu values so that only the selected avatar is visible: Go to your layer > Transform > Opacity > Alt + Click on the stopwatch to open the expression panel.
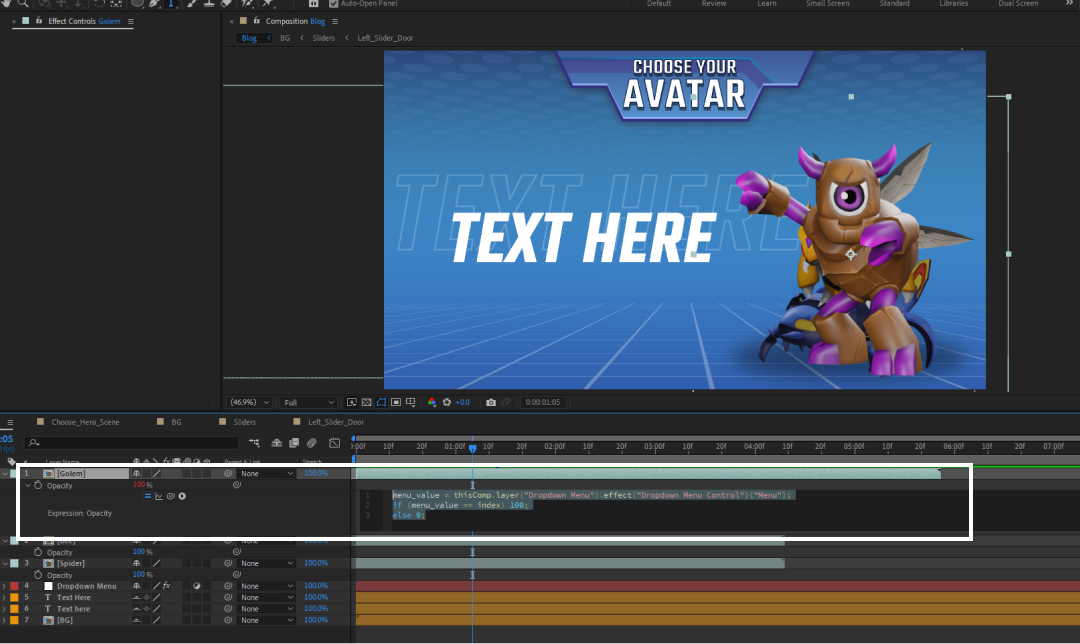
menu_value = thisComp.layer("Dropdown Menu").effect("Dropdown Menu Control")("Menu");
if (menu_value == index) 100;
else 0;- Here, in this expression, the
menu_valuecollects the selected index value of the menu. - The menu_value is then checked with the current index of the layer. Say layer "Golem" is at the top of the layer panel, meaning its index is 1, which is exactly the index value of the selected Dropdown menu. Remember that the index value of a layer varies when it is placed at different positions on the layer hierarchy.
- If the value is matched, the current layer's OOpacity is set to 100, making it visible.
Copy the expression and paste it on the remaining avatar layers. The layers of avatars should be in the same hierarchy as those of the dropdown menu. This process will make only the selected avatar visible.
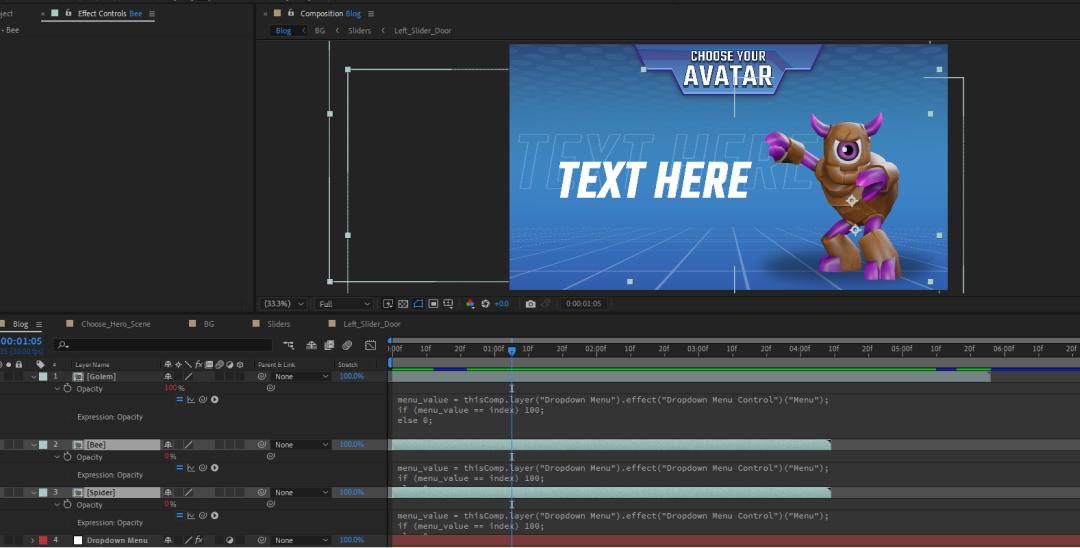
Moving on to the text layers, you can alter the text value as per the selection of the menu value. This process also requires a small expression that checks for the dropdown index to match its necessary value in the avatar list. Go to Main Text > Text > Source Text>Alt + Click on stopwatch.
dropdownMenu_index = thisComp.layer("Dropdown Menu").effect("Dropdown Menu Control")("Menu");
avatars = ["Golem","Bee","Spider"];
avatars[dropdownMenu_index-1]
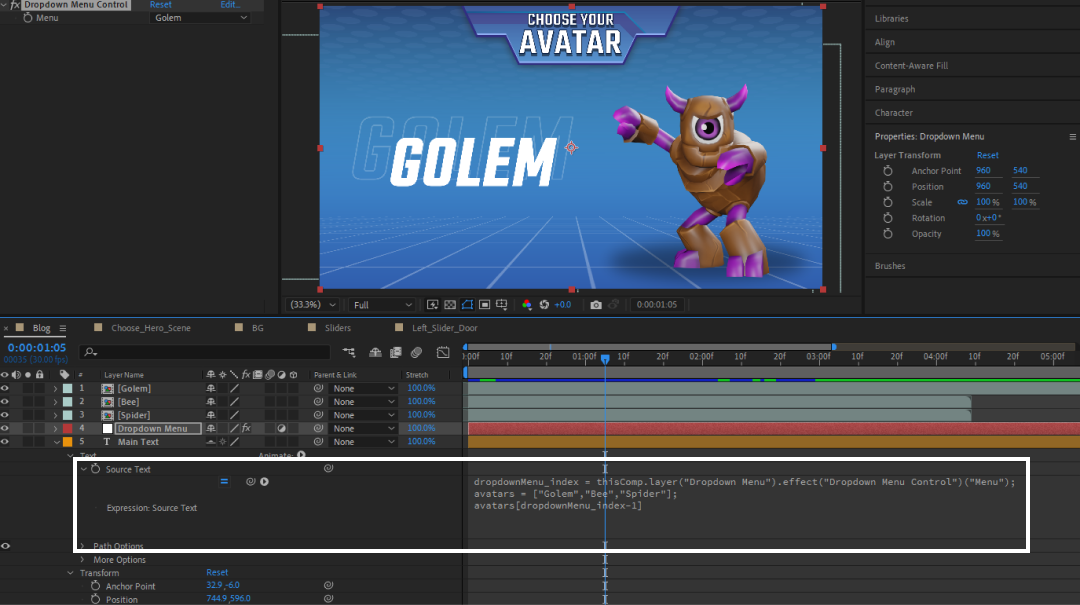
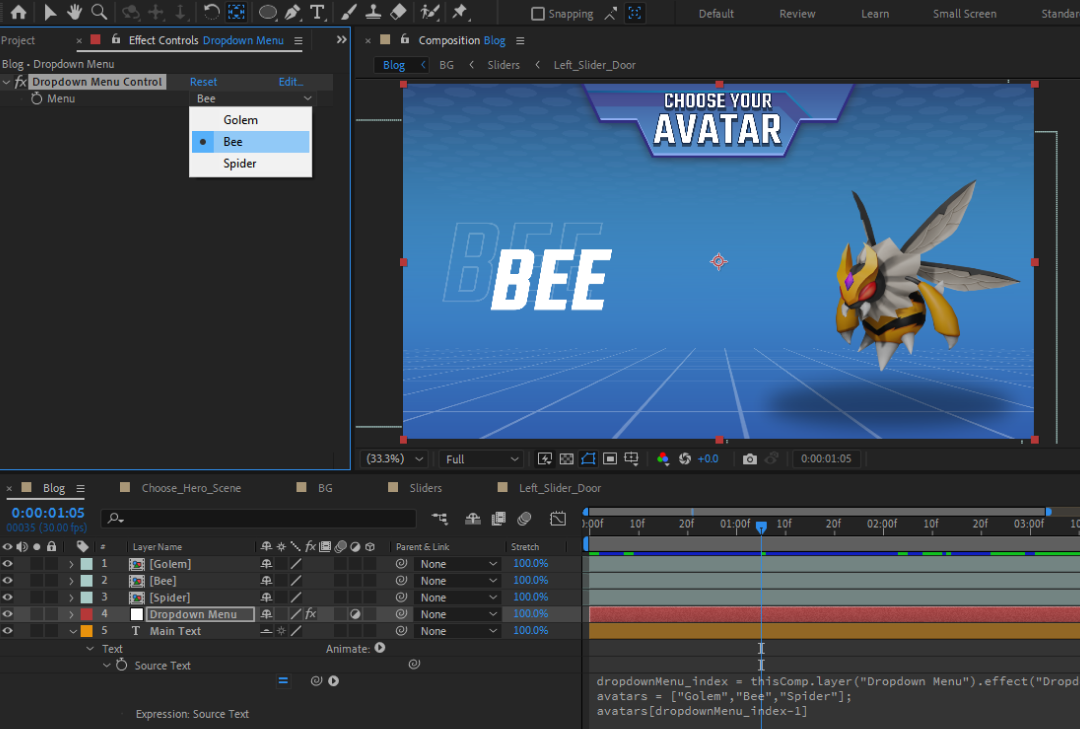
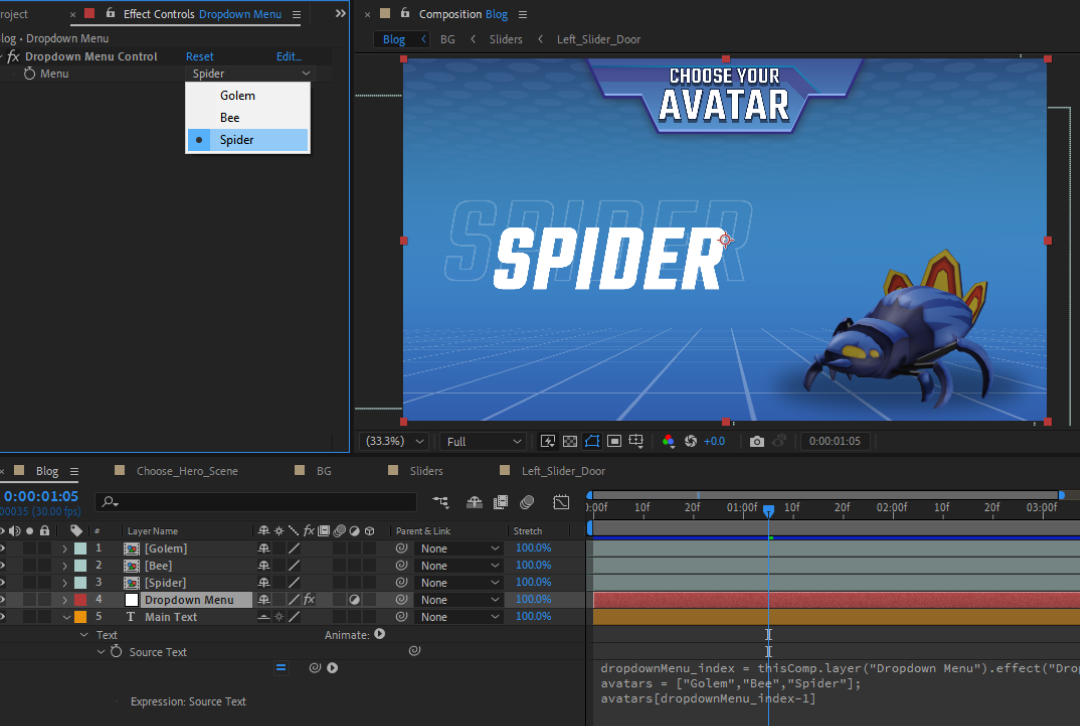
- In this expression, the
dropdownMenu_indexcollects the selected index value of the Dropdown menu. - You can make a list of the avatar names per the avatars' sequence in the dropdown menu.
- Finally, assign the array value to the avatar name variable. The avatars variable contains the avatar names and you can access the avatar names as per the selected avatar in the menu by its index value. We have to remember that the menu index starts with 1, but the array starts with 0, so to access the values from the list, we have to subtract the index by 1 to make the Dropdown index 0, which matches the array index. Dropdown[0] means Golem, Dropdown[1] means Bee and Dropdown[2] means Spider of the avatars.
Conclusion
The Dropdown menu controller is a powerful tool for artists, designers, and animators to switch between layers. By understanding its functionalities and implementing advanced techniques, you can easily switch between layers and their multiple properties, making the project flow much easier and more efficient.
Fig. 12 Selecting avatars