
It's a beauty that human faces have the same features, yet they are so different that each face becomes unique. People can have a pointed or flat nose, hooded eyes or almond eyes and full lips or thin lips. Every unique combination of these parts makes the faces distinct from each other.
Different people have differently shaped noses, but they all have the same basic shape structure. A nose can easily be drawn by breaking it down into simple shapes. In this article, I will be working on Photoshop, but you can follow along with any other drawing application or with paper and a pencil.
Structure of the Nose
Understanding the basic structure of the nose will help you draw any type of nose in your style to fit the purpose of the drawing. Realistic or cartoon, knowing its shape will help you recreate it in any way you want effectively.
You can break down the nose into three rectangles and one rectangle for the base. The middle rectangle will be wider to the tip of the nose. The other two rectangles on the sides will be placed the same way but thinner. They will also be narrower at the top and wider at the bottom for the placement of the nostrils. Study from real photographs and draw these rectangular shapes over their noses to understand how these shapes work around them and at different angles.
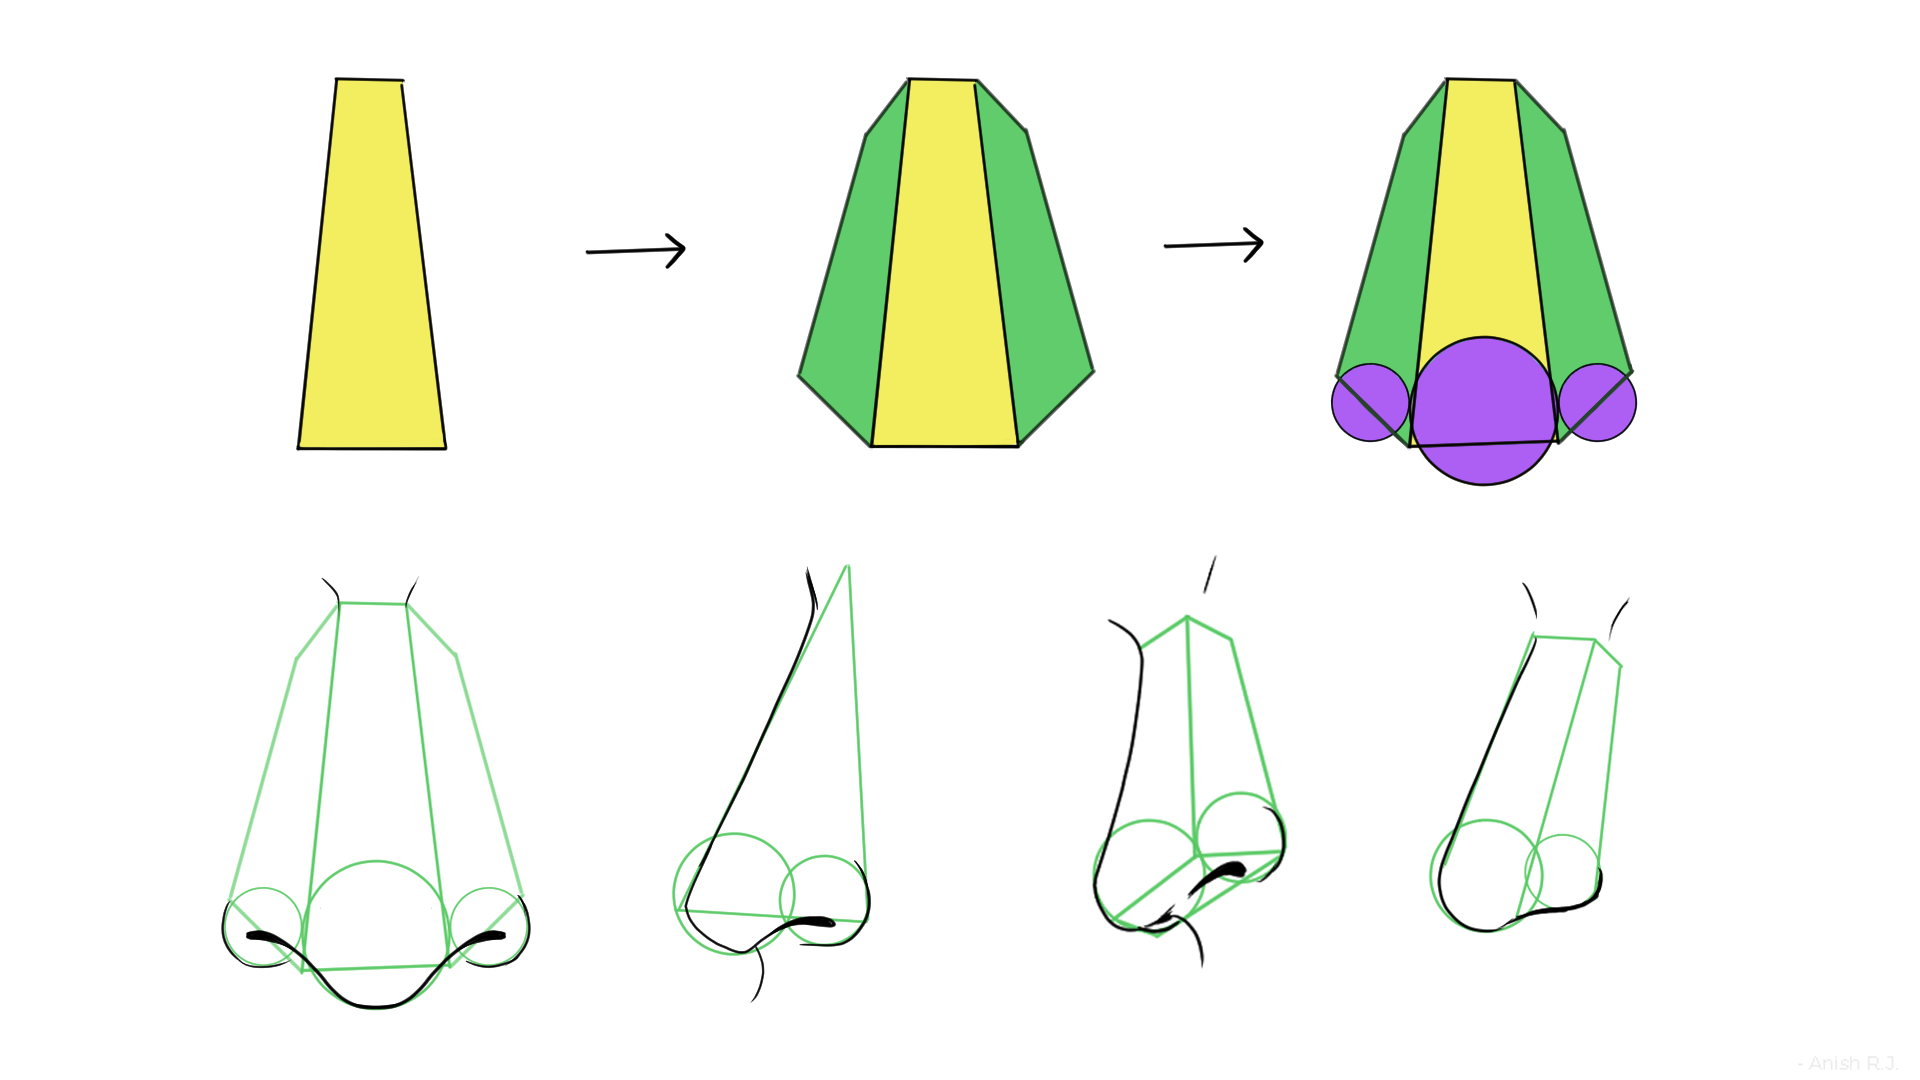
Once you understand these shapes, try drawing them from various angles. After knowing about the basic structure, you can add volume to the nose to make it more realistic. Add three spheres to the tip of the nose; a big sphere in the middle for the tip and two on the sides for the nostrils.
The above image shows the use of the spheres. The sphere is cut to add nostrils. Draw these shapes again by looking at real photographs to understand how the nostrils are seen from different angles, like the example shown in the image. After knowing this basic structure, you can draw a pointy, curved or flat nose by slightly changing the shapes.
Placement of the Nose
After knowing how to draw a nose with basic shapes, you can place the nose in your character's face. The nose will fit in the centre of the face and be placed in the same lines as the ears. If you draw the line at the bottom of the ear, the bottom of the nose will be placed on that line.
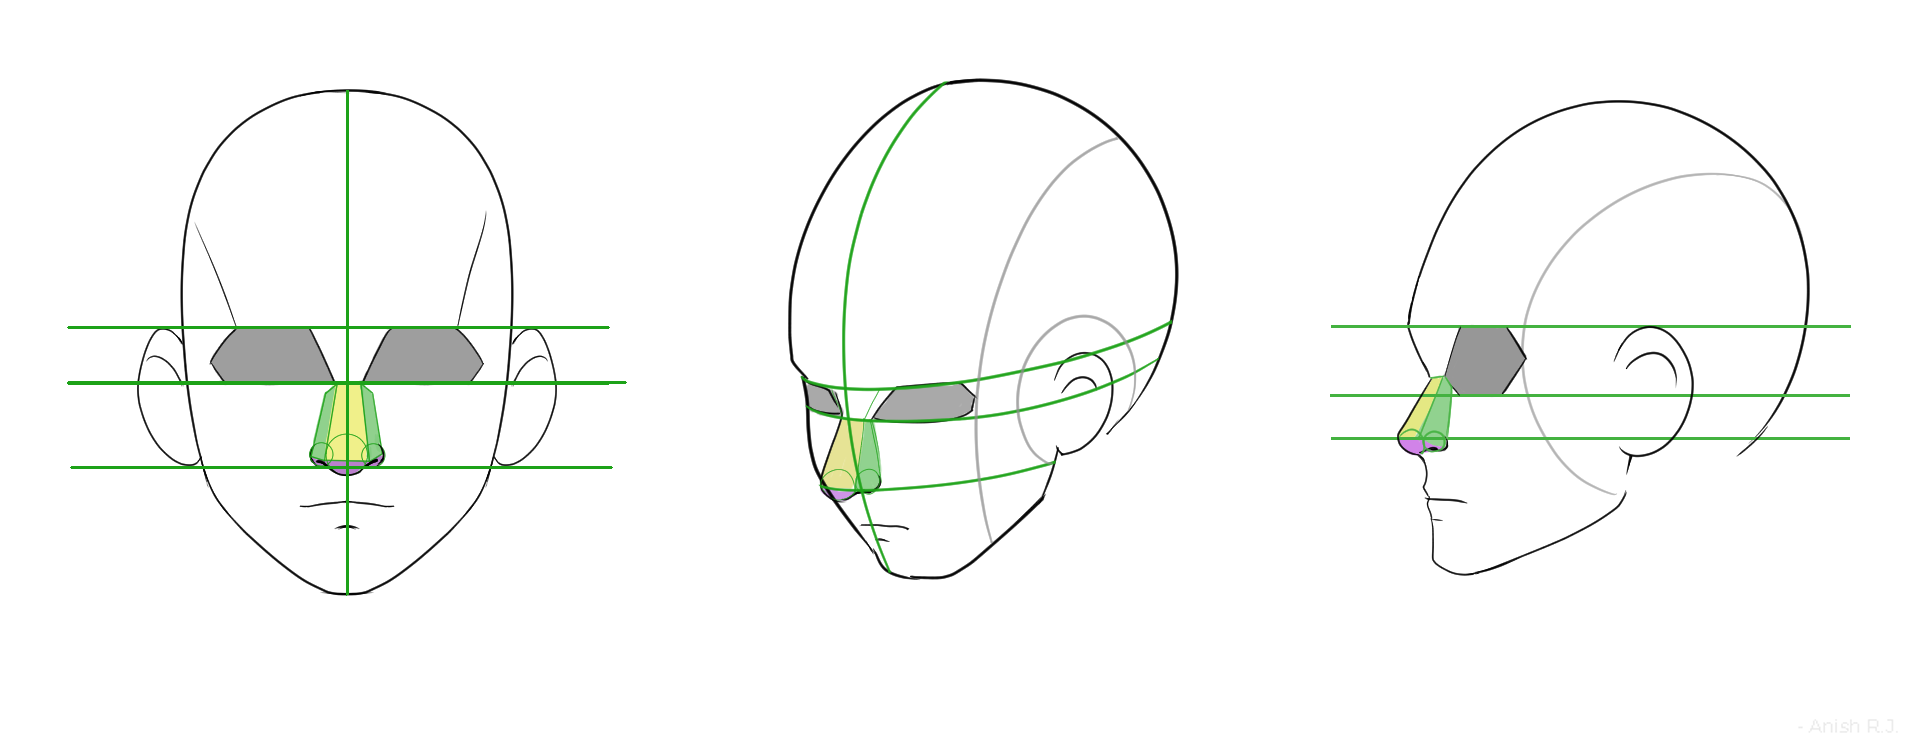
If you are going for a more realistic approach with your drawing style, noses can help to show the characters' gender and age. Most males have larger nostrils than females. Children's noses are small, while old peoples' noses are bigger and droop down.
Shading of the Nose
While looking at real-life photographs of noses, you might have realized that noses do not have distinct lines around them. The structure of the nose can be learned and practised with sharp lines, but while drawing a nose realistically, you do not need to draw the lines.
As the nose protrudes out of the face, the light hits its surface and creates perceived lines from the different values of light and shadows. We can take help from the previous rectangles to determine the different shading levels in various nose sections.
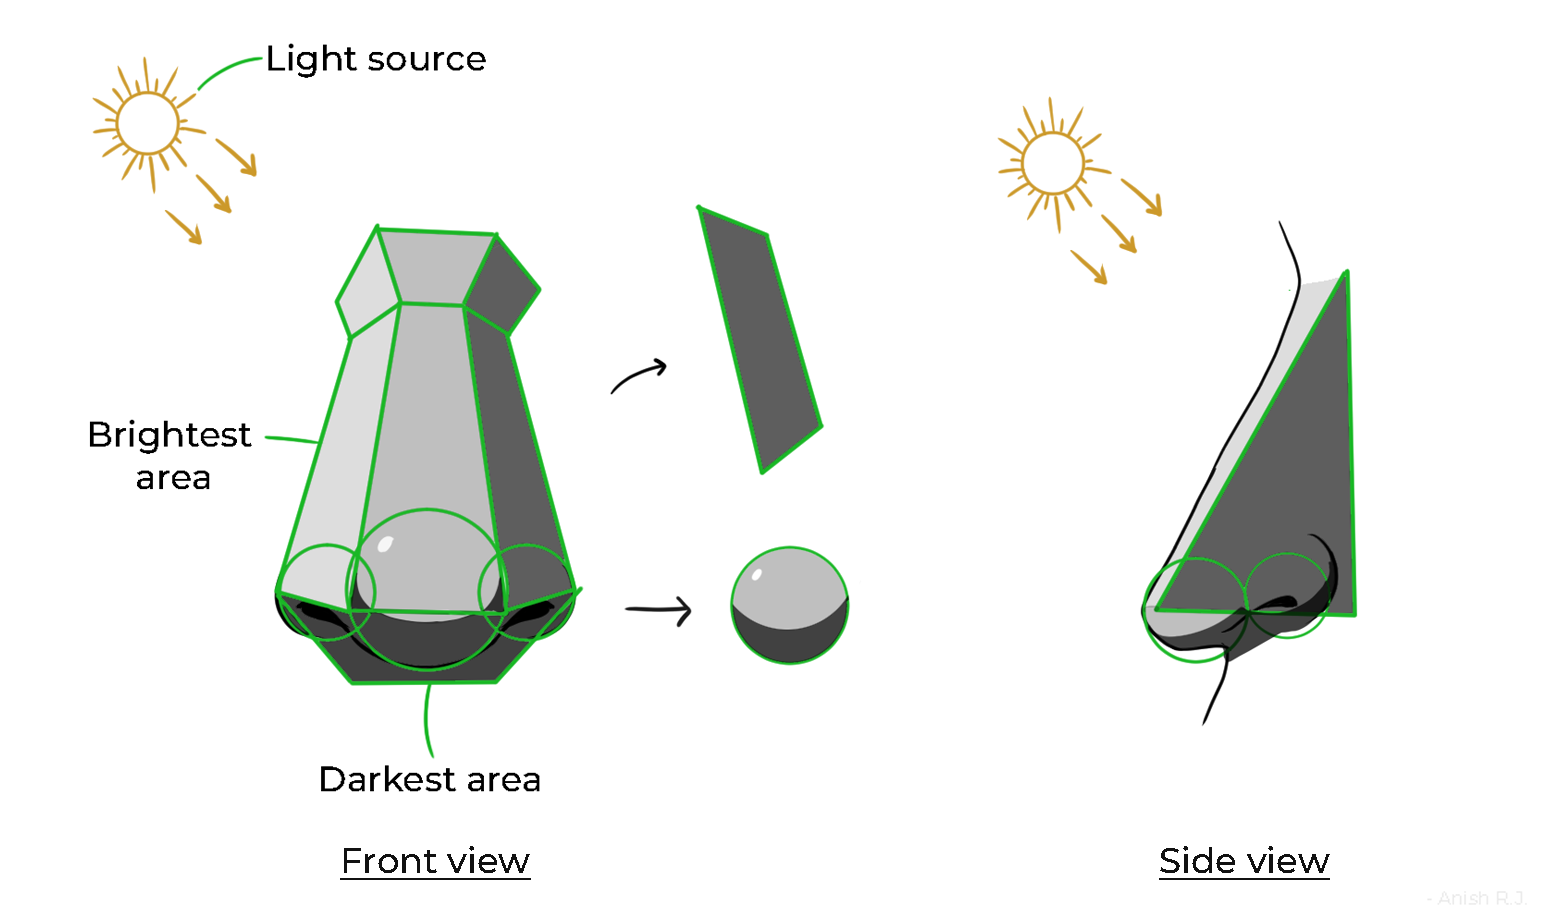
If the light source is above and to the left, the right part of the nose will be darker, and the parts underneath it will be the darkest. Since the tip of the nose protrudes the most and receives more light, it will have a highlight.
Different Styles of Drawing Noses
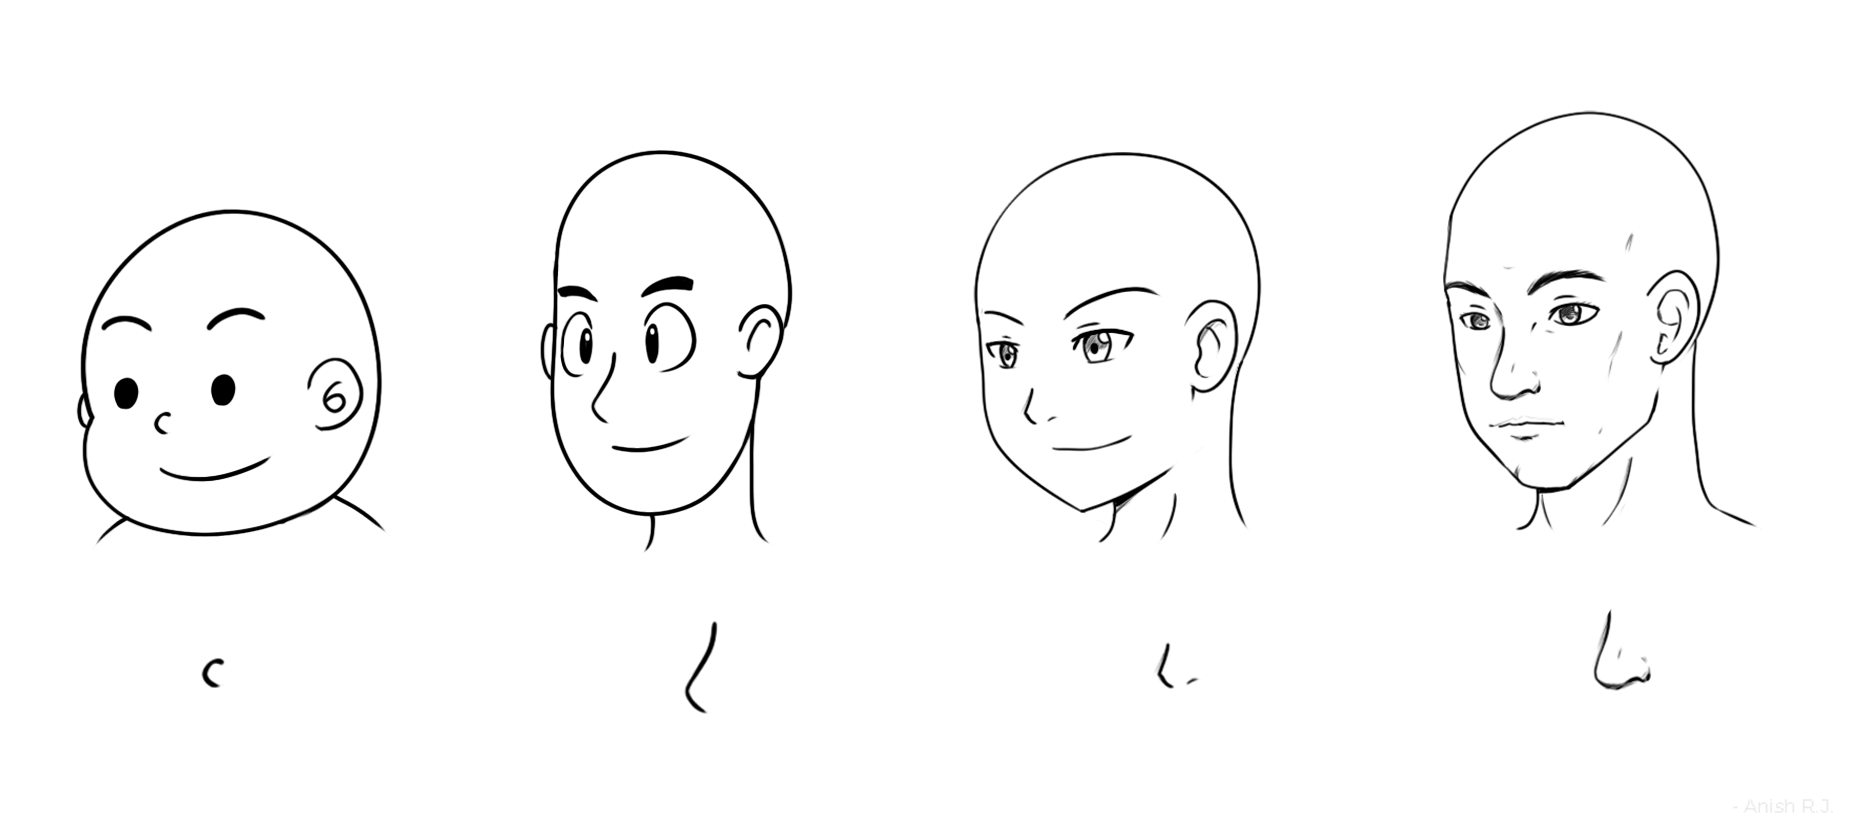
You can stylize the nose for different purposes. If it's for a cartoon, you can simply draw a circle or a few lines to define a nose. However, having knowledge of drawing real noses from different angles will help your stylized nose look accurate. Drawing two lines for the nostrils and shading the areas around it can also help to define a nose in a drawing.
A Step-by-Step Pictorial
To wrap up the tutorial, we will use the above information to draw noses from different angles. For a straight view, draw three rectangles and three circles at the bottom, as shown in the image below. Draw these rectangles with a lighter pencil or with lighter opacity (if you are working on a digital application). Since the light is coming from the top area, you can draw the darkest areas with hard lines. Add nostrils to the lower part of the two circles at the sides.
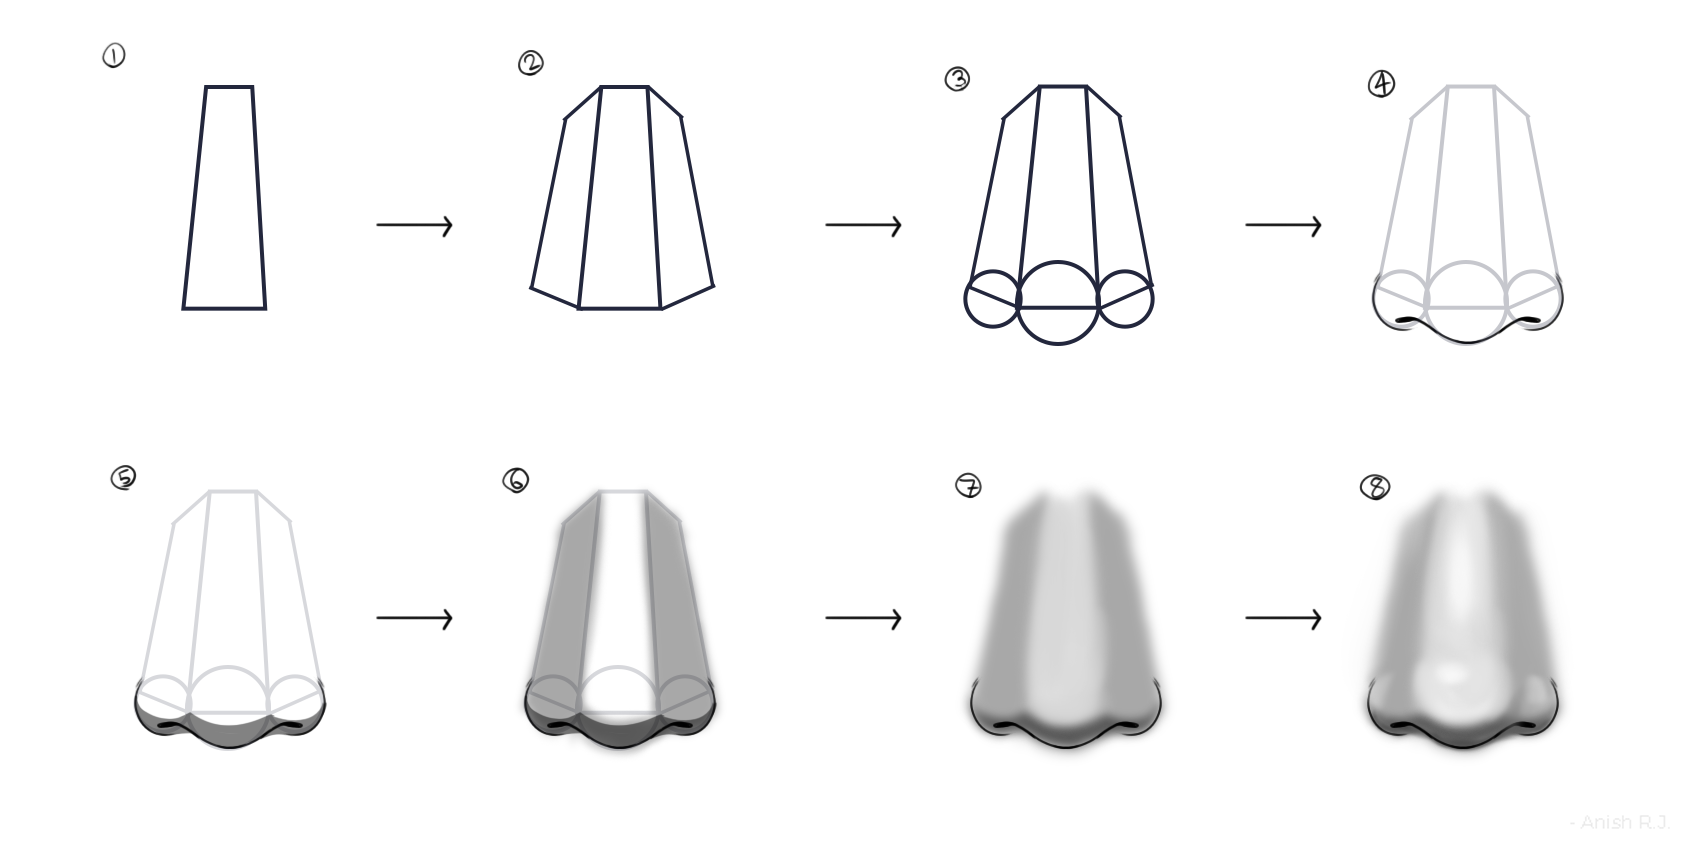
For a more realistic appearance, shade the lower parts of all three circles like how you would shade a sphere. After this, we need more values for the upper part of the nose to give it depth. Shade the side rectangles softly and blend them. Since the tip of the nose is a little bulbous, we need to make it have the brightest highlight. Shade the rest of the nose with an even lighter shade. Erase the upper part of the centre circle to create a highlight.
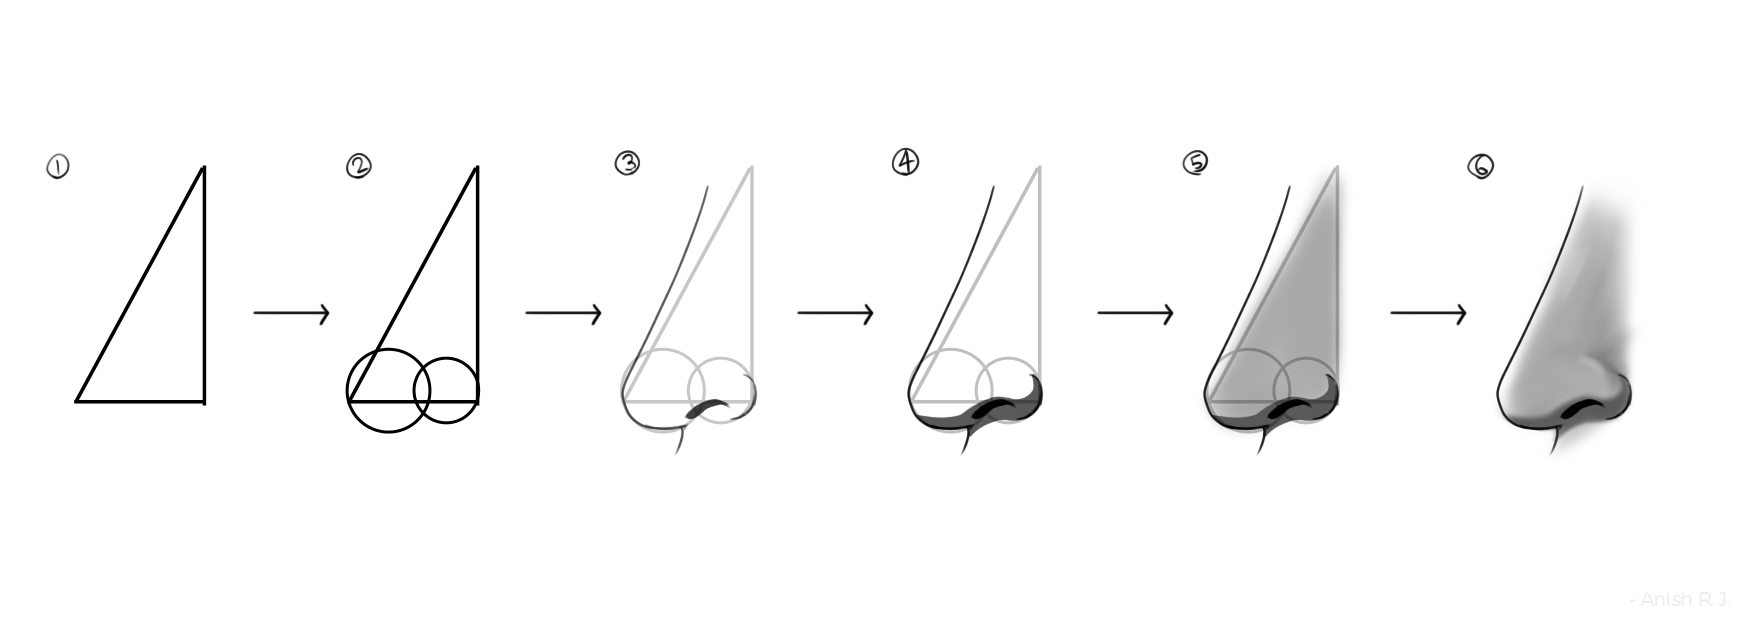
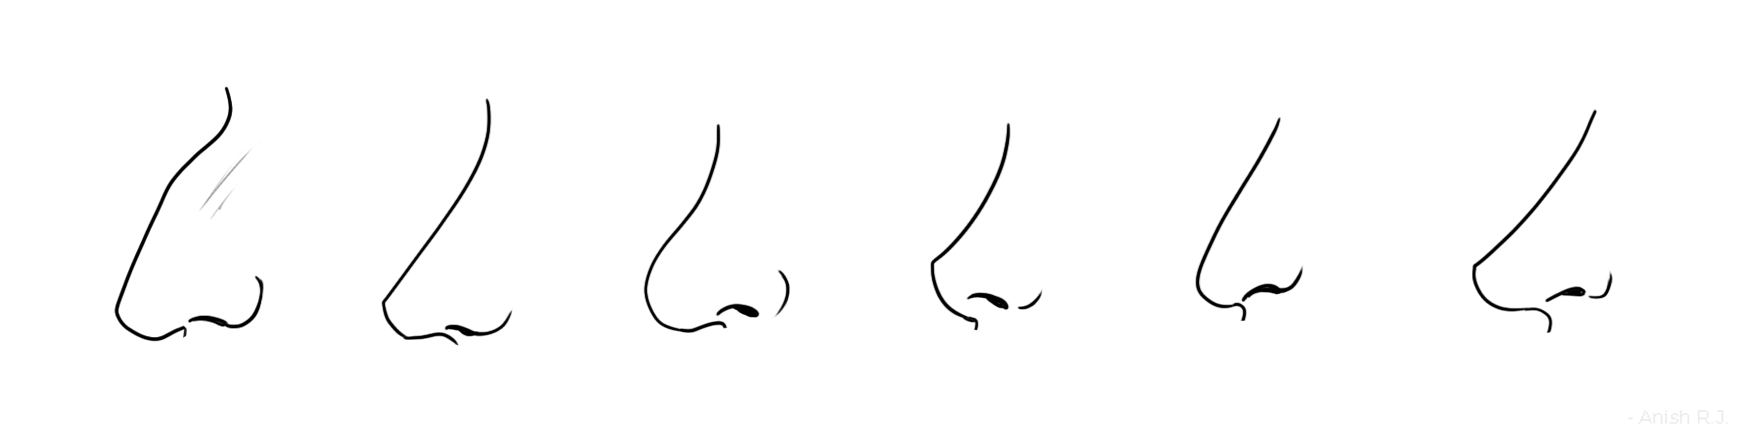
You can follow similar steps for drawing the nose from the side or from any angle. With a triangle drawn for the side view, you can change the curve of the nose bridge to make different types of noses.
This article explained the basic shapes to draw the human nose. I hope everyone who reads this now nose how to draw different types of noses. Practice these techniques more while studying and copying real-life photographs to better grasp them.
Thank you so much for reading this article. Hope you found these tips to be helpful. Subscribe by using either of the buttons below for more!