
Digital Art means the artwork created on a computer. Today we can see tonnes of digital artworks over the internet and in our daily lives. Digital artwork has become one of the important parts of our lives in the field of art, science, architecture, technology and more. In this tech-driven era, the creation and need of digital art have grown even bigger with the boom of websites, mobile applications, games, online markets, contests, NFTs and many more. There are lots of online digital art communities and seasonal online art challenges like Inktober as well. Now for creating digital artwork, there are thousands of software available on various devices to create your artwork. One of the most common and popular apps is Adobe Photoshop, there are many other highly dedicated tools that can be downloaded to create your digital art like Clip Studio Paint, Illustrator, Affinity, Wacom Studio, Sketchbook Pro etc. There are many apps to create 8-Bit style pixel artwork like Pixaki, which is in trend these days. But Procreate for iPad is one of the most effective and simplest tools with tonnes of features and shortcuts that I found very productive to use in my daily life.
I have been using this tool for almost five years now, and its efficiency is still incomparable with other drawing applications found in the App store. Though it has some limitations like you can draw vector artworks or search your artwork in the library ( I requested this update from their app store reviews, hope they add it soon) but they do have included other helpful tools like the selection, perspective and symmetry tools with drawing assists, time-lapses and 3D tools (new feature) to boost the productivity. The following are the steps or layering that I follow to create digital artwork in Procreate.
These basic steps can be used across all other digital art tools but the provided screenshots are for only Procreate.
Layer 1: Sketch

Whenever you want to start your artwork process, always begin with the quick thumbnail art or quick sketches. This helps you map out the composition, layout and objective. You can do this manually by using the pencil on a piece of paper which you later snap and drop on the procreate layer, or you can use the pencil tool and start sketching in the procreate itself. Either you do it manually on paper or use procreate on iPad, this is the first step or layer your artwork in the digital art process. Procreate offers a very dynamic default pencil brush tool to start your sketching process. It allows you pen pressure and various streamlining options to create your artwork. Don't worry, you can end up with multiple sketches and drafts, you only need to choose the right one and proceed with the art process.
Layer 2: Ink
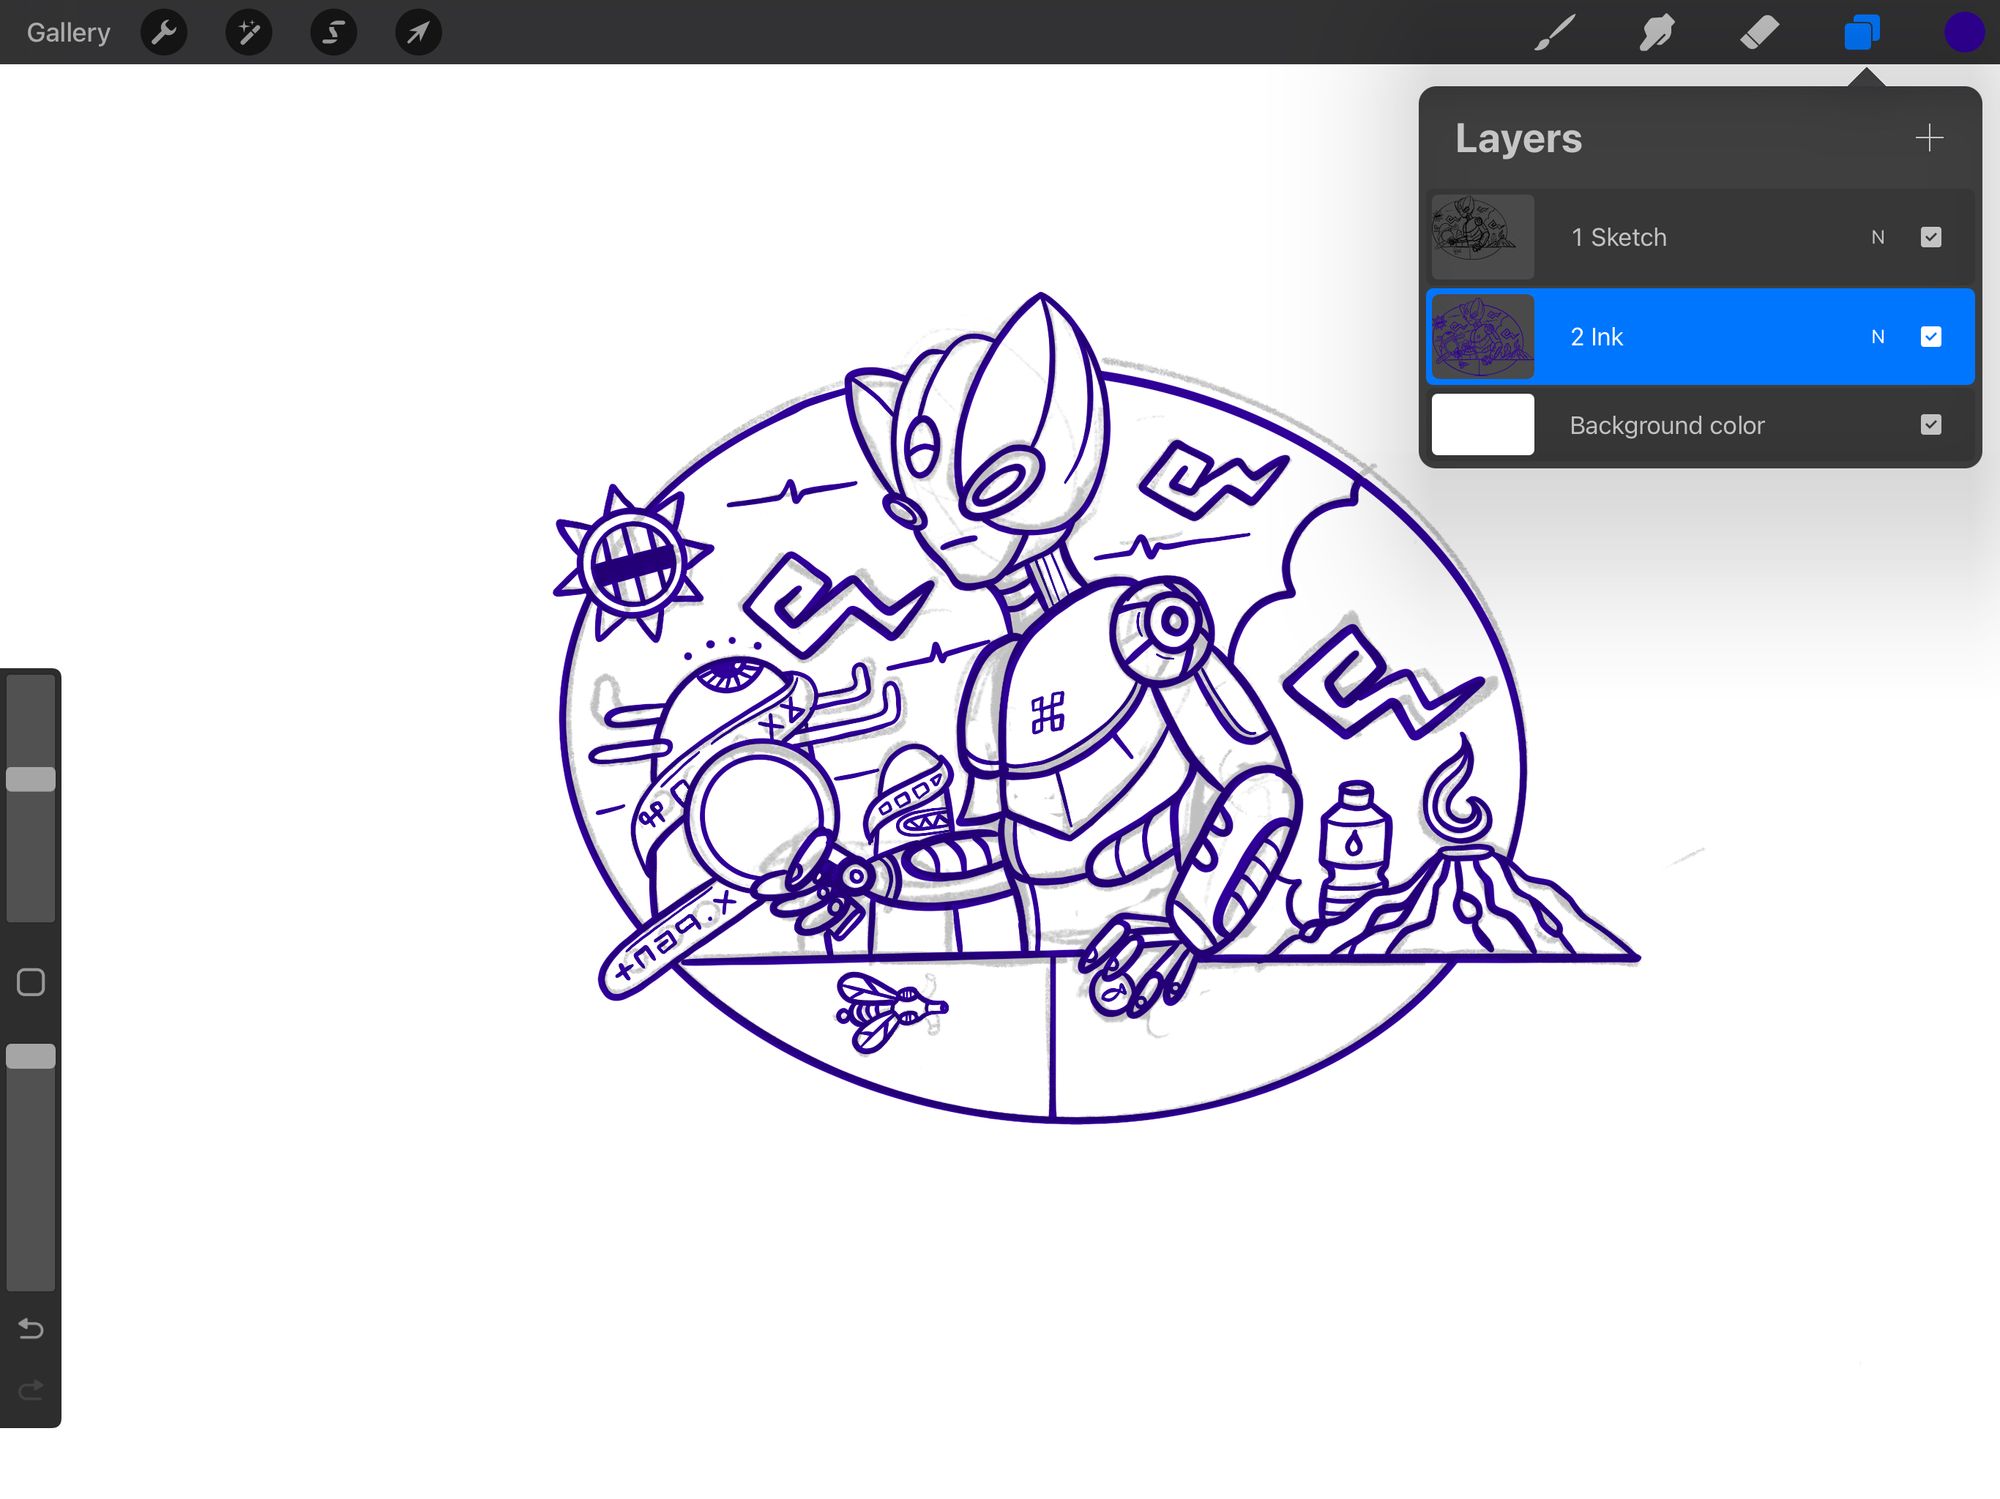
The next step is inking. In simple words, it can be said as outlining or tracing over the rough pencil sketches that you select. It can be simply understood as drawing the lines over the base sketch layer. The base sketch layer can be the procreate layer you can also insert the photograph layer of the sketch created on the paper. This procreate provides you with lots of dynamic inking brushes in their inking brush panel. You can choose the one that fits your style. To start with the inking process, you create a new layer above the sketch layer and start drawing using the required inking brushes. Before that make sure you decrease the opacity of the sketch layer so that it gives you the proper preview of the foreground and the background. You can adjust the opacity percentage that best fits your preview. For inking, I use the brush that I have modified the default studio pen in procreate. You can also modify the artwork by adding and removing the details seen in the base layer. There are tonnes of brush options for the artist and illustrators to choose from in the default procreate library itself. One can even create or download it and use it.
Layer 3: Colors
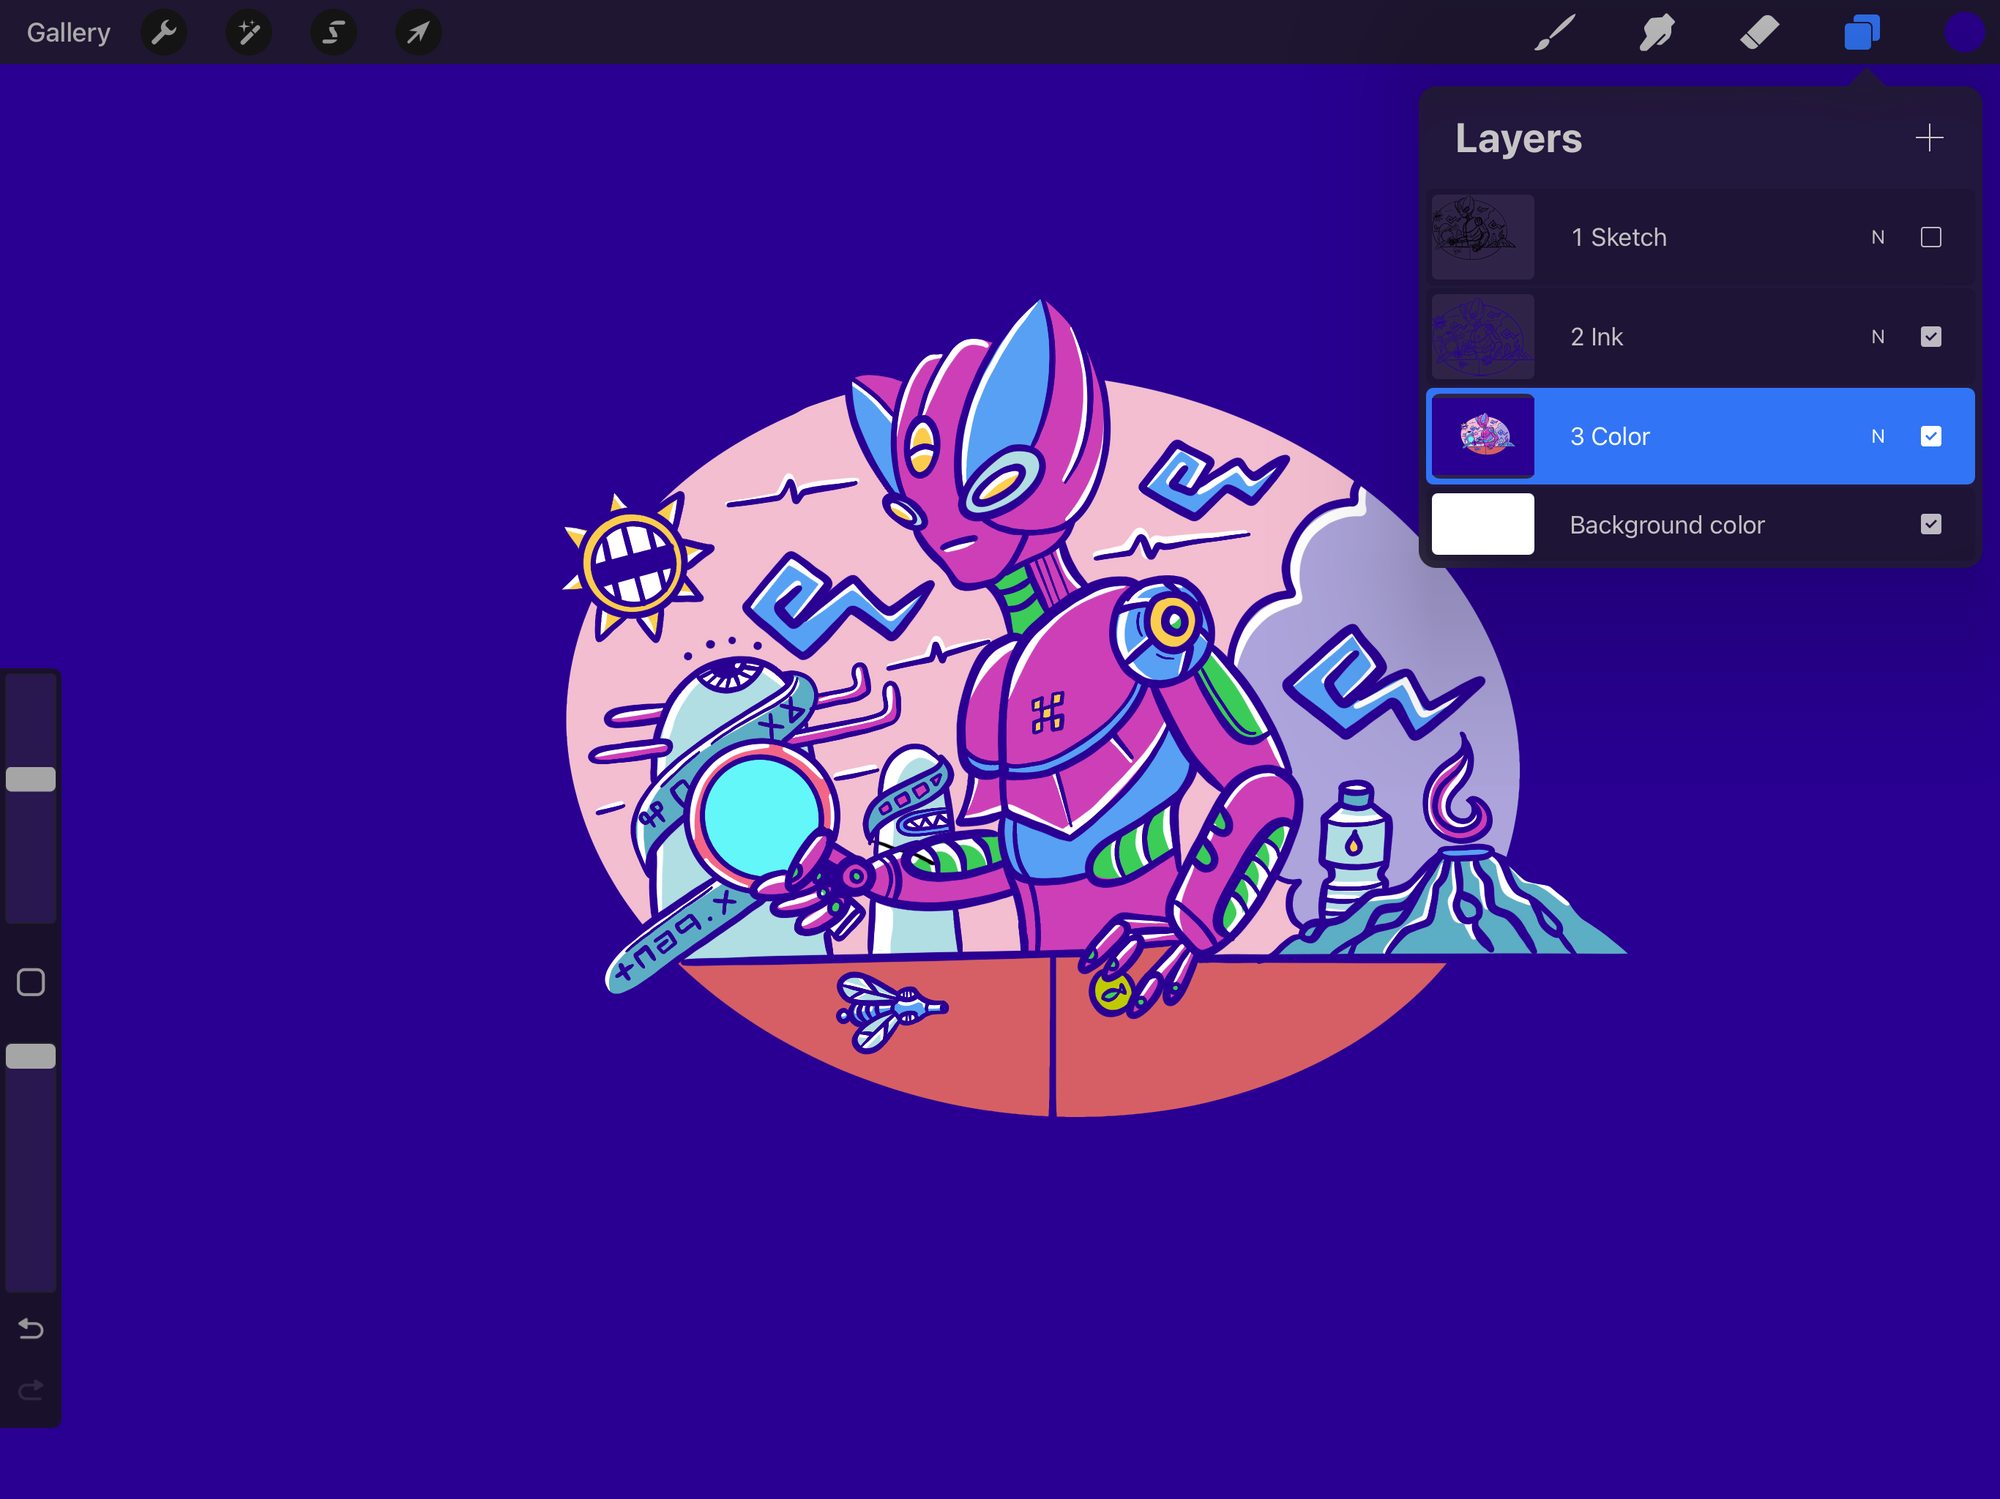
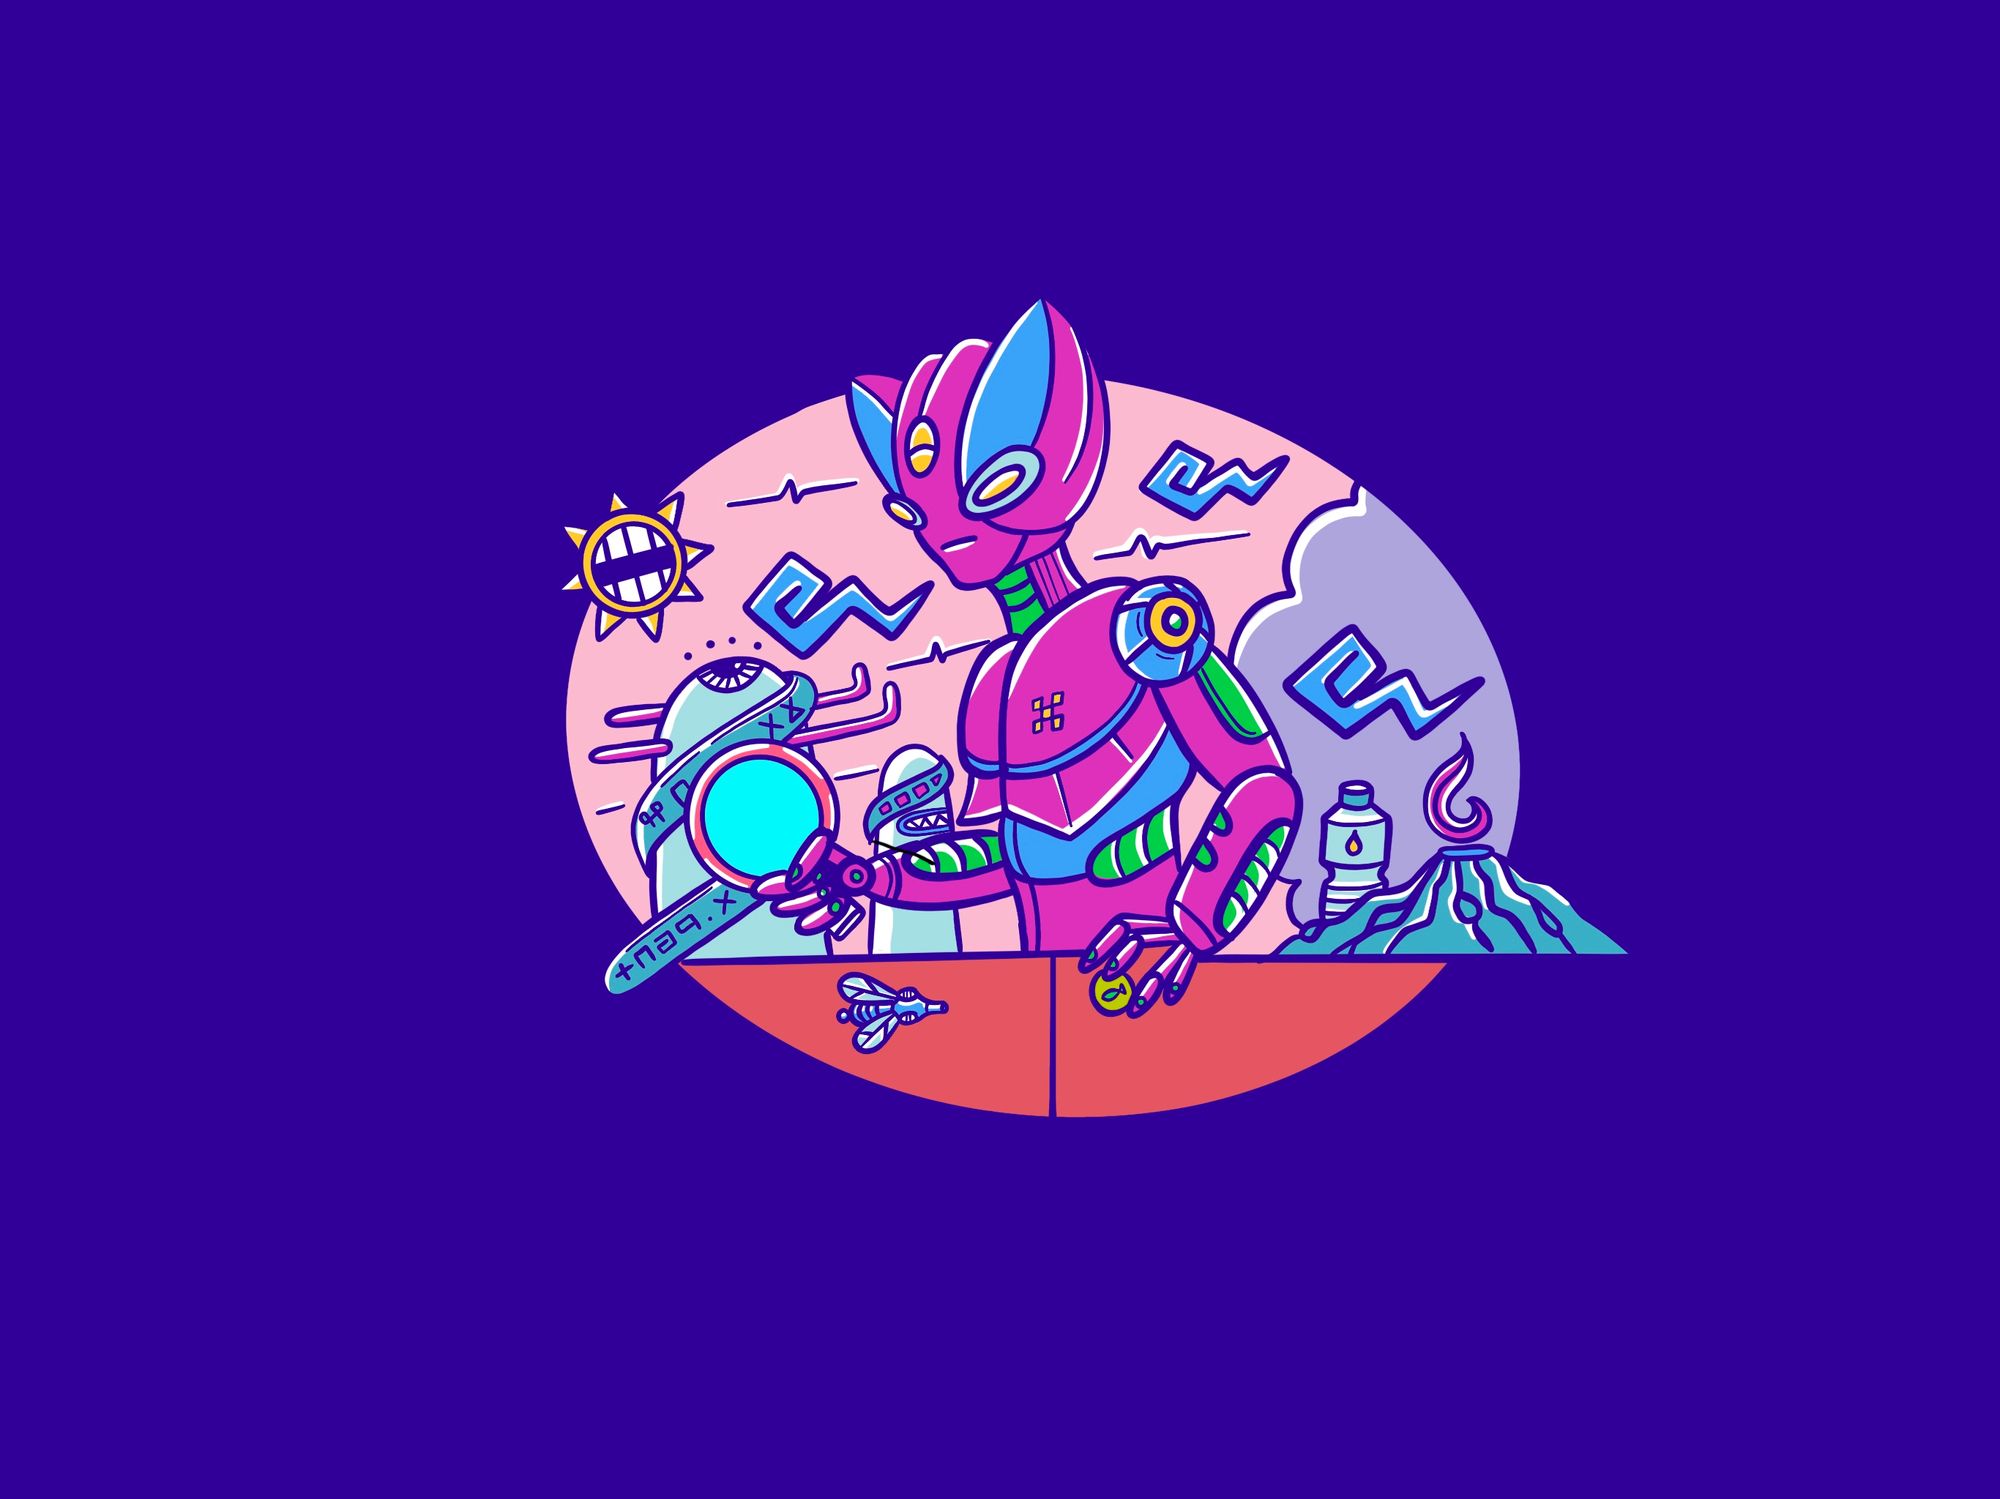
This is the final step or layer in the artwork process. You create a new layer below the sketch layer and start applying color, the sketch layer (Layer:1) can be hidden or deleted if it distracts you. For coloring process, we artists follow the simple principle quoted "Heavier Details, Lesser Colors; Lesser Details, Heavier Colors". This principle helps to create the artwork with better color contrast and color composition. For coloring you can create assets of color palettes or download them from the internet as well. In the case of multiple colors, I add the random colors to multiple layers and tune their HSB (Hue Saturation Brightness) and check and select the best color and contrast for the artwork. You can also add the highlights, mid-tones and shadows to the artwork if it's required for the type of style you have chosen. Now when you complete your coloring process, you are ready with the final digital art, and you can export them to multiple formats as required over several media.
Thank you for reading. Let me know what you have in comments.