
Deploying a self-hosted Docker registry with self-signed certificates and a GUI can seem daunting, but it can be simple with proper guidance. Set up your own Docker registry, secure it with self-signed certificates, and enable a graphical user interface for ease of use with the assistance of this blog.
You'll require Linux Operating System (preferably Ubuntu 20.04) with Docker to get started.
What is Docker Registry?
Docker Registry is an open-source tool that stores and distributes Docker images. You can think of it as a central repository where developers can store and share their Docker images, simplifying team collaboration on projects. You can use Docker Registry to host or share your private images with a wider community.
Also read: GUI vs API Testing: Which is Better?
Deploying the Registry
Step 1: Install Docker Registry
The first step is to install Docker Registry on your server. To do this, you can use the following command.
docker run -d -p 5000:5000 --name registry registry:2This will download and run the latest version of Docker Registry on your server, listening on port 5000.
Step 2: Generate self-signed certificates
The next step is to generate your own self-signed certificates. For that, you can use OpenSSL to generate a private key and a self-signed certificate.
openssl req -newkey rsa:4096 -nodes -sha256 -keyout domain.key -x509 -days 365 -out domain.crtThe above command will generate a private key and a self-signed certificate valid for 365 days. You'll be prompted to enter some information, such as the domain name, organization name, and email address. Ensure to enter the correct information, as this will be used to generate the certificate.
Step 3: Configure Docker Registry to use the certificates
The next step is to configure Docker Registry to use them. To do this, you need to create a directory to store your certificates and copy them into the directory. You can use the following command to perform the task.
mkdir certs && cp domain.crt domain.key certs/Next, you must create a configuration file for Docker Registry and add the following configuration to use the certificates.
version: 0.1
log:
  fields:
    service: registry
storage:
  filesystem:
    rootdirectory: /var/lib/registry
http:
  tls:
    certificate: /certs/domain.crt
    key: /certs/domain.key
Docker Registry configuration file
Save this configuration to a file named config.yml in the same directory as your certificates.
Related article: Building Multi Architecture Apps in Docker
Step 4: Start Docker Registry with the new configuration
Now that you have generated your self-signed certificates and configured Docker Registry to use them, the final step is to start Docker Registry with the new configuration. To do this, save the following as docker-compose.yml.
version: '3.3'
services:
    registry:
        ports:
            - '5000:5000'
        restart: always
        container_name: registry
        volumes:
            - '$(pwd)/certs:/certs'
            - '$(pwd)/config.yml:/etc/docker/registry/config.yml'
        image: 'registry:2'
Container Image Registry Docker-Compose file
Next, run the command below. This command will start Docker Registry using the new configuration and mount the certs directory and config.yml file into the container.
docker-compose -f docker-compose.yml up -dStep 5: Set up Docker Registry GUI
By default, Docker Registry doesn't come with a GUI. Nonetheless, you can add one by using a web UI called Portus. Portus is an open-source tool that provides a web interface to manage Docker images.
To add a GUI to your Docker registry, follow these steps:
I. Install Portus
Portus is a GUI built for Docker Registry. While it cannot replicate the user experience of the dockerhub GUI, it comes close and is an acceptable replacement.
Save the following as docker-compose.portus.yml.
version: '3.3'
services:
    mysql:
    	ports:
            - '3306:3306'
        container_name: mysql
        environment:
            - MYSQL_PASSWORD=supersecret
            - MYSQL_USERNAME=root
            - MYSQL_DATABASE=portus
        volumes:
            - /var/lib/mysql:${PWD}/data/mysql
        image: mysql:latest
    portus:
        ports:
            - '3000:3000'
        container_name: portus
        links:
            - 'registry:registry'
        environment:
            - REGISTRY_HOST=registry
            - REGISTRY_PORT=5000
            - REGISTRY_SECURE=false
            - PORTUS_DB_ADAPTER=mysql2
            - PORTUS_DB_POOL=5
            - PORTUS_DB_HOST=db
            - PORTUS_DB_PORT=3306
            - PORTUS_DB_USERNAME=root
            - PORTUS_DB_PASSWORD=supersecret
            - PORTUS_DB_DATABASE=portus
        hostname: 'true'
        volumes:
            - '/certs:/certs:ro'
            - '/etc/docker:/certs/client:ro'
            - '/etc/ssl/certs:/etc/ssl/certs:ro'
            - '/etc/pki/ca-trust/extracted/pem:/etc/ssl/certs/ca-bundle.crt:ro'
            - '/var/run/docker.sock:/var/run/docker.sock:Z'
        image: 'portus/portus:latest'
        depends_on:
          - mysql
Docker compose file
Now, run the command below to download and run the latest version of Portus, linking it to your Docker Registry and mounting the necessary volumes.
docker-compose -f docker-compose.portus.yml up -dII. Configure Portus
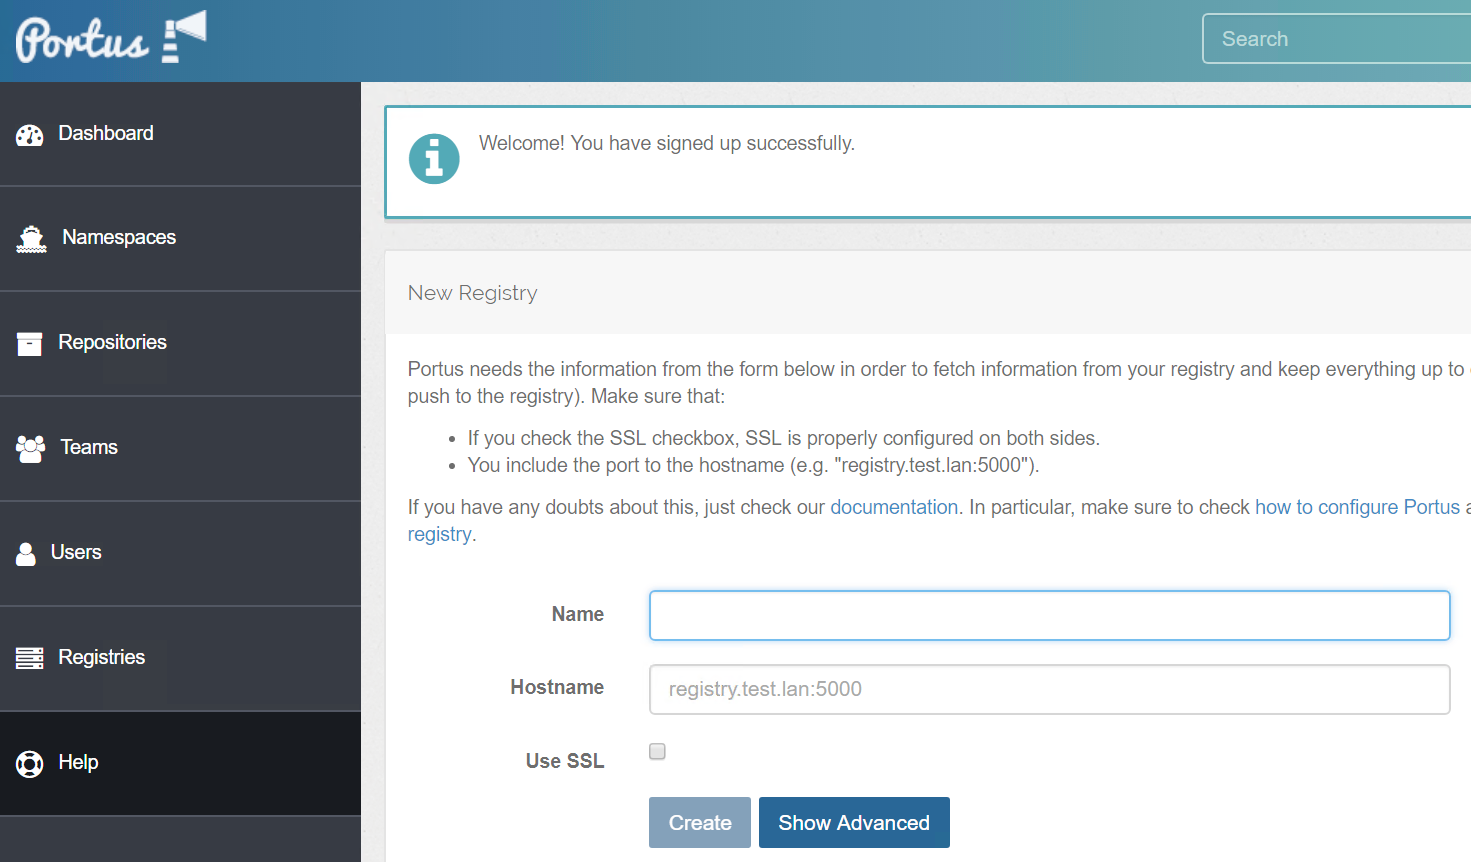
Once Portus is up and running, you must configure it to work with your Docker Registry. To do this, go to http://192.168.1.1:3000 in your web browser and log in with the following default credentials.
Username: admin
Password: admin
After logging in, go to the Registries tab and click New Registry. Enter the following information.
Name: Local Container Registry
Hostname: http://localhost:5000
Use SSL: true
Click Create to save the changes.
III. Test the GUI
To test the GUI, go to the Catalog tab and click Refresh. You should see a list of Docker images in your Registry. You can also search for specific images using the search bar.
Congratulations!
You've successfully deployed a self-hosted Docker Registry with self-signed certificates and a GUI. Explore more in the docs section of Portus and Docker Registry to enhance your self-hosted Docker Registry experience.
Please comment below if you have any queries. It'll be of help as I try to update the article regularly to ensure legibility!