
What is tmux?
TMUX is a Terminal MUltipleXer that acts as a windows manager for your terminal. You can open multiple windows and split-views (panes) within one terminal window. Because of this, you can have multiple commands/applications running side-to-side without the need to open multiple terminals.
Installing tmux
Installing tmux is very straightforward. Type the following command on your OS Terminal app:
- On Ubuntu and Debian
sudo apt-get install tmux
- On CentOS and Fedora
sudo yum install tmux
- On macOS
brew install tmux
Customization
The default tmux configuration is good enough to get started, but we can customize many things to fit our preferences. Fortunately, customizing tmux is as easy as writing on a text file. This article will be about how I have configured mine and how you can configure yours to your preferences.
First of all, create a configuration file .tmux.conf on your home directory if it's not already there.
touch ~/.tmux.conf
Open the file you just created with any editor you are comfortable with. I will be using nano for simplicity.
nano ~/.tmux.conf
Now we can customize tmux behaviour to our preference. Just add, remove, or modify the following lines according to your preference.
Setting Index to Start at 1
By default, the windows/panes number starts at index 0. So you need to set their indexes to 1.
# start window index at 1
set -g base-index 1

# start pane index at 1
set -g pane-base-index 1

# re-number windows when one is closed
set -g renumber-windows on
Changing Prefix Combo
Since you will be pressing the prefix combo a lot, we will change the default combo (Ctrl + b) to something more natural (Ctrl + s). You can assign it to whichever key works best for you. Add the following line on the configuration file you just opened.
# Remapping prefix
unbind-key C-b
set-option -g prefix C-s # setting prefix from C-b to C-s
bind-key C-s send-prefix # ensure that we can send Ctrl-s to other apps or the shell
Changing Split Commands
By default, the '"' and '%' are the keys for vertical and horizontal split, respectively, which is not very intuitive. We will be changing that to '\' and '-'. Also, split panels open up in a home directory instead of the current directory we are working from by default, so we will also change that.
# Split panel with the current path
unbind %
unbind '"'
bind '\' split-window -h -c '#{pane_current_path}'
bind '-' split-window -v -c '#{pane_current_path}'Change Windows/Panes without Prefix
You will be changing between different windows/panes a lot. So, pressing the prefix combo and other command keys becomes tedious and counterproductive.
# Use Alt-arrow keys without prefix key to switch panes
bind -n M-Left select-pane -L
bind -n M-Right select-pane -R
bind -n M-Up select-pane -U
bind -n M-Down select-pane -D

# Shift arrow to switch windows
bind -n S-Left  previous-window
bind -n S-Right next-window
After adding the lines above to the config file, you can use Shift + Arrow Keys (←→↑↓) to change windows and Alt + Arrow Keys (←→↑↓) to change panes.
For those who are familiar with vim, you can also add the following lines to change between panes using vim navigation keys.
# Vim style pane selection
bind h select-pane -L
bind j select-pane -D
bind k select-pane -U
bind l select-pane -R

# Use Alt-vim keys without prefix key to switch panes
bind -n M-h select-pane -L
bind -n M-j select-pane -D
bind -n M-k select-pane -U
bind -n M-l select-pane -R
Changing Copy/Paste
By default, copying contents from the tmux session to the system clipboard is complicated. So we will be changing it.
For this, you will need to have xclip installed.
You can install xclip using sudo apt-get install xclip on Ubuntu/Debian, sudo yum install xclip on Fedora/CentOS, or brew install xclip on macOS.
Once xclip is installed, add the following line to the tmux configuration file.
## Capture current tmux buffer and copy it to system clipboard with prefix + 'Ctrl + c'
bind C-c run "tmux save-buffer - | xclip -i -sel clipboard"

## Optional - paste from system clipboard to tmux session with prefix + 'Ctrl + v'

bind C-v run "tmux set-buffer "$(xclip -o -sel clipboard)"; tmux paste-buffer"
For me, those above keys are not very intuitive. So let's modify them to mimic vim key-bindings.
#copy and paste vim style

## Enable vi-copy-mode
setw -g mode-keys vi

# Turn off mouse and use vim keys for navigations
# turn this on if you want to use touchpad or mouse to scroll through terminal
setw -g mouse off

## changing the key to enter copy mode from `[` to `ESC`
unbind [
bind Escape copy-mode

## unbind p and set it to paste from buffer
unbind p
bind p paste-buffer

## set keys for visual mode (v) and yank/copy (y)
bind-key -Tcopy-mode-vi 'v' send -X begin-selection
bind-key -Tcopy-mode-vi 'y' send -X copy-pipe-and-cancel 'xclip -in -selection clipboard'Now, copying the output from the tmux session to the system clipboard is a lot easier.
First, press 'Prefix Combo' + ESC to enter copy mode. If you see a yellow visual indicator on the top right of your tmux window, you can now move around the output using vim navigation keys.
Now, to highlight the text you want to copy, press Space or 'v', then use your arrow keys or vim navigation keys to select the desired text. Then, at last, "yank" (copy) the highlighted output with 'y'. You can paste using normal shortcuts, but pressing 'p' should also do the work.
Reload tmux Config Without Closing Current Sessions
Add the line below to allow you to press 'Prefix Combo' + r to reload and apply your changes to the tmux config file without closing your current sessions.
unbind r
bind r source-file ~/.tmux.conf \; display "Reloaded tmux config!"
Miscellaneous Changes
# Automatically set the window title
set-window-option -g automatic-rename off

# activity notifications
setw -g monitor-activity on
setw -g visual-activity on

# Improve terminal colors
set -g default-terminal "screen-256color"
set -ga terminal-overrides ",xterm-256color:Tc"

# increase scrollback buffer to 10000
set -g history-limit 10000
The code above contains some miscellaneous customization from my tmux config file. Feel free to add these lines to your own config to tinker with them to find something that fits you.
Here's what my tmux looks like currently.
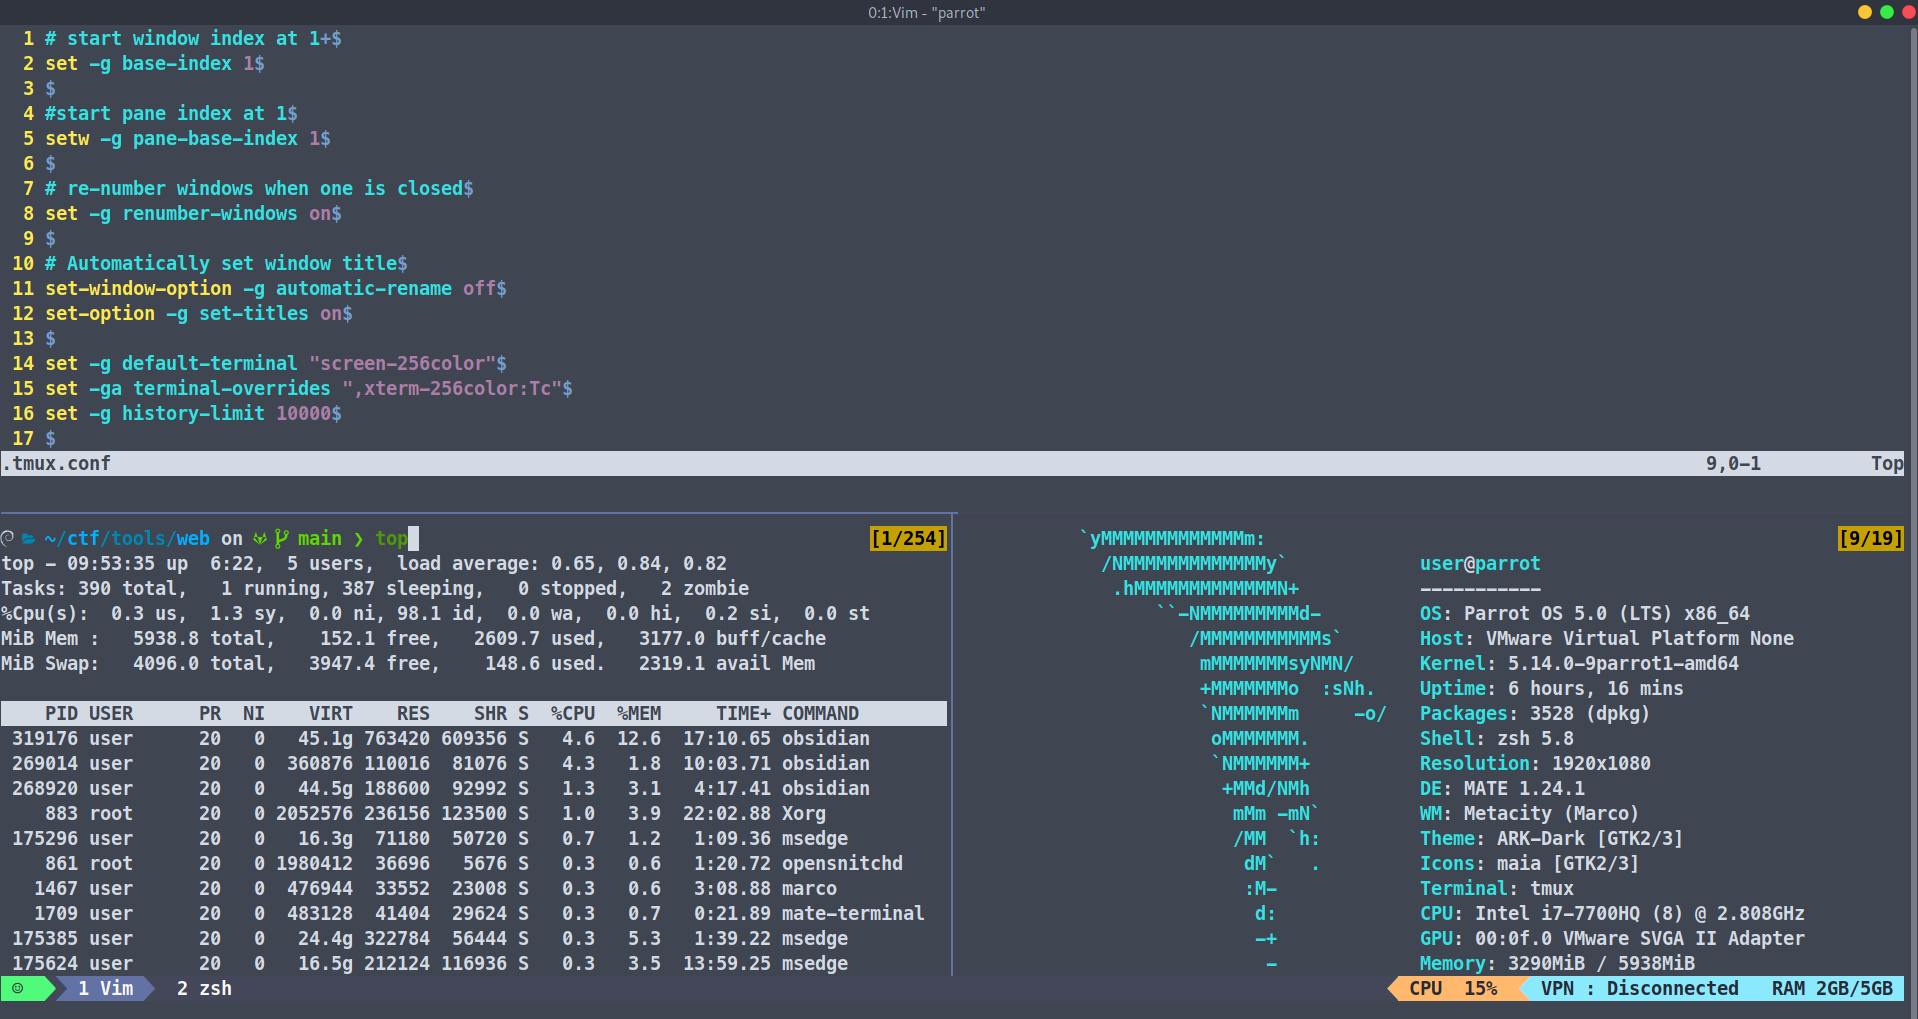
Wondering why my TMUX looks different than yours? Stay tuned for part 2 to find out.