
An audio spectrum is the range of frequencies present in an audio signal. Audio visualisation adds a dynamic element to videos, music visualisers, or motion graphics projects. One popular technique is creating an audio spectrum where sound frequencies are represented by visual bars that react to the audio. Adobe After Effects provides powerful tools and features to create stunning audio spectrums that sync with the audio track.
In this step-by-step guide, we will walk through the process of creating an audio spectrum in After Effects, allowing you to add an interesting visual element to your projects.
Steps For Creating Audio Spectrum
Step 1: Import the audio
Start by opening After Effects and creating a new composition. In our case, we have named the composition as 'Audio_Spectrum'.
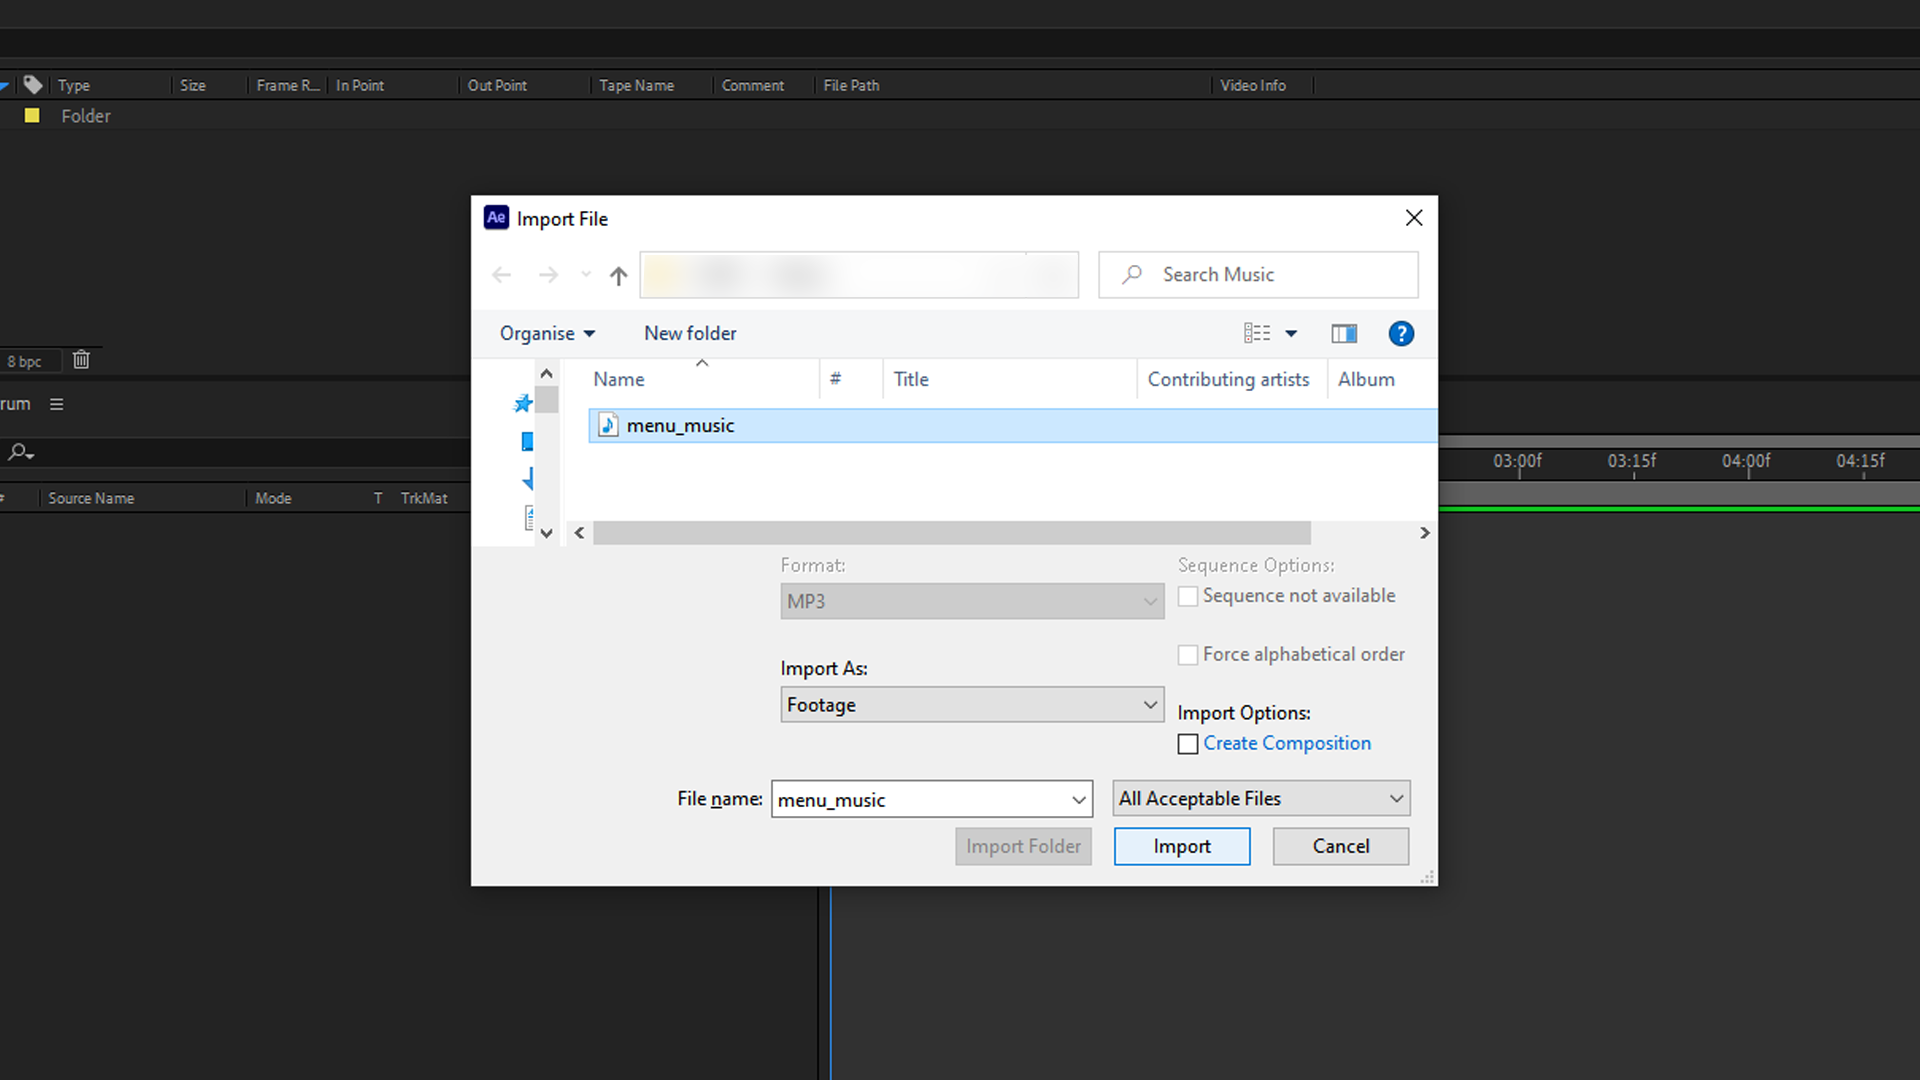
Import the audio file you wish to visualise by going to File > Import > File or simply drag and drop your music file to the After Effects timeline directly.
It is important to note that After Effects supports various audio formats like WAV, MP3, and AIFF. Once imported, drag the audio file to the timeline.
Step 2: Create a solid layer
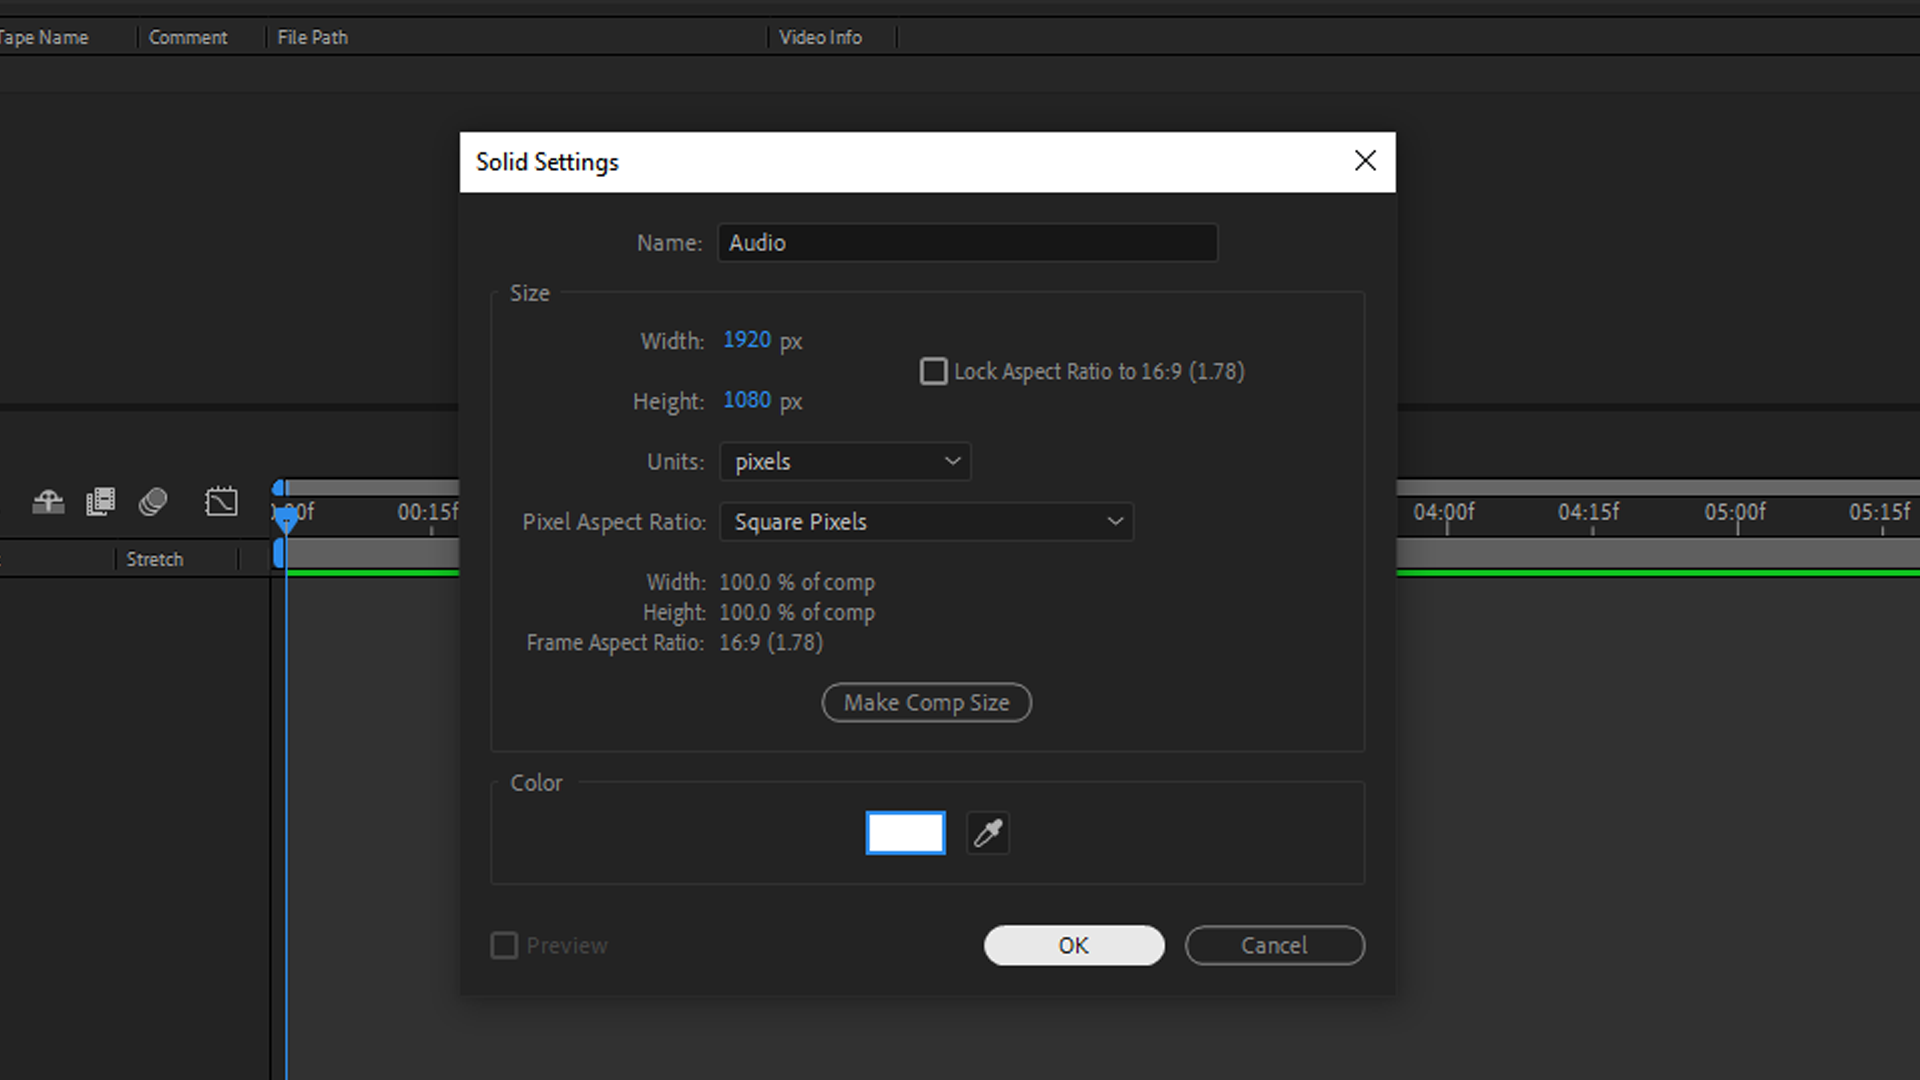
Next, create a new solid layer by selecting Layer > New > Solid or right-click on the timeline, then go to New > Solid.
Choose a colour that contrasts well with the audio spectrum you want to create. This solid layer will act as the background for the spectrum.
Step 3: Apply the Audio Spectrum effect
With the solid layer selected, navigate to Effects & Presets and search for Audio Spectrum.
Drag and drop the Audio Spectrum effect onto the solid layer or double-click on the effect. This effect will generate the visual representation of the audio frequencies.
Step 4: Adjust Audio Spectrum settings
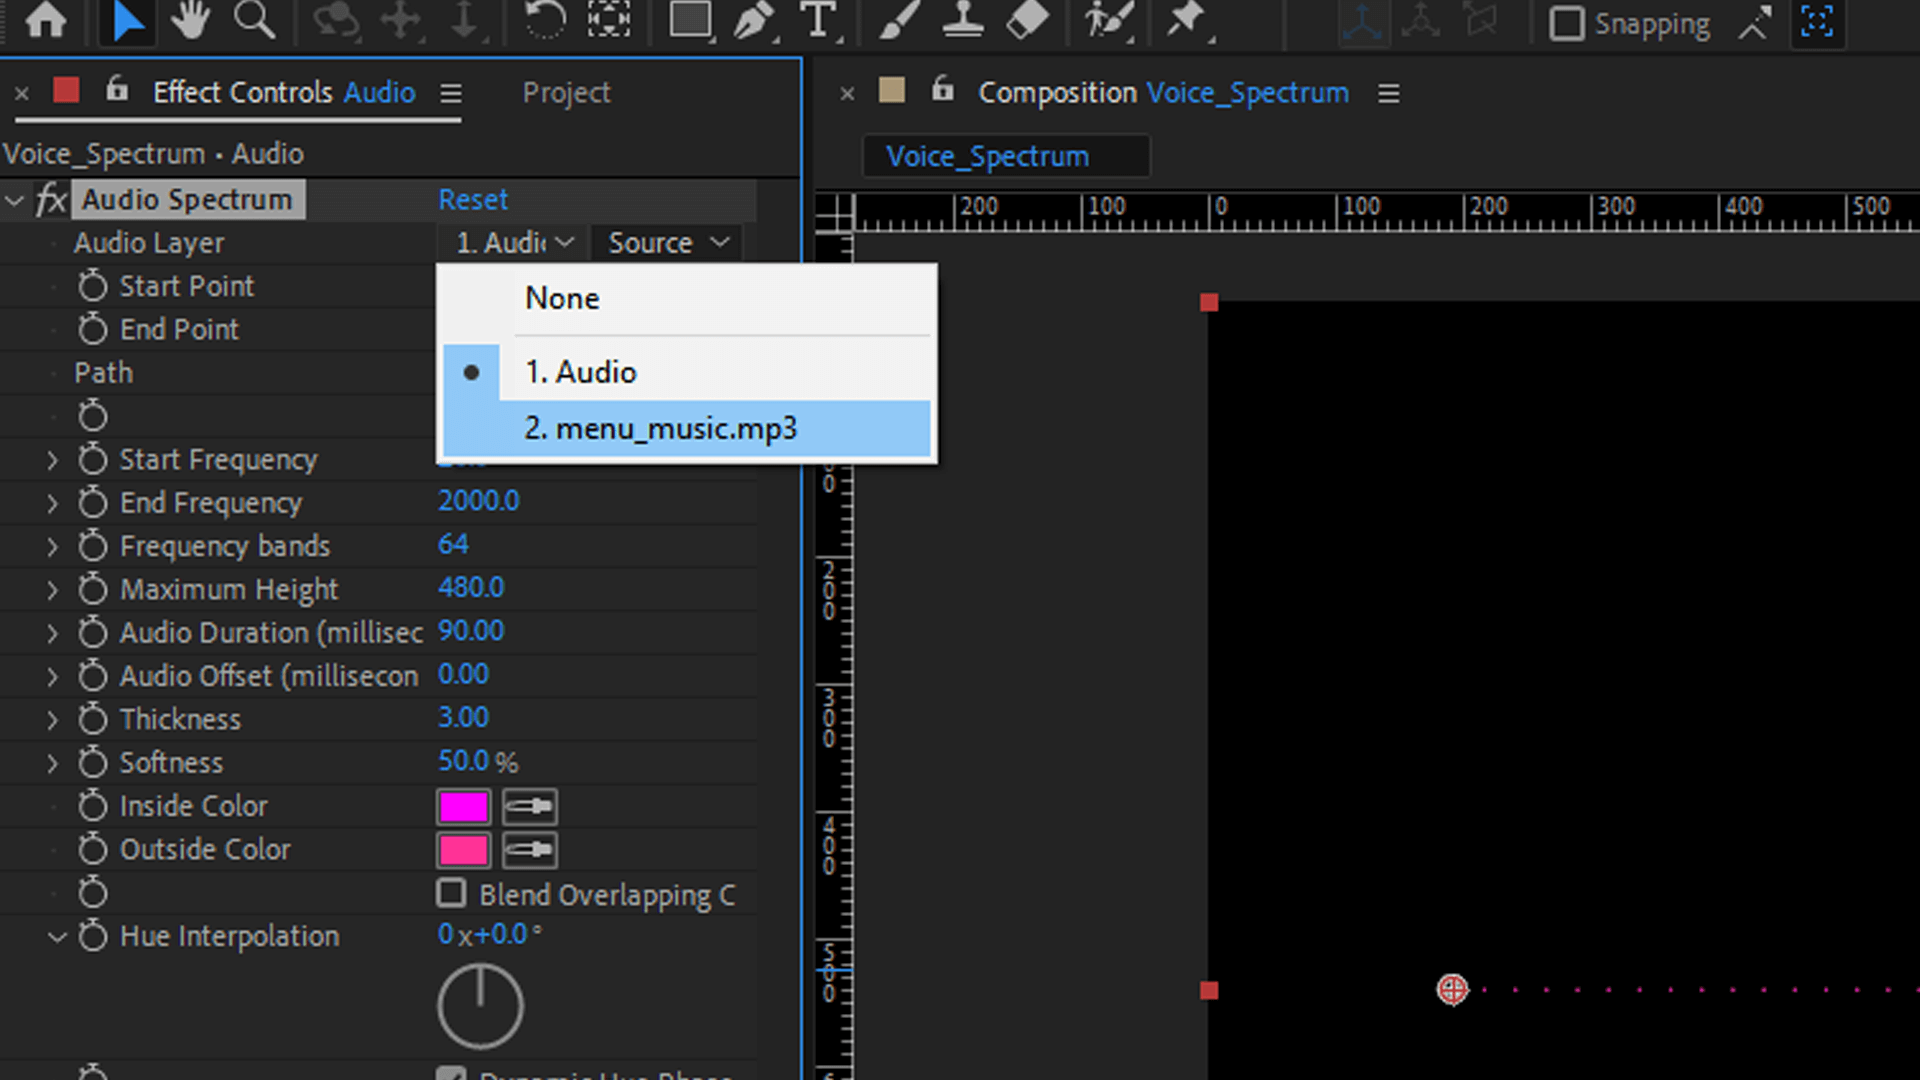
In the Effect Controls panel, you'll find various parameters to customise the audio spectrum. Start by selecting the Audio Layer in the Audio Spectrum dropdown menu. This tells After Effects which audio layer to use for the spectrum.
Adjust the frequency range, maximum height, and bar width to achieve the desired look. Experiment with the different settings to create unique visualisations.
Step 5: Customise the visual appearance
After Effects provides several options to customise the visual appearance of the audio spectrum. You can change the colour of the bars, adjust their opacity, add a glow effect, or modify the background.
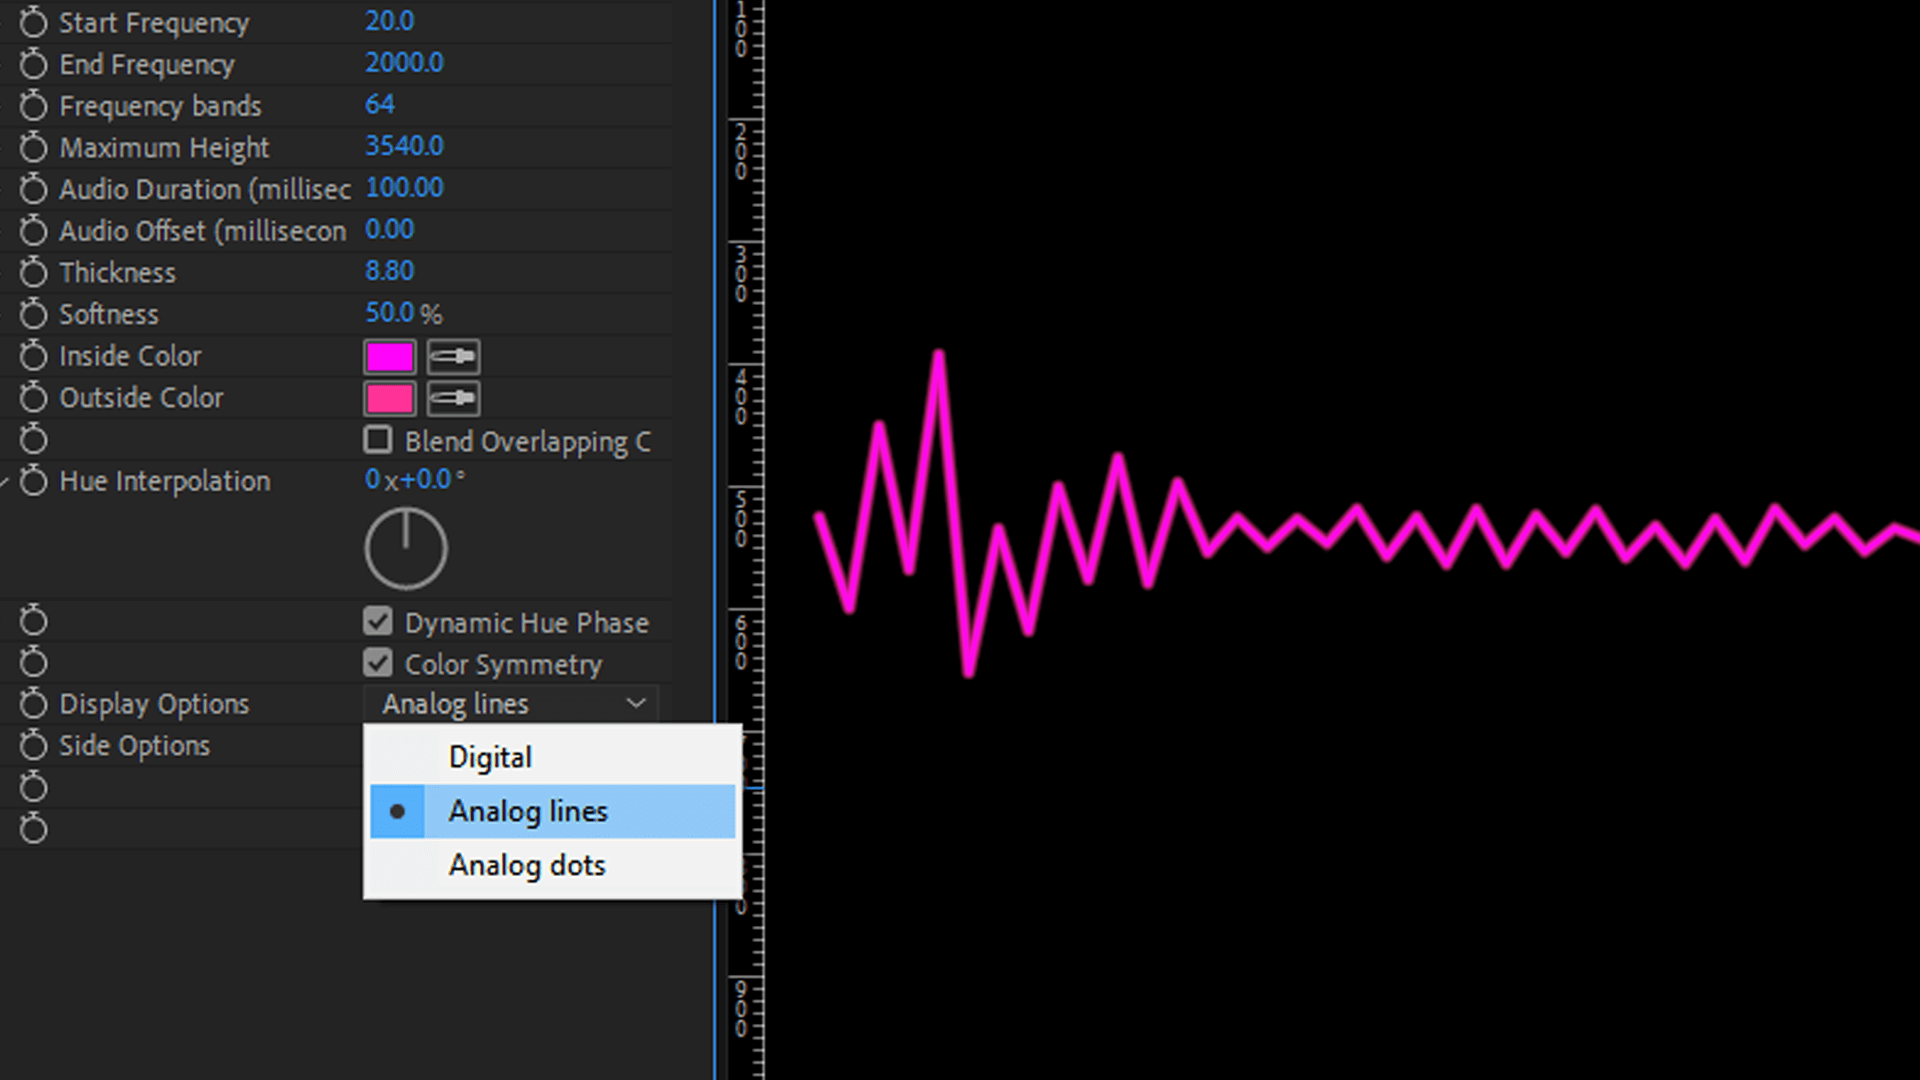
The audio spectrum display can be customised with digital lines, analogue or digital dots. Additionally, adjustments can be made to either or both sides (Side A and Side B) of the spectrum, allowing changes in both upward and downward directions.
Explore the options in the Effect Controls panel to match the style and mood of your project.

Step 6: Sync the spectrum with audio
To synchronise the audio spectrum with the audio track, enable the Composite On Original checkbox in the Effect Controls panel. This ensures that the visual bars react to the audio's amplitude and frequency. You can refine the synchronisation further by adjusting the audio duration, start frequency, and end frequency parameters.
Step 7: Fine-tuning and enhancing
Time to take your audio spectrum visualisation to the next level!
To truly captivate your audience, consider incorporating additional effects and elements to make the visual display even more appealing.
With Adobe After Effects, the possibilities for creativity and experimentation are endless. One technique you can employ is the application of motion blur, which adds a smooth and flowing quality to the movements within the audio spectrum.
By integrating the motion blur effect, you can enhance the overall aesthetic and create a visually pleasing experience for your viewers.
Another option to explore is the integration of other visual elements, such as particles or text. These additions can further enrich the audio spectrum by adding depth and intrigue.
Experimenting with blending modes and opacity changes will enable you to achieve unique and eye-catching visual effects. This can bring your creation to life in unexpected ways.
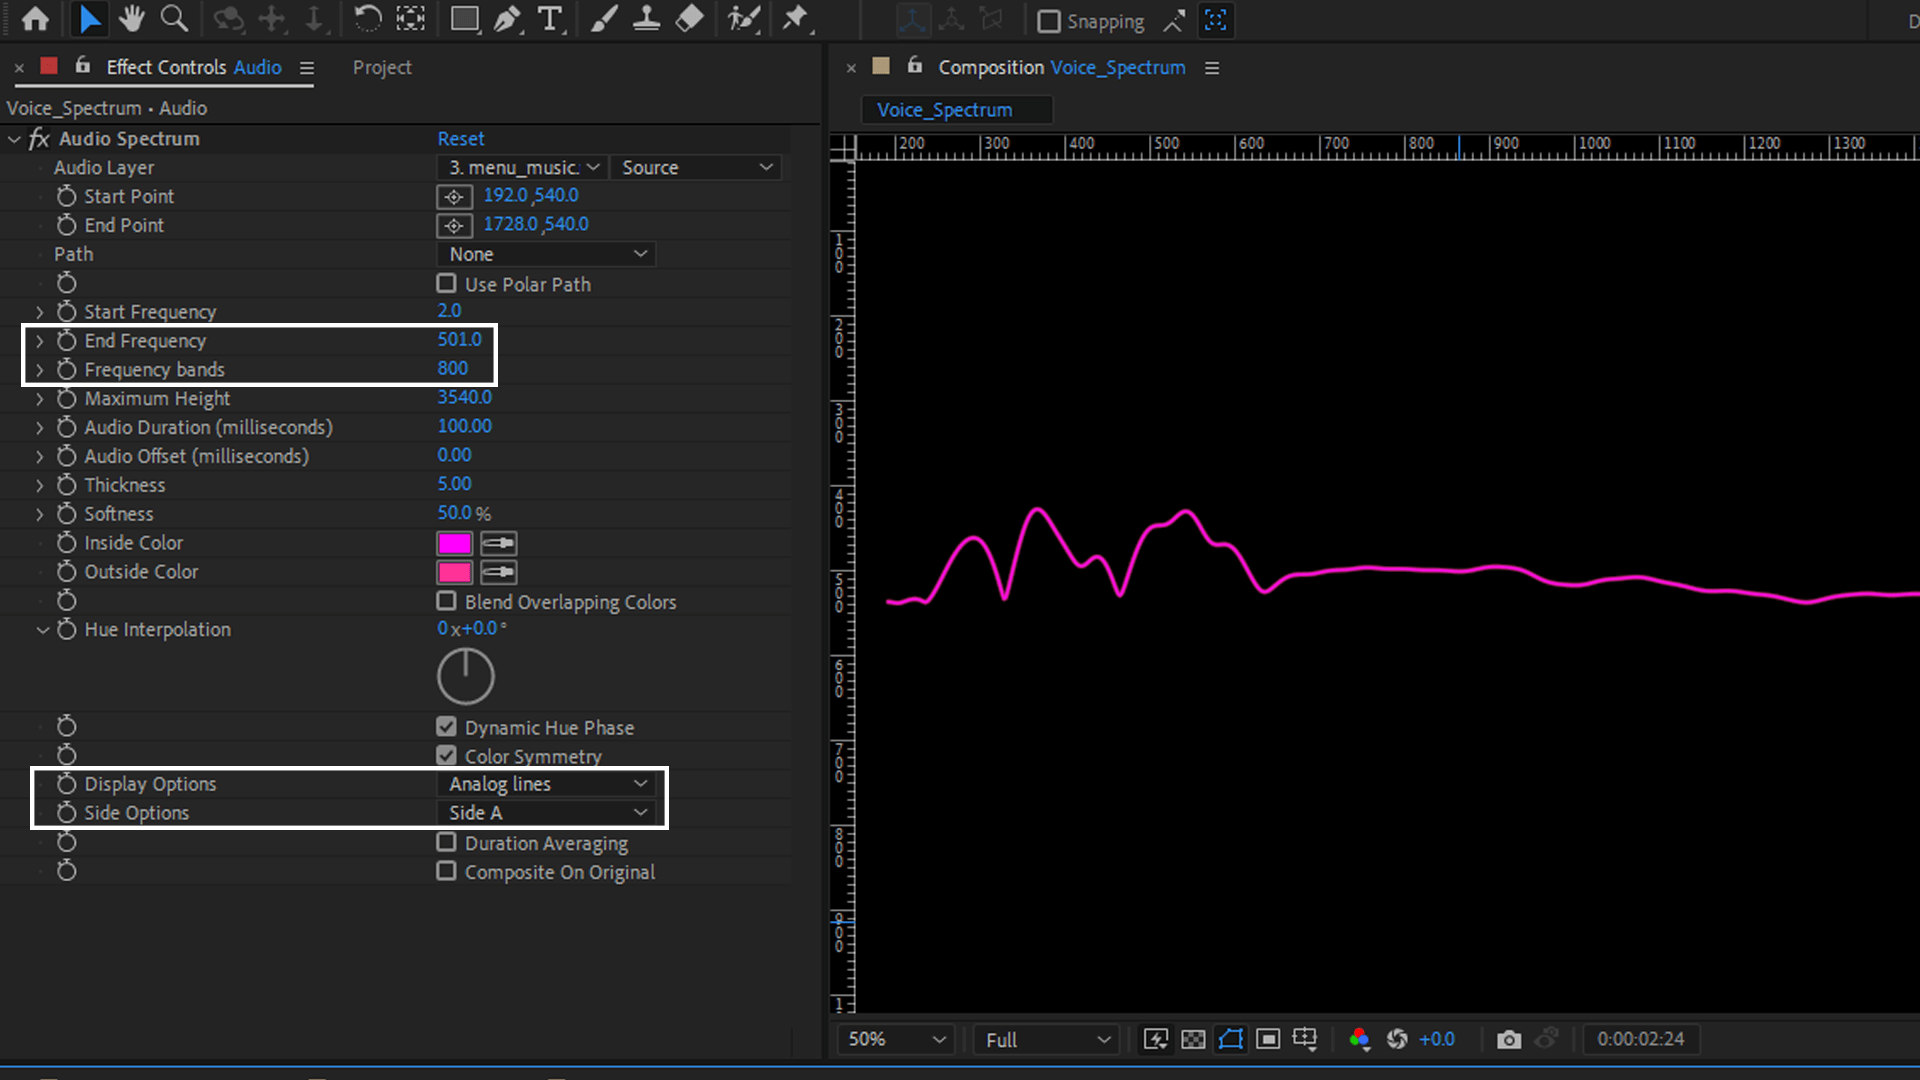
End Frequency, Frequency Band, Display Options and Side OptionsLet's delve into a specific example to illustrate how you can amplify the visual impact of your audio spectrum.
To begin, you might consider increasing the Frequency Band and End Frequency settings. This adjustment will result in a spectrum resembling rolling hills, providing a visually stimulating experience.
You can add a compelling background to the spectrum to further enhance the composition.
Start by duplicating the Audio Spectrum layer where the effect is actively playing, and adjust its display options by setting it to Digital. This modification will create a contrasting visual element that complements the audio spectrum.
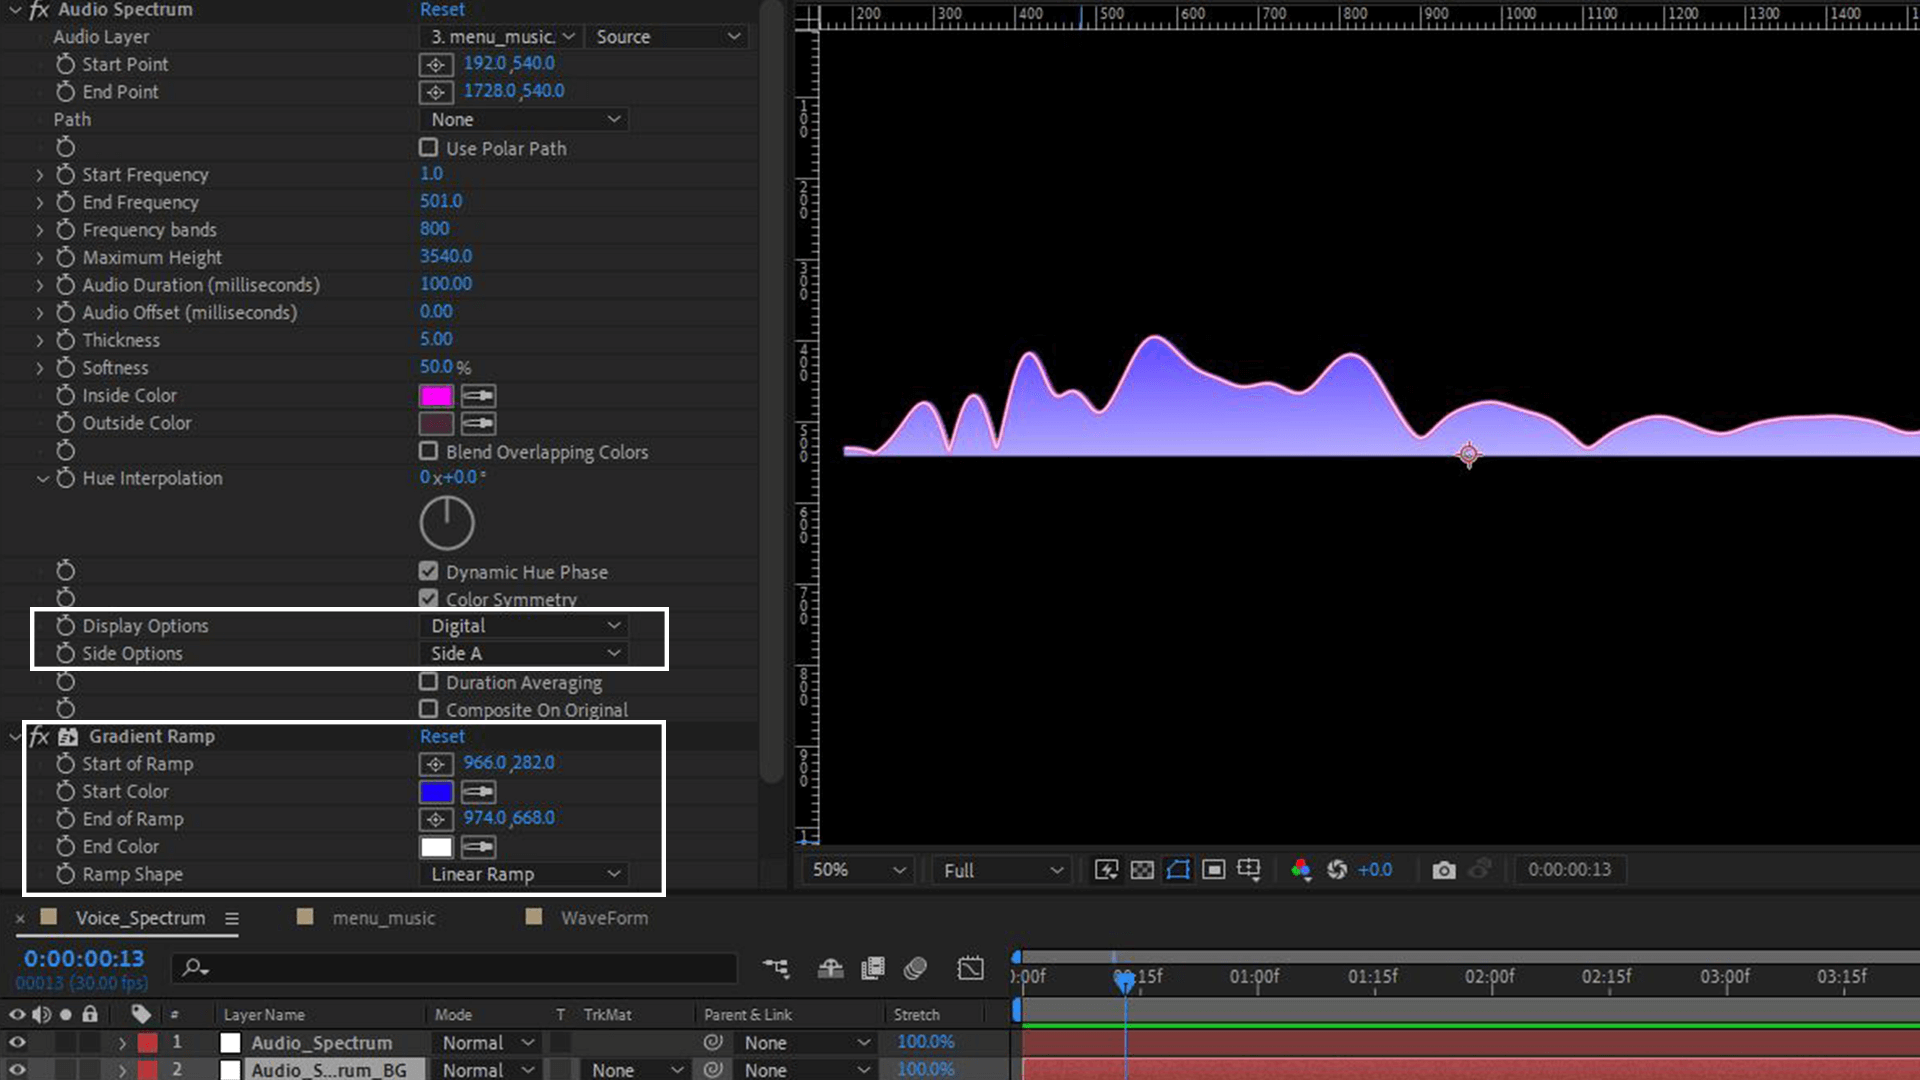
Display Options, Side Options and adding a gradient ramp in the duplicated layerTo achieve a gradient-style background, apply the gradient ramp effect to the duplicated layer. This effect allows you to introduce a smooth transition between the colours, adding depth and dimension to the overall visual presentation.
Don't hesitate to experiment with different colour schemes to find the one that best suits your creative vision.
For a touch of dynamism, consider fine-tuning the side options to display visualisations on both sides of the spectrum. This adjustment will create captivating visuals that interact with the audio, adding an extra layer of interest and excitement to your project.
Remember, this process is all about unleashing your imagination and exploring various techniques to create a visually stunning audio spectrum.
Step 8: Pre-render and export
Once you are satisfied with your audio spectrum, it's time to render and export your composition.
Go to Composition > Add to Render Queue.
In the Render Queue panel, select the desired output format, codec, and destination folder. Adjust any additional settings as necessary, such as frame rate or resolution. Finally, click Render to export your audio spectrum as a video file.
Creating an audio spectrum in After Effects allows you to add a visually captivating element to your videos, music visualisers, or motion graphics projects.
Following this tutorial, you can customise and synchronise the audio spectrum with your audio track, adjusting its appearance to match your desires.
Remember to experiment with various settings, effects, and enhancements to create unique and visually stunning audio spectrums that enhance your projects.
With After Effects' powerful tools, your audio visualisation possibilities are limited only by your imagination.
Thanks for reading! Don't forget to subscribe and leave a comment below.