
A person might chat with another person by words, pictures or sign language. But in the modern world, we use different mobile and web applications to chat with other people.
An example of a general chat app is Meta Facebook Messenger, which we all know of. It operates by storing all of the messages on its server. This is why we can load messages from 5 years ago on Messenger.
You might have also heard of Viber, which also stores your data on its server. Unlike Messenger, however, Viber deletes your data from its server once a message is delivered.
We will be trying to imitate how Viber works in our app. We won't be storing data on our servers for now.
Initializing Project
Follow the article mentioned above to get started by creating a project structure. We will be installing the socket.io-v4 package in the project by executing the following command in the project directory.
npm install socket.ioAnd now, we will replace index.ts with the following code.
This will be our socket server. We will have login => join room => and chat actions in the system that the client needs to follow.
import { Server, Socket } from "socket.io";

const io = new Server({});

io.on("connection", (socket: Socket) => {
	console.log("client connected");

	// login to the server with a userName
	socket.on("login", (name: string) => {
		socket.data.name = name;
	});

	// joins the room of given roomName
	socket.on("join", (roomName: string) => {
		socket.join(roomName);
		socket.data.roomName = roomName;
	});

	// sends message to everyone in room
	socket.on("chat", (message: string) => {
		const myRoom = socket.data.roomName;
		io.in(myRoom).emit("message", {
			user: socket.data.name,
			message: message,
		});
	});
});

io.listen(3000);Building Client
Let's build our client (command line). We will start by installing the required packages and writing the client code client.ts in the src directory.
npm install socket.io-client socketio-wildcardconst readline = require("readline");
const rl = readline.createInterface({
input: process.stdin,
output: process.stdout,
});
const clientIO = require("socket.io-client");
const socket_wildcard = require("socketio-wildcard");
let options = {
path: "/socket.io",
};
const socket = clientIO("http://127.0.0.1:3000", options);
const patch = socket_wildcard(clientIO.Manager);
patch(socket);
socket.on("connect", async function () {
console.log("Connected to Socket Server");
let quit = false;
async function askAgain(quit: boolean) {
if (quit === false) {
rl.question("Event : ", async function (event: string) {
rl.question("Data : ", async function (data: any) {
socket.emit(event, data);
await askAgain(quit);
});
});
}
}
await askAgain(quit);
});
socket.on("*", function (args: any) {
const data = args.data;
console.log("event received : " + data[0]);
console.log(data[1]);
});
Compiling and Testing
Let's compile the typescript code by running tsc -p tsconfig.json it from the project directory.
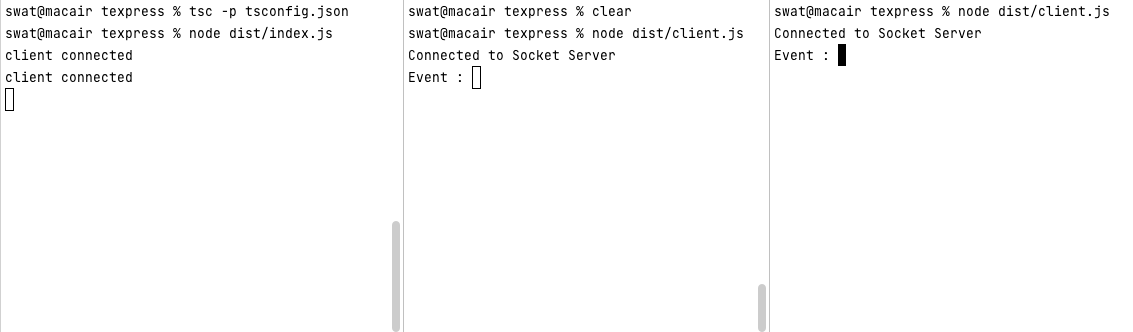
Now I will demonstrate the workings of this application by opening 3 terminals and running one server with node dist/index.js and then two clients with node dist/client.js. This simulates a conversation between Client 1 and Client 2, with Server 1 handling the messages.
Now, we follow the process for a chat. We start the events login > join room > chat.
Let's log in from two clients using usernames "one" and "two" respectively by sending names as data in the login event.
Then, join the same room named "test" from both clients by sending the room name as data in the join event. It will result in:
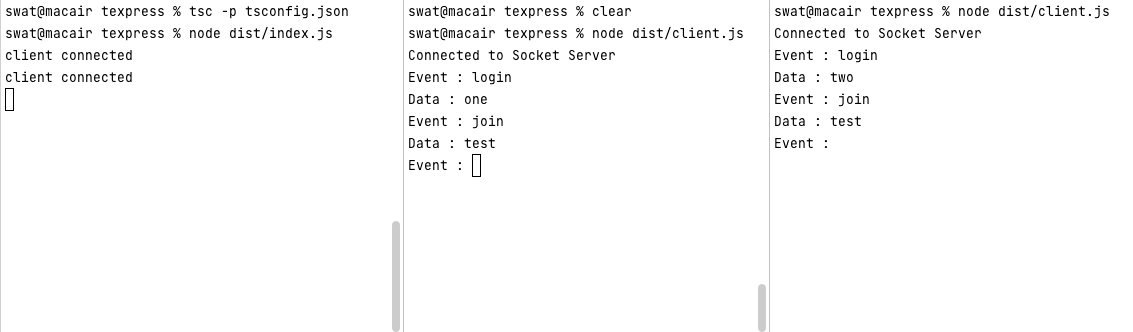
This process will join both socket clients in the room test. Now we can chat by sending a message as data in the chat event. The result is shown below.
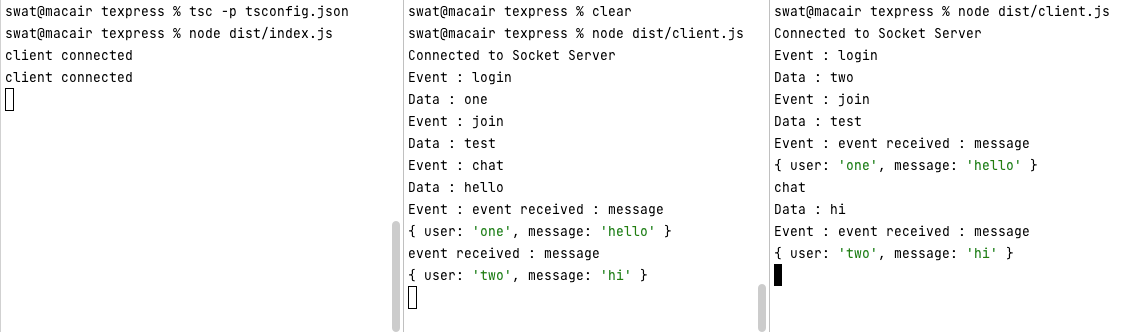
The first client sent "hello" in the message received by the second client, shown in the above figure in green. Then the second client sent "hi" in the message received by the first client.
This code worked! And we didn't use any database services!
Pros and Cons of this Chat System
While we are at this, let's discuss the pros and cons of the chat system that we have created in this tutorial.
Pros
- It is simple to use and build
- It stores no data, so data privacy is maintained
- No authorization is required, which adds to the ease of use
- Users can remain anonymous as no credentials are stored
Cons
- If the client goes offline, the sent data is lost
- Old chats are not recoverable since they are never stored
Possible Improvements
There are a lot of improvements that can be made in this char system. For example, we could do the following improvements to make this chat system a better one.
- Adding end-to-end encryption for more security
- Adding a temporary data storage system in the server to forward data to users in the room when they come online
- Building a proper a GUI
Adding these features will definitely make our chat application far better.
I hope you learned something new today. The possible improvements are something that is definitely possible with a little bit of code. Therefore, stay tuned for more parts of this series!