
Arcade Vs Simulated Games
When it comes to game physics, there are two primary classifications: Arcade and Simulated. Arcade games are known for deviating from the laws of physics, as seen in popular game titles like Mario Kart and Need for Speed. These games offer unrealistic features such as gravity-defying jumps and exaggerated drifting.
In contrast, simulated games strive to replicate real-world physics as accurately as possible. The focus is creating a gaming experience that feels authentic and true to life. Simulated games immerse players in a realistic environment by incorporating accurate physics calculations. A third category, Simcade, adopts a combination of both simulated and arcade physics.
In this article, we will build a basic Arcade Car Controller in Unity. So let's dive in.
Arcade Car Controller
We will develop a very basic 2d car controller with acceleration , steering and braking features.
Setting Up Car Prefab
We will start by setting up a car prefab with rigidbody2d and collider.
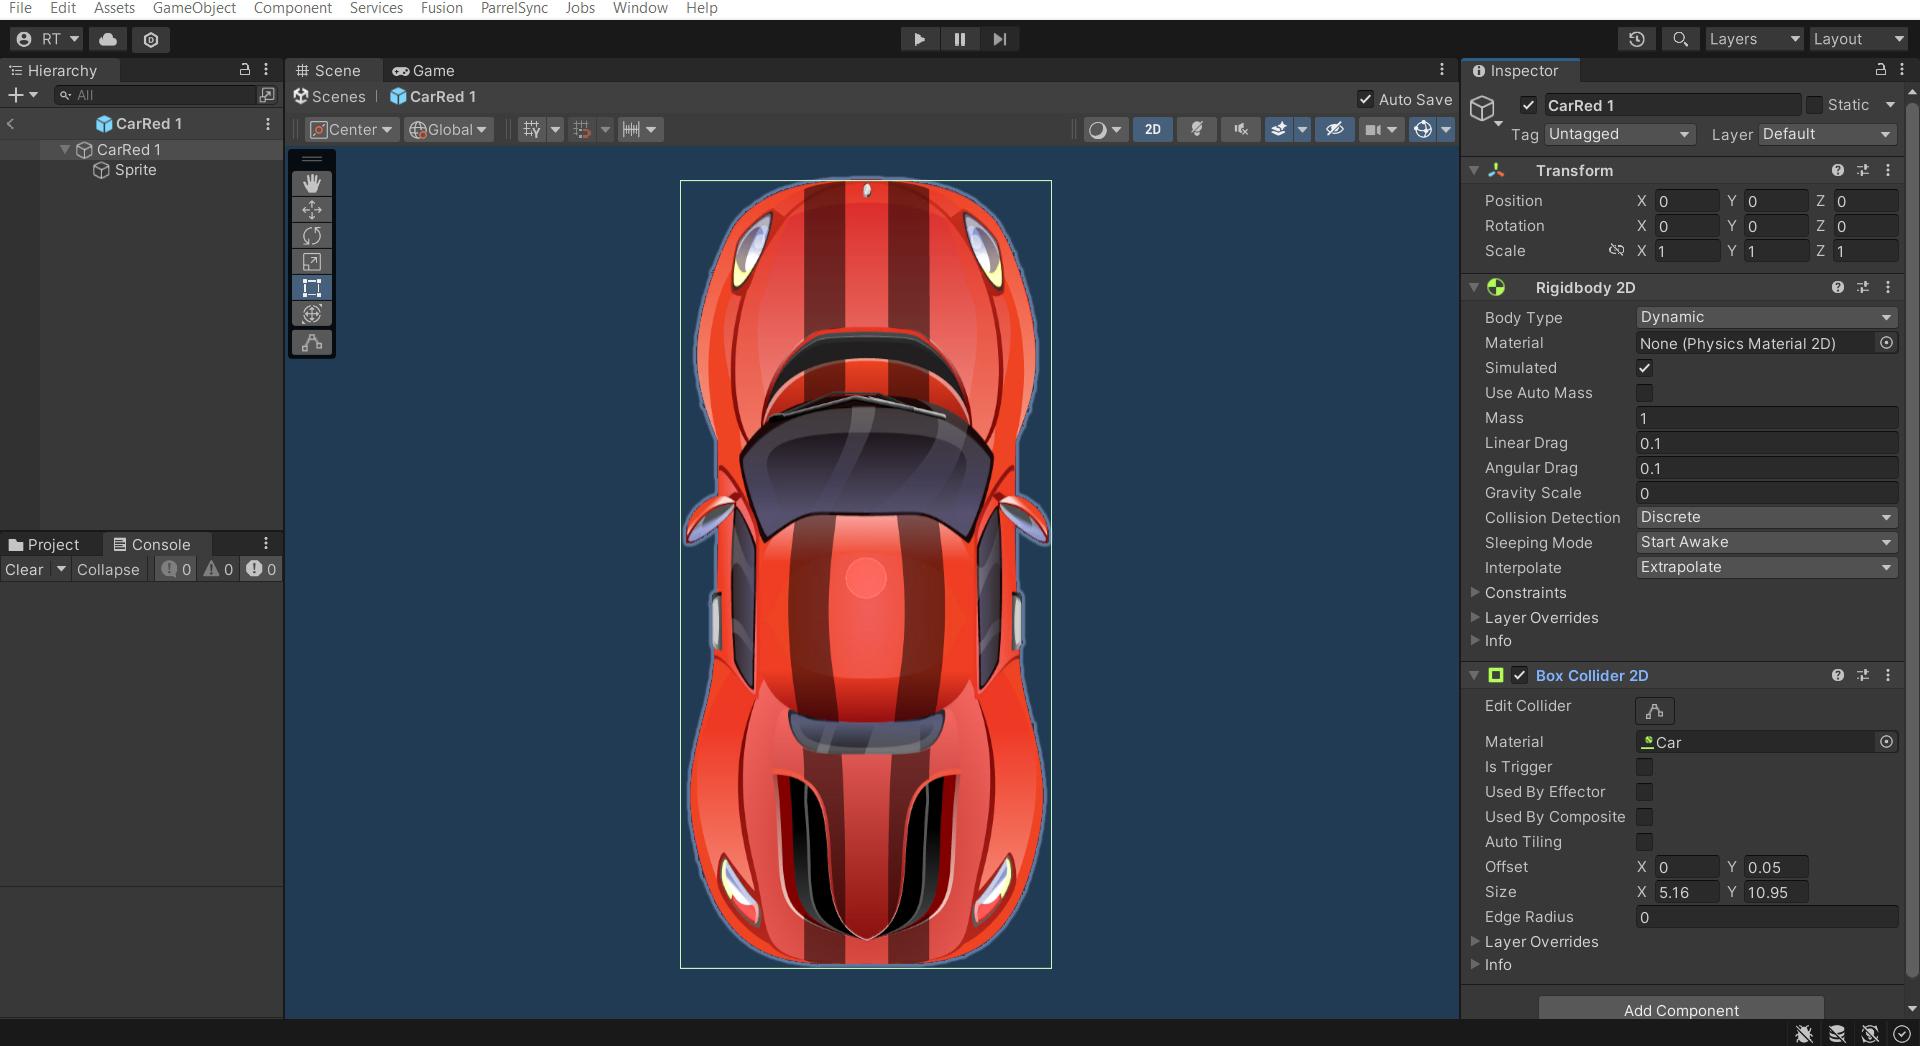
prefab with rigidbody2d and collider.- Download any of the free
car assets(you can also design it yourself if you like). - Add
rigidbody2dandbox collider 2dcomponents to your cargameobject. - Adjust your
collidersize to match thespritein the scene. - Drag and drop the
gameobjectto theprojecttab to create aprefabout of it.
Adjusting The Acceleration
We will collect input from the user, and based on user input, the force will be applied to the car's rigidbody2d.
1. Start by creating a new c sharp script CarController.cs
2. Add this script to the car gameobject.
We will first add a serialized float field to control the acceleration factor from the inspector.We will also reference the car's rigidbody2d component in a local variable.
[SerializedField] float acceleration;
Rigidbody2D carRigidbody2D;
We will get an attached rigidbody2d in the awake function and assign it to the local variable.
void Awake(){
	carRigidbody2d = GetComponent<Rigidbody2D>();
}
We will get the user's input in the update function.Vertical axis refers to the w/s key or up/down arrow on the keyboard.
You can set axes up in Edit>Project>Settings>Input>Manager>Axesvoid Update(){
accelerationInput = Input.GetAxis("Vertical");
}All forces are applied to the Fixedupdate function. Vector2d of engine force is calculated and added to the rigidbody2d.Transform.up is used so that force is always applied to the vehicle's forward direction despite its rotation.
private void FixedUpdate()
    Vector engineForceVector = transform.up * acceleration * accelerationInput;
    //Apply force and pushes the car forward
    carRigidbody2D.AddForce(engineForceVector, ForceMode2D.Force);
}accelerationAdjusting The Steering
Similar to acceleration input, we will collect steering input from the user and apply rotation on the car’s rigidbody2d.
Add a new serialized field to turn factor through inspector. Similarly steering input is introduced to store user’s steering input and rotationAngle to rotate the car based on this variable’s value.
[SerializeField] float acceleration;
[SerializeField] float turnFactor;

Rigidbody2D carRigidbody2D;

float accelerationInput;
float steeringInput;
float rotationAngle;
Similar to acceleration input steering input is collected from the user.
void Update()
{
    accelerationInput = Input.GetAxis("Vertical");
    steeringInput = Input.GetAxis("Horizontal");
}SteeringHorizontal axis refers to thea/dkey orleft/rightarrow on the keyboard.
Rotation of the car changes based on steering the input of the user. And calculated value is applied to rigidbody2d’s moverotation the function.
Adjusting The Drift Factor
You might have noticed that the car is not turning properly and moving unusually. This phenomenon occurs because there is no factor to limit the lateral velocity of a car (In the real world, friction restricts the car's movement in the lateral direction). We will achieve the same phenomenon by killing the velocity manually.
Introduce new float driftfactor so that the amount of drift can be controlled through the script.
Value of driftfactor around0.9to0.95performed very well in my case
[SerializeField] float acceleration;
[SerializeField] float turnFactor;
[SerializeField] float driftfactor;
First, forward velocity and then lateral velocity is calculated from rigidbody2d. Only lateral velocity is reduced by drift factor.
void KillLateralVelocity(){

    Vector2 forwardVelocity = transform.up * Vector2.Dot(carRigidbody2D.velocity, transform. up);
    Vector2 lateralVelocity = transform right *Vector2.Dot(carRigidbody2D.velocity, transform. right);
    carRigidbody2D.velocity = forwardVelocity*lateralVelocity*driftFactor;

}Drift FactorNow you can see that the vehicle turns as expected. The unusual sliding of the vehicle during turning is fixed. Adjust the drift factor value to achieve the desired result.
Restricting The Velocity
We can restrict the velocity of a car by comparing current velocity with max velocity.
float velocityVsUp = Vector.Dot(transform.up,carRigidbody2D.velocity);

//Limit so we cannot go faster than the max speed in the "forward" direction
if (velocityVsUp > maxSpeed && accelerationInput > 0)
    return;

Vector2 engineForceVector = transform. up * acceleration * accelerationInput;velocity of the carAdjusting The Deceleration Behaviour
We need to gradually decelerate the car down when no acceleration input is applied by the user. We can slow the car down by changing the drag factor of rigidbody . We change the drag value to 2 if no acceleration input is applied. Lerping will smoothly change drag value to 2.
if (accelerationInput == 0)
    carRigidbody2D.drag = Mathf .Lerp(carRigidbody2D. drag,2,Time.fixedDeltaTime * 3);

else carRigidbody2D.drag = 0.1f;
Decelerating the car when acceleration input is not appliedThe Full Code
public class CarController: MonoBehaviour{

    [SerializeField] float acceleration=4;
    [SerializeField] float maxSpeed;
    [SerializeField] float turnFactor=2;
    [SerializeField] float driftFactor= .95f;
    Rigidbody2D carRigidbody2D;
    float accelerationInput;
    float steeringInput;
    float rotationAngle;

    void Awake (){
        carRigidbody2D = GetComponent<Rigidbody2D>();
    }

    void Update(){
        accelerationInput = Input. GetAxis("Vertical");
        steeringInput = Input. GetAxis ("Horizontal");
    }

    void FixedUpdate(){
        ApplyEngineForce();
        KillLateralVelocity();
        ApplySteering();
	}

    void ApplyEngineForce(){

        if (accelerationInput == 0)
            carRigidbody2D.drag = Mathf.Lerp(carRigidbody2D.drag, 2,Time.fixedDeltaTime * 3)

        else
            carRigidbody2D.drag = 0.1f;

        //Caculate how much "forward" we are going in terms of the direction of our velocity

        float velocityVsUp = Vector2.Dot(transform.up,carRigidbody2D.velocity);

        //Limit so we cannot go faster than the max speed in the "forward" direction

        if (velocityVsUp > maxSpeed && accelerationInput==0)
            return;

        //Create a force for the engine
        Vector engineForceVector = transform.up *acceleration * accelerationInput;

        //Apply force and pushes the car forward
        carRigidbody2D.AddForce(engineForceVector,ForceMode2D.Force);

	}

    void ApplySteering(){

        //Update the rotation angle based on input
        rotationAngle -=steeringInput*turnFactor;

        //Apply steering by rotating the car object
        carRigidbody2d.MoveRotation(rotationAngle);
    }
}Thank you for reading. If you liked this article, consider subscribing and leaving a comment down below.