
Ever had to wait more than 20 minutes to get a build ready for your Unity project? Or have you ever had to build multiple target platforms for a single project? If you have faced one of the issues, you must have considered automating your Unity project's builds. So, in this blog, we will have a walkthrough on automating Unity Project builds with our GameCI GitHub Actions integrations.
GitHub Actions is a dynamic platform designed to help developers streamline their software development workflow. This is achieved by creating customized actions that respond to specific events like code modifications or release updates.
Developers can easily build, test and deploy their code. Thanks to the platform's extensive collection of pre-existing actions and the option to create custom ones. The workflows can be defined in a YAML file, which provides easy version control and efficient management of any changes made. The workflows can be triggered automatically and manually according to specific requirements.
Creating the Required Files
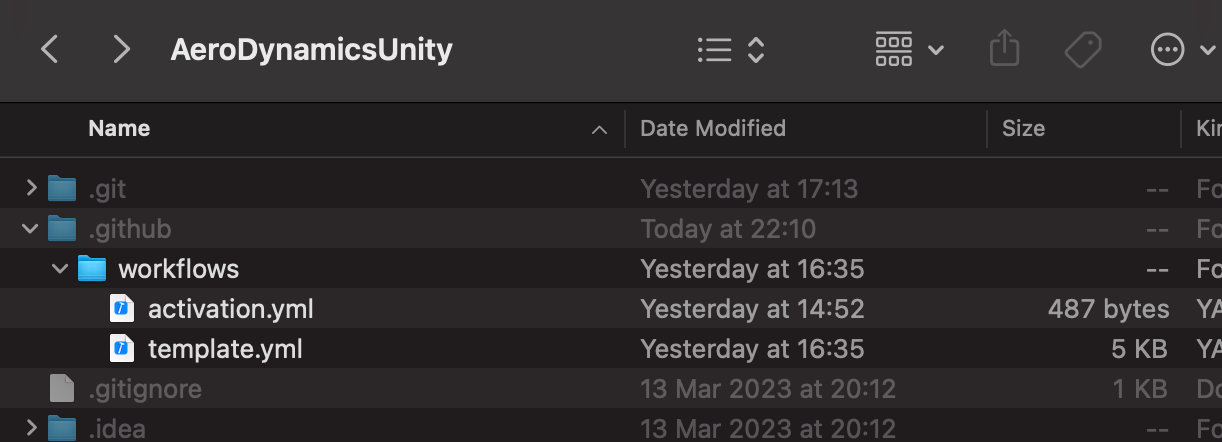
To dive into creating the workflow, we will first need to get inside our project repo and create a folder named .github with a child folder named workflows inside it. The following child folder workflow will have two of the major files activation.yml and template.yml.
Activation Workflow
This is a YAML file defining a GitHub Actions workflow called Get Unity license activation file. It has one job called requestManualActivationFile that runs on the latest version of Ubuntu.
The first step is to check the repository's source code using the actions/checkout action.
The second step uses a custom action called webbertakken/unity-request-manual-activation-file to request a manual activation file for a Unity license. The output file path is stored in the getManualLicenseFile ID.
The third and final step uses the actions/upload-artifact action to upload the output file from the previous step as an artifact with the name Manual Activation File. This artifact can then be downloaded and used as needed. You can copy and paste the content below to your Activation.yaml file too.
name: Get Unity license activation file 🔐

on: workflow_dispatch

jobs:
  requestManualActivationFile:
    name: Request manual activation file 🔑
    runs-on: ubuntu-latest
    steps:
      - uses: actions/checkout@v2

      - uses: webbertakken/unity-request-manual-activation-file@v2
        id: getManualLicenseFile

      - uses: actions/upload-artifact@v2
        with:
          name: Manual Activation File
          path: ${{ steps.getManualLicenseFile.outputs.filePath }}
Activation.yaml file for your GitHub workflowTemplate Workflow
This YAML file defines a GitHub Actions workflow for building and testing a Unity game project.
The workflow consists of four jobs, each with its own steps.
testRunner: This job runs Unity Test Runner to run tests for the game in both Editor/PlayMode. Use this to check errors or do unit testing before the build process.buildWebGL,buildWindows,buildAndroid: These jobs build the game for WebGL, Windows and Android, respectively, and create an artifact of the build.
Each job runs on an Ubuntu environment and includes a set of steps that perform the following actions.
- Check out the code from the repository.
- Create a list of large files (LFS) needed for the build/test.
- Restore the LFS cache to avoid downloading large files on every run.
- Pull LFS files from the Git LFS server.
- Restore the Unity library cache to avoid downloading it on every run.
- Build the game for the specified target platform using Unity Builder.
- Upload the build artifact to the GitHub Actions artifacts storage.
The workflow is triggered by a push event and requires the UNITY_LICENSE secret to being defined, which contains a Unity license key. However, you can customize the trigger event to something like a custom event action or a release trigger action.
You can copy and paste the content below to your Template.yaml file too.
name: GameCI Template 🎮

on: push

env:
  UNITY_LICENSE: ${{ secrets.UNITY_LICENSE }}

jobs:

  testRunner:
    name: Test all modes 📝
    runs-on: ubuntu-latest
    steps:
      - name: Checkout code
        uses: actions/checkout@v2

      - name: Create LFS file list
        run: git lfs ls-files -l | cut -d' ' -f1 | sort > .lfs-assets-id

      - name: Restore LFS cache
        uses: actions/cache@v2
        id: lfs-cache
        with:
          path: .git/lfs
          key: ${{ runner.os }}-lfs-${{ hashFiles('.lfs-assets-id') }}

      - name: Git LFS Pull
        run: |
          git lfs pull
          git add .
          git reset --hard

      - name: Restore Library cache
        uses: actions/cache@v2
        with:
          path: Library
          key: Library-test-project
          restore-keys: |
            Library-test-project-
            Library-

      - uses: webbertakken/unity-test-runner@v2
        id: testRunner
        with:
          testMode: all

      - uses: actions/upload-artifact@v2
        with:
          name: Test results (all modes)
          path: ${{ steps.testRunner.outputs.artifactsPath }}

  buildWebGL:
    needs: testRunner
    name: Build for WebGL 🖥️
    runs-on: ubuntu-latest
    strategy:
      fail-fast: false
    steps:
      - name: Checkout code
        uses: actions/checkout@v2

      - name: Create LFS file list
        run: git lfs ls-files -l | cut -d' ' -f1 | sort > .lfs-assets-id

      - name: Restore LFS cache
        uses: actions/cache@v2
        id: lfs-cache
        with:
          path: .git/lfs
          key: ${{ runner.os }}-lfs-${{ hashFiles('.lfs-assets-id') }}

      - name: Git LFS Pull
        run: |
          git lfs pull
          git add .
          git reset --hard

      - name: Restore Library cache
        uses: actions/cache@v2
        with:
          path: Library
          key: Library-build-WebGL
          restore-keys: |
            Library-build-
            Library-

      - uses: webbertakken/unity-builder@v2
        with:
          targetPlatform: WebGL

      - uses: actions/upload-artifact@v2
        with:
          name: build-WebGL
          path: build/WebGL

  buildWindows:
    needs: testRunner
    name: Build for Windows 🖥️
    runs-on: ubuntu-latest
    strategy:
      fail-fast: false
    steps:
      - name: Checkout code
        uses: actions/checkout@v2

      - name: Create LFS file list
        run: git lfs ls-files -l | cut -d' ' -f1 | sort > .lfs-assets-id

      - name: Restore LFS cache
        uses: actions/cache@v2
        id: lfs-cache
        with:
          path: .git/lfs
          key: ${{ runner.os }}-lfs-${{ hashFiles('.lfs-assets-id') }}

      - name: Git LFS Pull
        run: |
          git lfs pull
          git add .
          git reset --hard

      - name: Restore Library cache
        uses: actions/cache@v2
        with:
          path: Library
          key: Library-build-StandaloneWindows64
          restore-keys: |
            Library-build-
            Library-

      - uses: webbertakken/unity-builder@v2
        with:
          targetPlatform: StandaloneWindows64

      - uses: actions/upload-artifact@v2
        with:
          name: build-StandaloneWindows64
          path: build/StandaloneWindows64

  buildAndroid:
    needs: testRunner
    name: Build for Android 📱
    runs-on: ubuntu-latest
    strategy:
      fail-fast: false
    steps:
      - name: Checkout code
        uses: actions/checkout@v2

      - name: Create LFS file list
        run: git lfs ls-files -l | cut -d' ' -f1 | sort > .lfs-assets-id

      - name: Restore LFS cache
        uses: actions/cache@v2
        id: lfs-cache
        with:
          path: .git/lfs
          key: ${{ runner.os }}-lfs-${{ hashFiles('.lfs-assets-id') }}

      - name: Git LFS Pull
        run: |
          git lfs pull
          git add .
          git reset --hard

      - name: Restore Library cache
        uses: actions/cache@v2
        with:
          path: Library
          key: Library-build-Android
          restore-keys: |
            Library-build-
            Library-

      - uses: webbertakken/unity-builder@v2
        with:
          targetPlatform: Android

      - uses: actions/upload-artifact@v2
        with:
          name: build-Android
          path: build/Android
Template.yaml file for your GitHub workflowActions Page on GitHub
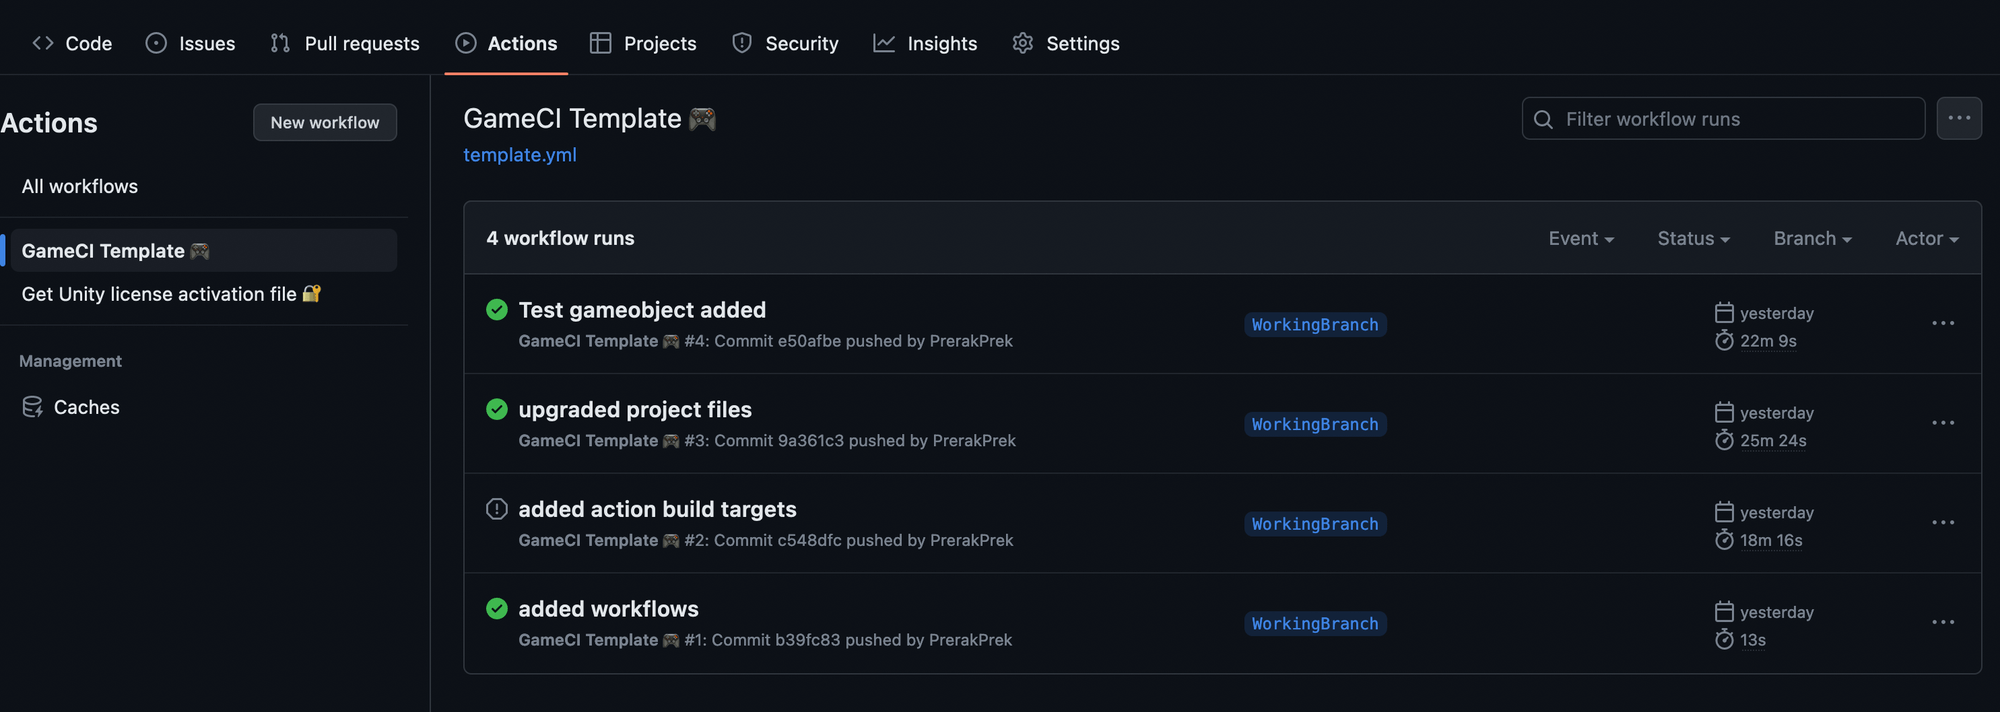
After successfully creating the files mentioned above and pushing those changes to your GitHub repo, you should be able to navigate to your repo's Actions page. The page will show you two workflows, one for the GameCI template and another called Get Unity License activation. The GameCI template will generate the builds, and the Get Unity License activation will generate your manual Unity license activation file.
Manually Activating Your Unity License For The Builder
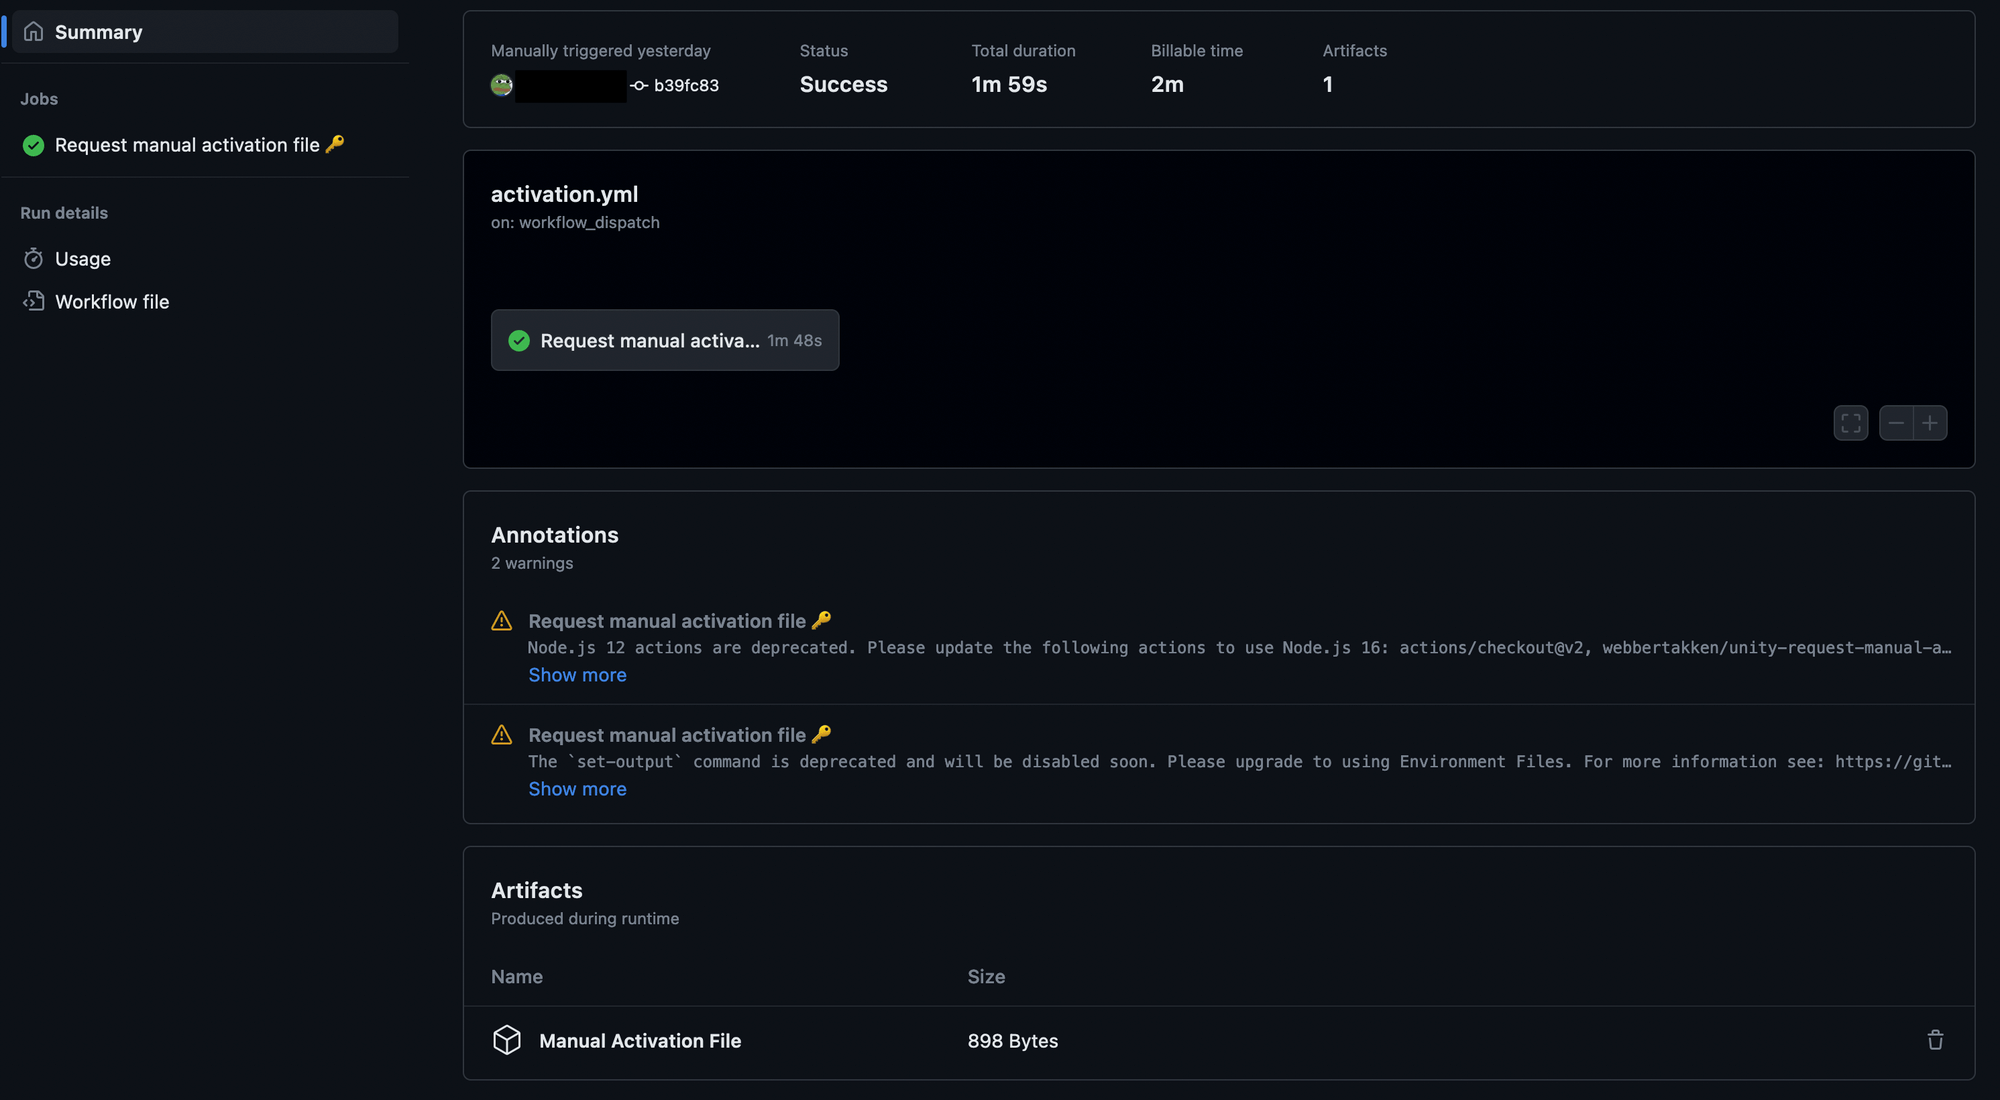
First, you will need to get inside the Get Unity License workflow, which will prompt you with an option to run your job. After some time, the job will be completed, and it will generate an .ulfartifact called a Manual Activation File. Then, download it in .zip format and keep it safe for later usage. Also, a green icon should appear in the action workflow, indicating that the task has been successfully completed.
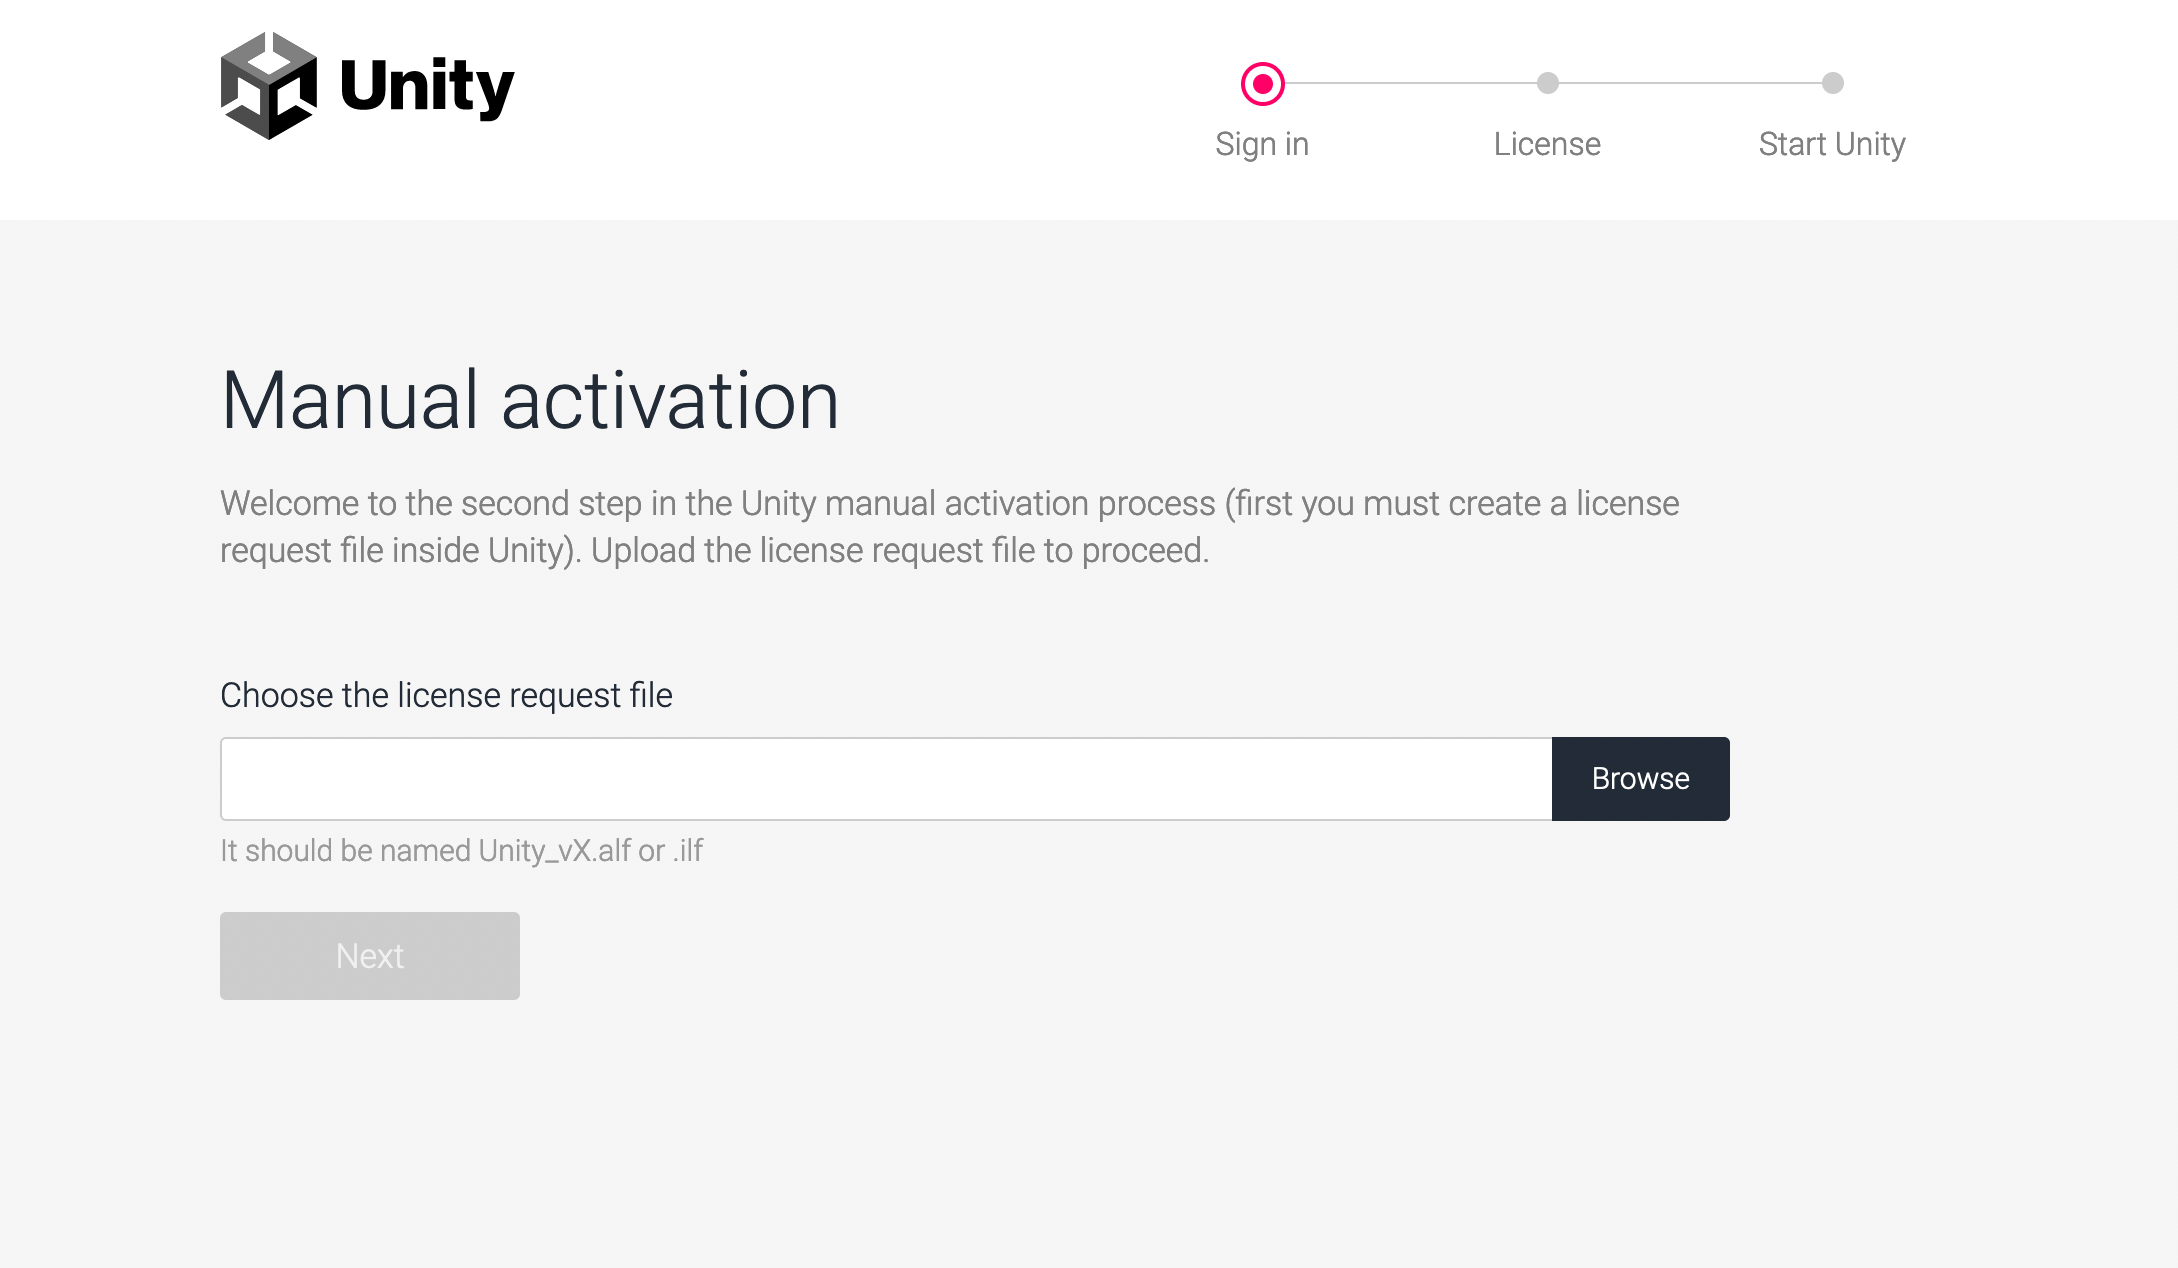
After you receive the manual activation artifact, head towards Unity's Manual Activation site. On the website, you can upload the .alf file generated by the Request manual activation file workflow. Proceed to choose your required Unity plan and continue. This process will also provide you with another file but in .ulf a format which can be downloaded and saved.
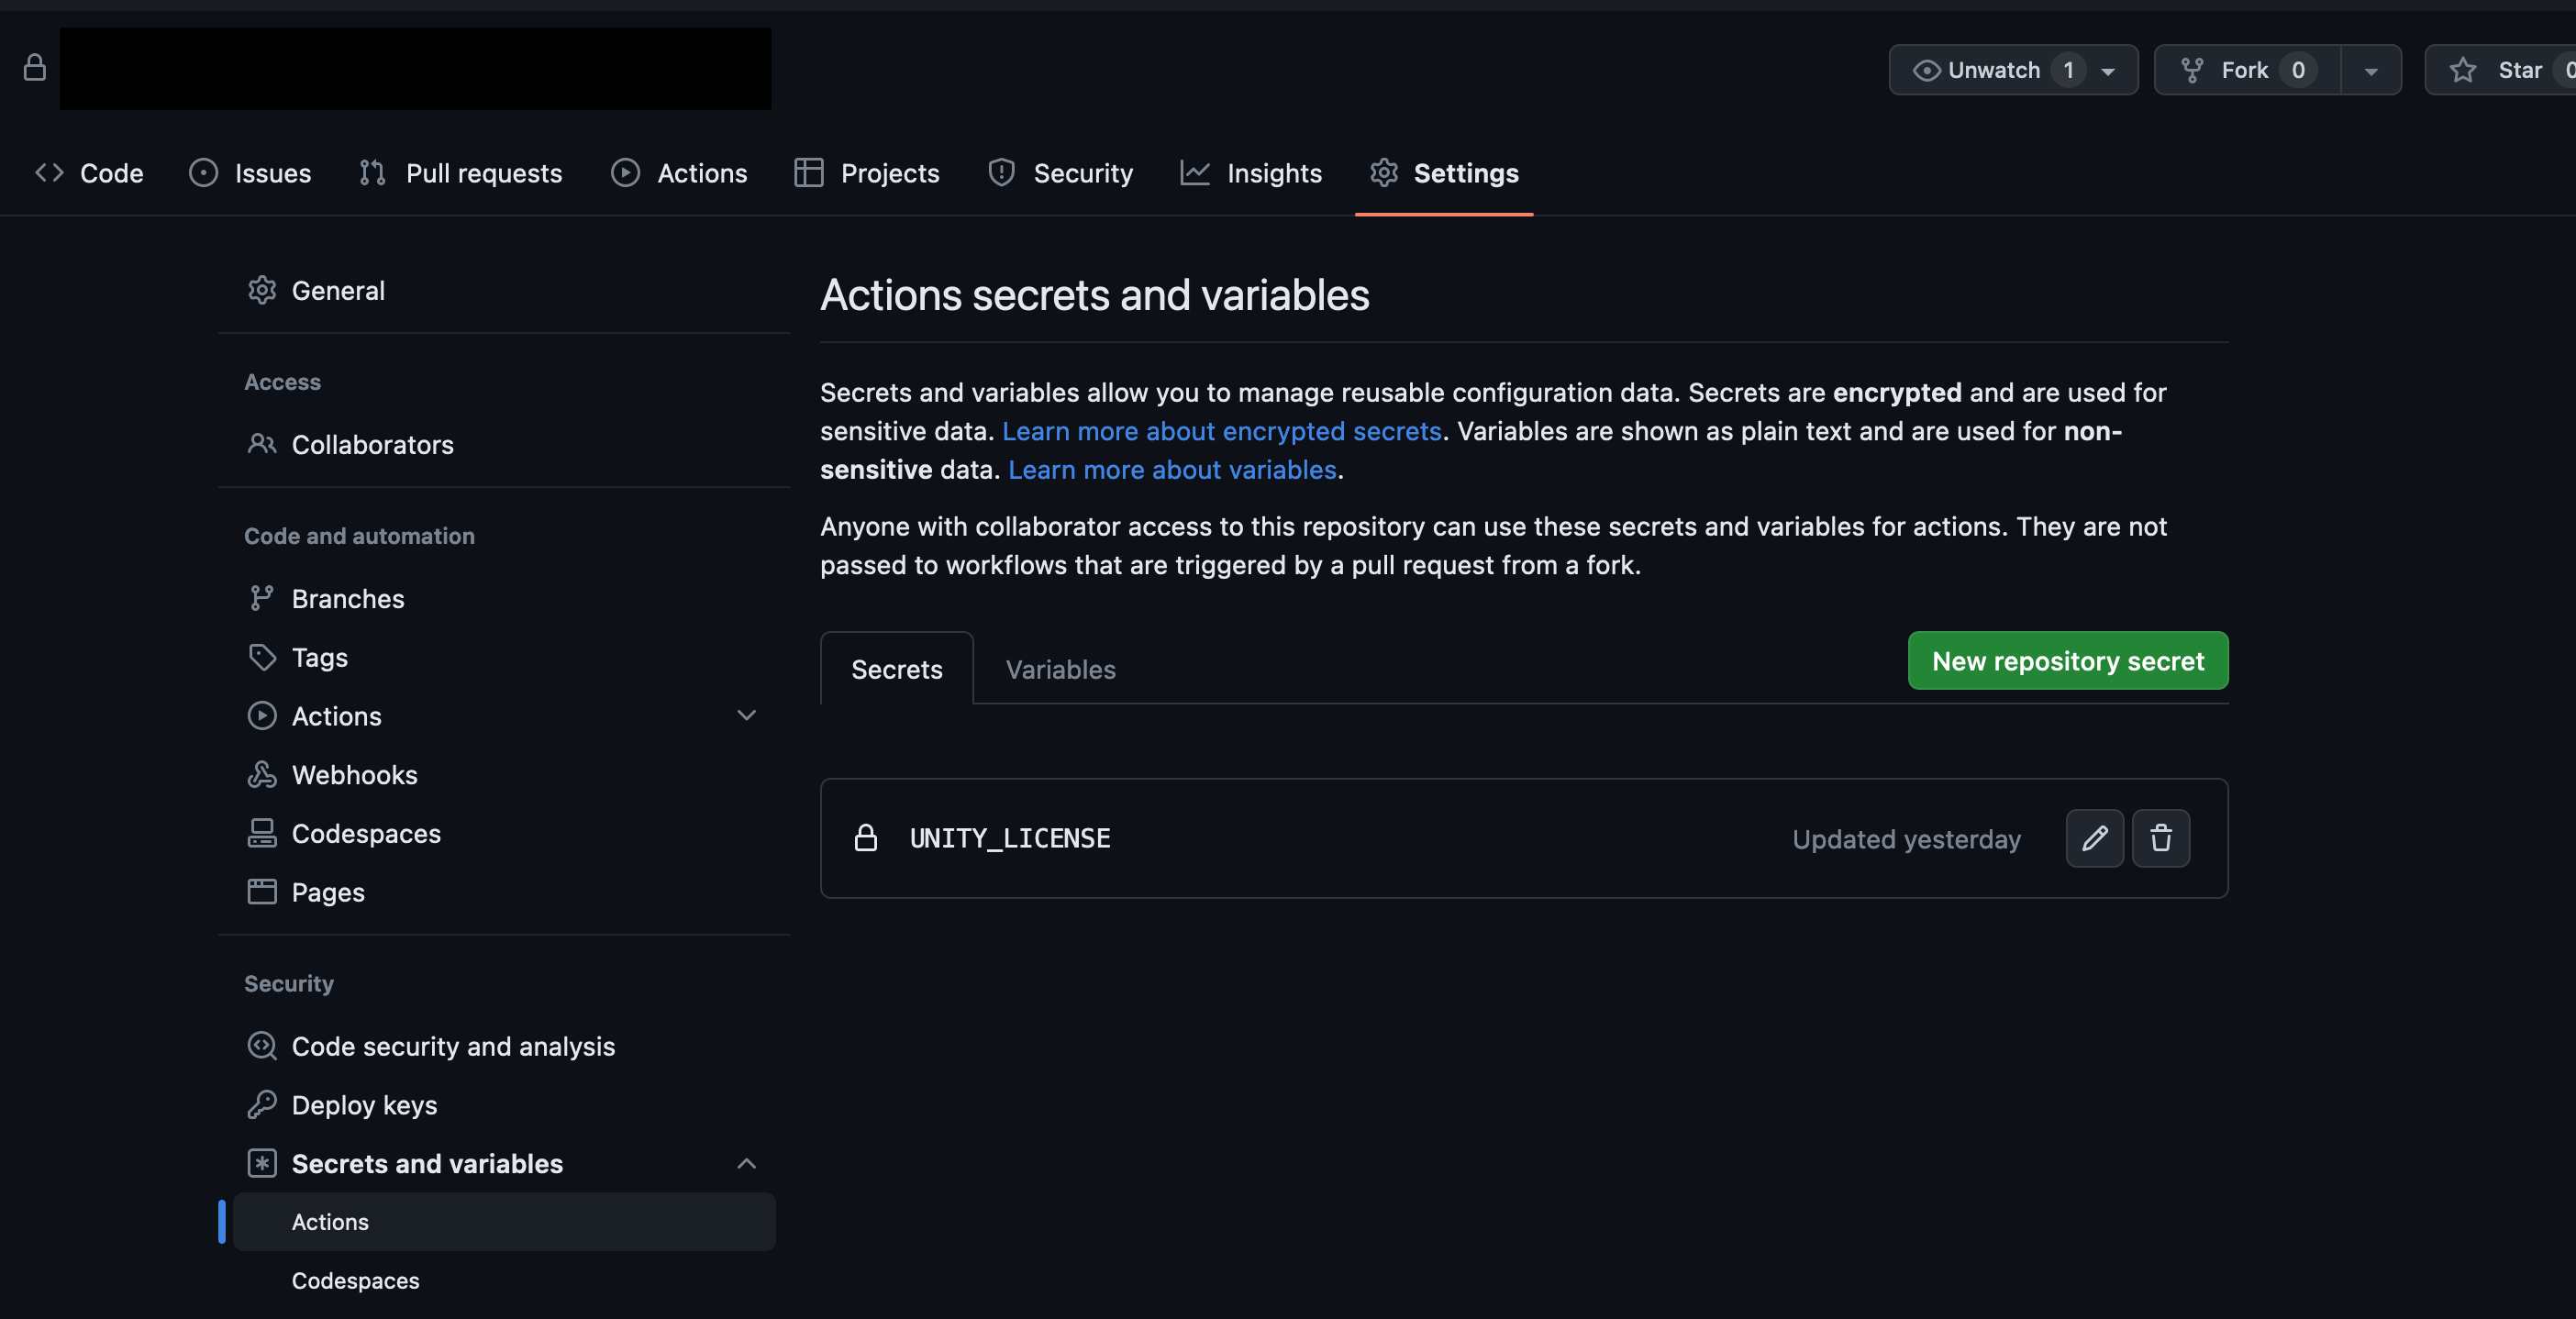
On receiving the file, head over to your GitHub repo settings and create a new secret action variable called UNITY_LICENSE. Ensure the variable name is the same as the one used for accessing the license in the YAML files above.
After creating the secret variable, open the license file of .ulf the format in any text editor to copy its content and paste it into the content field of your secret token.
Preparing for the Build
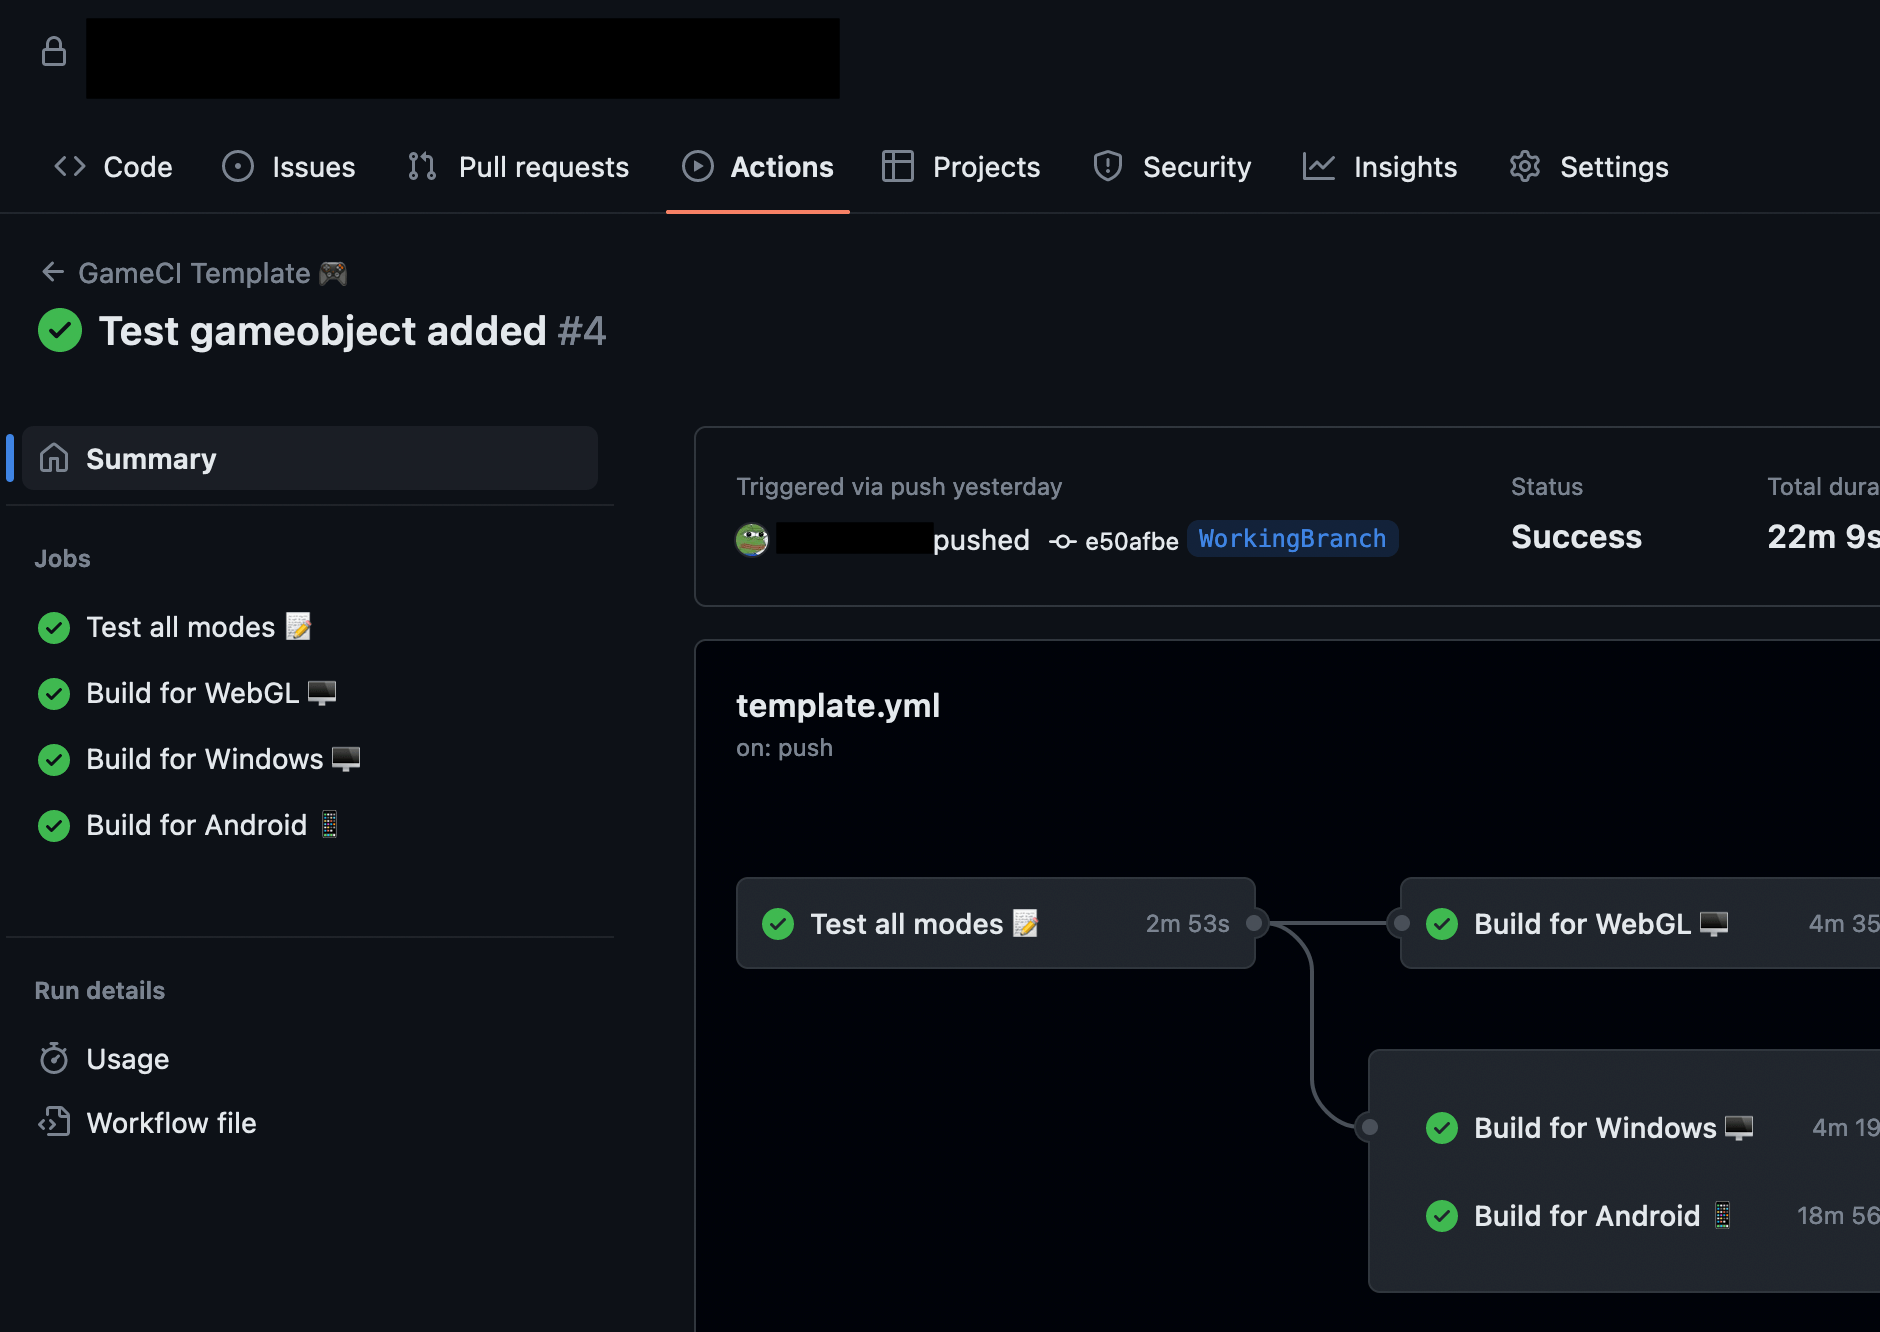
After completing the license generation, move on to the GitHub action page, where you can see your latest commit being processed by the GameCI template workflow.
First, the workflow job will test the Unity project to verify that there are no remaining test cases or errors in both play & edit modes. Next, it will build for all the target platforms in your template.yaml file. The build will take some time for the first run to ensure all the necessary Unity libraries and project dependencies are cached. Once the first build is completed, you may notice an increase in the speed of the builds.
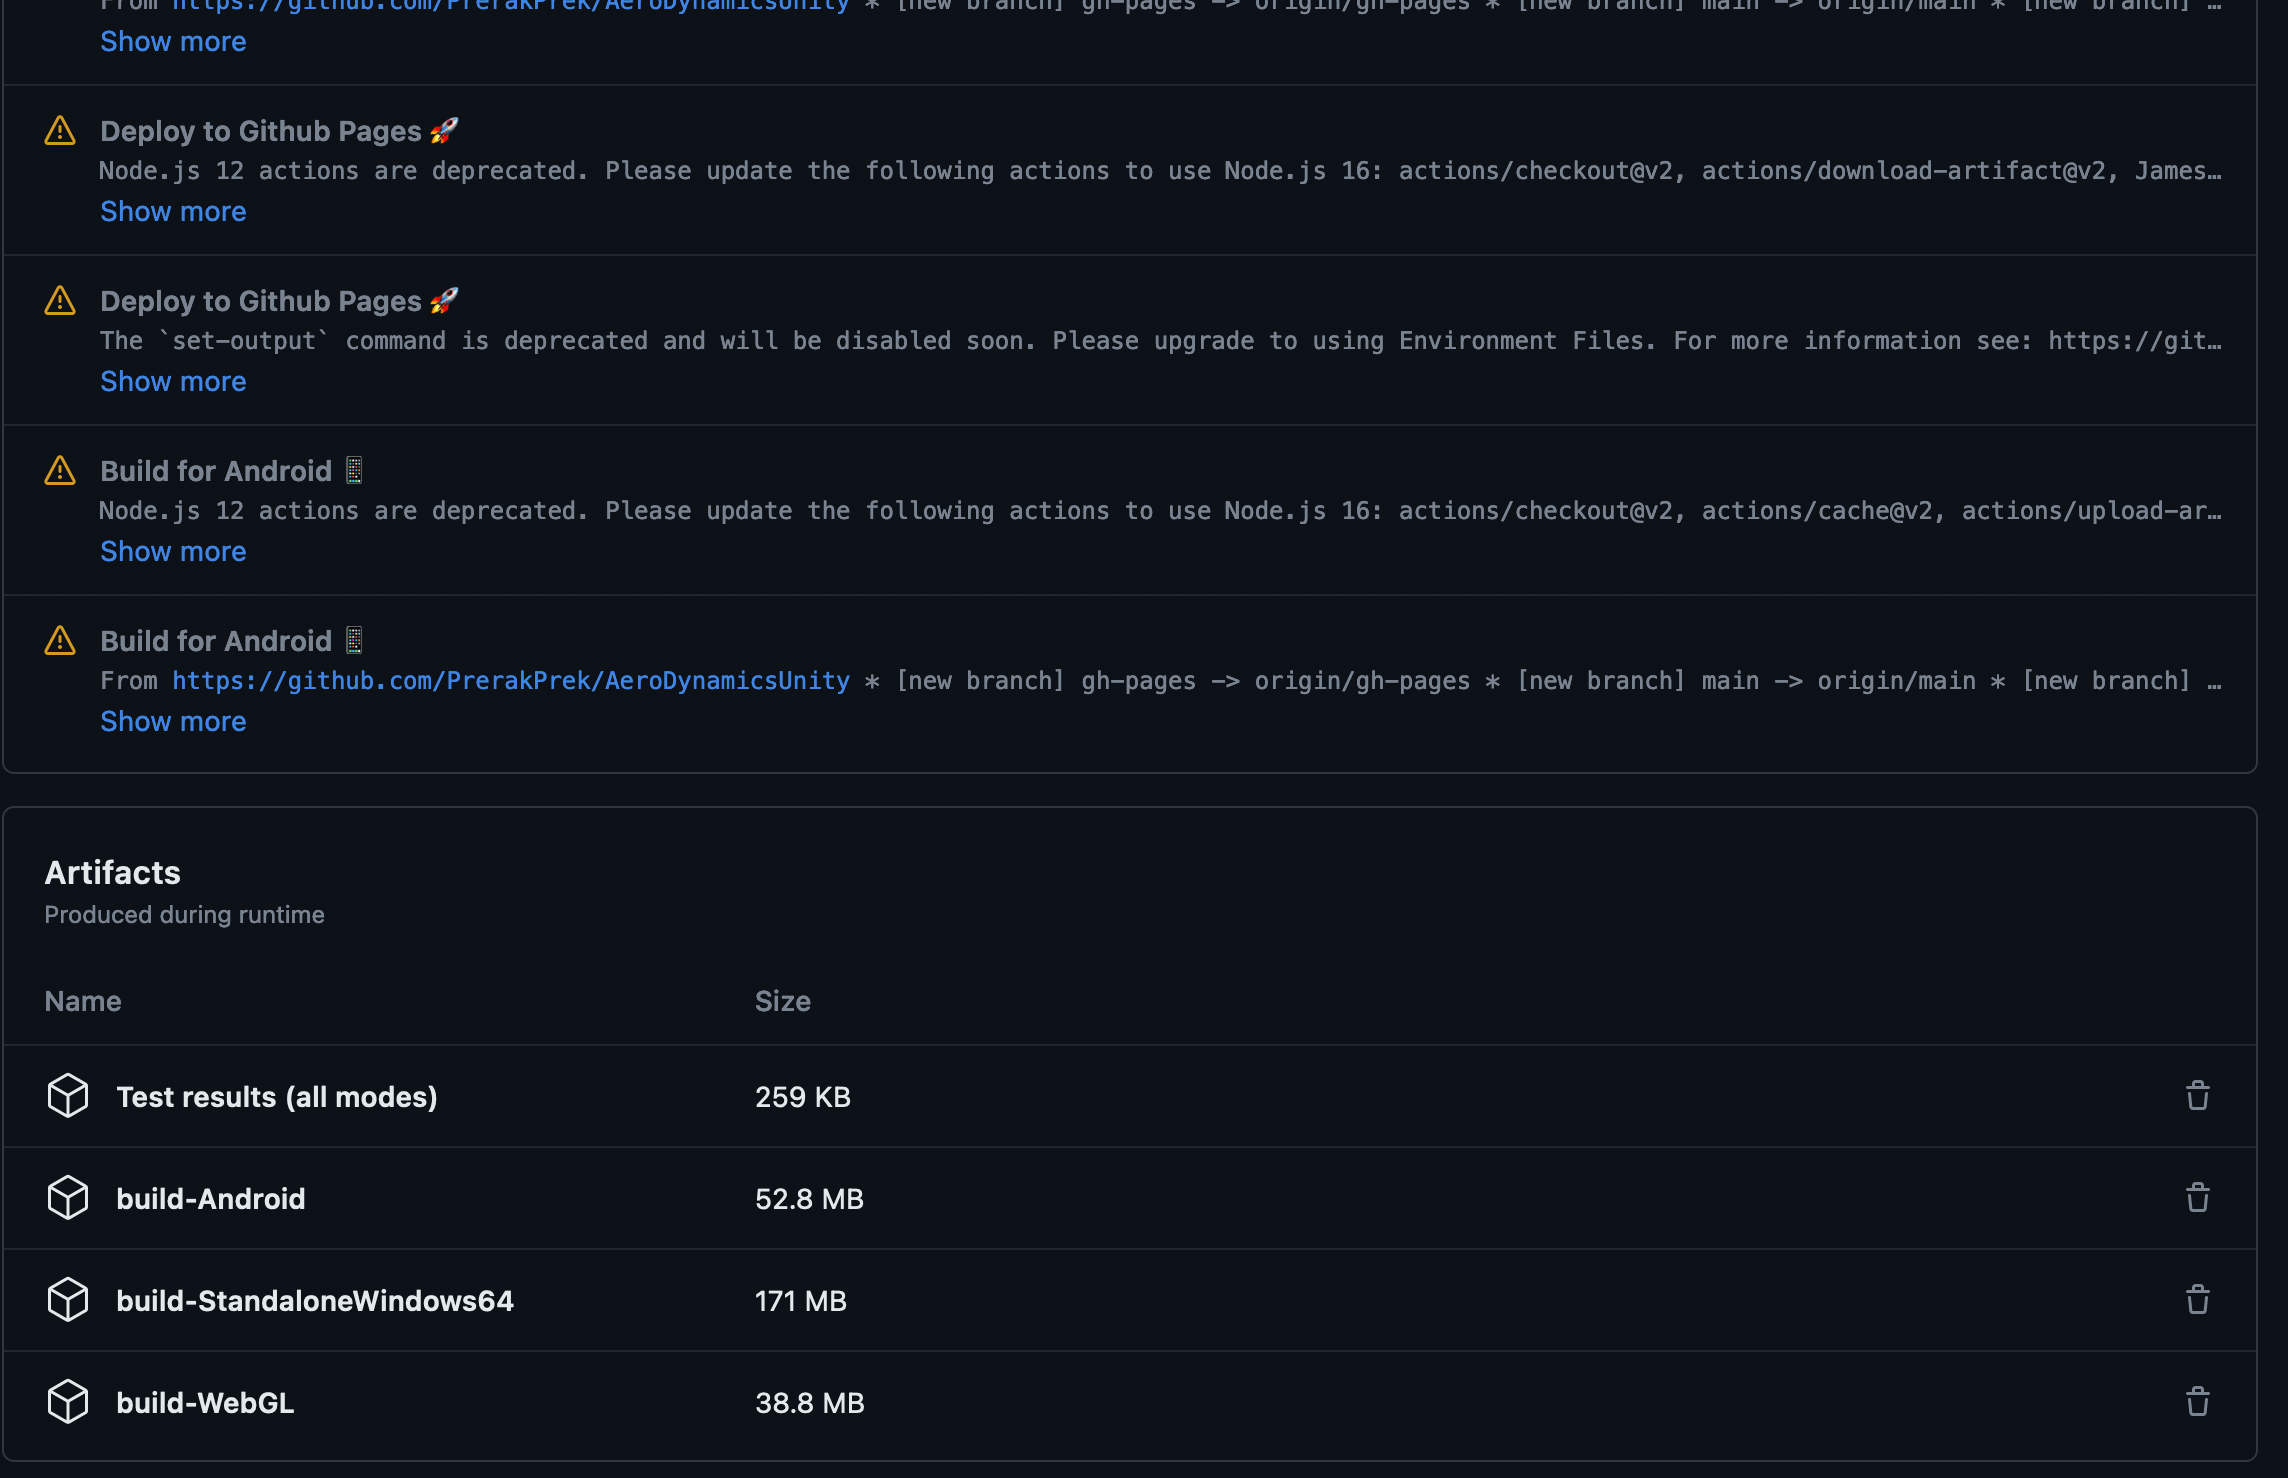
Accessing your Build Files
Once the build is completed, you can find your files as artifacts below your workflow window. Transfer your files to respective platforms and test them out.
Conclusion
Using an automated build system can save you a lot of time & make your development flow smoother. This way, you won't get stuck in the build process and won't have to keep switching platforms to perform multiple target platform builds.
You can also configure this in a way that will upload all your build files to a destination like game servers or an FTP service. For example, while using a multiplayer game service, you can simultaneously test your game by uploading your server & client builds together simultaneously. Also, thanks to the GameCI community for creating an easy CI/CD backbone integration for Unity.
If you encounter any errors in the process, let me know by commenting below. Thanks for reading!