
In After Effects, it is always smarter to use expressions over manual key-framing when two or more effects are involved.
Recently, I have been obsessed with After Effects expression controls and automated animations. This helps you lessen the manual key-framing burden on a massive level to achieve the same effect.
In this blog, I would like to introduce you to a simple tutorial on creating automated write-on effects with changes in the shape's position. There are many other tutorials on achieving this effect, but this one is a simpler version that achieves the same in the least amount of steps.
The steps in creating an automated write-on over a shape's position are as follows:
Step 1: Setting Up Composition
Create a composition with desired size and time. I usually use square composition for loop projects. You can use any size and time as per your need and application.
Now, in the composition, you must create a solid background layer first and assign the desired colour.
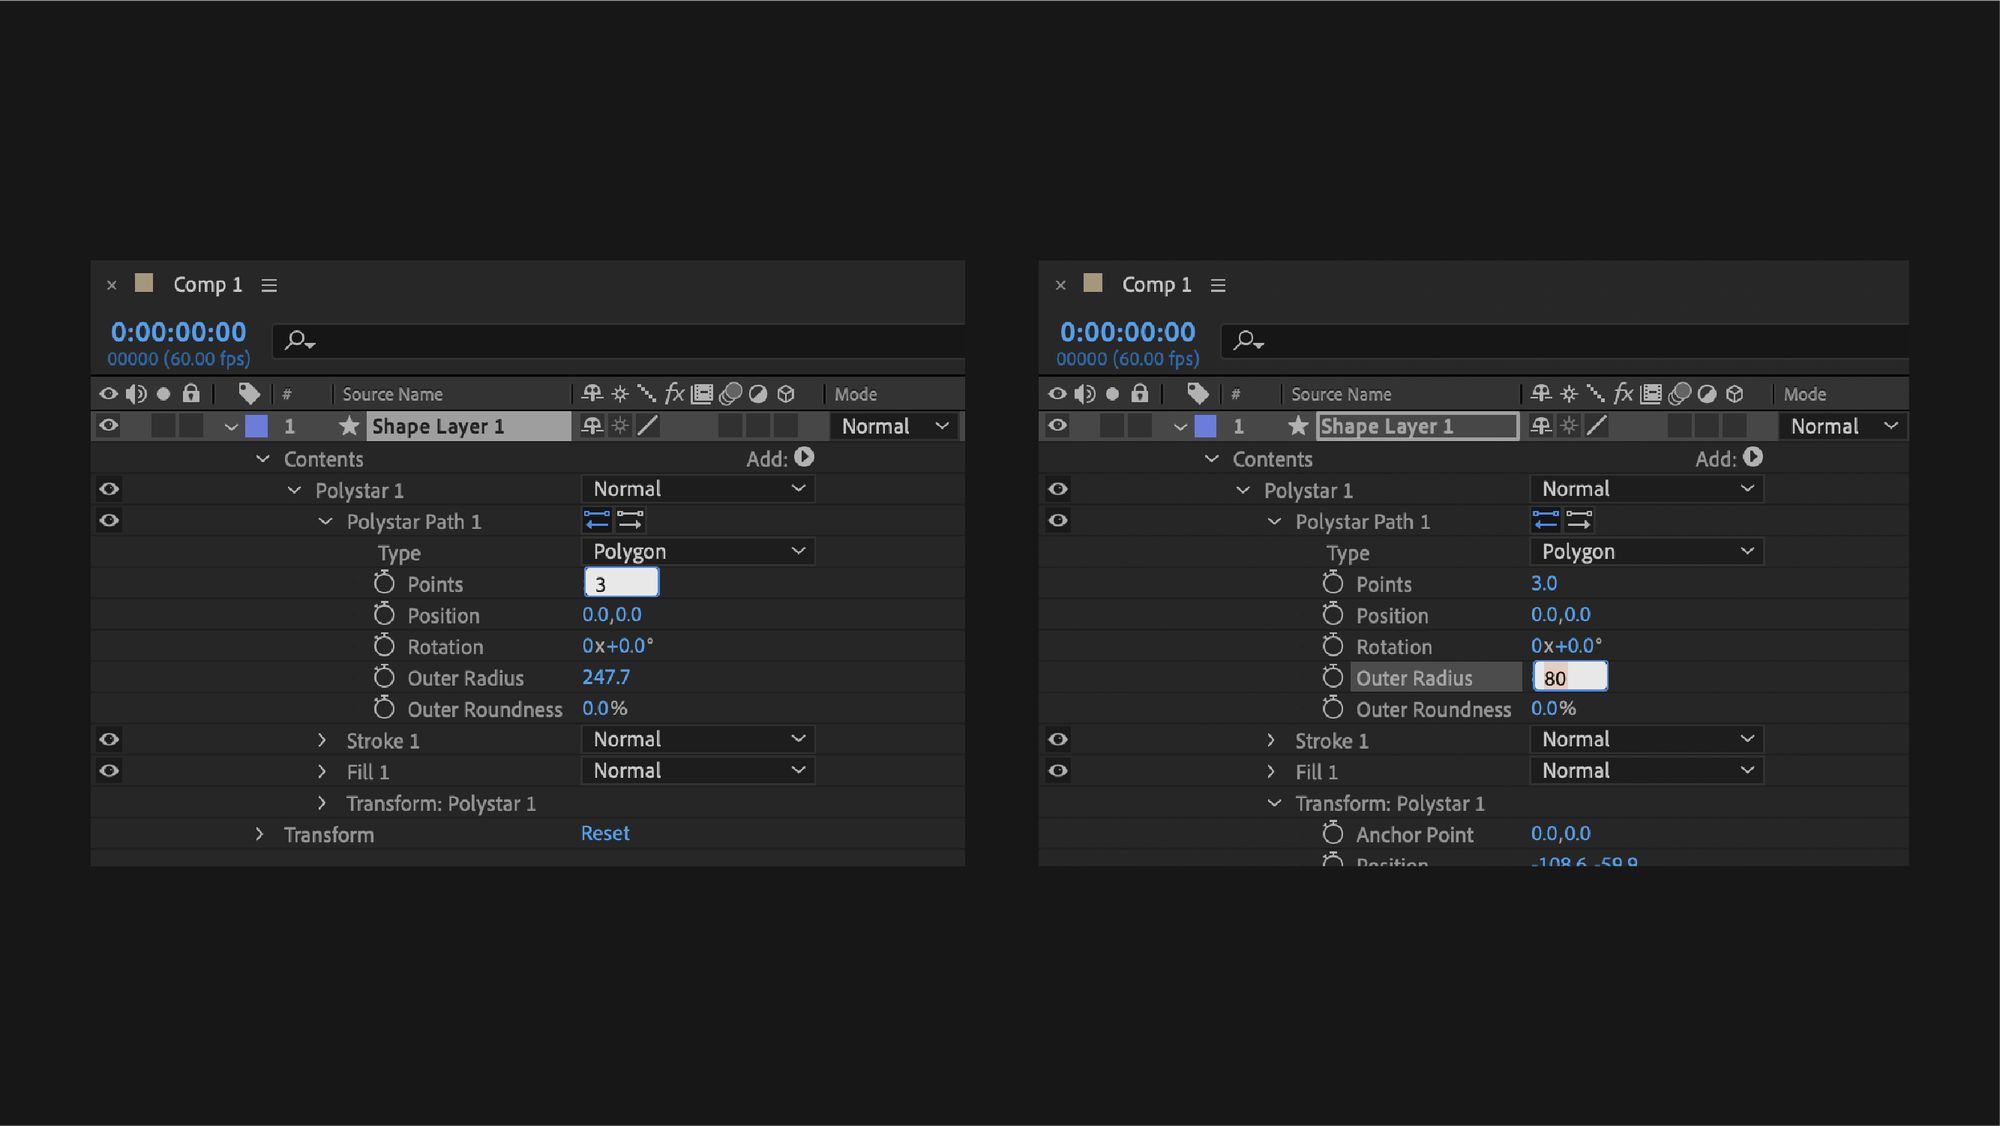
Then, create a shape layer and draw a triangle. To create a triangle, select the polygon tool from the toolbar panel and create an object. Navigate points under the poly-star path and change the value to 3 to create a triangle. Edit the radius and outer rounds of the triangles like you want.
Step 2: Adding the Effect
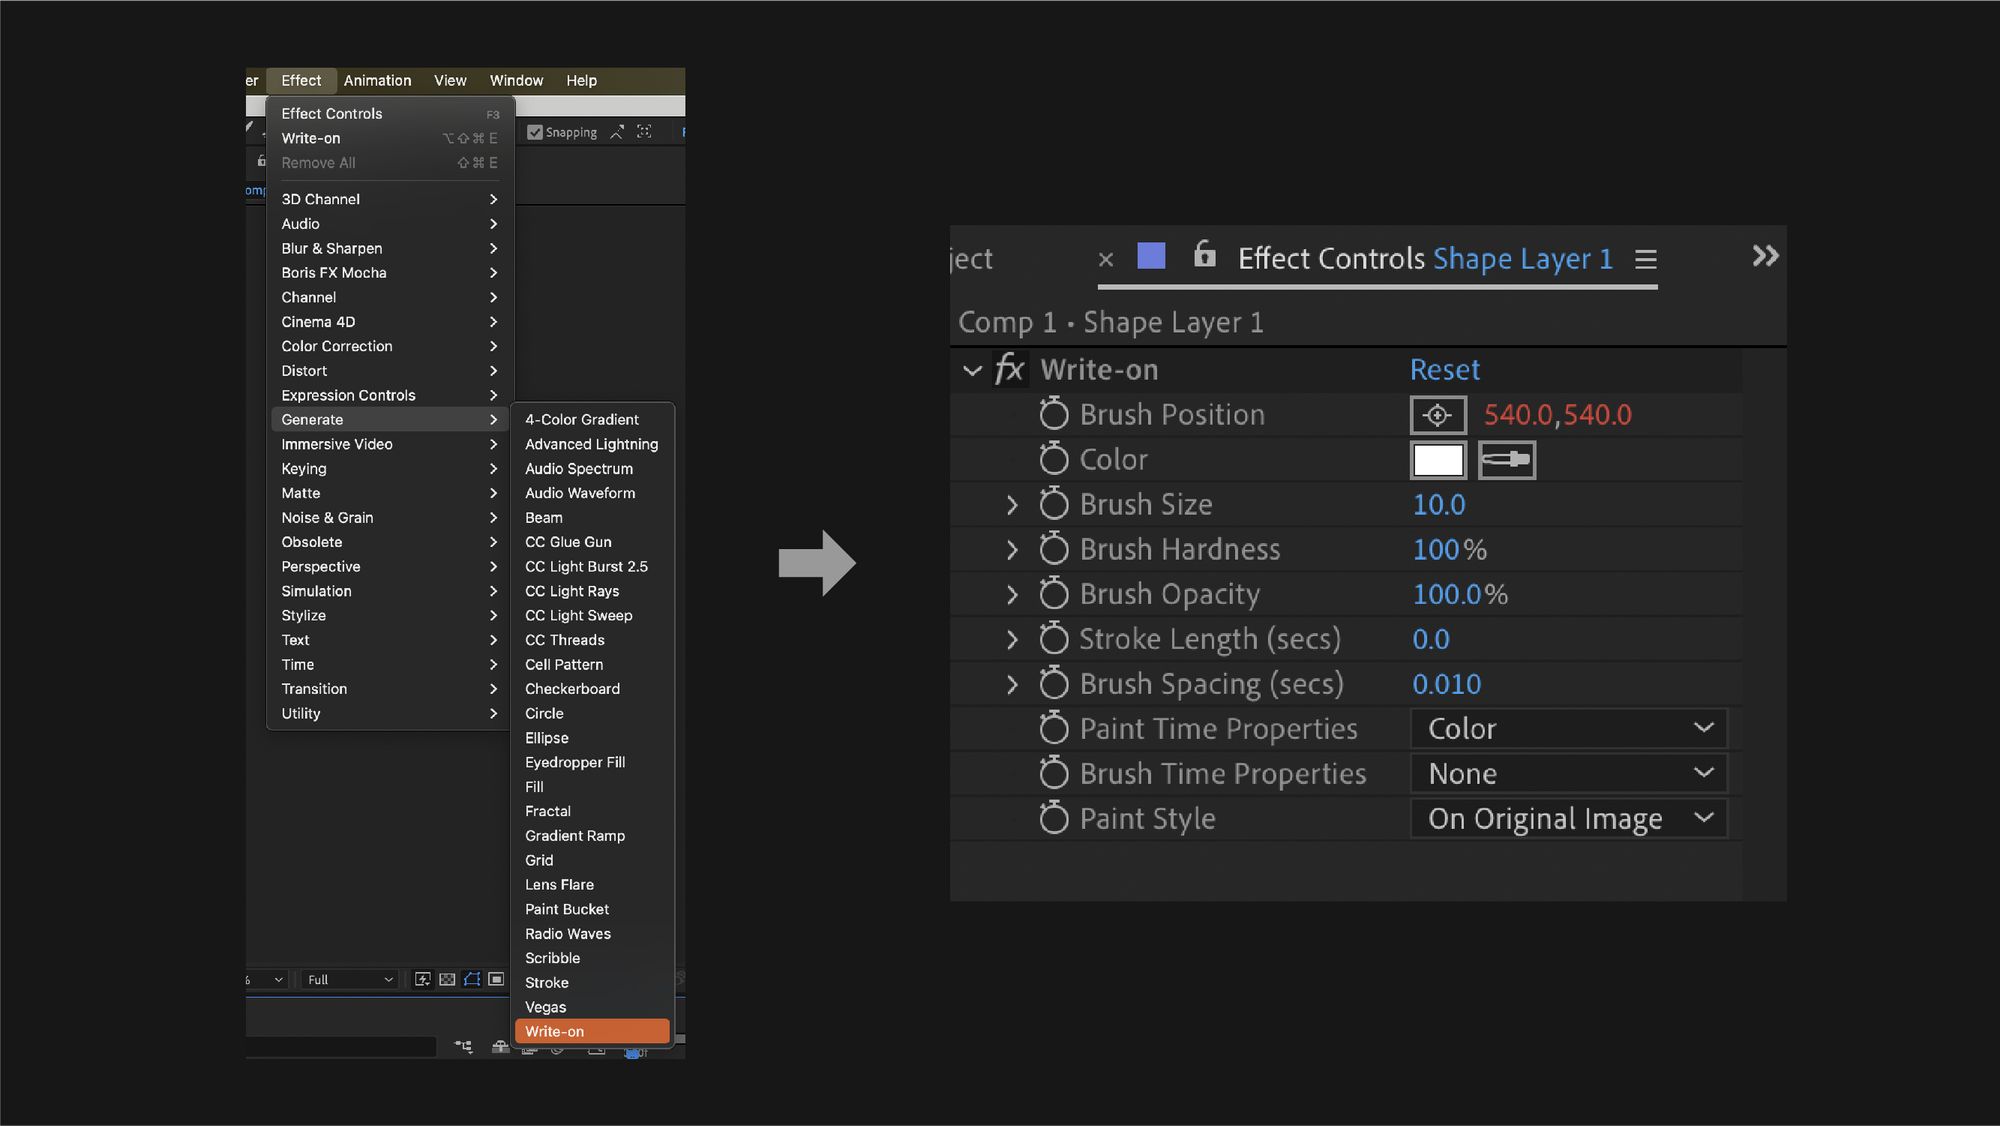
Now select the shape layer and add the write-on effect.
To do this, navigate to Effect > Generate > Write-On. This will add the write-on effect on the shape layer.
You can now edit the stroke properties you want from the effects panel and change the write-on stroke colour, size, hardness, opacity, length and spacing.
Once you have edited the write-on value from the effects panel, Alt/option + click the brush position from the Effects panel and drag the pick-whip to its position, as shown below.
This creates an expression on the shape layer, where the brush position of the write-on effect is influenced by the position of the triangle, thereby achieving the stroke animation with the movement inside the shape.
Step 3: Adding Auto-orientation
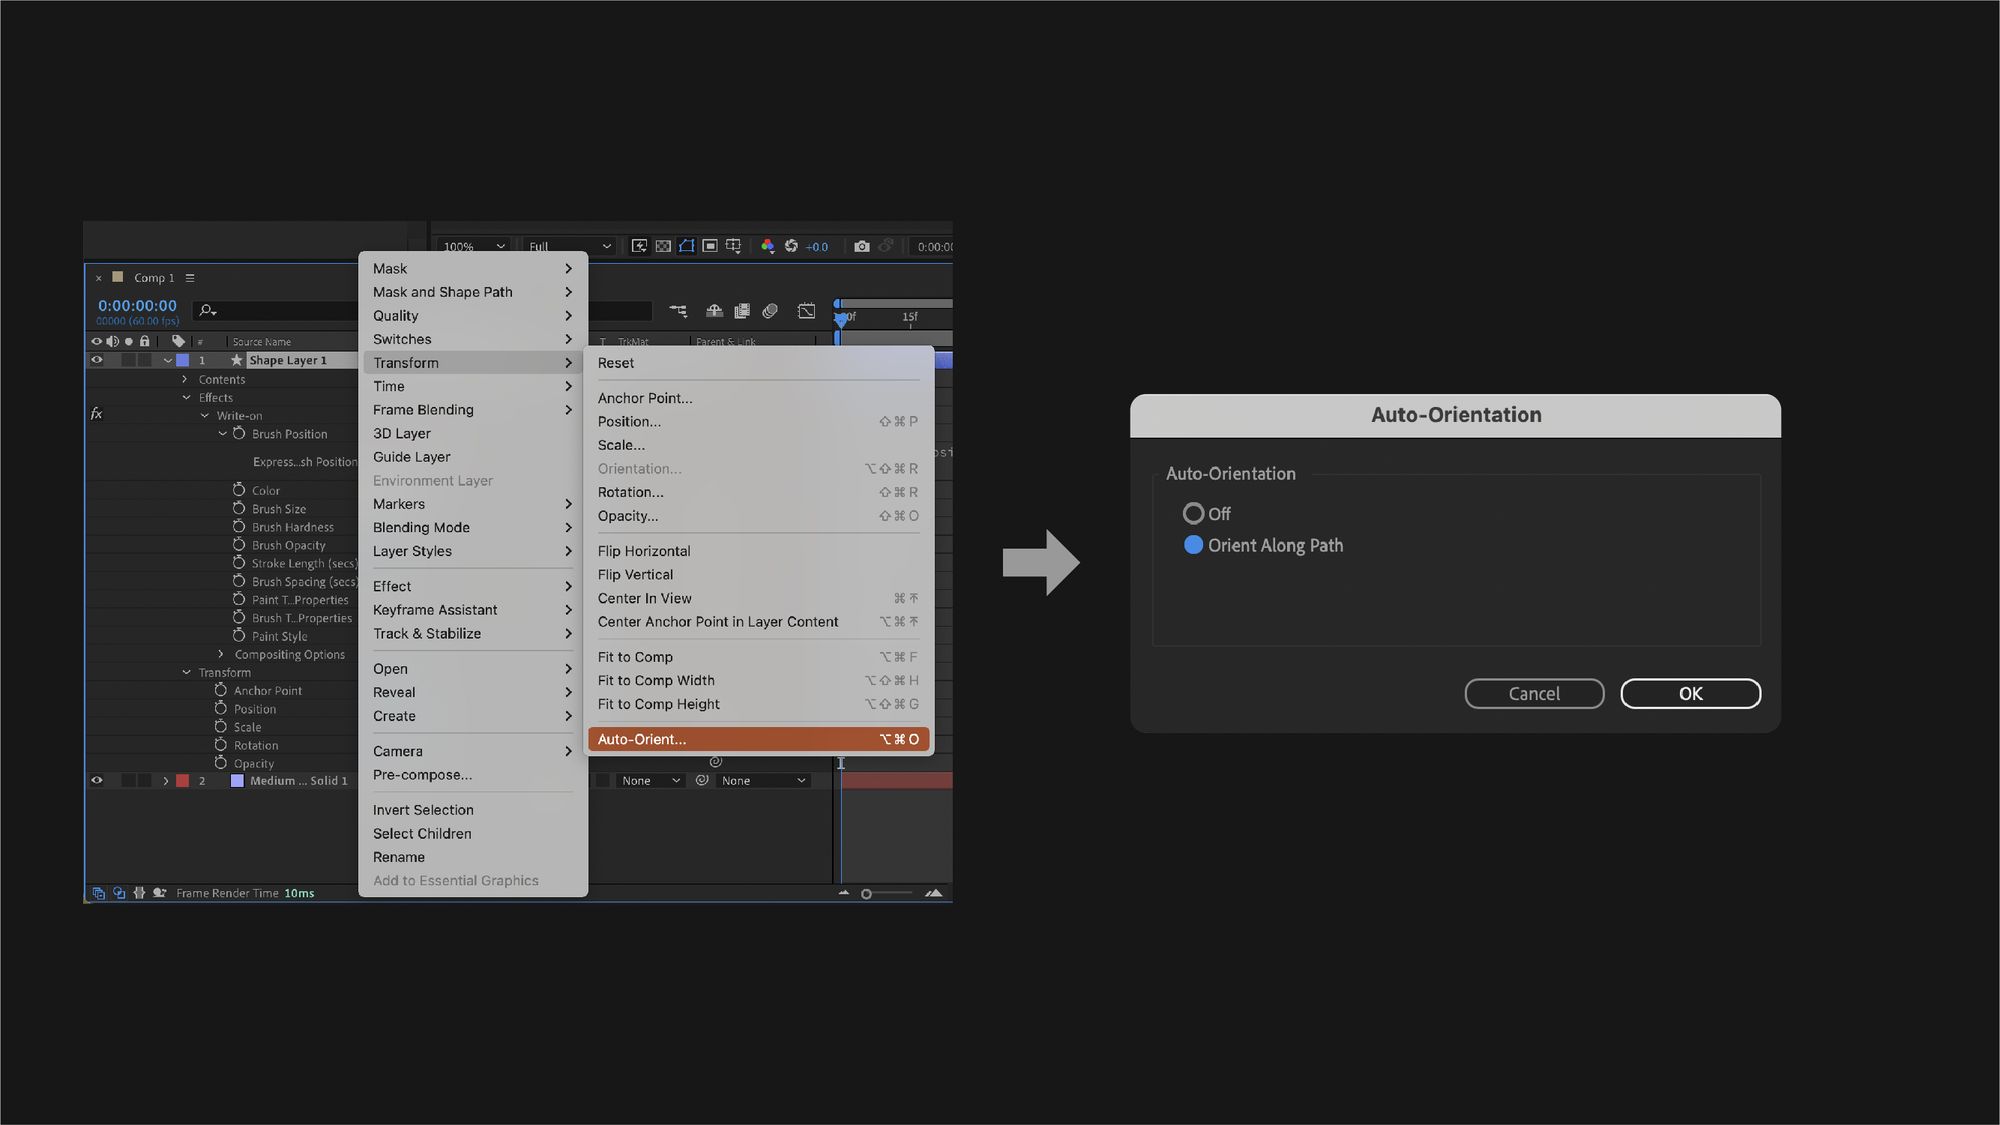
Since we are using the triangle here, enable the auto-orient function to automatically guide the rotation of the triangle to its path.
To do this, right-click the shape layer and navigate to Transform > Auto-orient. This opens the auto-orientation menu, where you need to select the Orient Along Path option and click OK.
After the auto-orient function is enabled on the shape, try rotating the triangle to find your triangle head in case the triangle orientation shows abnormal behaviour.
Step 4: Adding Write-On Stroke
The final step is creating a motion animation on the shape layer and watching the stroke write on itself.
Like any other motion tween, select the shape and open the position option by pressing P, click the stop-watch, and add Keyframe > Navigate to another frame on the timeline and change the position.
Now you will see that the shape creates an outline as its position changes. Try adding the motion path to the position and watch the shape create strokes along its path.
Applications
Creating Tails of Characters and Objects
You can use this effect to create an automatically generated tail that moves along with the character. This is more effective on flat illustrated character animations since this effect only allows you to add a flat stroke.
You can integrate this with other effects at an advanced level to achieve highly detailed tail animations.
Drawing Shapes Along Path
This effect can also be helpful when you want to create an animation of an object (like a pen) drawing a line along a path. This type of animation can be found in many infographics videos that use various shapes and path animations.
User Interface Visualisation
Write-on animations can also be useful in explaining UI interfaces and navigations visually. Onboarding mobile application screens also use these animation effects to guide and walk the user through the app's basics and functions.
Advertisements
Companies also use write-on effects to explain their products in commercials advertisements.
Please comment below if you have any confusion in this tutorial. Subscribe with the buttons below to get the latest blogs.