
What We'll Do
- Setup Node Environment
- Perform Socket.io Load Test
Prerequisites
- Web Socket Application
- Base Environment (Unix/Linux or Windows)
Introduction
Whenever a new infrastructure is provisioned, proper load testing is required to determine its stability for deployment. Unstable applications are a coherent risk and will fail to handle the expected amount of user traffic resulting in downtime and loss of revenue.
For this reason, it's crucial that whenever we provision new infrastructure, we do the proper amount of load tests on it so that it can be guaranteed to handle real-life scenarios effectively.
Artillery is a Load Testing tool capable of testing protocols such as HTTP/HTTPS, WebSockets and Socket.io. In this guide, we'll learn to set up a NodeJS Development Environment, Install Artillery and Perform a Load Test on a WebSocket endpoint.
Getting Started
To install artillery, we'll start by configuring Node Environment and proceed to install artillery via npm.
Setting up Node Environment
First, use brew to install NodeJS (for Ubuntu and Mac-based systems).
Installing Brew
If you don't have brew installed, simply run the following command to install brew:
bash -c "$(curl -fsSL https://raw.githubusercontent.com/Homebrew/install/master/install.sh)"Don't forget to add the Home Brew directory to PATH after installing; otherwise, applications installed via brew will not be accessible.
Use the following command to add the brew directory to PATH:
echo "export PATH=$PATH:/opt/homebrew/bin/brew" >> ~/.zshrcInstalling NodeJS
Use the command below to install the latest LTS release of Node JS.
brew install node@16
Installing Artillery
With NodeJS installed, we can install artillery with the following command:
npm --location=global install artillery@latest artillery-engine-socketio-v3
This will install the latest release of artillery in our system, which can be used globally, the -g command specifies that the modules need to be installed globally
-g is deprecated, so we use --location=global instead.Verifying Artillery Install
Artillery has a subcommand called dino, which prints messages on screen.
artillery dino -m "Testing Artillery Installation" -r
-r parameter to colourize the display message.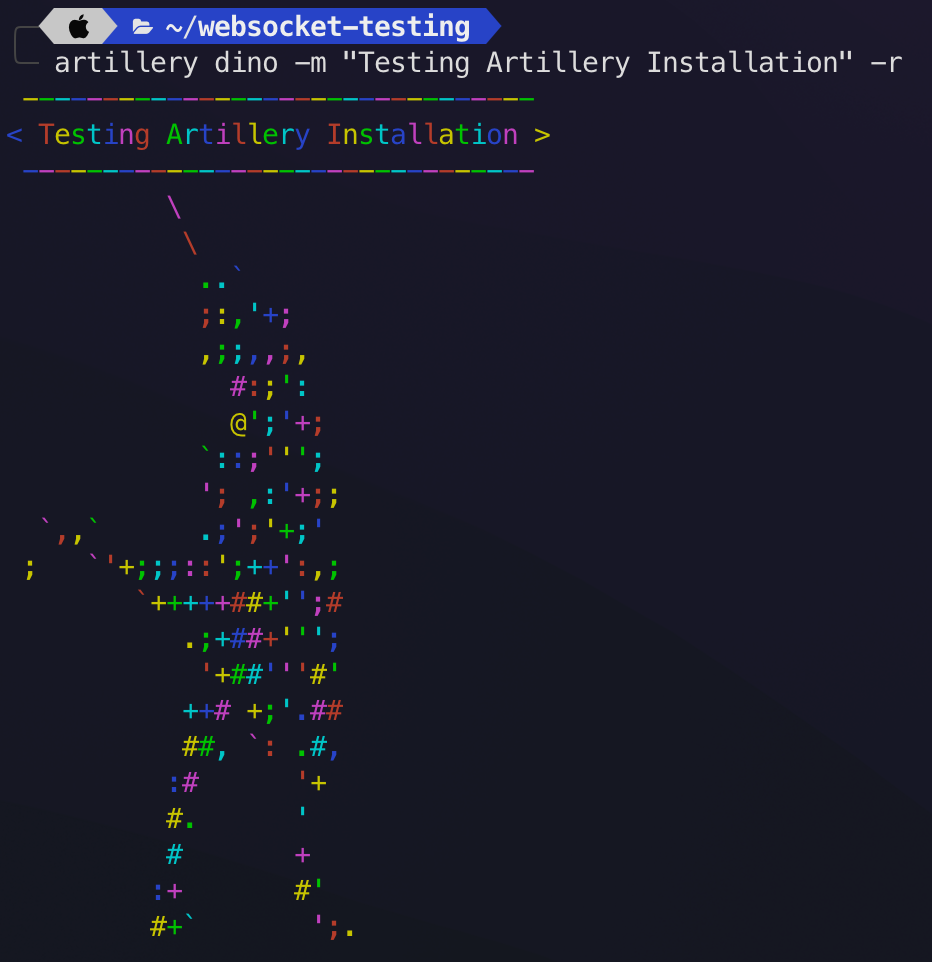
Dino is a feature provided by the tool. It serves no other purpose than to test a successful installation.
Load Testing with Artillery
There are two modes available for Load Testing using artillery.
- Quick: Quickly run a test using imperative commands in the CLI
- Run: Run a more thorough test using declarative YAML test profiles
Quick
The quick load test requires certain parameters specifying the requests per second, the packet size, and the URL. It does the rest automatically.
To quickly run a test, run the command below:
artillery quick -c 10 -n 100 http://127.0.0.1:3000Here,
-c = number of open connections
-n = number of requests to be sent through each open connection
Run using a YAML Test Profile
The artillery run command is specifically used to run Test Profiles specified in a YAML declaration file.
Copy and Save the content provided below as test-profile-1.yaml
# my-scenario.yml
config:
  target: "http://127.0.0.1:3000"
  phases:
    - duration: 60
      arrivalRate: 5
      name: Small WarmUp!
    - duration: 120
      arrivalRate: 5
      rampTo: 40
      name: Ramping up the Looooad!
    - duration: 600
      arrivalRate: 50
      name: Sustained Load
  engines:
   socketio-v3: {}

scenarios:
  - name: Socket.io-v3 Testing
    engine: socketio-v3
    flow:
      # wait for the WebSocket upgrade (optional)
      - think: 1

      # basic emit
      - emit:
          channel: "hello"
          data: "1"

      # do nothing for 30 seconds then disconnect
      - think: 30
Here,
target= URL of Web Socket Endpoint to Test
Phases = We specify request per second (rqs), also known as arrival rate, and time frame for different iterations of the load test here
engines = Socket.io Engine to use for load testing (Use the engine that your app is built on)
Phases
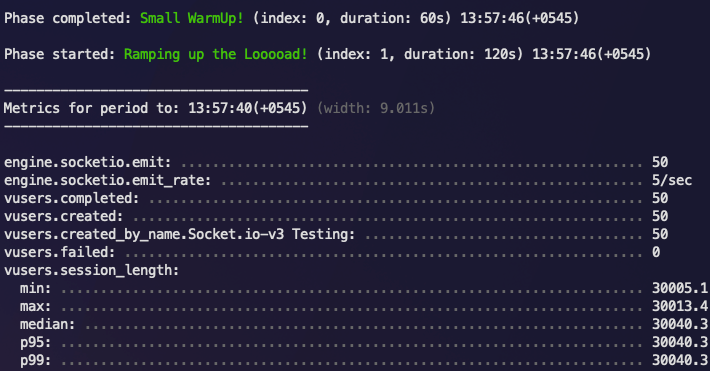
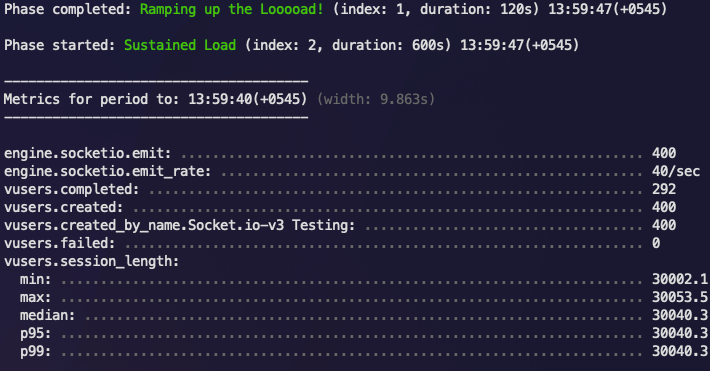
Phase 1: Runs for 60 seconds with 5 rqs
Phase 2: Runs for 120 seconds, starting from 5 rqs all the way to 40 rqs in the given time period.
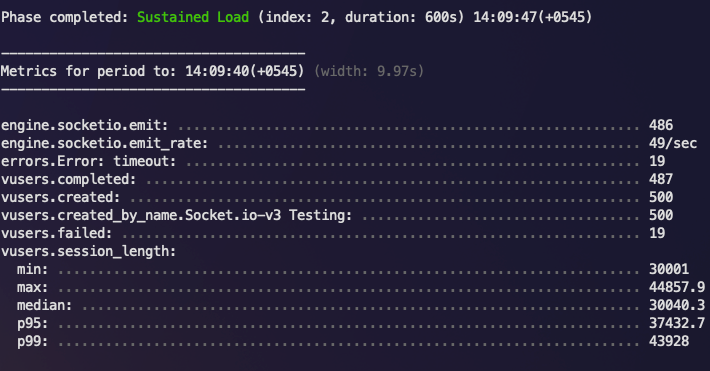
Phase 3: Runs for 600 seconds and sustains 50 rqs during the whole time period.
Scenarios
We can specify different actions for artillery to perform whilst connected to our application.
- Defined the engine to use for testing.
- Different actions to perform in the default namespace.
- A Custom Namespace is also provided for testing.
- Stuff like acknowledgements can also be added to it.
- At last, the think command directs artillery to sleep for 10 seconds before exiting.
Running the Test Profile
The number of open file descriptors (Open Connections) is limited by default. To increase it, run the command ulimit -n 10000.
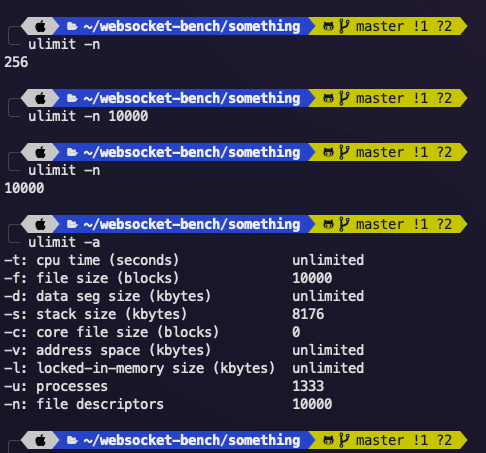
This will allow us to complete the test much faster as the default value limits the amount of traffic we can push.
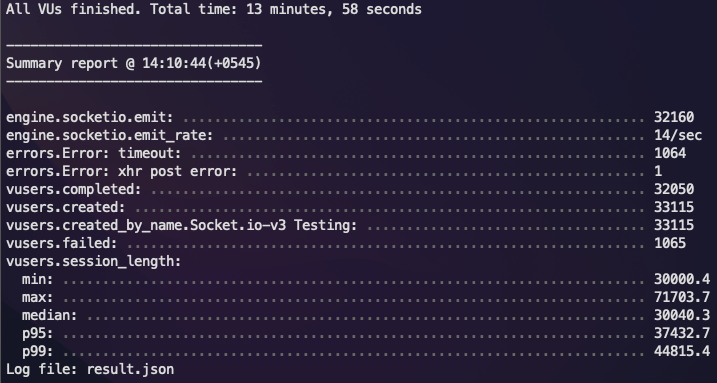
Use the following command to run the test and provide a JSON output which can later be used to analyze the success/failure of our tests!
artillery run test.yaml --output result.json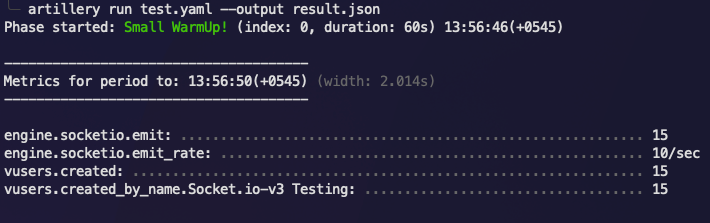
--output <file-name.json> will save the results into a file which will come in handy for performance analysis.
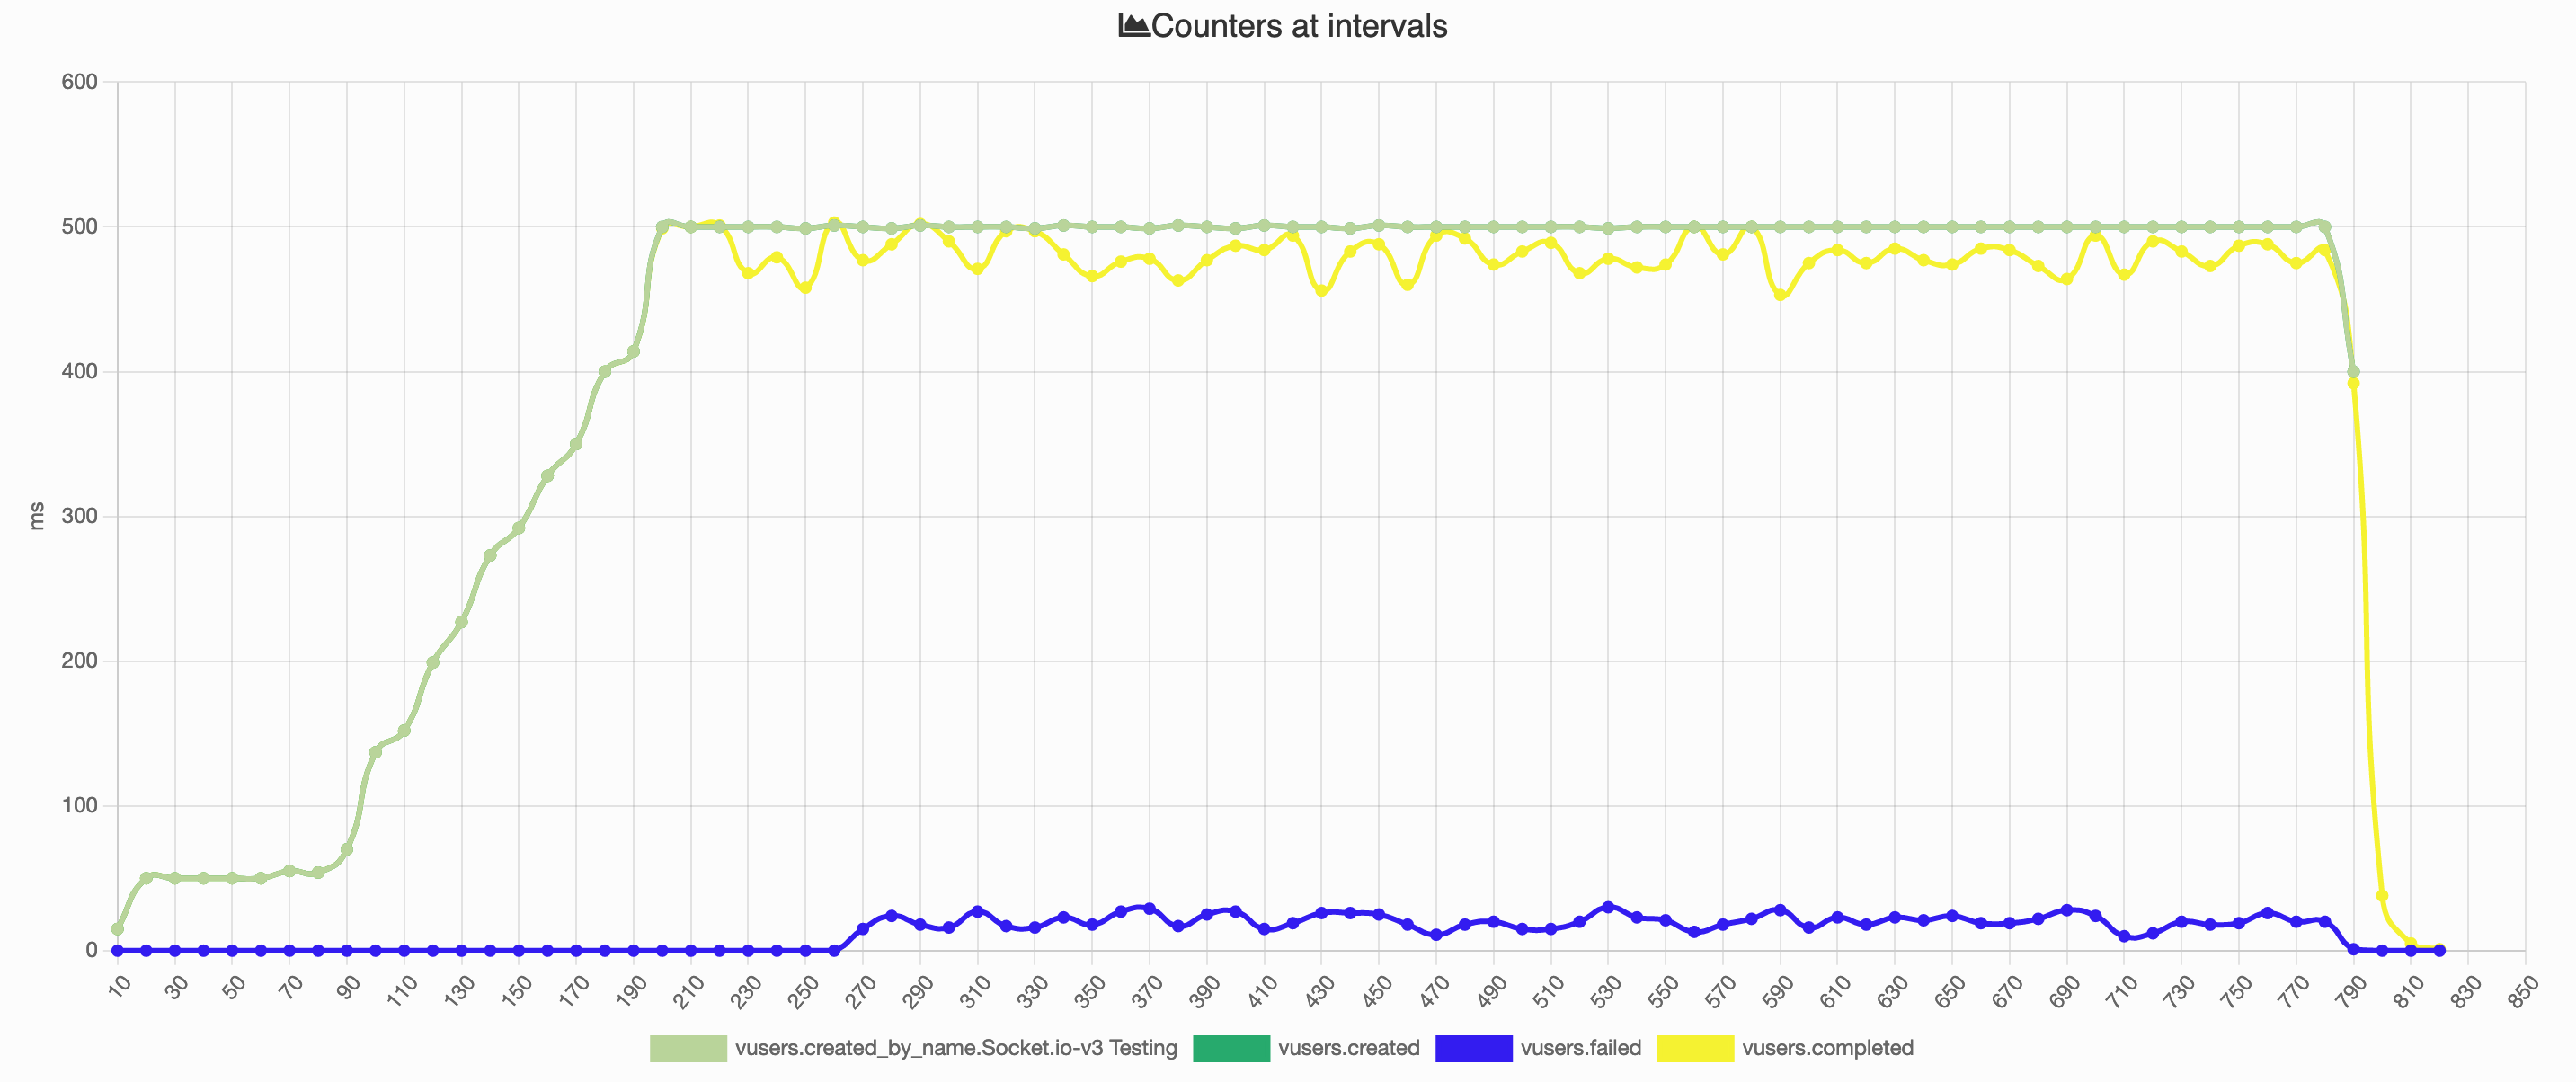
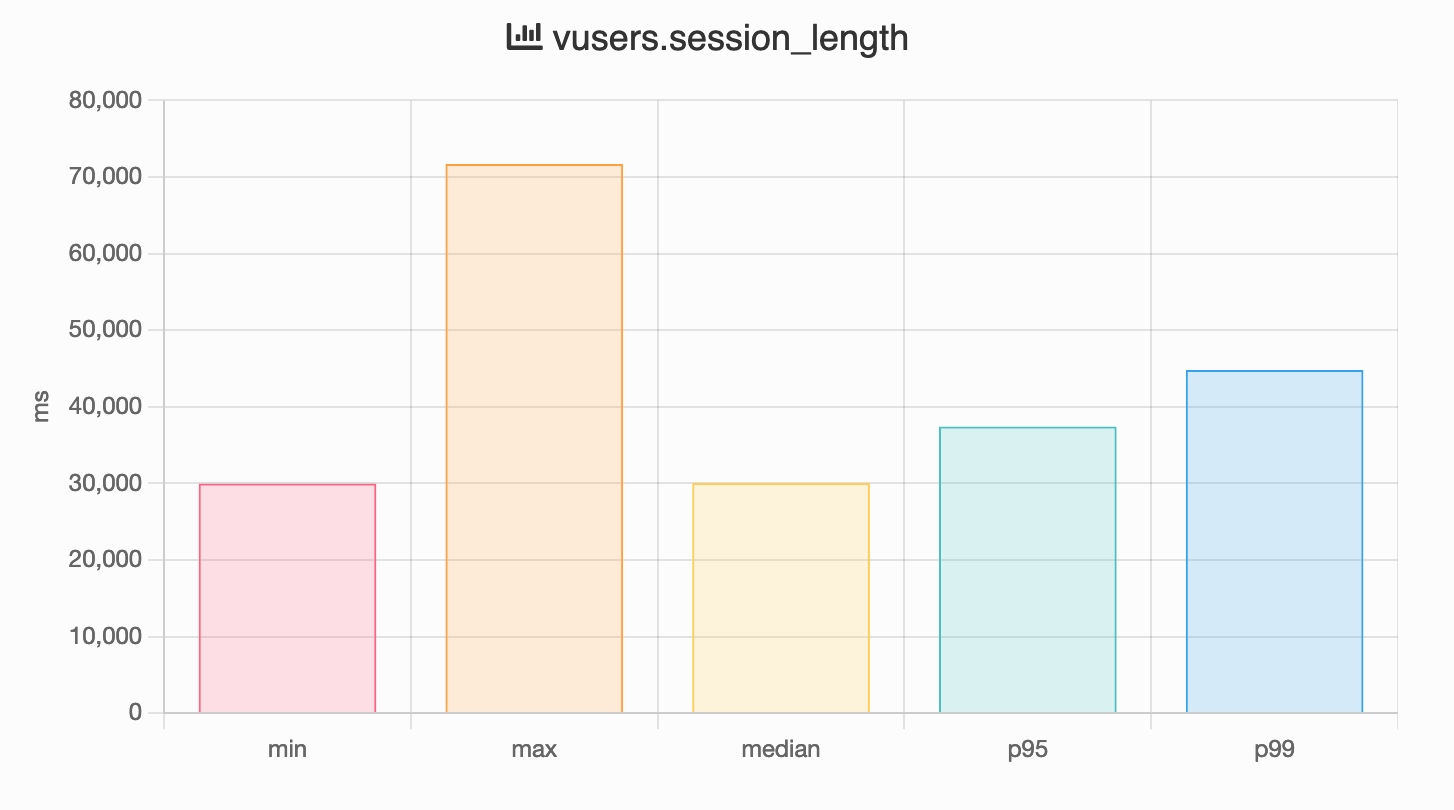
Generating and Viewing the Report
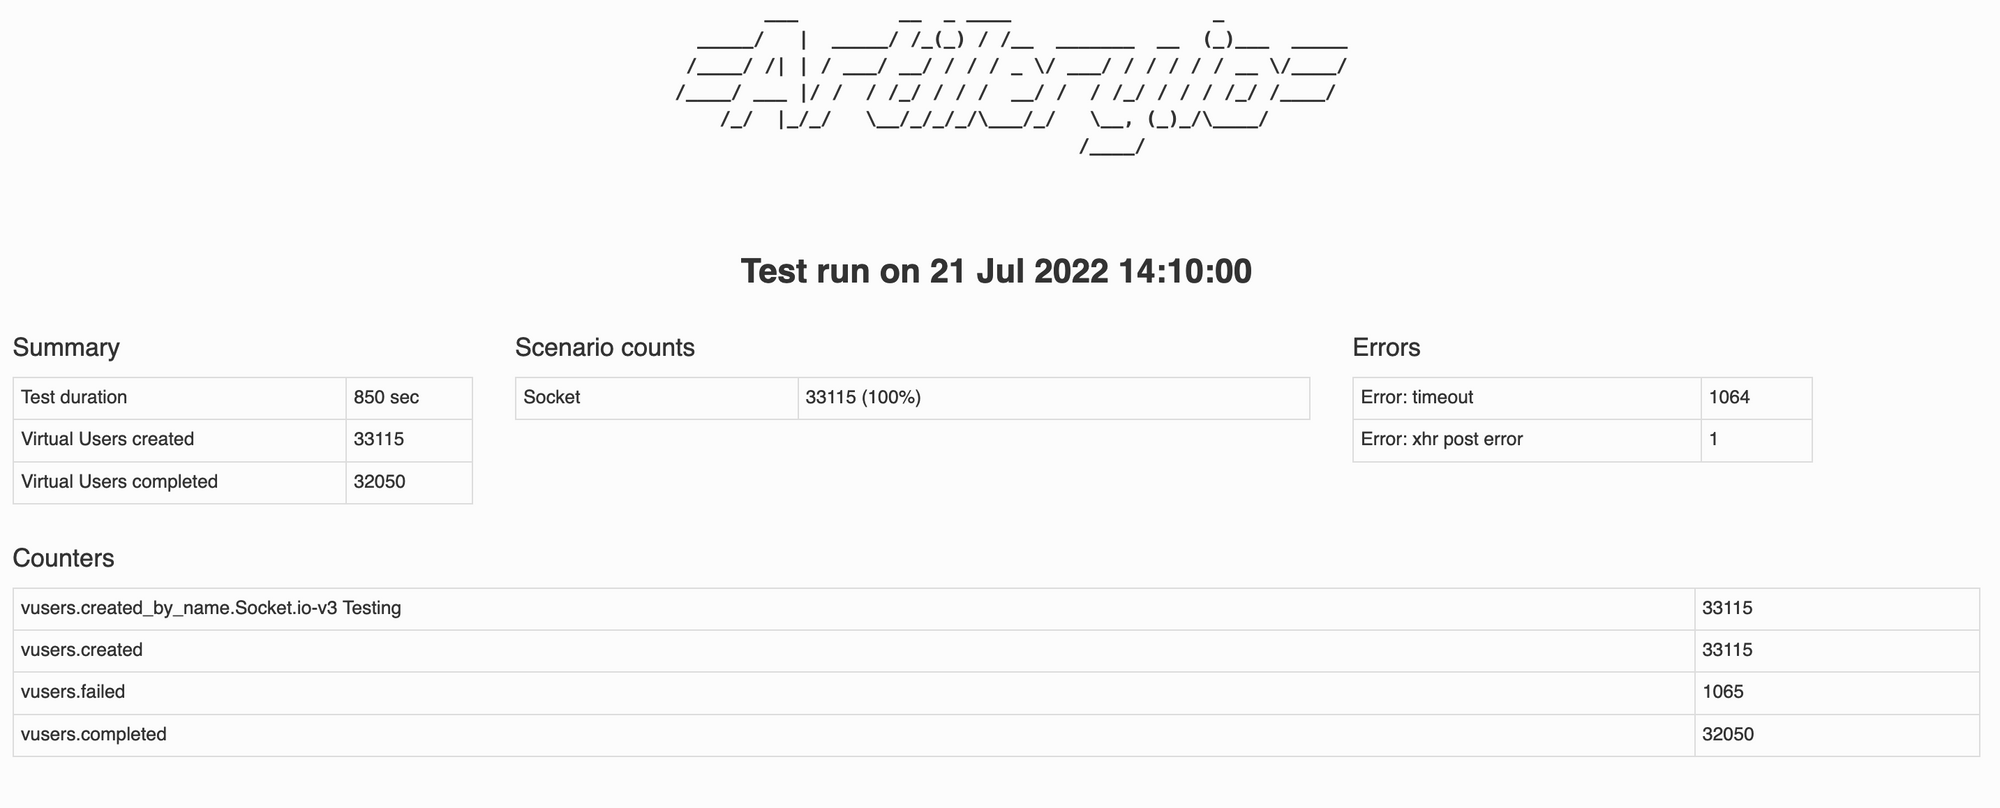
To open and read your generated report, run:
artillery report output.json
This will generate an HTML report with the same name, which can be opened in the browser to view test results!

Conclusion
By following this tutorial, you have successfully set up a Node JS Development Environment, installed artillery and its dependencies, and load-tested a Web Socket application!
I'll be back with a more advanced guide on load testing in the near future!
Subscribe to the blog to stay updated!