
Oracle Cloud started the Always Free Resources tier around 2021, and most of us are unaware of the benefits that are just some clicks away.
In this article, we will create a powerful server without any costs with Oracle Cloud Infrastructure Free Tier to reap the benefits of a starting 30-day trial + an Always Free plan that will never end (obviously claims supported by Oracle themselves) unless you terminate it yourself.
Sign Up Requirements
You do not need to be a student or prove to be a student. Anyone with a valid email and credit card details can sign-up and start the trial instantly.
- A valid email address.
- A valid credit or debit card.
- Go to the official link of Oracle Cloud Sign up.
- Start the sign-up process with your details. A verification email is sent to continue the sign-up process.
Oracle has made it mandatory to sign-up with a credit card. You need a valid credit or debit card that matches your billing address. Virtual Cards may not be accepted. However, the credit cards will not be charged unless you use paid services.
Logging in Oracle Cloud
After successfully signing up, use cloud.oracle.com to log in to the dashboard.
Once you have an account with Oracle Cloud, you are gifted ~$300 worth of credit and other full-fledged resources for a month from the date of your sign-up.

Free Resources
Some of the resources that you get free of charge for the life of the account are:
- 5 CA and 150 certificates
- 4 OCPU, 24GB memory, 200GB Block Storage
- 5 volume backups, 20GB of Object Storage
- 2 concurrent jobs for 24 hours
- 1 Load Balancer of 10Mbps bandwidth and 1 Network Load Balancer
- OS Images: Ubuntu, CentOS and a variety of Oracle Linux
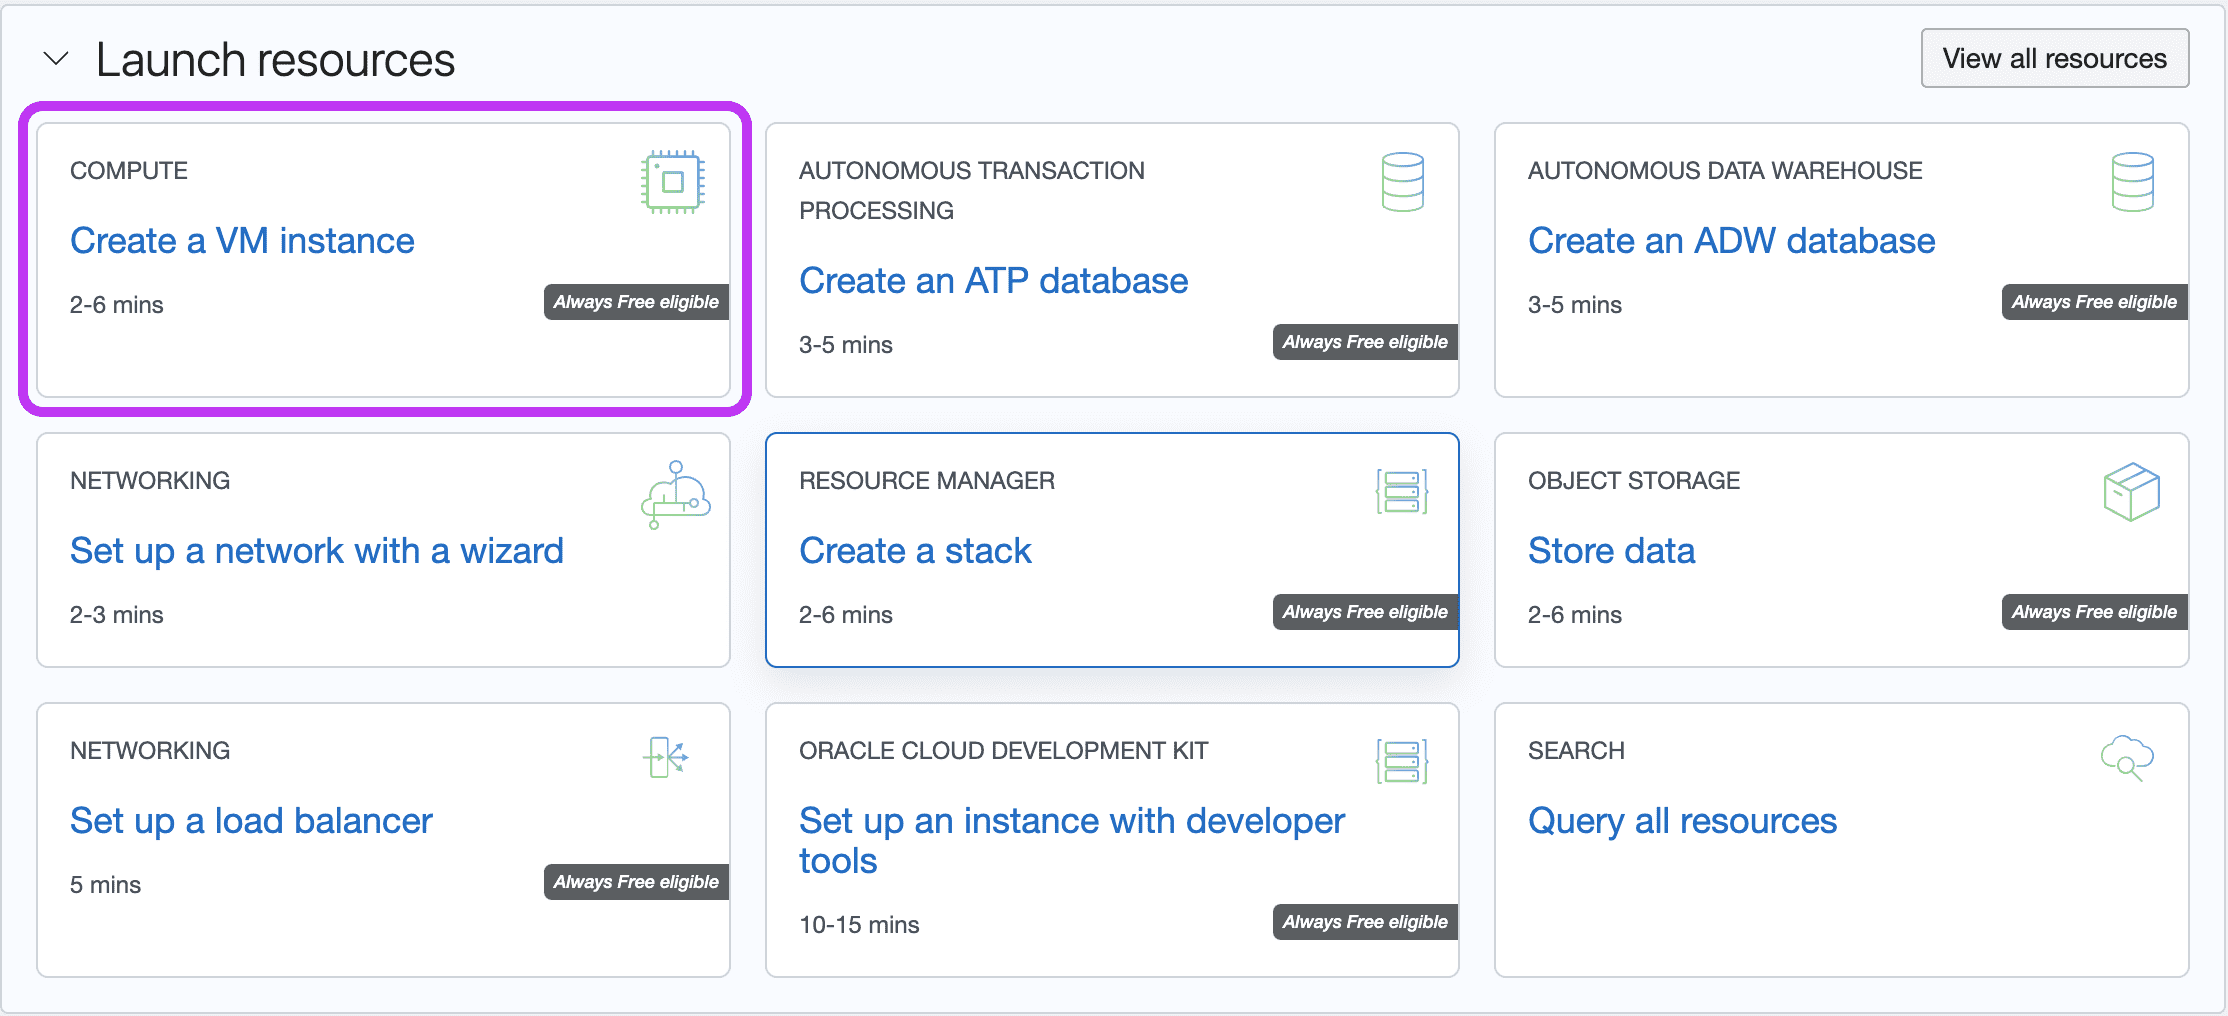
The Get Started Dashboard
Once you are in the Get Started dashboard, find the Create a VM instance in the Launch resources option.
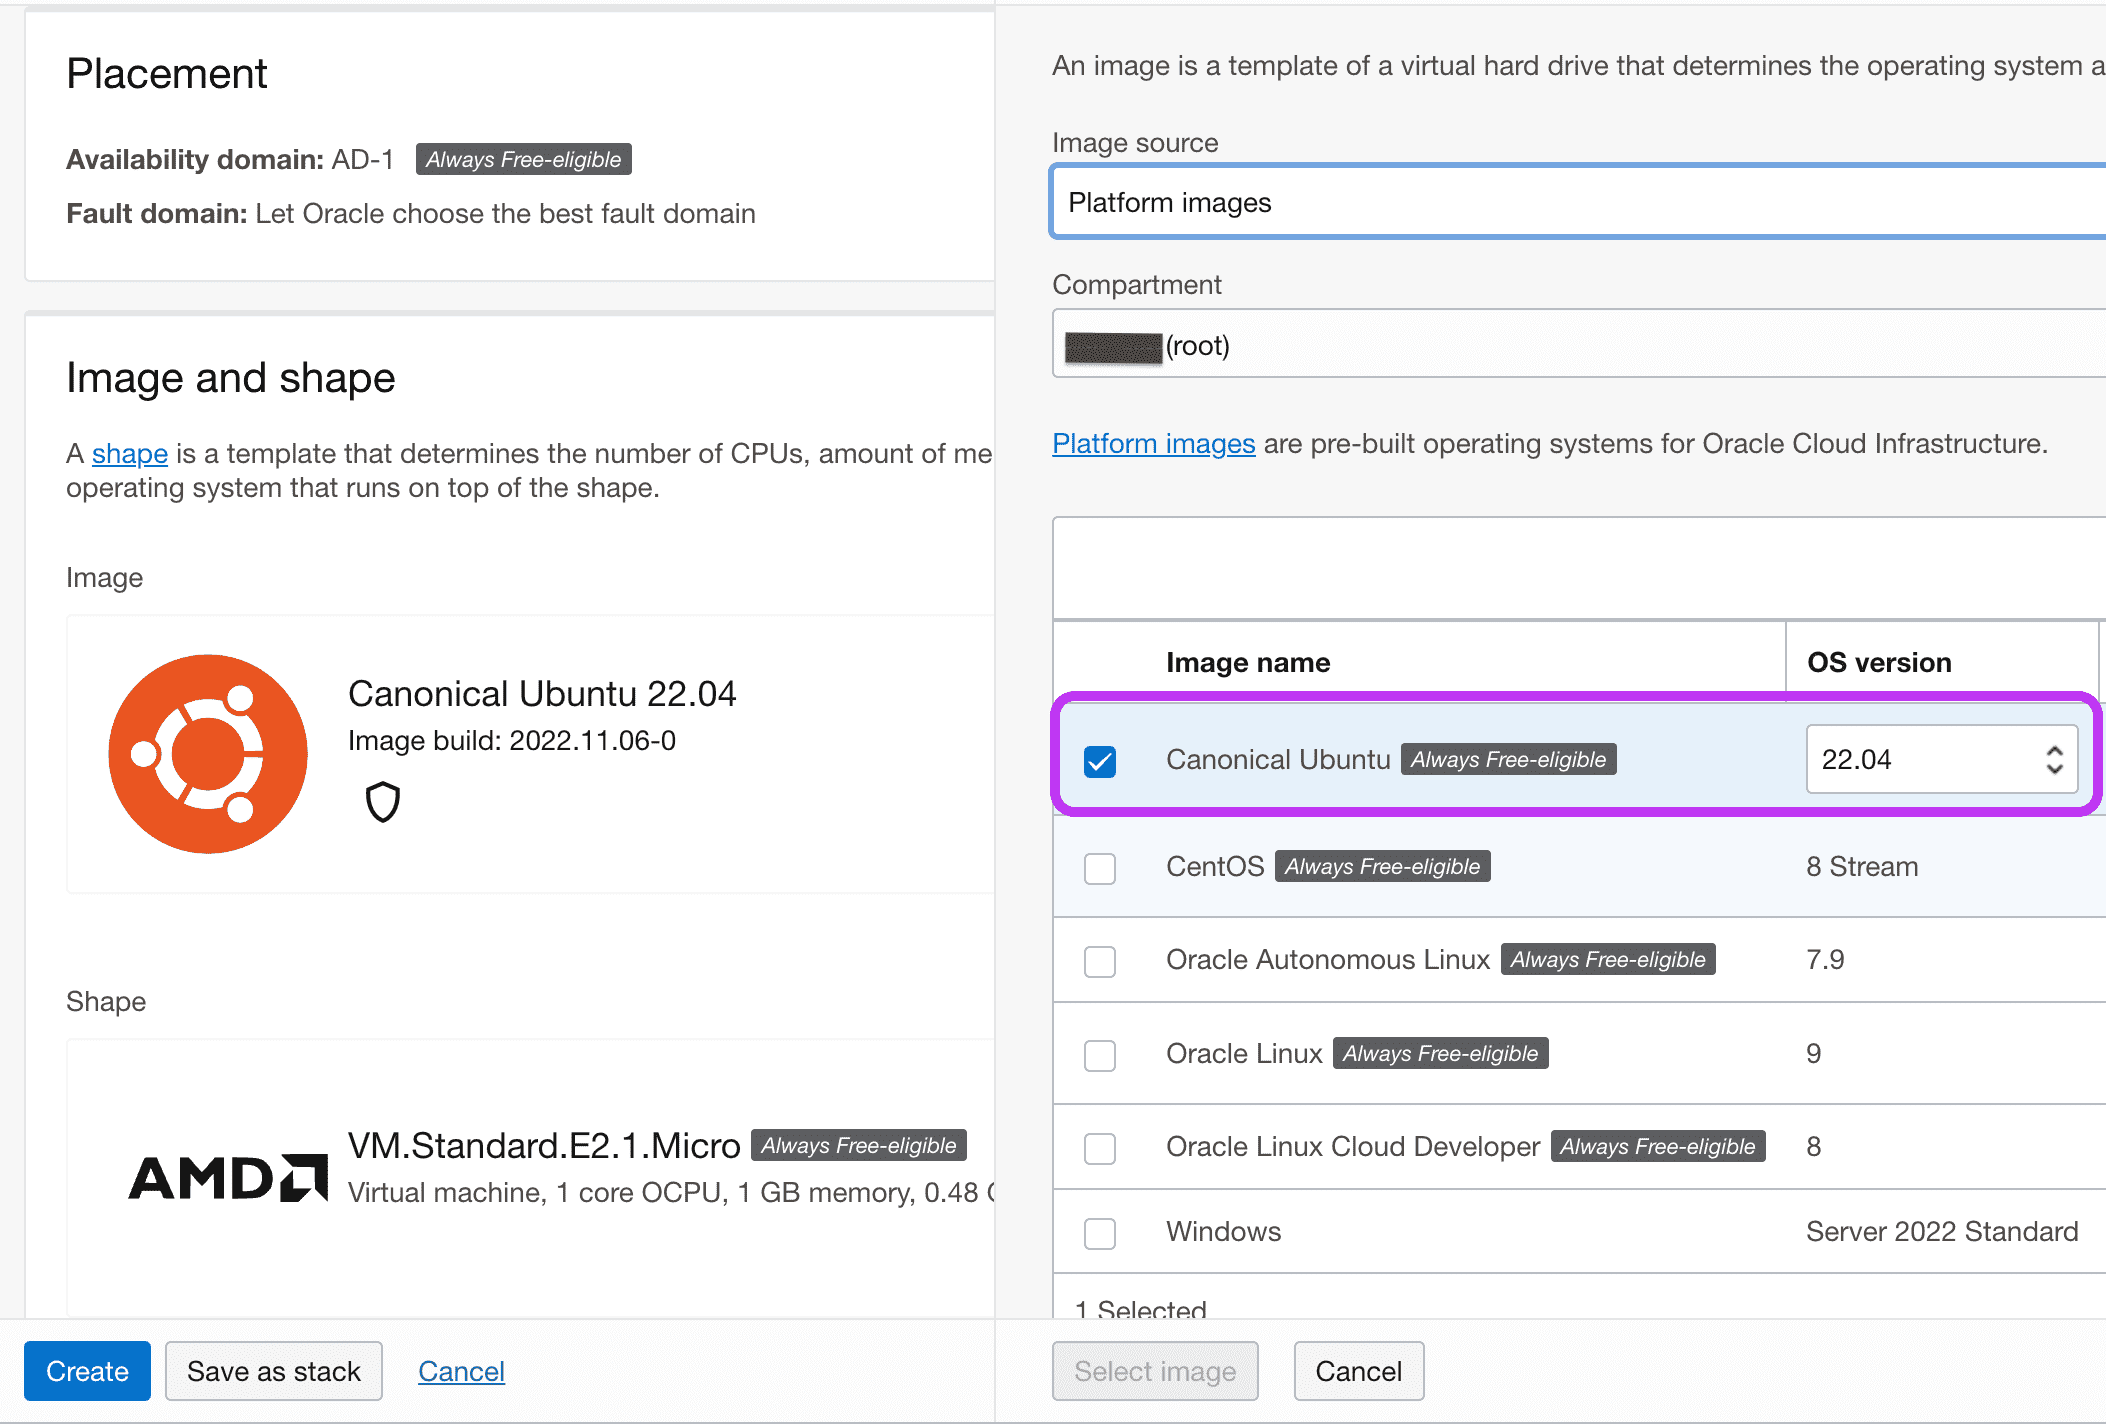
Next up, you can see a setup page for your compute instance. Here, the important part is the Image and shape where you can choose the operating system, number of CPUs, amount of memory, and other resources to allocate to your new instance.
I've highlighted a few options for your ease. However, the options are well laid out, so you can easily walk through them independently.
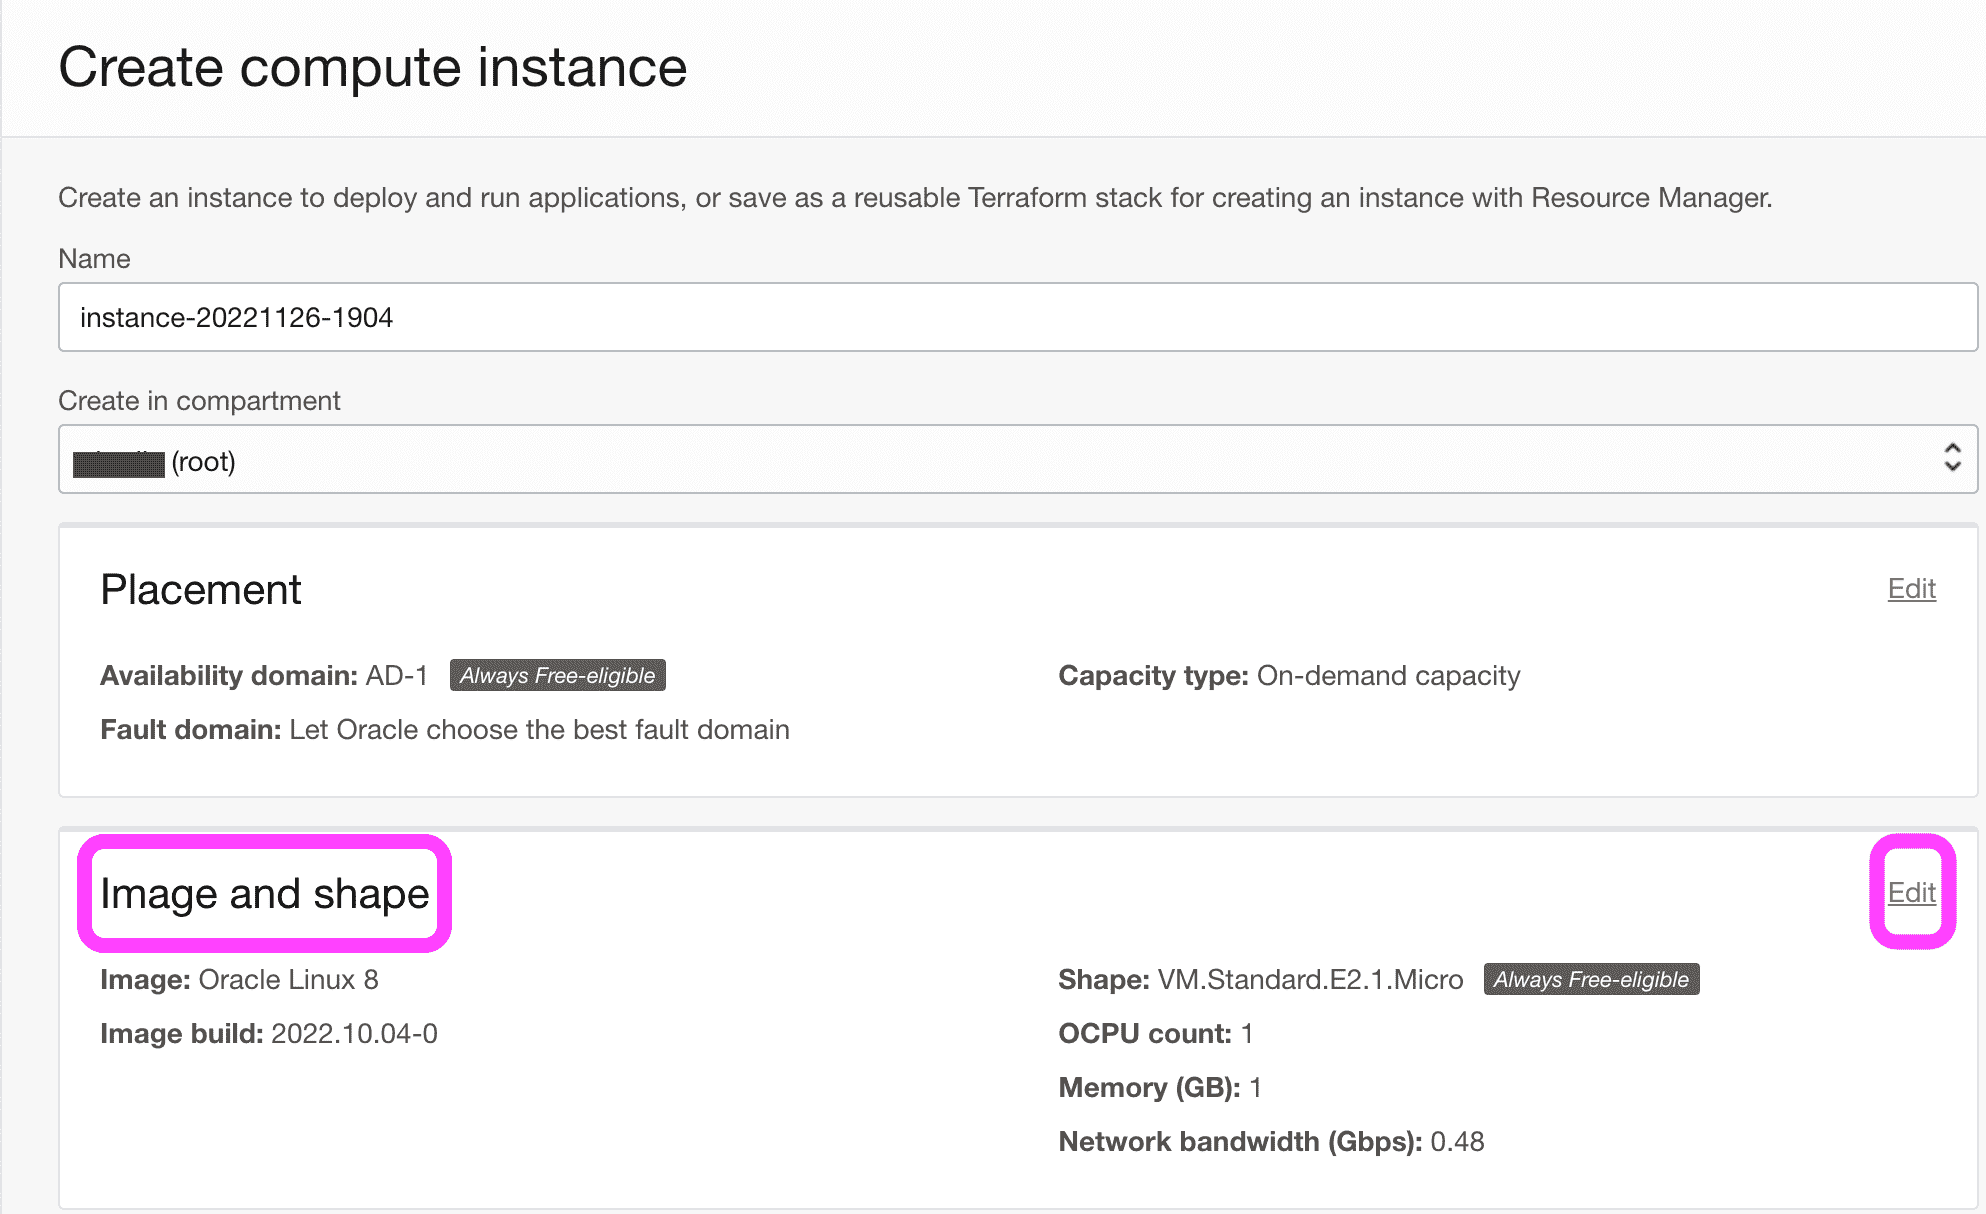
You can let Placement section to be default set and choose Fault domain to Let Oracle choose the best fault domain.
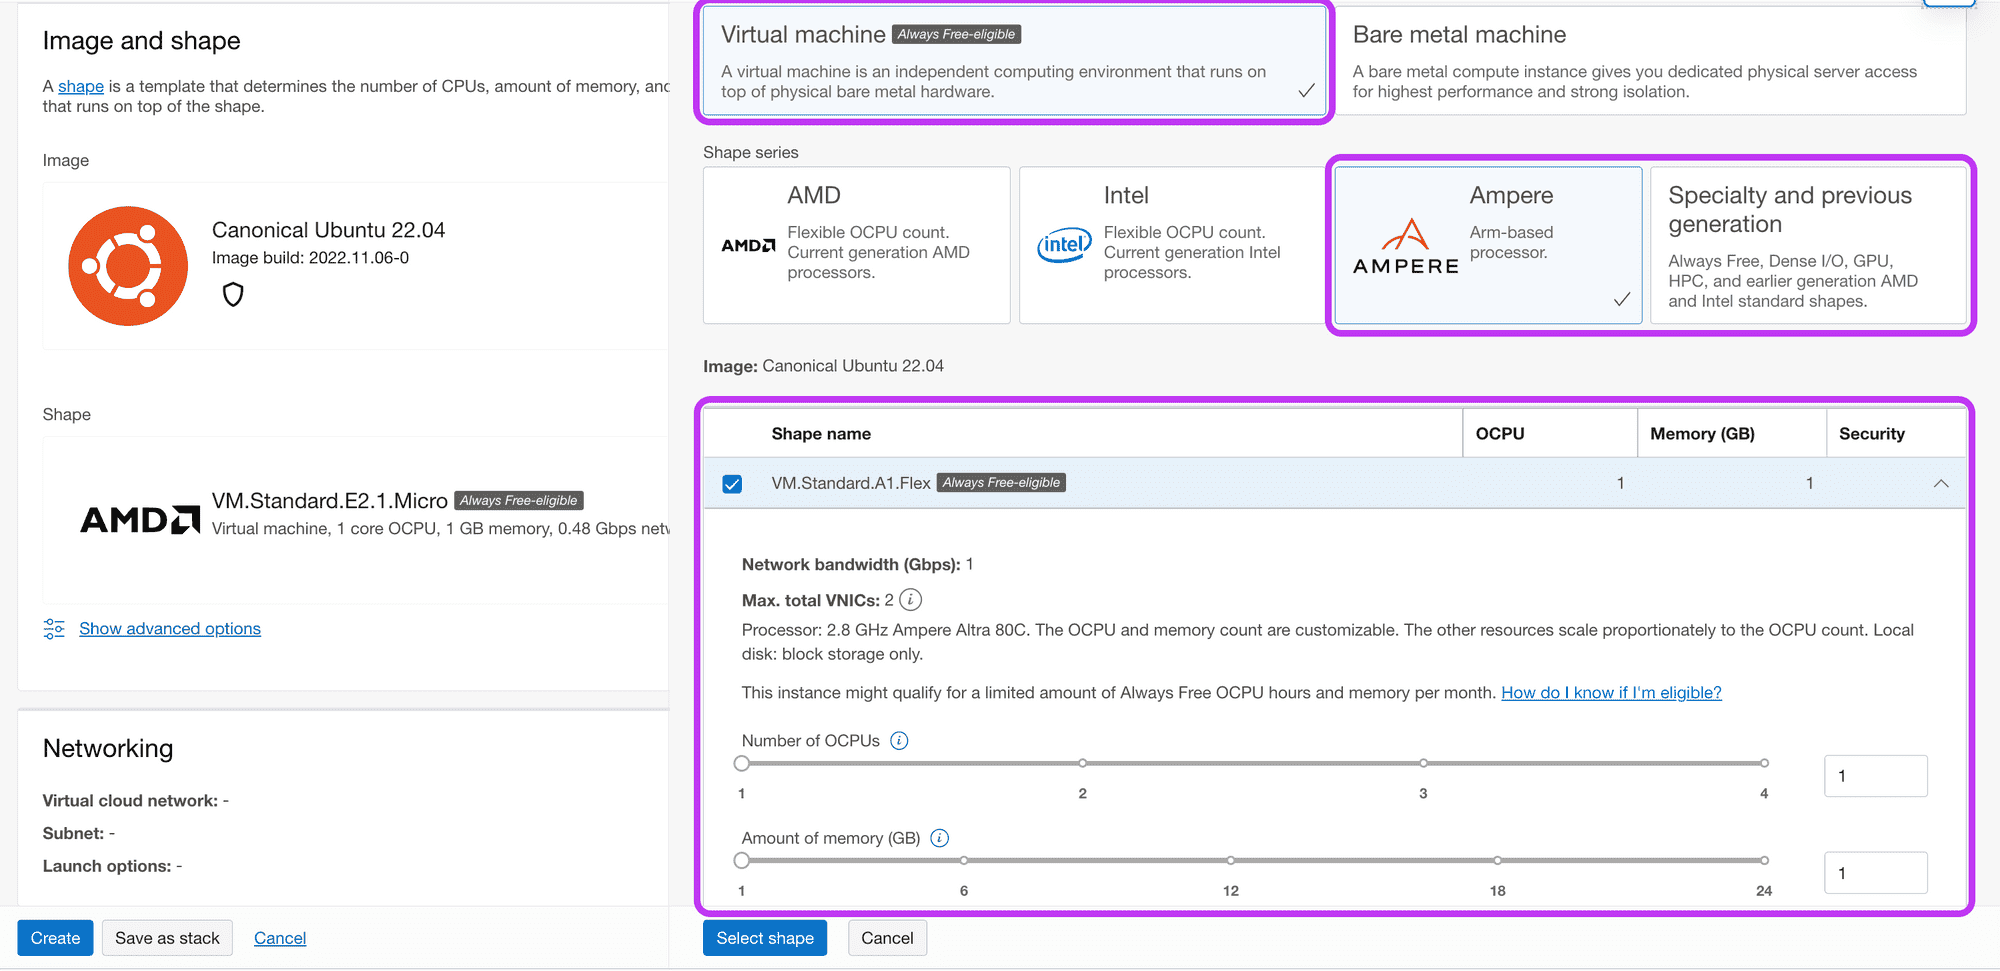
AMD and Intel based virtual machines are only available during the Paid plans or 30 day free trial. Once the trial ends, those shapes are out of bound. However Specialty and previous generation does have AMD CPU limited at 1 OCPU, 1GB memory and 0.48 Gbps bandwidth. So if you plan to use app hosting suites like Cloudron then the Ampere based processor will not support at all. In such cases, choose the Specialty and previous generation virtual machine that still gives you AMD based CPU to run Cloudron and other apps.
If you are unaware of the configurations, you can leave the default values set for Networking and Boot volume. However, password-based authentication is not allowed in creating this instance. So, you must use SSH keys to log in and access your VPS afterwards. I've laid out a few default steps below for your safe bet, but you can continue on your own.
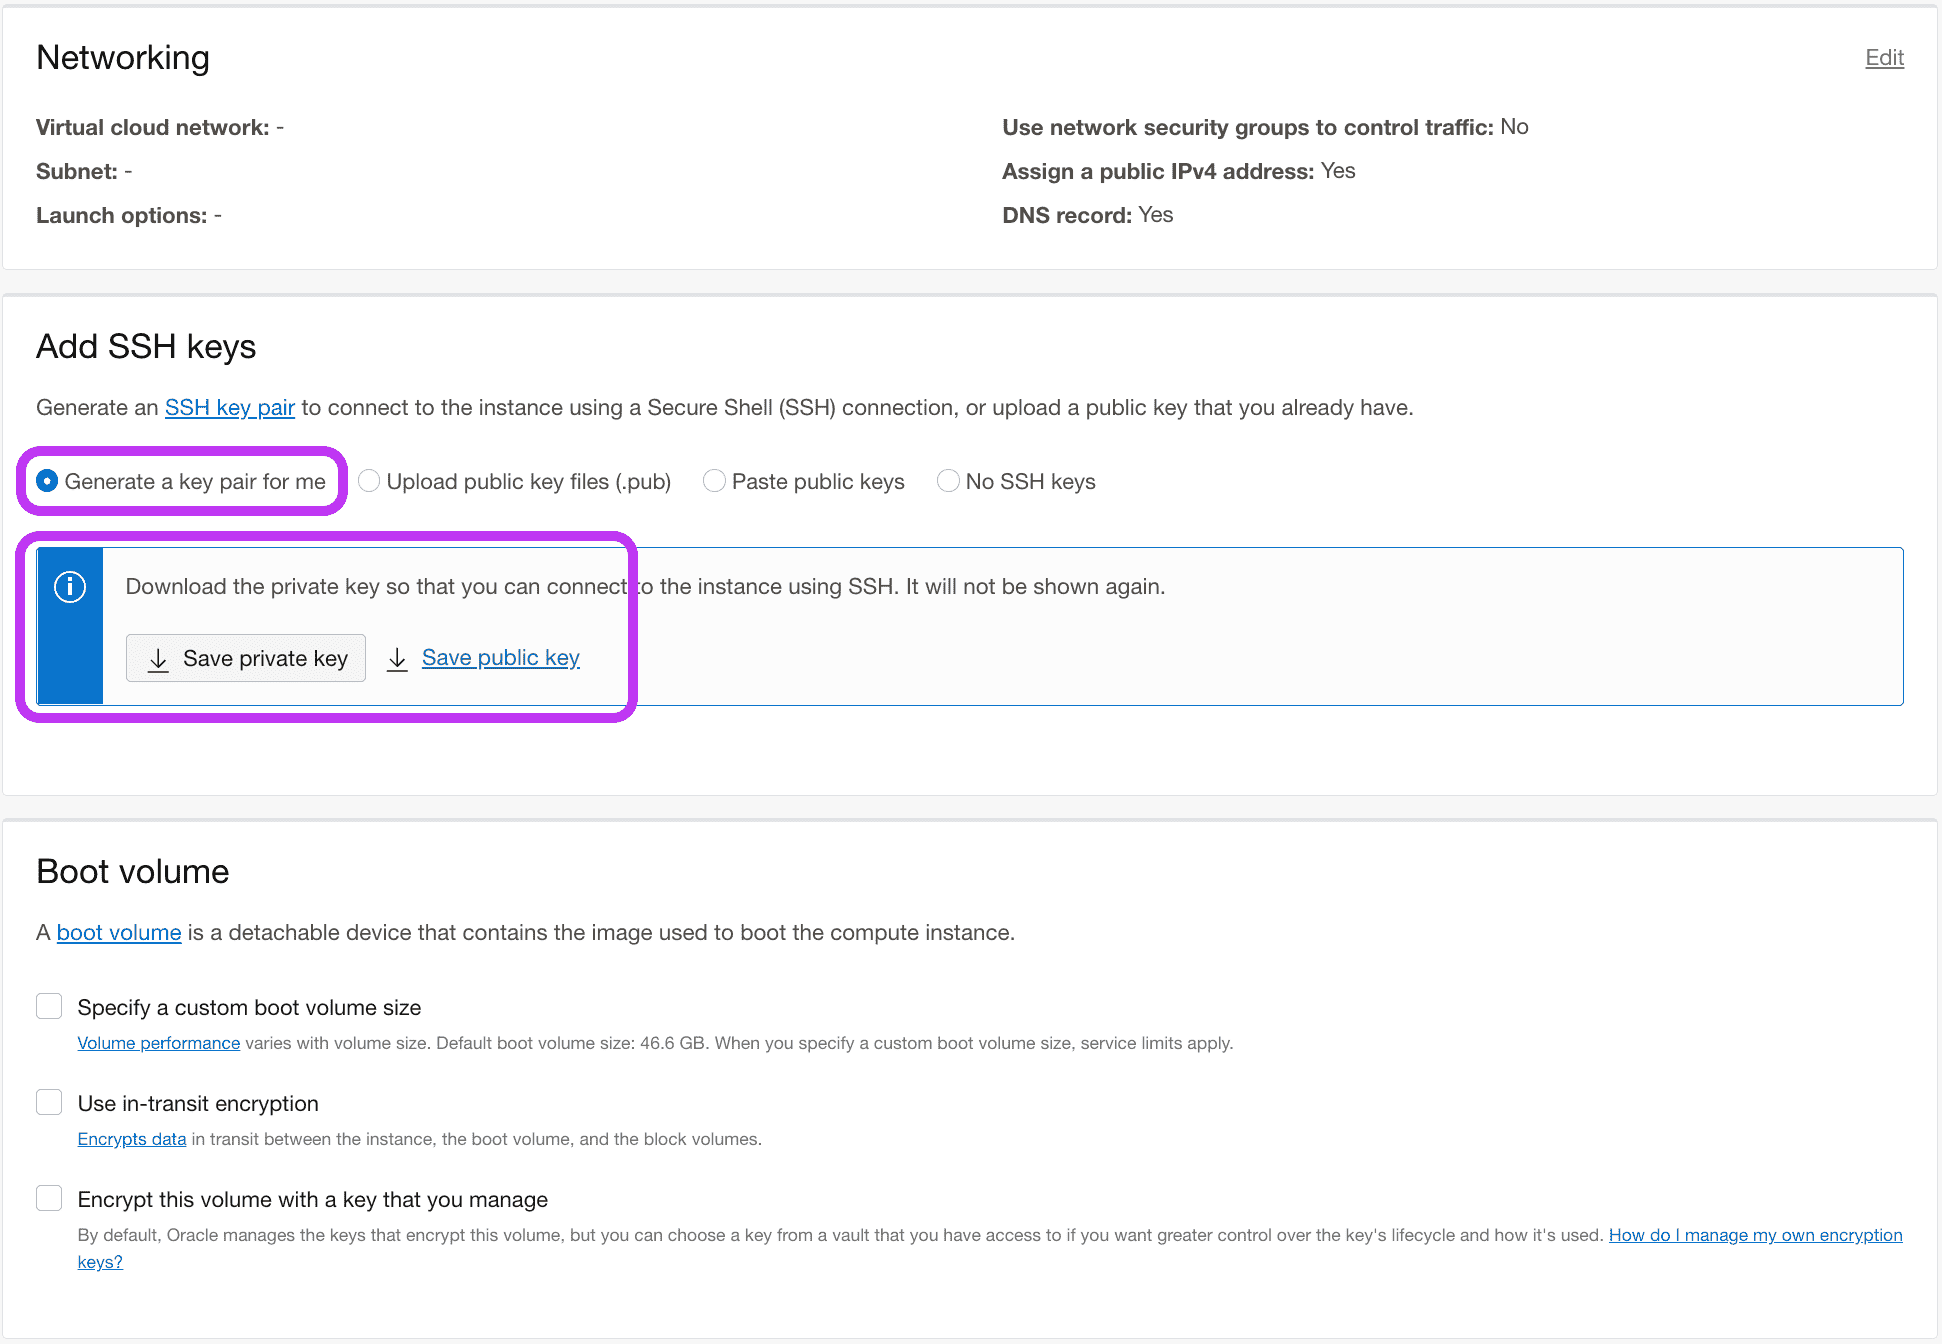
To set up your instance with SSH keys,
Step 1: Select Generate a key pair for me
Step 2: Click Save private key to download the private key ssh-key-yyyy-mm-dd.key
Step 3: Click Save public key to download the public key ssh-key-yyyy-mm-dd.key.pub
To set SSH files and folder permissions in your preferred terminal:
chmod 700 ~/.sshchmod 400 ~/.ssh/ssh-key-yyyy-mm-dd.keychmod 644 ~/.ssh/ssh-key-yyyy-mm-dd.key.pub
Finally, hit Create and the provisioning starts. Once the provisioning completes, you've a few important details to check for a successful launch.
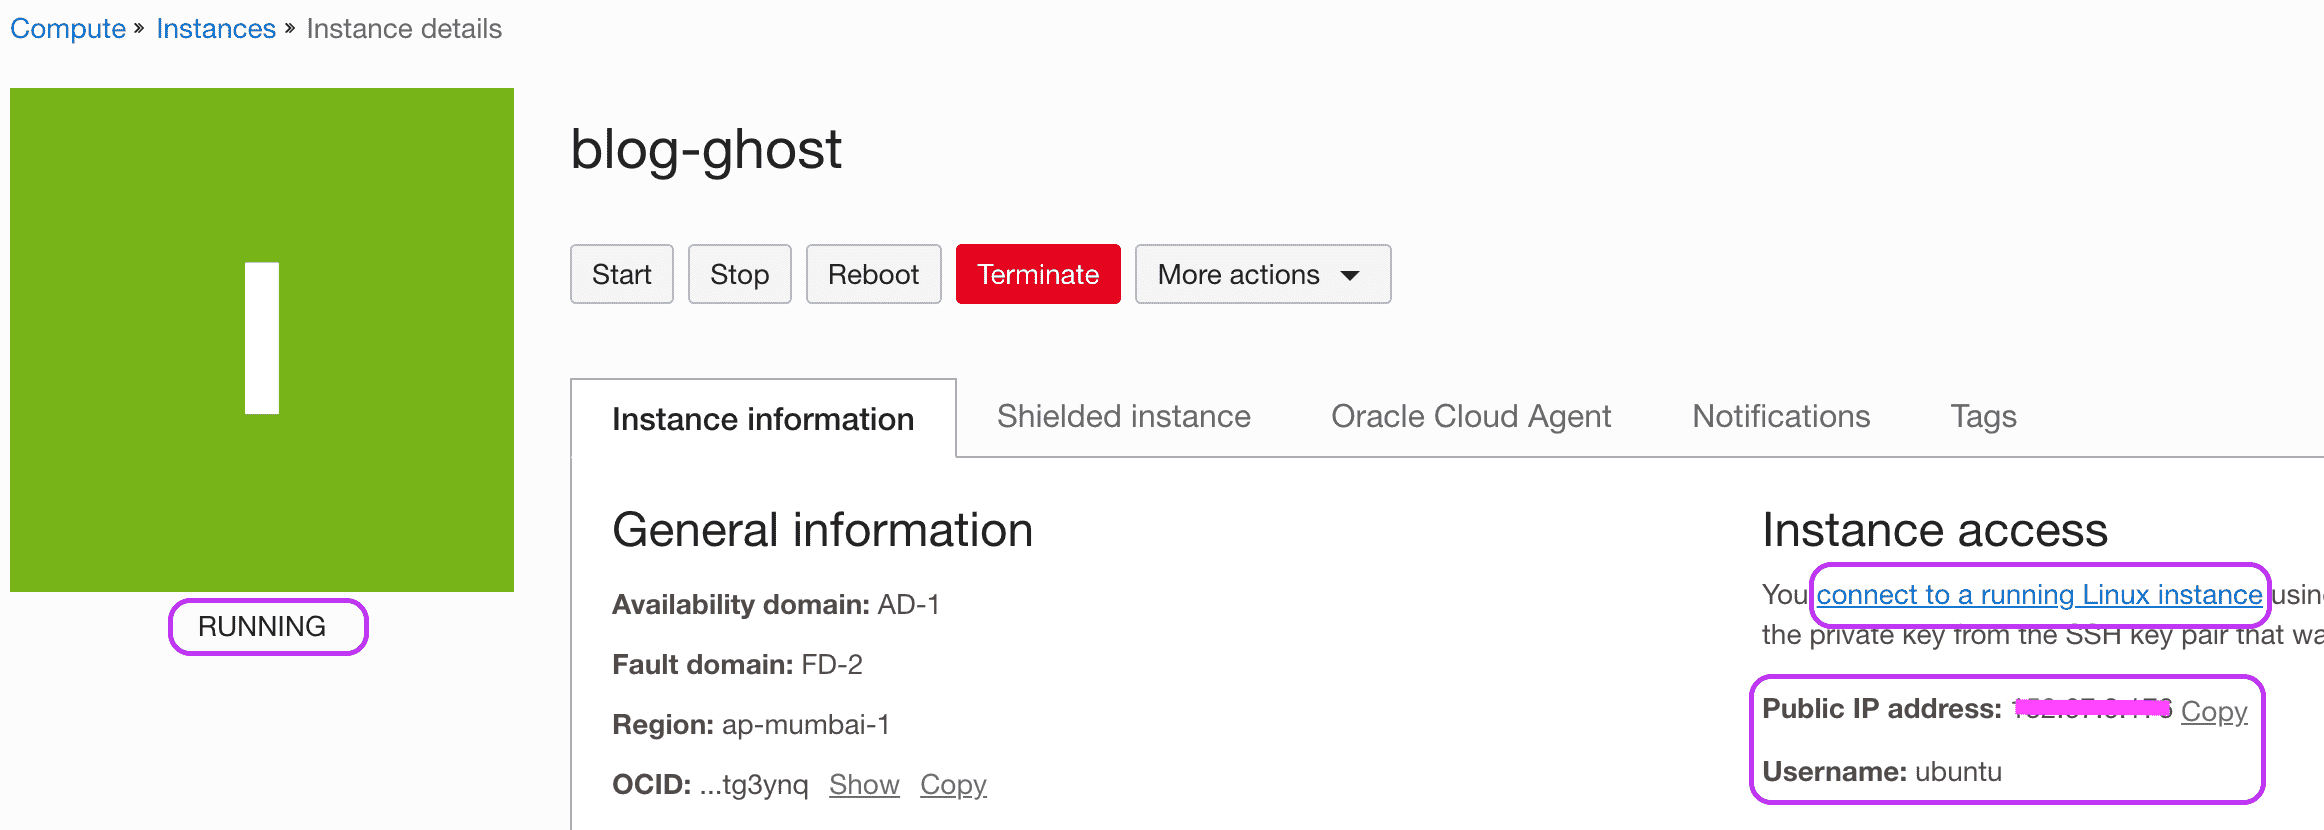
Congratulations! on your cloud server with a free and lifetime subscription.
After your instance is up and running, use your downloaded public key to login into your server via SSH. For more details, you can follow this article Connecting to an Instance.
If you want to change the specifications like RAM, Disk storage or OCPU after the instance is created then you can go to More actions and edit them in the similar way when you created it at the beginning.
Commonly Known Issues
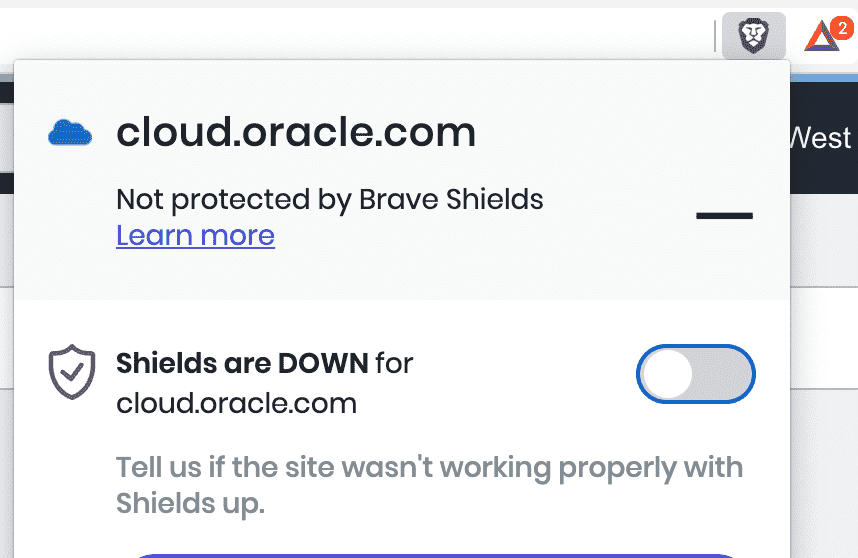
Issue
"The required information to complete authentication was not provided or was incorrect."
"Either this resource doesn't exist, or you don't have permission to view it. Contact your administrator for help."
Solution
Turn down Brave Shields for cloud.oracle.com. Turn off ad blockers too.
If you use the Brave browser, you must ensure the Shields are down for the Oracle Cloud Dashboard to work, or else you will encounter issues with such error messages.
I edit and update this article timely for corrections and improvements. Thank you for reading. Subscribe for more :)