Basics
In simplest words, alignment tools are the basis of visual placements and aligning objects on the art-board. From a wider perspective, alignment is one of the key design principles to ensure consistency in layout and design compositions. Lack of alignment creates disruptions in the design. Distribution on the other hand means the technique of spacing the objects. Distribution is also another important source of alignment in design software.
Let's take a look at the key alignment and distribution tools in adobe illustrator. You can access them from the top menu Window > Align. Like the text alignment tool in every text edit and design software, the icons are pretty clear to the user to understand the alignment target (left/centre/right/top/centre/bottom).
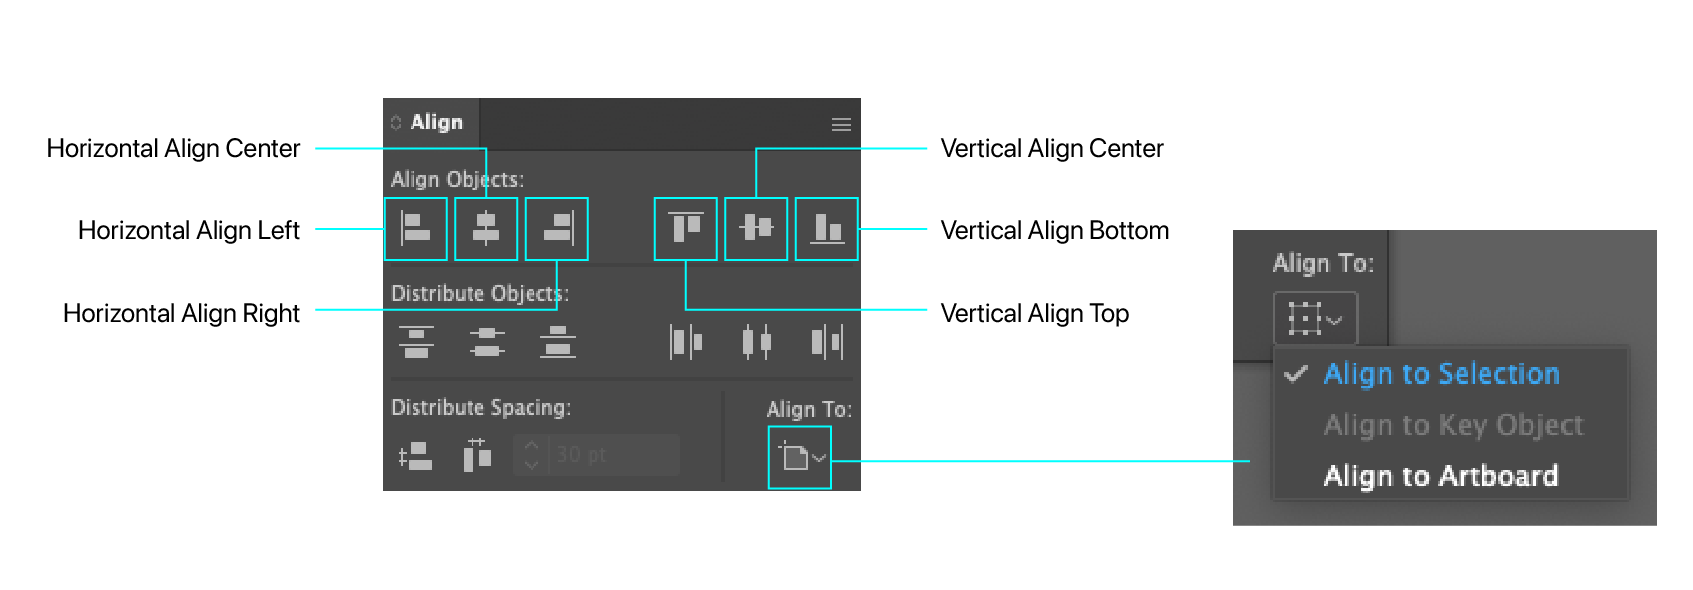
You can either toggle align the object to Selection or align to the Artboard. With Align to Selection mode selected, illustrator allows you to align the objects left or right of the selected objects, while Align to Artboard aligns the object left or right of the artboard directly. In the latest versions of illustrator 2021 and above when two objects are selected by it aligns them to Selection and when a single object or group object is selected it aligns to Artboard.
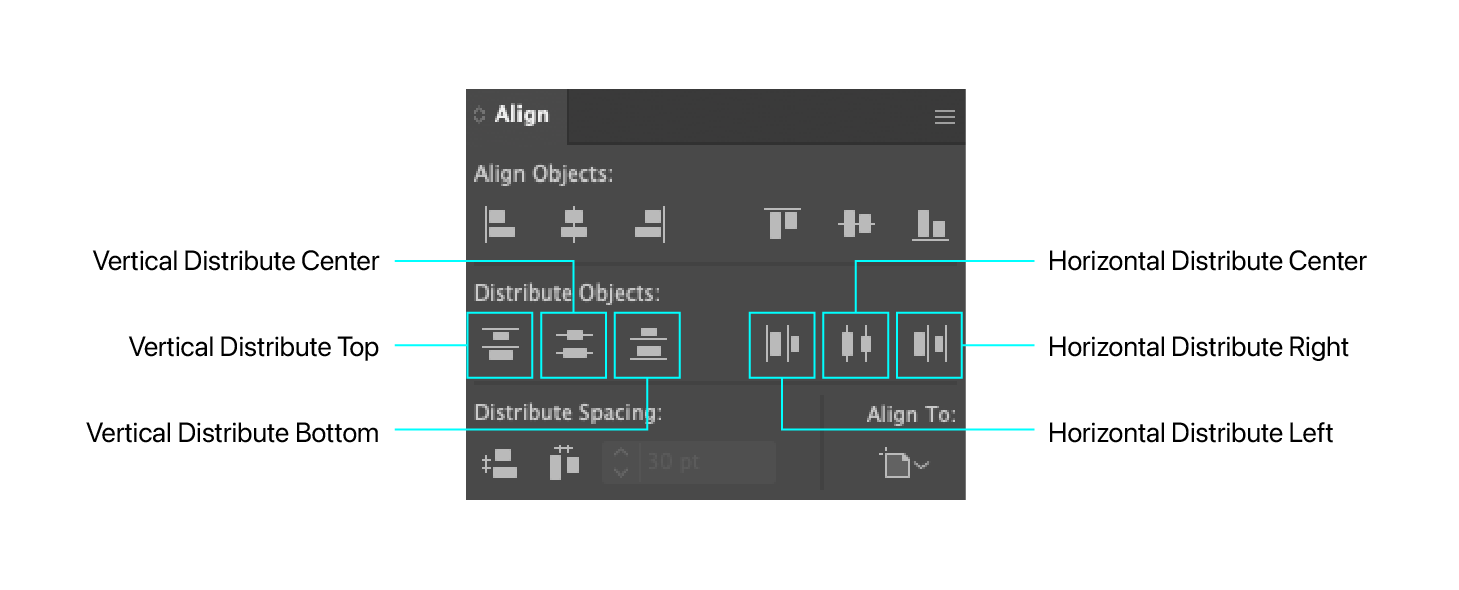
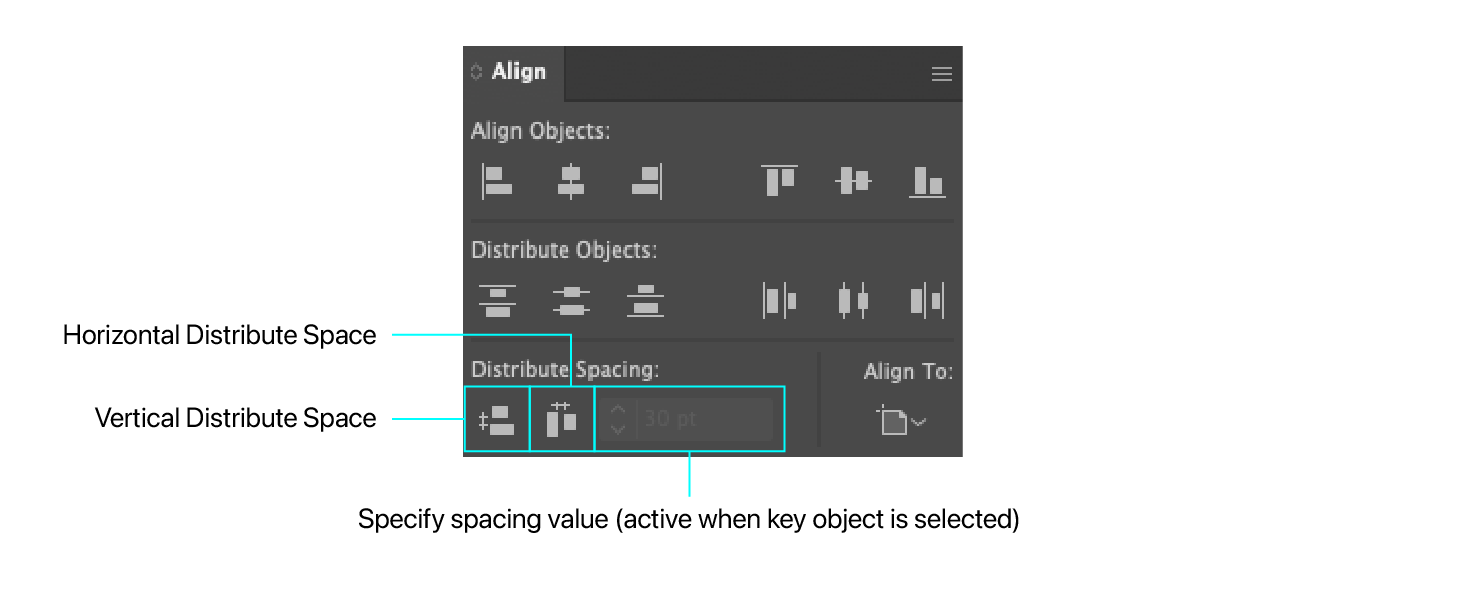
Similarly, the icons for the distribution tools are pretty clear and solid about how to distribute or space out the distance between the objects directly by selecting the objects and clicking the required distribution.
Pro Tips
The above tools were pretty basics, but the most useful alignment and distribution technique is using them according to the selected object and specified values respectively. This will allow you to align or distribute the objects as per the desired layout or composition.
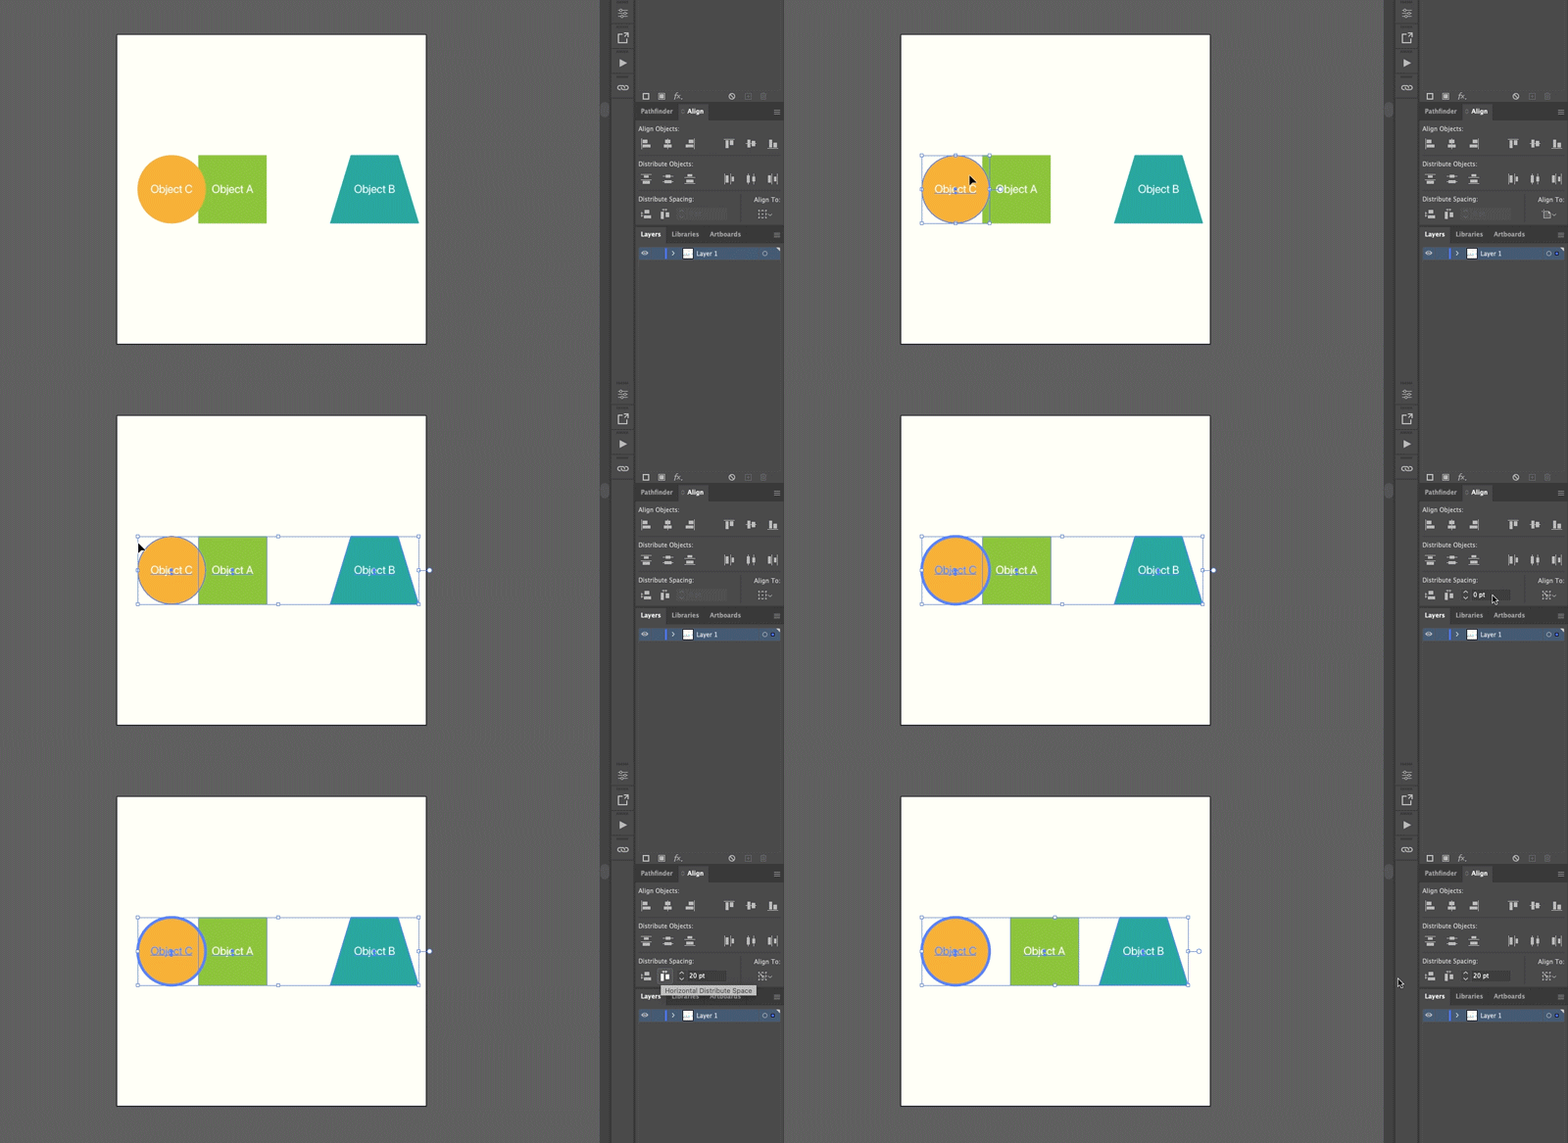
Let's start with the pro alignment technique. Whenever you want to align an object (left/centre/right/top/centre/bottom) to the position of the other object, you can simply drag and select both the objects and again select the key object, and hit the desired align tool. This will allow you to align the selected object to the direction of the selected key object.
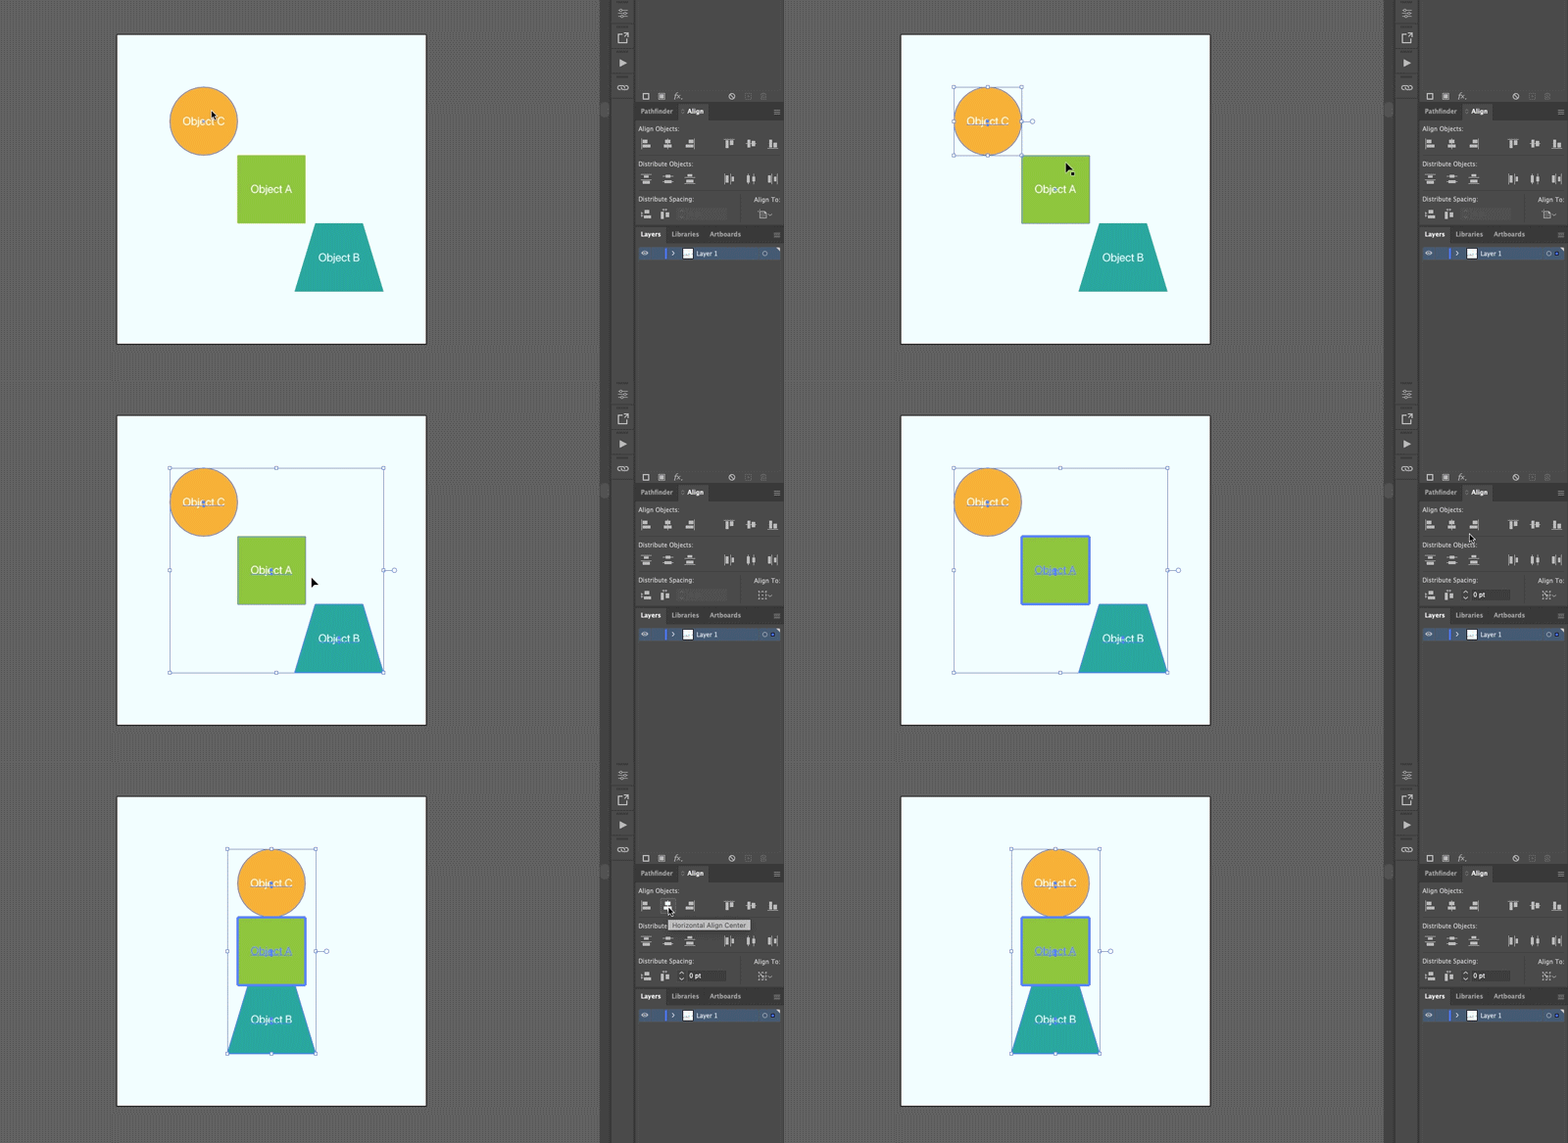
Similarly, for the pro distribution technique you can select the multiple objects (shift select or drag to select multiple objects on artboard); select the key object; add value in the distribute spacing box in the align panel and select the desired distribution to create specified space between the objects, vertically or horizontally. If you distribute the objects without specifying the value, it uses the default value 0px and distributes the objects accordingly.
Try these techniques and get your layout done in an awesome way!
Thank you for trying my tutorial. If you've any queries about the article feel free to comment down.
