We are quite familiar with test automation tools and libraries like Selenium, Appium, Cypress, etc. for web applications and mobile apps. But, coming to the gaming industry, I got curious about finding the standard tool for automating game testing! According to my findings, tools such as Alt Tester, Appium, TestComplete, etc. were popular among the QA engineers. This article is about why I chose one of the above and how you can get started with it.
Overview of Alt Tester
The game development industry is experiencing steady growth, with Unity emerging as a preferred engine for many developers. Unity's proprietary rendering system for custom graphics and its unique approach to handling interactions pose challenges for conventional testing tools. Specifically, automation frameworks like Appium, which rely on standard and predictable UI elements for tracking, find Unity-based games difficult to analyze and manage effectively.
In my opinion, the best tool for automating games made with Unity is Alt Tester; which is exclusively designed for Unity engines and provides direct access to game objects and interactions, allowing for precise and efficient testing in the Unity environment. With Alt Tester, QAs and testers can automate UI & functional tests and make sure that game mechanics and features work as intended. This tool facilitates the identification and manipulation of game elements using an inspector-like interface, thereby allowing the prompt and successful creation of tests.
Diving into the facets of Alt tester, it is developed to support automating processes across multiple platforms(i.e., Android, iOS, Mac, Windows, etc.) making wireless and parallel execution possible in multiple devices. It provides various locator strategies to find game objects and supports the ability to simulate user actions such as clicks, taps and swipes. Along with this, Alt tester can be integrated with test automation frameworks such as NUnit and Pytest. Reporting tools such as Allure, and ExtentReport can also be integrated which generates detailed test reports, including logs and screenshots, to help diagnose and fix issues.
Integrating Alt tester with Unity
There are three requisites for integrating Alt tester and Unity, i.e. an instrumented version of the game, connection to the server and the editor.
Firstly, get ready with an instrumented version of the app, you are about to automate. If you don't have the Alt Tester enabled in the instrumented version, import Alt Tester package by dragging the downloaded package in your Unity project and resolve the dependencies required for it. To ensure Alt Tester is imported to your project, you need to see "Alt Tester ®" in the projects menu, as shown below:

Now, to instrument your app, open Build Settings in the Alt tester Editor window and navigate to AltTester Port; setting its value to 13000. Select the scenes you want to include in the build. And provide the platform and path to download the build. Finally, after all settings, click on Build only to get an instrumented version.
Secondly, you need to establish a connection with the Alt Server, which can be feasible with the use of Alt Tester Desktop (You can download it from here.) After downloading it, open the app and now move on to AltTester Editor in Unity project, set the platform to the editor and click Play in Editor.
Finally, you are ready to kick-start automating your tests for any project in Unity. Let's understand some Alt Tester basics, to begin with scripting.
Understanding Locators and Interactions
In simple terms, locators are the methods used to identify and select game objects within a Unity Scene. The common locator strategies in Alt Tester are:
- By Name: Identifies game objects by name.
self.altDriver.find_object(By.NAME, "PlayBtn")- By Text: Identifies objects with certain text value.
self.altDriver.find_object(By.TEXT, "START")- By Tag: Selects objects based on their tag. Tags are useful for grouping similar objects.
self.altDriver.find_object(By.TAG, "Block")- By Component: Locates object having the specified component.
self.altDriver.find_object(By.COMPONENT, "PlayerController")- By Path: Locates object using the path in the object hierarchy.
self.altDriver.find_object(By.PATH, "/Canvas/Menu/StartButton")- By Id: Searches for id value in
AltIdandInstanceId.
self.altDriver.find_object(By.ID, "showPanel")- By Layer: Selects objects based on their layer.
self.altDriver.find_object(By.LAYER, "UI")To this point, we can find and track objects, now we need to interact with these objects. Interactions allow us to imitate user actions on game objects. These actions are crucial for testing gameplay mechanics and user interfaces. Some common interaction strategies are click, tap, swipe, scroll, keypress, pointer actions, drag and drop, etc.
Let's see an example of combining locators and interactions below:
Here, we will try to find a start button and tap on it.
start_button = self.altdriver.find_object(By.NAME, "Btn:Start")
start_button.tap()
Assertions and Validations
To ensure that the game behaves as intended, assertions and validations are essential parts of testing. While validations verify that game states and actions are accurate, assertions determine if certain criteria are satisfied. Using assertions, we can check the visibility, position, text, and state, of any game object or element and also validate the scene transition, UI updates, and animation state in our game. We can visualize this in the snippet below:
def test_start_game(self):
    # Find and click the Start button
    start_button = self.driver.find_object(By.NAME, "Btn:Start")
    start_button.tap()
    time.wait(2)

    # Find the Player object and assert its name is TestUser
    player = self.driver.find_object(By.NAME, "PlayerName")
    self.assertEqual(self.altdriver.get_text(player), "TestUser", "Player name is not TestUser.")
Visualizing our first game automation tests
Let's write our first test script for automating the setting section of a card game. The setting panel has features of turning ON/OFF sound and music, selecting card designs, navigating to the About page, Feedback page and so on. Here, we will test and validate some items in settings.
import unittest
import time
from alttester import *


class MainSettings(unittest.TestCase):

    altdriver = None

    @classmethod
    def setUpClass(cls):
        cls.altdriver = AltDriver()

    def test_1_click_settings_icon(self):
        ele = self.altdriver.find_object(By.NAME, "Button:Settings")
        ele.tap()
        self.assertTrue(self.altdriver.find_object(By.TEXT, "Settings"), "Settings icon is not clicked")

    def test_2_change_sound_setting(self):
        self.altdriver.find_object(By.NAME, "Button:AudioSetting").tap()
        self.altdriver.set_delay_after_command(0.5)

    def test_3_change_music_setting(self):
        self.altdriver.find_object(By.NAME, "Button:MusicSetting").tap()
        self.altdriver.set_delay_after_command(0.5)

    def test_4_change_card_front_design(self):
        self.altdriver.find_object(By.NAME,"CardFrontSelectionBtn").tap()
        self.altdriver.set_delay_after_command(0.5)

    def test_5_change_card_back_design(self):
        self.altdriver.find_object(By.NAME,"CardBackSelectionBtn").tap()
        self.altdriver.set_delay_after_command(0.5)

    def test_6_shut_settings(self):
        self.altdriver.find_object(By.NAME,"Button:CloseSettingPanel").tap()
        self.altdriver.set_delay_after_command(0.5)
        self.assertEqual("Main_Menu_template", self.altdriver.get_current_scene(), "Setting panel is not closed")


    @classmethod
    def tearDownClass(cls):
        cls.altdriver.stop()
Automated UI Testing for Settings Panel
To run the snippet above, as I mentioned earlier, get ready with your project to run and side-wise open your alt tester desktop app to establish a connection with Unity Project.
But wait, the execution process is not yet completed!
Open your terminal and navigate to your test project and run the following command to see the magic happening.
python -m pytest tests/settings.py --alluredir Report/allureFollowing is a short clip of the test scripts written above, being executed in the Editor.
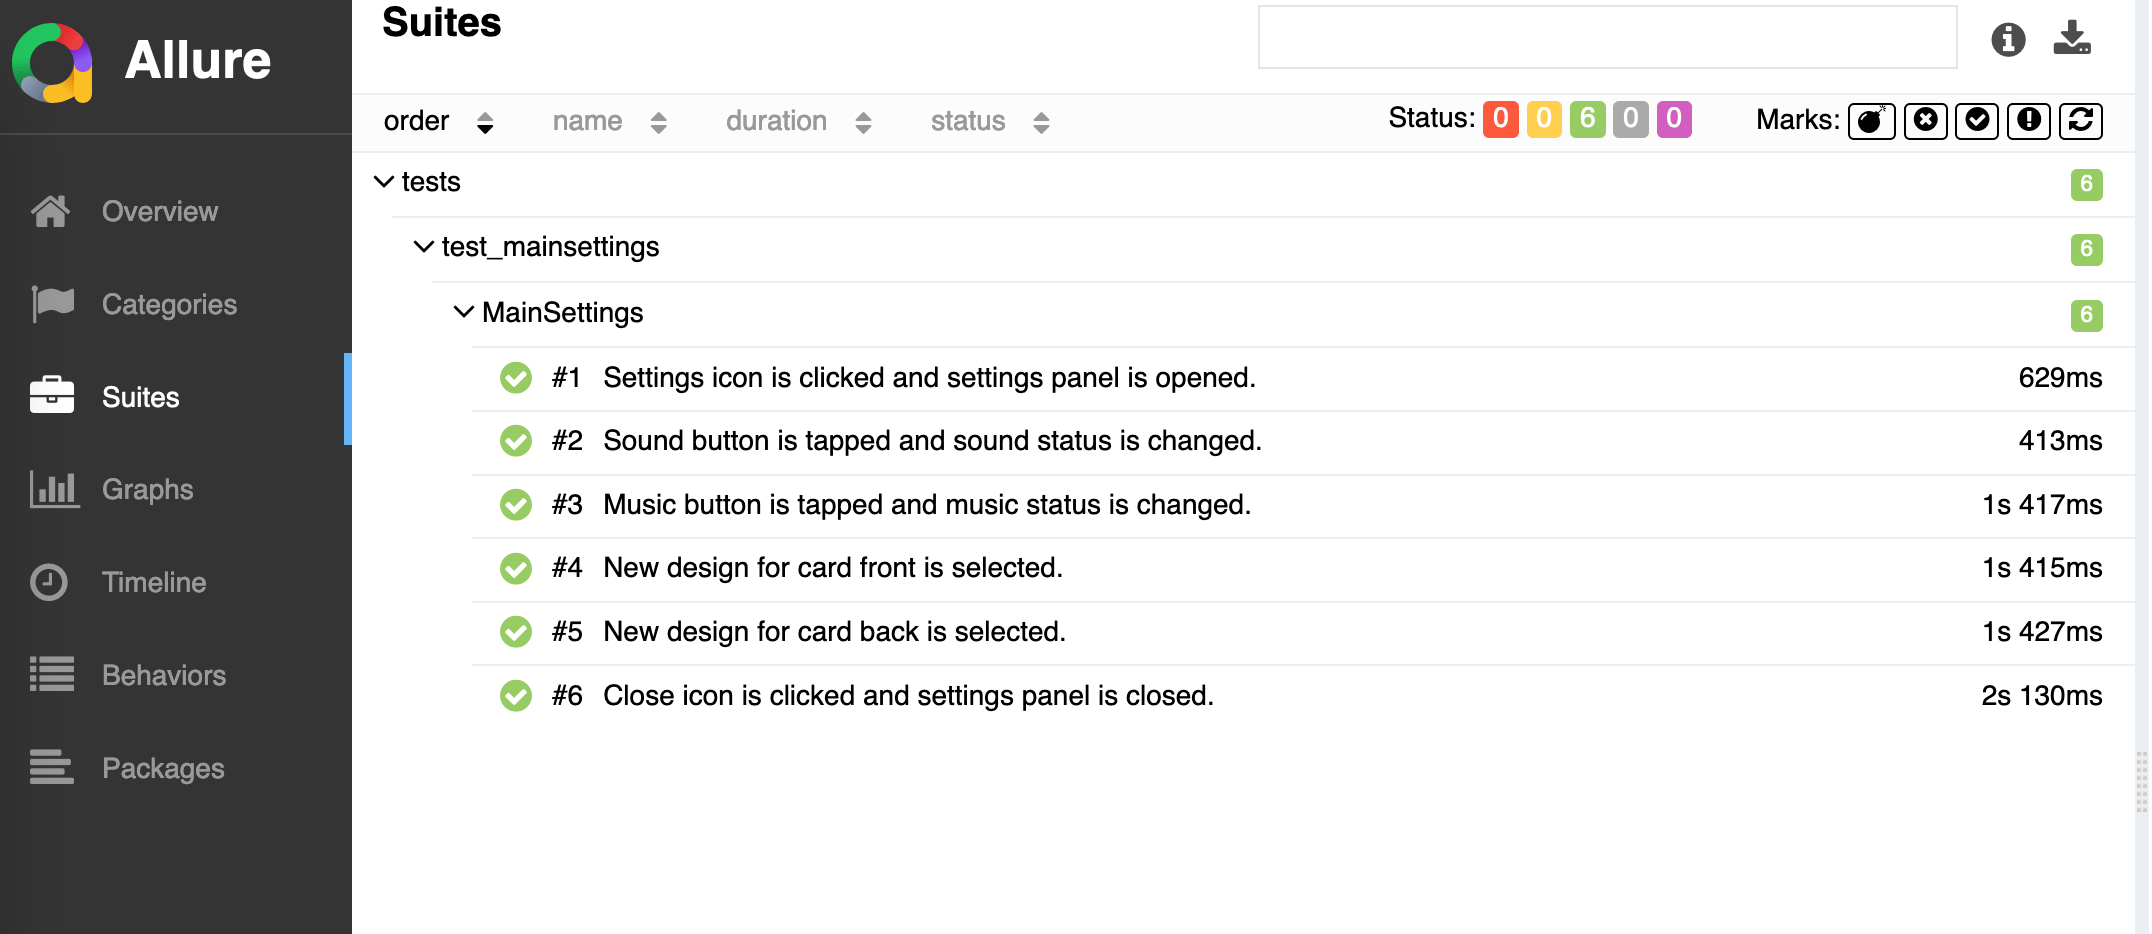
You can also generate an HTML report for easy and efficient understanding of test outcomes; using various reporting tools. I have used Allure and my report looks like this:

Conclusion
In summary, utilizing Alt tester's robust features for object recognition and test execution, we can achieve thorough testing and bug detection. Though the initial setup requires some basic knowledge, the streamlined workflows and reliable results make it worthwhile.
As the gaming industry evolves, tools like Alt Tester will highly aid in maintaining quality and meeting user demands, saving time and resources and allowing teams to focus more on creative development.
Thank you for reading this article. See you in the next one.

