
Reusing rigged character animation is somewhat easy if you know how to re-target animation from one character to another. As long as the rig is similar you can use the same animation across the different characters. But what ab0ut 2D animation that is not using bone animation? rather a sprite animation. It becomes cumbersome quickly as you have to make the same animation for a different character and just keep on repeating the same task. So how about a sprite swap? Is it possible? Well, the answer is yes. Unity now has a feature for swapping sprites so that we can use the same animation for different characters. Let's look at things that we require for a successful sprite swap in animation.
Steps required for setting up reusable 2D animation.
1) You need to install a 2D animation package from the package manager. My version of 2D animation is v5.0.10. Yours might be different if you have a different version installed.
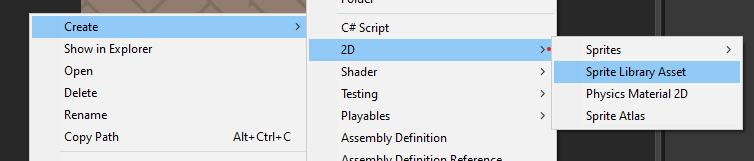
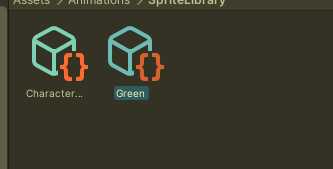
2) Create sprite library asset by going: Create -> 2D -> Sprite Library Asset
3) Create different categories for different animations. In my case, I have made 2 categories Run and Jump.
4) Assign sprites that are required in each category.
Here is an example from my sample project :
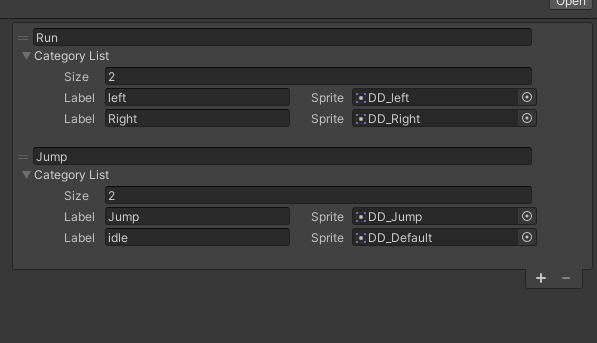
In the example above you can see 2 sprites for a run and 2 animations for the jump. Yours can be completely different. You can assign whatever label you want but do it so that you can understand what each sprite represents.
Animation part :
Creating animation is a little different for this setup.
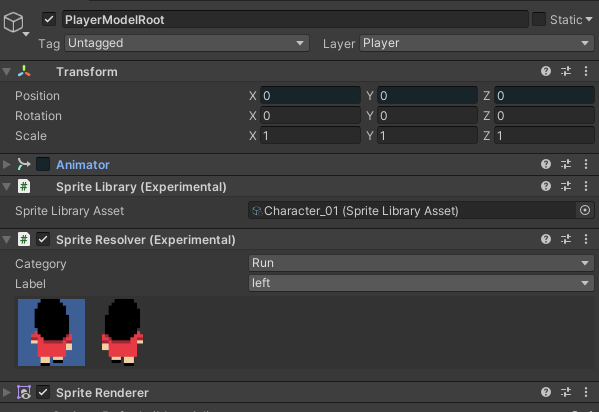
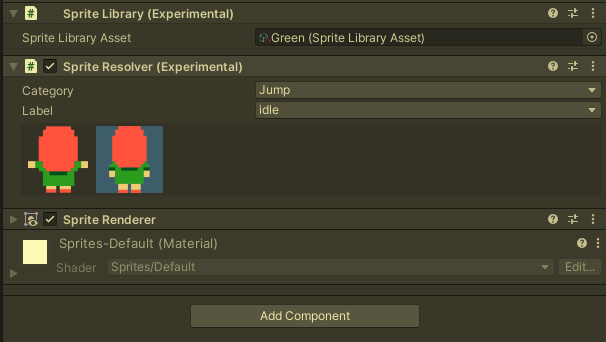
1) First, you need to add 2 components: Sprite Library and Sprite Resolver to the game object that contains Sprite Renderer.
2) You need to assign the Sprite Library Asset we created earlier to the Sprite Library component.
3) Open the animation window and create blank animation for the game object of your choice.
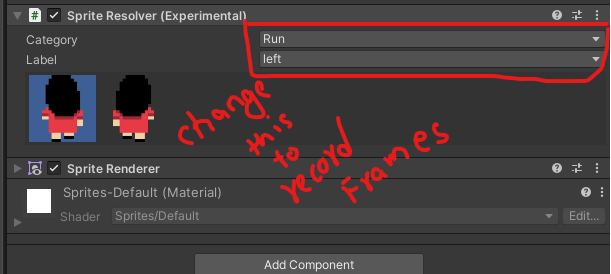
4) Start recording animation and select the category of your choice in Sprite resolver. In my case, I have selected the Run category and assigned a set label to left. This records the first frame as a left sprite.
5) Move some frame ahead in the recorder and change the label to a different sprite. I have used label right. In my case, I then recorded the last frame as left again so that the animation has a smooth loop.
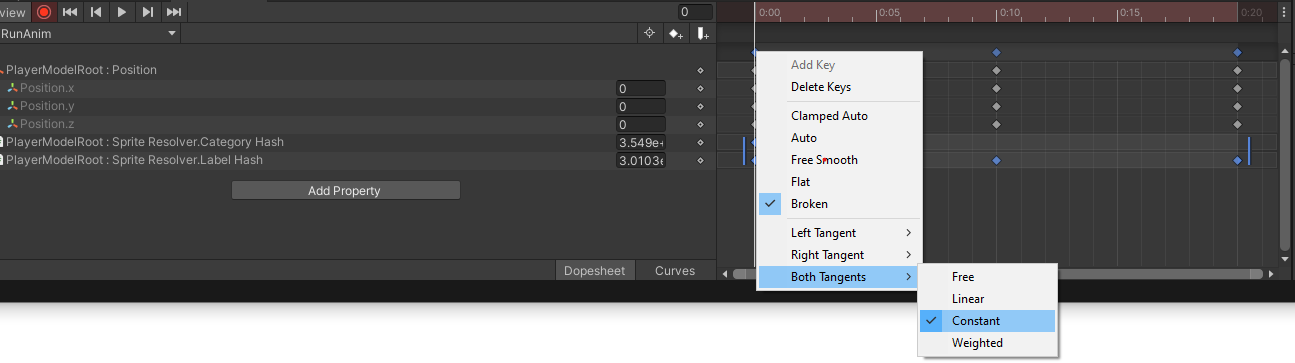
6) Last step is to make category hash and label hash to be constant. If you don't change this you won't be able to play the animation. Make select animation frames containing label hash and category hash and make them Broken and set Both Tangents > Constant.
After this, your animation part is done. This is the only initial step you need to do for creating an animation. For swapping characters you simply duplicate previous sprite library assets and assign different sprites for each category.
After this, you assign a new sprite library asset to Sprite Library where animation was created. Doing this will change the current character and get a new one with the same animation. After this, you can simply change the character asset from the script in runtime.
The animation created here was simple, but it applies to other animations where there are many frames. There might be some changes in UI if you are using different 2D animation packages but the process should be similar. That's it, I hope you learned something new from this. This will surely increase your productivity when working with 2D animations where a sprite swap is necessary.
Thank you for following till the very end. More articles are in progress.